
C# PropertyGrid 1 - 프로퍼티 그리드 1
C# 2021. 12. 14. 14:03 |반응형
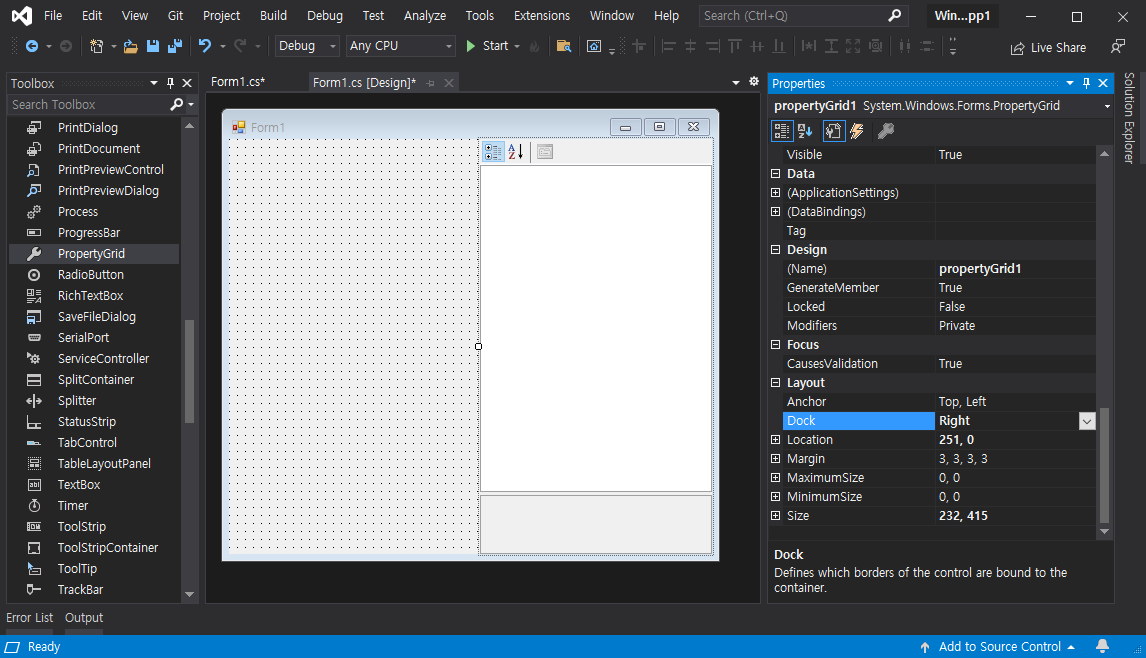
Property Grid를 사용해 보자.
|
1
2
3
4
5
6
7
8
9
10
11
12
13
14
15
16
17
18
19
20
21
22
23
24
25
26
27
28
29
30
31
32
33
34
35
36
37
38
39
40
41
42
43
44
45
46
47
48
49
50
51
52
53
54
55
56
57
58
59
60
61
62
63
64
65
66
67
68
69
70
71
72
73
74
75
76
77
78
79
80
81
82
83
84
85
86
87
88
89
90
91
92
93
94
95
96
97
98
99
100
101
102
103
104
105
106
107
108
109
110
111
112
113
|
using System;
using System.Collections.Generic;
using System.ComponentModel;
using System.Data;
using System.Drawing;
using System.Linq;
using System.Text;
using System.Threading.Tasks;
using System.Windows.Forms;
namespace WindowsFormsApp1
{
public partial class Form1 : Form
{
private Transcript ts = new Transcript();
public Form1()
{
InitializeComponent();
propertyGrid1.SelectedObject = ts;
}
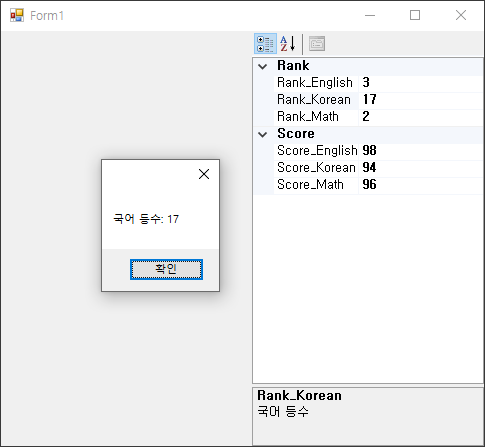
private void propertyGrid1_PropertyValueChanged(object s, PropertyValueChangedEventArgs e)
{
switch (e.ChangedItem.Label)
{
case "Score_Math":
MessageBox.Show("수학 점수: " + e.ChangedItem.Value.ToString());
break;
case "Score_Korean":
MessageBox.Show("국어 점수: " + e.ChangedItem.Value.ToString());
break;
case "Score_English":
MessageBox.Show("영어 점수: " + e.ChangedItem.Value.ToString());
break;
case "Rank_Math":
MessageBox.Show("수학 등수: " + e.ChangedItem.Value.ToString());
break;
case "Rank_Korean":
MessageBox.Show("국어 등수: " + e.ChangedItem.Value.ToString());
break;
case "Rank_English":
MessageBox.Show("영어 등수: " + e.ChangedItem.Value.ToString());
break;
default:
MessageBox.Show("N/A");
break;
}
}
}
class Transcript
{
[Category("Score"), Description("수학 점수"), DisplayName("Score_Math")]
public int Score_Math
{
get;
set;
}
[Category("Score"), Description("국어 점수"), DisplayName("Score_Korean")]
public int Score_Korean
{
get;
set;
}
[Category("Score"), Description("영어 점수"), DisplayName("Score_English")]
public int Score_English
{
get;
set;
}
[Category("Rank"), Description("수학 등수"), DisplayName("Rank_Math")]
public int Rank_Math
{
get;
set;
}
[Category("Rank"), Description("국어 등수"), DisplayName("Rank_Korean")]
public int Rank_Korean
{
get;
set;
}
[Category("Rank"), Description("영어 등수"), DisplayName("Rank_English")]
public int Rank_English
{
get;
set;
}
public Transcript()
{
Score_Math = 96;
Score_Korean = 94;
Score_English = 98;
Rank_Math = 2;
Rank_Korean = 5;
Rank_English = 3;
}
}
}
|
프로퍼티 그리드에 지정할 오브젝트로 만들 클래스를 정의하고 프로퍼티 값 변경 이벤트등 위와 같은 소스를 작성한다.


반응형
'C#' 카테고리의 다른 글
| C# Default Value - 기본값 (0) | 2021.12.19 |
|---|---|
| C# typeof - 타입 정보 확인 (0) | 2021.12.15 |
| C# Extension Methods - 확장 메소드 (0) | 2021.12.11 |
| C# Try-Catch and TryParse() - 에러 잡기 (0) | 2021.12.10 |
| C# Windows Forms Control Library(User Control) - 유저 컨트롤 (0) | 2021.12.04 |