import huggingface_hub

huggingface_hub.login(token="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")

# 로그인 후 사용자 정보 가져오기
user_info = huggingface_hub.whoami()
print(user_info['fullname'])

# 로그아웃
huggingface_hub.logout()
from huggingface_hub import InferenceClient

# 기본 질문-응답(question answering) 모델을 사용하여 질문에 대한 답변 생성
client = InferenceClient(token="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")
answer = client.question_answering(question="What is the capital of France?",
								   context="France is a country in Europe. Its capital is Paris.")
print(answer)
#print(answer.answer)

# 대화(conversational) 모델을 사용하여 대화 생성
client = InferenceClient(token="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",
						 model="Qwen/Qwen2.5-7B-Instruct")
messages = [{"role": "user", "content": "프랑스의 수도는 어디야?"}]
answer = client.chat_completion(messages=messages, max_tokens=100)
print(answer)
#print(answer.choices[0].message.content)

# 이미지 생성(text-to-image) 모델을 사용하여 텍스트를 기반으로 이미지 생성
client = InferenceClient(token="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",
						 model="stabilityai/stable-diffusion-xl-base-1.0")
image = client.text_to_image("A beautiful sunset over the mountains.")
image.save("sunset.png")
모델에 따라 답변 및 여러 가지 정보가 생성된다.
텍스트에 따른 이미지를 생성한다.
from transformers import AutoModelForCausalLM

model = AutoModelForCausalLM.from_pretrained("Qwen/Qwen3-0.6B", dtype="auto", device_map="auto")
# 미리 학습된 인과적 언어 모델을 로드한다.
print(model._get_name())
처음 실행하면 모델을 다운로드받고 이름을 출력한다. (C:\Users\Sean\.cache\huggingface\hub\models--Qwen--Qwen3-0.6B)
다음 실행부터는 다운로드된 모델을 로딩만 한다.
from transformers import AutoTokenizer

tokenizer = AutoTokenizer.from_pretrained(pretrained_model_name_or_path="Qwen/Qwen3-0.6B")
# 미리 학습된 모델의 토크나이저를 불러오는 코드이다. "Qwen/Qwen3-0.6B"는 모델의 이름을 나타낸다.

result = tokenizer("Hello, how are you?", return_tensors="pt")
# pt: PyTorch를 나타내며, return_tensors="pt"는 토큰화된 결과를 PyTorch 텐서 형식으로 반환하도록 지정하는 것이다.
print(result)
처음 실행 시 필요한 파일을 다운로드한다. 이후 실행 시 마지막 결과만 출력된다.
from transformers import AutoTokenizer

tokenizer = AutoTokenizer.from_pretrained(pretrained_model_name_or_path="Qwen/Qwen2.5-7B-Instruct")
# 미리 학습된 모델의 토크나이저를 불러오는 코드이다. "Qwen/Qwen2.5-7B-Instruct"는 모델의 이름을 나타낸다.

result = tokenizer("Hello, how are you?", return_tensors="pt")
# pt: PyTorch를 나타내며, return_tensors="pt"는 토큰화된 결과를 PyTorch 텐서 형식으로 반환하도록 지정하는 것이다.
print(result)
from transformers import AutoTokenizer

tokenizer = AutoTokenizer.from_pretrained(pretrained_model_name_or_path="LGAI-EXAONE/EXAONE-4.0-1.2B")
result = tokenizer("Hello, how are you?", return_tensors="pt")
print(result)
from transformers import AutoTokenizer

tokenizer = AutoTokenizer.from_pretrained(pretrained_model_name_or_path="Qwen/Qwen2.5-7B-Instruct")
# 미리 학습된 모델의 토크나이저를 불러오는 코드이다. "Qwen/Qwen2.5-7B-Instruct"는 모델의 이름을 나타낸다.

result = tokenizer("Hello, how are you?", return_tensors="pt")
# pt: PyTorch를 나타내며, return_tensors="pt"는 토큰화된 결과를 PyTorch 텐서 형식으로 반환하도록 지정하는 것이다.
print(result)

result = tokenizer.encode("Hello, how are you?", return_tensors="pt")
# encode() 메서드는 입력 텍스트를 토큰화하고, 토큰 ID만 반환하는 메서드이다.
print(result)
from transformers import AutoTokenizer

tokenizer = AutoTokenizer.from_pretrained(pretrained_model_name_or_path="Qwen/Qwen2.5-7B-Instruct")
# 미리 학습된 모델의 토크나이저를 불러오는 코드이다. "Qwen/Qwen2.5-7B-Instruct"는 모델의 이름을 나타낸다.

result = tokenizer.encode("Hello, how are you?", return_tensors="pt")
# encode() 메서드는 입력 텍스트를 토큰화하고, 토큰 ID만 반환하는 메서드이다.
print(result)

result = tokenizer.decode(result[0], skip_special_tokens=True)
# decode() 메서드는 토큰 ID를 다시 텍스트로 변환하는 메서드이다.
# clean_up_tokenization_spaces=True 옵션은 토큰화 과정에서 생긴 불필요한 공백을 제거하는 옵션이다.
print(result)
from transformers import AutoModelForCausalLM, AutoTokenizer

model_name = "LGAI-EXAONE/EXAONE-4.0-1.2B"
model = AutoModelForCausalLM.from_pretrained(model_name, dtype="bfloat16", device_map="auto")
tokenizer = AutoTokenizer.from_pretrained(model_name)

prompt = "네가 얼마나 대단한지 설명해 봐"

messages = [
    {"role": "user", "content": prompt}
]
inputs = tokenizer.apply_chat_template(
    messages,
    tokenize=True,
    add_generation_prompt=True,
    return_tensors="pt",
    return_dict=True
).to(model.device)
# .to(model.device): 모델이 실행되는 장치(GPU 또는 CPU)로 입력 데이터를 이동시키는 역할을 함.

output = model.generate(
    **inputs,
    max_new_tokens=256,
    do_sample=False,
)
# **inputs의 의미: inputs 딕셔너리의 키-값 쌍을 언패킹하여 model.generate 함수에 전달하는 것.
# 즉, inputs 딕셔너리의 각 항목이 model.generate 함수의 인자로 전달됨.
# do_sample=False의 의미: 모델이 생성할 텍스트를 결정할 때 무작위성을 배제하고,
# 가장 가능성이 높은 토큰을 선택하도록 설정하는 것.

print(tokenizer.decode(output[0]))
EXAONE
from transformers import AutoModelForCausalLM, AutoTokenizer

model_name = "QWen/Qwen3-0.6B"
model = AutoModelForCausalLM.from_pretrained(model_name, dtype="bfloat16", device_map="auto")
tokenizer = AutoTokenizer.from_pretrained(model_name)

prompt = "네가 얼마나 대단한지 설명해 봐"

messages = [
    {"role": "user", "content": prompt}
]
inputs = tokenizer.apply_chat_template(
    messages,
    tokenize=True,
    add_generation_prompt=True,
    return_tensors="pt",
    return_dict=True
).to(model.device)
# .to(model.device): 모델이 실행되는 장치(GPU 또는 CPU)로 입력 데이터를 이동시키는 역할을 함.

output = model.generate(
    **inputs,
    max_new_tokens=256,
    do_sample=False,
)
# **inputs의 의미: inputs 딕셔너리의 키-값 쌍을 언패킹하여 model.generate 함수에 전달하는 것.
# 즉, inputs 딕셔너리의 각 항목이 model.generate 함수의 인자로 전달됨.
# do_sample=False의 의미: 모델이 생성할 텍스트를 결정할 때 무작위성을 배제하고,
# 가장 가능성이 높은 토큰을 선택하도록 설정하는 것.

print(tokenizer.decode(output[0]))
QWen
from transformers import pipeline

generator = pipeline(task='text-generation', model='LGAI-EXAONE/EXAONE-4.0-1.2B')
# EXAONE과 같은 인스트럭션(대화형) 튜닝 모델은 챗 템플릿 형식으로 프롬프트를 전달해야 올바른 답변이 나온다.
messages = [
    {"role": "user", "content": "한국의 수도는 어디야?"}
]

# return_full_text=False를 주면 질문은 제외하고 생성된 답변만 반환한다.
result = generator(messages, return_full_text=False)

print(result)
#print(result[0]['generated_text'])
EXAONE
from transformers import pipeline

generator = pipeline(task='text-generation', model='QWen/Qwen3-0.6B')
messages = [
    {"role": "user", "content": "한국의 수도는 어디야?"}
]

# return_full_text=False를 주면 질문은 제외하고 생성된 답변만 반환한다.
result = generator(messages, return_full_text=False)

print(result)
#print(result[0]['generated_text'])
from ultralytics.models.sam import SAM3SemanticPredictor
# Initialize predictor with configuration
overrides = dict(
conf=0.25,
task="segment",
mode="predict",
model="sam3.pt",
half=True, # Use FP16 for faster inference
save=False
)
predictor = SAM3SemanticPredictor(overrides=overrides)
# Set image once for multiple queries
predictor.set_image("rose.png")
# Works with descriptive phrases
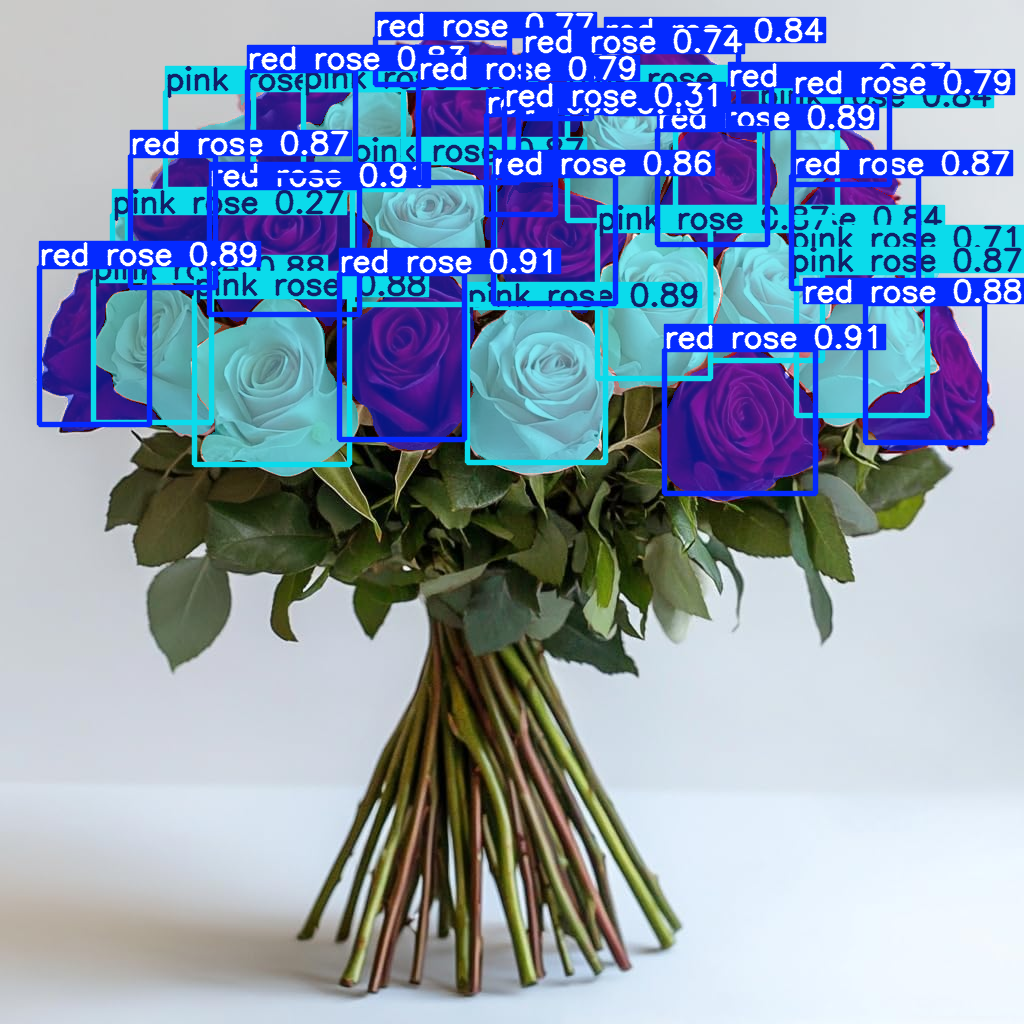
results = predictor(text=["red rose", "pink rose"])
results[0].show()
빨간 장미와 분홍 장미를 구분한다.
rose.png
꽤 잘 구분한 것 같다.
overrides = dict(
    conf=0.25,
    task="segment",
    mode="predict",
    model="sam3.pt",
    half=True,  # Use FP16 for faster inference
    save=False,
    device='cpu' #device='cuda'
)
device 옵션으로 CPU, GPU를 선택할 수 있다. device 옵션을 주지 않으면 GPU가 사용 가능할 경우 GPU를 사용하고 아니면 CPU를 사용한다.
CPU 사용. 36093.2ms
GPU 사용. 339.3ms
from ultralytics.models.sam import SAM3SemanticPredictor

# Initialize predictor with configuration
overrides = dict(
    conf=0.25,
    task="segment",
    mode="predict",
    model="sam3.pt",
    half=True,  # Use FP16 for faster inference
    save=False
)
predictor = SAM3SemanticPredictor(overrides=overrides)

# Set image once for multiple queries
predictor.set_image("office.jpg")

# Works with descriptive phrases
results = predictor(text=["person with gray shirt"])
results[0].show()
회색 옷을 입은 사람을 찾는다.
office.jpg
회색 옷을 입은 사람을 정확히 찾아냈다.
from ultralytics.models.sam import SAM3SemanticPredictor
# Initialize predictor with configuration
overrides = dict(
conf=0.25,
task="segment",
mode="predict",
model="sam3.pt",
half=True, # Use FP16 for faster inference
save=False
)
predictor = SAM3SemanticPredictor(overrides=overrides)
# Set image once for multiple queries
predictor.set_image("catsdogs.png")
# Works with descriptive phrases
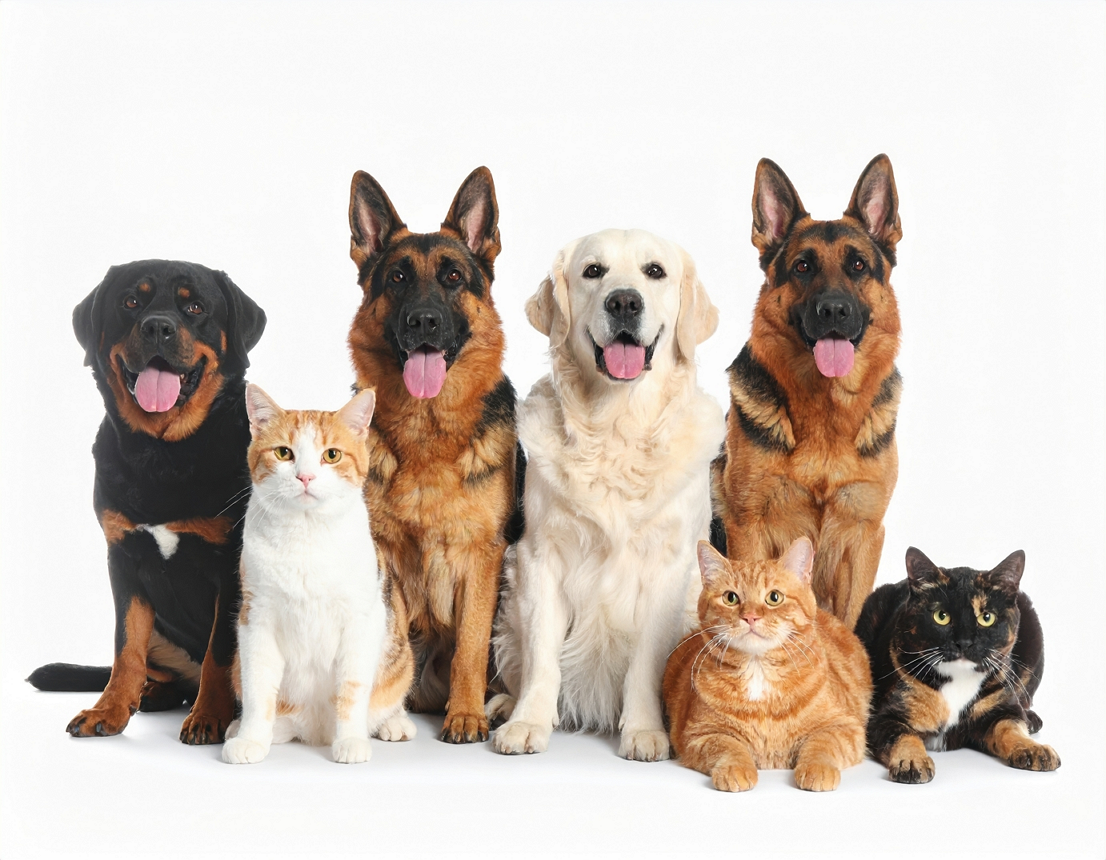
results = predictor(text=["cats", "dogs"])
results[0].show()
개와 고양이를 구분한다.
catsdogs.png
개와 고양이를 정확히 구분한다.
from ultralytics.models.sam import SAM3SemanticPredictor

# Initialize predictor with configuration
overrides = dict(
    conf=0.25,
    task="segment",
    mode="predict",
    model="sam3.pt",
    half=True,  # Use FP16 for faster inference
    save=False
)
predictor = SAM3SemanticPredictor(overrides=overrides)

# Set image once for multiple queries
predictor.set_image("sleep.jpg")

# Works with descriptive phrases
results = predictor(text=["sleeping student on desk"])
results[0].show()
책상에서 자는 학생을 찾는다.
sleep.jpg
실제 자는 학생의 확률이 0.90으로 가장 높지만 뒤에 자지 않는 학생의 확률도 0.86으로 굉장히 높다.
from ultralytics.models.sam import SAM3SemanticPredictor

# Initialize predictor with configuration
overrides = dict(
    conf=0.25,
    task="segment",
    mode="predict",
    model="sam3.pt",
    half=True,  # Use FP16 for faster inference
    save=False
)
predictor = SAM3SemanticPredictor(overrides=overrides)

# Set image once for multiple queries
predictor.set_image("sleep.jpg")

# Works with descriptive phrases
results = predictor(text=["student sleeping on desk"])
results[0].show()
import numpy as np
import cv2
from mss import mss

with mss() as sct:
	# Part of the screen to capture
    monitor = {"top": 40, "left": 0, "width": 800, "height": 640}
    while True:
        img = np.array(sct.grab(monitor))
        cv2.imshow("img", img)
        if cv2.waitKey(1) & 0xFF == ord("q"):
            cv2.destroyAllWindows()
            break
from kiwipiepy import Kiwi

kiwi = Kiwi()
kiwi.add_user_word("AI", "NNP")  # 사용자 단어 추가 예시

text = "안녕하세요. 저는 AI 언어 모델입니다."
result = kiwi.analyze(text)

# 출력 형태 확인
print(result)

print("-" * 30)

# 형태소와 품사 출력
for word in result[0][0]:
	print(f"{word.form}\t{word.tag}")

print("-" * 30)

# 명사만 출력
print("명사만 출력:")
for word in result[0][0]:
	if word.tag.startswith('N'):
		print(f"{word.form}\t{word.tag}")

nouns = [word.form for word in result[0][0] if word.tag.startswith('N')]
print("명사 리스트:", nouns)

print("-" * 30)

# 동사만 출력
print("동사만 출력:")
for word in result[0][0]:
	if word.tag.startswith('V'):
		print(f"{word.form}\t{word.tag}")

verbs = [word.form for word in result[0][0] if word.tag.startswith('V')]
print("동사 리스트:", verbs)
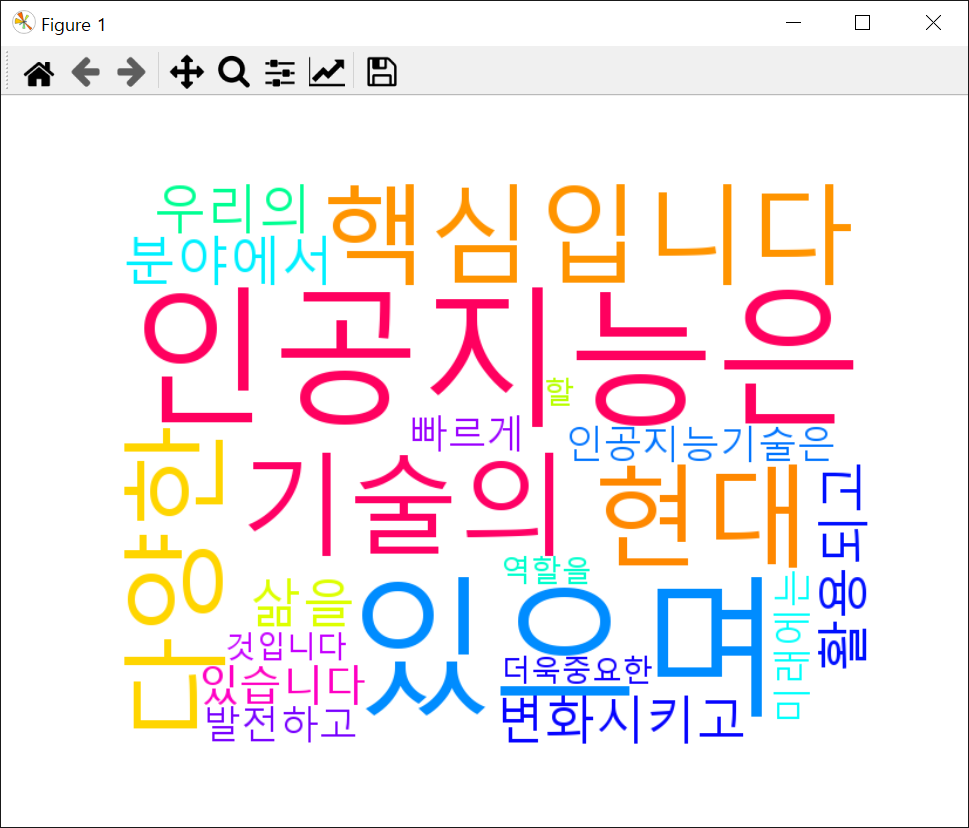
from wordcloud import WordCloud
import matplotlib.pyplot as plt

text = "인공지능은 현대 기술의 핵심입니다.\
인공지능은 다양한 분야에서 활용되고 있으며,\
우리의 삶을 변화시키고 있습니다. 인공지능\
기술은 빠르게 발전하고 있으며, 미래에는 더욱\
중요한 역할을 할 것입니다."

# 워드클라우드 생성
wordcloud = WordCloud(font_path='malgun.ttf',\
width=640, height=480, max_words=100,\
background_color='white', colormap='hsv')\
.generate(text)

# 워드클라우드 시각화
plt.figure(figsize=(10, 5))
plt.imshow(wordcloud, interpolation='bilinear')
plt.axis('off')
plt.show()
마지막으로 긴 텍스트에서 형태소 분석기를 이용해 명사를 추출하고 최다 빈도 명사 10개로 워드 클라우드를 생성해 보자.
from kiwipiepy import Kiwi
from wordcloud import WordCloud
from collections import Counter
import matplotlib.pyplot as plt

kiwi = Kiwi()

text = "《시간의 역사》(A Brief History of Time)는 스티븐 호킹에 의해 쓰여진 저명한 과학책으로\
1988년 벤탐 델 출판사에 의해 출판된 책이다. 이 책은 베스트셀러로 천 만 부 이상이 팔렸으며, 또한\
런던 선데이 타임즈에 베스트셀러로 4년 이상 랭크되었다. <시간의 역사>는 갈릴레이, 뉴턴, 아인슈타인\
등의 과거 과학자들의 우주에 대한 연구 내용을 핵심적으로 짚어주고, 우주가 대폭발에서 시작했다는\
빅뱅 이론, 블랙홀과 특이점에 대한 내용, 우주의 역사를 통해 우주의 미래와 종말을 전망한다. 이 책을\
통해 '시간'이라는 개념에 대해서도 새로운 인식을 하게 만들었다. 지구에서만 적용되는 물리적인 법칙이\
깨지거나 변화하는 우주 다른 공간에서는 우리가 쓰는 '시간'의 의미가 완전히 달라짐을 말해준다."
result = kiwi.analyze(text)

# 명사만 출력
# print("명사만 출력:")
# for word in result[0][0]:
# 	if word.tag.startswith('N'):
# 		print(f"{word.form} : {word.tag}")

# 명사 리스트 생성
nouns = [word.form for word in result[0][0] if word.tag.startswith('N')]
print("■ 명사 리스트:", nouns)

# 명사 빈도수 10위까지 출력
counts = Counter(nouns)
print("\n■ 명사 빈도수:", counts.most_common(10))

# 명사 워드 클라우드 생성
wordcloud = WordCloud(font_path='malgun.ttf', width=640, height=480, max_words=100,\
   background_color='white', colormap='hsv').generate_from_frequencies(counts)

# 워드 클라우드 시각화
plt.figure(figsize=(10, 5))
plt.imshow(wordcloud, interpolation='bilinear')
plt.axis('off')
plt.show()
import time
import random
import os

# Clear the console based on the operating system
os.system('cls' if os.name == 'nt' else 'clear')

# Define color codes
# '\033[0m': text and background colors reset
color_format = ['\033[31m', '\033[32m', '\033[33m','\033[34m', '\033[35m','\033[36m', '\033[37m', '\033[0m']

tree = [
    "      *      ",
    "     ***     ",
    "    *****    ",
    "   *******   ",
    "  *********  ",
    " *********** ",
    "*************",
    "      |      ",
    "      |      "
]

while True:
    time.sleep(0.5)
    for line in tree:
        colored_line = ''.join(f"{random.choice(color_format)}{char}" if char == '*' \
                               else f"{color_format[-1]}{char}" for char in line)
        print(colored_line)
    print("\033[F" * 9, end='')  # Move cursor up nine lines
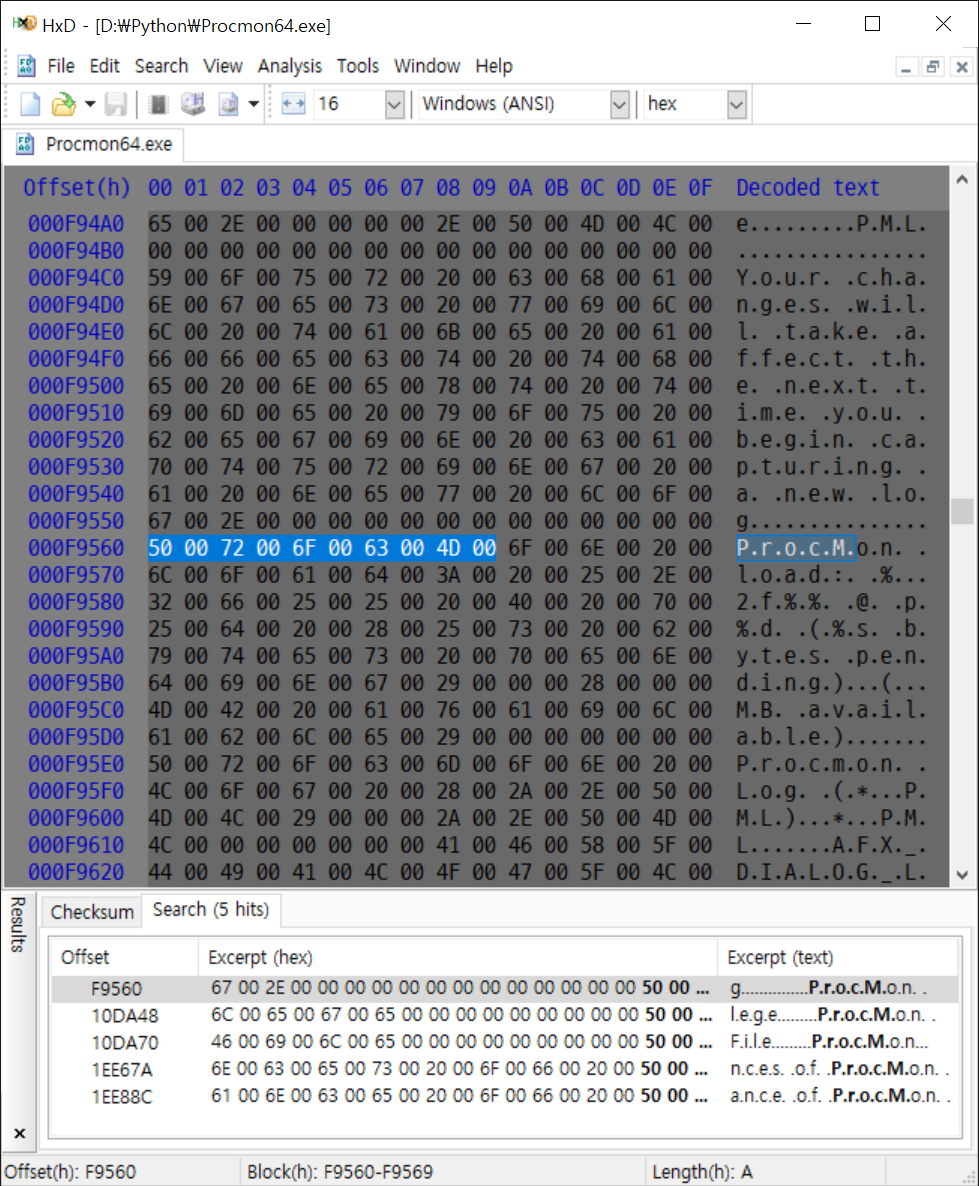
Procmon64.exe 파일의 0xF9560 위치에 'ProcM' 이라는 유니코드(UTF-16) 문자열이 있다.
import binascii
with open("Procmon64.exe", "rb") as f:
f.seek(0xf9560) # 파일 포인터 이동
data = f.read(10)
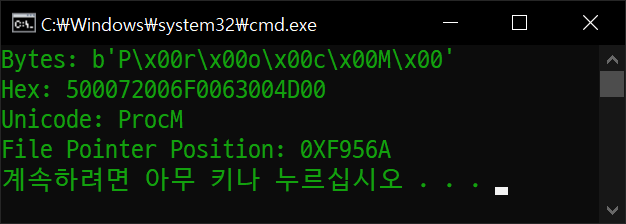
print(f"Bytes: {data}")
print(f"Hex: {binascii.b2a_hex(data).decode().upper()}")
print(f"Unicode: {binascii.unhexlify(binascii.b2a_hex(data)).decode(encoding='utf-16', errors='ignore')}")
print("File Pointer Position: " + hex(f.tell()).upper()) # 현재 파일 포인터 위치 출력
0xF9560위치에서 10바이트를 읽고 출력해 보자.
'ProcM' 문자열이 읽혀진다.
import binascii

with open("Procmon64.exe", "r+b") as f:
    f.seek(0xf9560) # 파일 포인터 이동
    pattern = "QrocM".encode(encoding="utf-16le").hex()
    f.write(bytes.fromhex(pattern))

    f.seek(-10, 1)  # 현재 위치(1)에서 10바이트 앞으로 이동
    data = f.read(10)
    print(f"Bytes: {data}")
    print(f"Hex: {binascii.b2a_hex(data).decode().upper()}")
    print(f"Unicode: {binascii.unhexlify(binascii.b2a_hex(data)).decode(encoding='utf-16', errors='ignore')}")
'ProcM'을 'QrocM'으로 바꿔보자.
문자열이 'QrocM'으로 바뀌었다.
파일을 직접 확인해 보자.
import binascii

file_name = "Procmon64.exe"
pattern = "ProcM"
byte_sequence = pattern.encode(encoding="utf-16le")

def find_all_bytes(file_name, byte_sequence):
    with open(file_name, 'rb') as f:
        file_content = f.read()  # 파일 전체를 바이트열로 읽어옵니다.

    occurrences = []
    start_index = 0
    while True:
        try:
            # find() 메서드는 일치하는 위치의 인덱스를 반환합니다.
            index = file_content.find(byte_sequence, start_index)
            if index == -1:
                break  # 더 이상 일치하는 패턴이 없으면 루프를 종료합니다.
            occurrences.append(hex(index).upper())
            start_index = index + len(byte_sequence)  # 다음 검색 시작 위치를 갱신합니다.
        except ValueError:
            break

    return occurrences

positions = find_all_bytes(file_name, byte_sequence)

print(f"문자열 {pattern}({byte_sequence.hex().upper()})이(가) 발견된 위치:")
for idx, pos in enumerate(positions):
    print(f"{idx+1}. 오프셋 [{pos}]에서 발견됨.")
파일 전체에서 'ProcM' 문자열을 찾아보자.
5개의 'ProcM' 문자열이 발견되었다.
직접 확인해 보자. 5개의 같은 결과가 나온다.
import re

text = "The rain in Spain stays mainly in the plain.".encode(encoding="utf-16le")
print(f"UTF-16 Text: {text}")

matches = re.findall("ain".encode(encoding="utf-16le"), text)  # 대소문자 구분
print(matches)

matches = re.findall("Ain".encode(encoding="utf-16le"), text, re.IGNORECASE)  # 대소문자 무시
print(matches)
'PROCM', 'procm', 'Procm' 등 대소문자 구분없이 모든 문자열을 찾기 위해 파이썬 정규식 표현을 살펴보자.
코드 마지막에서 'Ain' 문자열을 대소문자 구분 없이 모두 찾았다.
import re

text = "The rain in Spain stays mainly in the plain.".encode(encoding="utf-16le")
pattern = "Ain".encode(encoding="utf-16le")
print(f"UTF-16 Text: {text}")
print(f"UTF-16 Pattern: {pattern}")

for idx, match in enumerate(re.finditer(pattern, text, re.IGNORECASE)):
    print(f"{idx+1}. {match.group()} found at byte offset: {match.start()}")
이번엔 finditer()로 문자열의 위치까지 정확히 찾아보자.
찾은 문자열의 위치가 표시된다. (문자 하나는 2바이트)
import binascii
import re

file_name = "Procmon64.exe"
pattern = "ProcM"
byte_sequence = pattern.encode(encoding="utf-16le")

with open(file_name, 'rb') as f:
    file_content = f.read()
    print(f"Searching for pattern: {pattern}")

    # Find all occurrences of the byte sequence in the file content
    for idx, match in enumerate(re.finditer(byte_sequence, file_content, re.IGNORECASE)):
        print(f"{idx+1:2}. {binascii.unhexlify(binascii.b2a_hex(match.group())).decode(encoding='utf-16', errors='ignore')} \
        found at byte offset: {hex(match.start()).upper()}")
위 결과를 바탕으로 'ProcM' 문자열을 대소문자 구분 없이 찾아보자.
'ProcM' 문자열이 대소문자 구분없이 모두 찾아졌다.
직접 확인해 봐도 40개의 결과가 표시된다.
import binascii
import re

def replace_pattern_in_file(file_name, pattern, replacement):
    byte_sequence = pattern.encode(encoding="utf-16le")
    with open(file_name, 'r+b') as f:
        file_content = f.read()
        print(f"Searching for pattern: {pattern}")

        # Find all occurrences of the byte sequence in the file content
        # Case-sensitive search
        for idx, match in enumerate(re.finditer(byte_sequence, file_content)):
            print(f"{idx+1:2}. {binascii.unhexlify(binascii.b2a_hex(match.group())).decode(encoding='utf-16', errors='ignore')} found at byte offset: {hex(match.start()).upper()}")

            f.seek(match.start())
            f.write(replacement.encode(encoding="utf-16le"))
            print(f"   => Replaced with: {replacement} at byte offset: {hex(match.start()).upper()}")

file_name = "Procmon64.exe"
pattern = "ProcM"

replace_pattern_in_file(file_name, pattern, "Q")