반응형

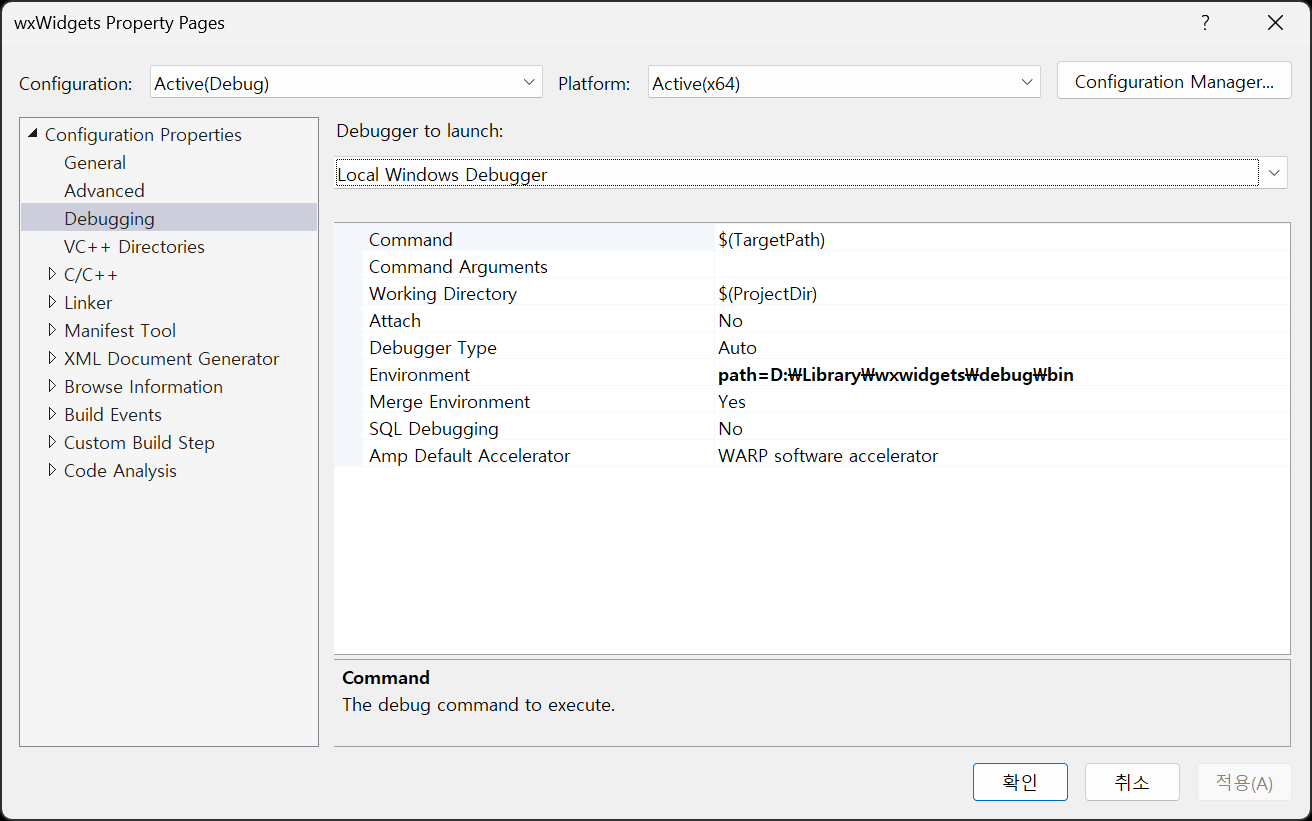
wxWidgets을 빌드하고 간단한 예제를 만들어 보자.
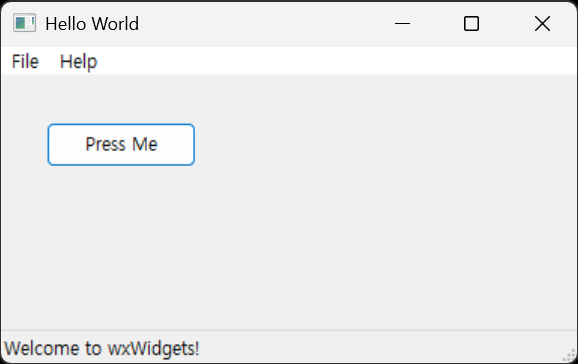
 

vcpkg install wxwidgets


약 4분 정도가 걸린다.


콘솔 프로젝트라면 SubSystem을 Windows로 바꿔준다.


간단한 예제.

#include <wx/wx.h>

class MyApp : public wxApp
{
public:
	bool OnInit() override;
};

wxIMPLEMENT_APP(MyApp);

class MyFrame : public wxFrame
{
public:
	MyFrame();

private:
	void OnHello(wxCommandEvent& event);
	void OnExit(wxCommandEvent& event);
	void OnAbout(wxCommandEvent& event);
};

enum
{
	ID_Hello = 1
};

bool MyApp::OnInit()
{
	MyFrame* frame = new MyFrame();
	frame->Show(true);
	return true;
}

MyFrame::MyFrame() : wxFrame(nullptr, wxID_ANY, "Hello World")
{
	wxMenu* menuFile = new wxMenu;
	menuFile->Append(ID_Hello, "&Hello...\tCtrl-H", "Help string shown in status bar for this menu item");
	menuFile->AppendSeparator();
	menuFile->Append(wxID_EXIT);

	wxMenu* menuHelp = new wxMenu;
	menuHelp->Append(wxID_ABOUT);

	wxMenuBar* menuBar = new wxMenuBar;
	menuBar->Append(menuFile, "&File");
	menuBar->Append(menuHelp, "&Help");

	SetMenuBar(menuBar);

	CreateStatusBar();
	SetStatusText("Welcome to wxWidgets!");

	Bind(wxEVT_MENU, &MyFrame::OnHello, this, ID_Hello);
	Bind(wxEVT_MENU, &MyFrame::OnAbout, this, wxID_ABOUT);
	Bind(wxEVT_MENU, &MyFrame::OnExit, this, wxID_EXIT);
}

void MyFrame::OnExit(wxCommandEvent& event)
{
	Close(true);
}

void MyFrame::OnAbout(wxCommandEvent& event)
{
	wxMessageBox("This is a wxWidgets Hello World example", "About Hello World", wxOK | wxICON_INFORMATION);
}

void MyFrame::OnHello(wxCommandEvent& event)
{
	wxLogMessage("Hello world from wxWidgets!");
}


버튼을 추가해 보자.

.
.
.
	CreateStatusBar();
	SetStatusText("Welcome to wxWidgets!");

	wxPanel* panel = new wxPanel(this, wxID_ANY);
	wxButton* myButton = new wxButton(panel, wxID_ANY, "Press Me", wxPoint(30, 30), wxSize(100, 30));
	myButton->Bind(wxEVT_BUTTON, &MyFrame::OnHello, this);
	//Bind(wxEVT_BUTTON, &MyFrame::OnHello, this, myButton->GetId());

	Bind(wxEVT_MENU, &MyFrame::OnHello, this, ID_Hello);
	Bind(wxEVT_MENU, &MyFrame::OnAbout, this, wxID_ABOUT);
	Bind(wxEVT_MENU, &MyFrame::OnExit, this, wxID_EXIT);
.
.
.


코드만으로 UI를 디자인하기는 쉽지 않다. 필요하다면 wysiwyg 방식으로 디자인할 수 있는 wxFormBuilder를 사용하자.

wxFormBuilder


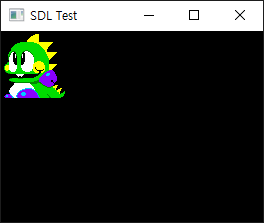
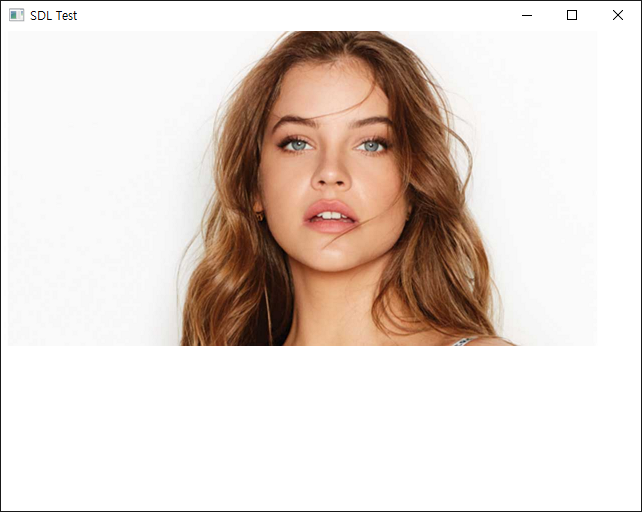
이번에는 OpenCV를 이용해 이미지를 표시해 보자.

#include <wx/wx.h>
#include <opencv2/opencv.hpp>

class MyApp : public wxApp
{
public:
	bool OnInit() override;
};

wxIMPLEMENT_APP(MyApp);

class MyFrame : public wxFrame
{
public:
	MyFrame();

private:
	void OnHello(wxCommandEvent& event);
	void OnExit(wxCommandEvent& event);
	void OnAbout(wxCommandEvent& event);

	wxPanel* m_panel; // 버튼과 이미지를 담을 패널
	wxStaticBitmap* m_imageCtrl; // 이미지 표시를 위한 컨트롤
};

enum
{
	ID_Hello = 1
};

bool MyApp::OnInit()
{
	MyFrame* frame = new MyFrame();
	frame->Show(true);
	return true;
}

MyFrame::MyFrame() : wxFrame(nullptr, wxID_ANY, "Hello World")
{
	wxMenu* menuFile = new wxMenu;
	menuFile->Append(ID_Hello, "&Hello...\tCtrl-H", "Help string shown in status bar for this menu item");
	menuFile->AppendSeparator();
	menuFile->Append(wxID_EXIT);

	wxMenu* menuHelp = new wxMenu;
	menuHelp->Append(wxID_ABOUT);

	wxMenuBar* menuBar = new wxMenuBar;
	menuBar->Append(menuFile, "&File");
	menuBar->Append(menuHelp, "&Help");

	SetMenuBar(menuBar);

	CreateStatusBar();
	SetStatusText("Welcome to wxWidgets!");

	m_panel = new wxPanel(this, wxID_ANY);
	wxButton* myButton = new wxButton(m_panel, wxID_ANY, "Press Me", wxPoint(30, 30), wxSize(100, 30));
	myButton->Bind(wxEVT_BUTTON, &MyFrame::OnHello, this);
	//Bind(wxEVT_BUTTON, &MyFrame::OnHello, this, myButton->GetId());

	m_imageCtrl = new wxStaticBitmap(m_panel, wxID_ANY, wxNullBitmap, wxPoint(30, 80));
	// 이미지 표시 컨트롤 초기화. wxNullBitmap으로 초기화하여 나중에 이미지가 로드될 때 업데이트할 수 있도록 함.

	Bind(wxEVT_MENU, &MyFrame::OnHello, this, ID_Hello);
	Bind(wxEVT_MENU, &MyFrame::OnAbout, this, wxID_ABOUT);
	Bind(wxEVT_MENU, &MyFrame::OnExit, this, wxID_EXIT);
}

void MyFrame::OnExit(wxCommandEvent& event)
{
	Close(true);
}

void MyFrame::OnAbout(wxCommandEvent& event)
{
	wxMessageBox("This is a wxWidgets Hello World example", "About Hello World", wxOK | wxICON_INFORMATION);
}

void MyFrame::OnHello(wxCommandEvent& event)
{
	//wxLogMessage("Hello world from wxWidgets!");
	cv::Mat image = cv::imread("palvin1.png");
	if (image.empty())
	{
		wxLogError("Could not load image!");
	}
	else
	{
		// OpenCV는 BGR을 사용하므로 wxImage에서 필요로 하는 RGB 형식으로 변환.
		cv::cvtColor(image, image, cv::COLOR_BGR2RGB);

		// wxWidgets 구조상 플랫폼 비의존적(Device Independent)인 픽셀 데이터를 플랫폼 의존적(Device Dependent)인
		// 이미지로 그리기 위해서는 wxImage를 거쳐 wxBitmap으로 변환해야 한다. wxImage는 픽셀 데이터를 소유하므로
		// 이미지가 wxImage에 의해 관리되도록 true를 전달한다.
		wxImage wxImg(image.cols, image.rows, image.data, true);
		wxBitmap bitmap(wxImg);

		if (m_imageCtrl)
		{
			m_imageCtrl->SetBitmap(bitmap);
			m_imageCtrl->SetSize(bitmap.GetWidth(), bitmap.GetHeight());
			m_panel->Refresh();
		}
	}
}


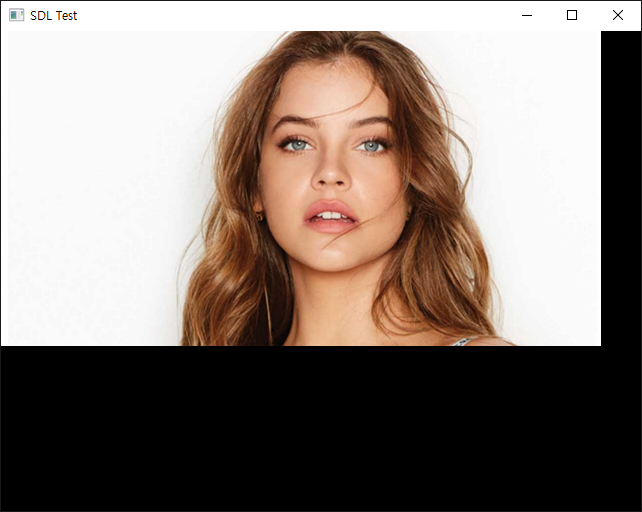
wxStaticBitmap과 같은 컨트롤을 거치지 않고 wxPaintDC(Device Context)를 이용하여 디스플레이에 직접 그리는 방식도 가능하다. 이 방법은 비디오 캡처 등으로 계속 프레임이 바뀔 때 컨트롤을 계속 업데이트하는 오버헤드를 줄이는데 유리할 수 있다.


#include <wx/wx.h>
//#include <wx/dcbuffer.h> // wxBufferedPaintDC를 사용하기 위한 헤더
#include <opencv2/opencv.hpp>

class MyApp : public wxApp
{
public:
	bool OnInit() override;
};

wxIMPLEMENT_APP(MyApp);

class MyFrame : public wxFrame
{
public:
	MyFrame();

private:
	void OnHello(wxCommandEvent& event);
	void OnExit(wxCommandEvent& event);
	void OnAbout(wxCommandEvent& event);
	void OnPaint(wxPaintEvent& event);

	wxPanel* m_panel; // 버튼과 이미지를 담을 패널
	wxBitmap m_bitmap; // 직접 그릴 비트맵 데이터
};

enum
{
	ID_Hello = 1
};

bool MyApp::OnInit()
{
	MyFrame* frame = new MyFrame();
	frame->Show(true);
	return true;
}

MyFrame::MyFrame() : wxFrame(nullptr, wxID_ANY, "Hello World")
{
	wxMenu* menuFile = new wxMenu;
	menuFile->Append(ID_Hello, "&Hello...\tCtrl-H", "Help string shown in status bar for this menu item");
	menuFile->AppendSeparator();
	menuFile->Append(wxID_EXIT);

	wxMenu* menuHelp = new wxMenu;
	menuHelp->Append(wxID_ABOUT);

	wxMenuBar* menuBar = new wxMenuBar;
	menuBar->Append(menuFile, "&File");
	menuBar->Append(menuHelp, "&Help");

	SetMenuBar(menuBar);

	CreateStatusBar();
	SetStatusText("Welcome to wxWidgets!");

	m_panel = new wxPanel(this, wxID_ANY);
	//m_panel->SetBackgroundStyle(wxBG_STYLE_PAINT);
	// wxBufferedPaintDC 사용시 검은 화면 방지, wxBG_STYLE_PAINT는 직접 패널 배경을 그리겠다는 의미로
	// OnPaint에서 DC의 배경색으로 패널의 배경색을 설정하고 Clear()를 호출하여 화면을 지워야 한다.

	wxButton* myButton = new wxButton(m_panel, wxID_ANY, "Press Me", wxPoint(30, 30), wxSize(100, 30));
	myButton->Bind(wxEVT_BUTTON, &MyFrame::OnHello, this);
	//Bind(wxEVT_BUTTON, &MyFrame::OnHello, this, myButton->GetId());

	// 패널에 페인트 이벤트를 바인드하여 DC를 통해 직접 그린다.
	m_panel->Bind(wxEVT_PAINT, &MyFrame::OnPaint, this);
	m_panel->Bind(wxEVT_ERASE_BACKGROUND, [](wxEraseEvent& event) { event.Skip(); }); // 배경 지우기 이벤트를 무시하여 깜빡임 방지
	m_panel->SetDoubleBuffered(true); // 깜빡임 방지 위해 더블 버퍼링 활성화

	Bind(wxEVT_MENU, &MyFrame::OnHello, this, ID_Hello);
	Bind(wxEVT_MENU, &MyFrame::OnAbout, this, wxID_ABOUT);
	Bind(wxEVT_MENU, &MyFrame::OnExit, this, wxID_EXIT);
}

void MyFrame::OnExit(wxCommandEvent& event)
{
	Close(true);
}

void MyFrame::OnAbout(wxCommandEvent& event)
{
	wxMessageBox("This is a wxWidgets Hello World example", "About Hello World", wxOK | wxICON_INFORMATION);
}

void MyFrame::OnHello(wxCommandEvent& event)
{
	//wxLogMessage("Hello world from wxWidgets!");
	cv::Mat image = cv::imread("palvin1.png");
	if (image.empty())
	{
		wxLogError("Could not load image!");
	}
	else
	{
		// OpenCV는 BGR을 사용하므로 wxImage에서 필요로 하는 RGB 형식으로 변환.
		cv::cvtColor(image, image, cv::COLOR_BGR2RGB);

		// wxWidgets 구조상 플랫폼 비의존적(Device Independent)인 픽셀 데이터를 플랫폼 의존적(Device Dependent)인
		// 이미지로 그리기 위해서는 wxImage를 거쳐 wxBitmap으로 변환해야 한다. wxImage는 픽셀 데이터를 소유하므로
		// 이미지가 wxImage에 의해 관리되도록 true를 전달한다.
		wxImage wxImg(image.cols, image.rows, image.data, true);
		m_bitmap = wxBitmap(wxImg);

		m_panel->Refresh(); // 패널을 다시 그리도록 요청하여 OnPaint가 호출되게 한다.
	}
}

void MyFrame::OnPaint(wxPaintEvent& event)
{
	// m_panel에 대한 Paint DC 생성 (페인트 이벤트 안에서만 사용 가능)
	wxPaintDC dc(m_panel);

	// wxPaintDC 대신 메모리에 먼저 그리고 화면에 출력하는 wxBufferedPaintDC 클래스를 사용해도 부드러운 출력이
	// 가능하며 깜빡임도 줄일 수 있다고 한다. wxBufferedPaintDC는 wxPaintDC를 상속하므로 wxPaintDC 대신
	// wxBufferedPaintDC를 사용하면 된다. 이 경우 m_panel에 더블 버퍼링은 활성화할 필요가 없다.
	// 둘 중 하나만 사용하면 된다. wxPaintDC + SetDoubleBuffered 사용을 추천.
	// wxBufferedPaintDC는 운영체제의 네이티브 더블 버퍼링을 지원하지 않는 옛날 OS나 특수한 상황을 위해 존재한다.

	// 상단의 #include <wx/dcbuffer.h> 주석 취소.
	//wxBufferedPaintDC dc(m_panel);

	//dc.SetBackground(wxBrush(m_panel->GetBackgroundColour()));
	//dc.Clear();
	// 패널 기본 배경색으로 화면을 지워준다.
	// wxBG_STYLE_PAINT 스타일을 사용했다면 OnPaint에서 DC의 배경색을 패널의 배경색으로 설정하고 Clear()를 호출하여 화면을
	// 지워야 검은색으로 나타나지 않는다.

	if (m_bitmap.IsOk()) // 비트맵이 유효한 경우에만 그린다.
	{
		// 지정된 좌표 (30, 80)에 비트맵을 직접 그린다. 마스크 사용은 false로 설정.
		dc.DrawBitmap(m_bitmap, 30, 80, false);
	}
}


결과는 이전 코드와 같다.


※ 참고

Hello World Example

Documentation

Tutorials


반응형
Posted by J-sean
:
반응형

memcpy()를 사용해 cv::Mat 이미지를 복사해 보자.


#include <iostream>
#include <opencv2/opencv.hpp>

int main()
{
	cv::utils::logging::setLogLevel(cv::utils::logging::LOG_LEVEL_ERROR);

	cv::Mat image = cv::imread("palvin1.png");
	if (image.empty()) {
		std::cerr << "Error: Could not open image file" << std::endl;

		return -1;
	}

	cv::Mat copyImage(image.size(), image.type());
	//cv::Mat copyImage; // 이 경우 메모리 공간이 전혀 할당되어 있지 않다.
	//copyImage.create(image.size(), image.type()); // 필요한 메모리 공간 할당.

	// image에서 copyImage로 memcpy()를 사용하여 복사
	if (image.isContinuous() && copyImage.isContinuous()) {
		std::cout << "Using memcpy for continuous memory" << std::endl;
		std::memcpy(copyImage.data, image.data, image.total() * image.elemSize());
		// 메모리가 연속적으로 할당되어 있는 경우, 전체 데이터를 한 번에 복사할 수 있다.
	}
	else {
		for (int i = 0; i < image.rows; ++i) {
			std::cout << "Using memcpy for uncontinuous memory, row " << i << std::endl;
			std::memcpy(copyImage.ptr(i), image.ptr(i), image.cols * image.elemSize());
			// 메모리가 연속적으로 할당되어 있지 않은 경우, 각 행을 개별적으로 복사해야 한다.
		}
	}

	cv::imshow("Original Image", image);
	cv::imshow("Copied Image", copyImage);

	cv::waitKey(0);

	cv::destroyAllWindows();

	return 0;
}


원본과 동일한 이미지가 생성된다.


CUDA를 지원하도록 컴파일된 OpenCV가 아닌 경우, 아래와 같이 GPU 메모리에서 모든 연산을 직접 지시해야 한다.

이미지의 밝기를 어둡게 하는 예를 살펴보자.

#include "cuda_runtime.h"
#include "device_launch_parameters.h"
#include <opencv2/opencv.hpp>
#include <stdio.h>

// 간단한 CUDA 커널 예시: 이미지를 어둡게 만들기 (밝기 반감)
__global__ void darkenImageKernel(uchar3* d_img, int width, int height)
{
	int x = blockIdx.x * blockDim.x + threadIdx.x;
	// blockIdx.x: 현재 블록의 x 인덱스, blockDim.x: 블록당 스레드 수, threadIdx.x: 현재 스레드의 x 인덱스
	int y = blockIdx.y * blockDim.y + threadIdx.y;
	// blockIdx.y: 현재 블록의 y 인덱스, blockDim.y: 블록당 스레드 수, threadIdx.y: 현재 스레드의 y 인덱스

	if (x < width && y < height)
	{
		int idx = y * width + x;
		// BGR 각 채널의 값을 절반으로 줄임
		d_img[idx].x = d_img[idx].x / 2; // B
		d_img[idx].y = d_img[idx].y / 2; // G
		d_img[idx].z = d_img[idx].z / 2; // R
	}
}

int main()
{
	// CPU에서 이미지 읽기
	cv::Mat cpuImg = cv::imread("palvin1.png", cv::IMREAD_COLOR);
	if (cpuImg.empty())
	{
		printf("Could not read the image\n");
		return 1;
	}

	int width = cpuImg.cols;
	int height = cpuImg.rows;
	size_t imgSize = width * height * sizeof(uchar3); // 3채널(BGR) 8비트 이미지 크기

	// GPU 메모리 포인터 선언
	uchar3* d_imgData = nullptr;

	// GPU 공간 할당 (cudaMalloc)
	cudaMalloc((void**)&d_imgData, imgSize);

	// CPU 데이터(cv::Mat 내부 배열)를 GPU 메모리로 복사 (Host -> Device)
	if (!cpuImg.isContinuous())
	{
		std::cout << "Image data is continuous. Copying all at once." << std::endl;
		// cv::Mat이 연속적인 메모리 레이아웃을 가지고 있는지 확인
		// isContinuous()가 true인 경우, 데이터는 한 블록으로 연속적으로 저장되어 있다. 이는 cudaMemcpy로 복사할 때 효율적이다.
		cudaMemcpy(d_imgData, cpuImg.data, imgSize, cudaMemcpyHostToDevice);
	}
	else
	{
		std::cout << "Image data is not continuous. Copying row by row." << std::endl;
		// cv::Mat이 연속적이지 않은 경우, 각 행을 개별적으로 복사해야 한다. 이는 비효율적이지만, 모든 경우에 안전하다.
		for (int i = 0; i < height; ++i)
		{
			cudaMemcpy(d_imgData + i * width, cpuImg.ptr<uchar3>(i), width * sizeof(uchar3), cudaMemcpyHostToDevice);
		}
	}

	// 직접 작성한 CUDA 커널 실행
	dim3 threadsPerBlock(16, 16);
	// CUDA에서 dim2를 사용하는것은 표준이 아니며, 일반적으로 dim3를 사용한다. dim3는 3차원 블록과 그리드 구성을 지원하지만,
	// 2D 이미지 처리에서는 threadsPerBlock를 (16, 16)으로 설정하는 것이 일반적이다. 사용하지 않는 z 차원은 기본값인 1로 유지된다.
	// 각 블록에 16x16 스레드 (총 256 스레드, 32의 배수로 맞추는것이 효율적)
	// threadsPerBlock.x = 16, threadsPerBlock.y = 16
	// 16x16 스레드 블록은 일반적으로 이미지 처리에 적합한 크기다. 이는 GPU의 워프(warp) 크기와도 잘 맞아떨어지며, 많은 GPU에서 효율적으로 실행된다.
	// 워프(warp): CUDA에서 스레드 그룹의 기본 단위로, 일반적으로 32개의 스레드로 구성된다. 16x16 블록은 256개의 스레드를 포함하므로,
	// 이는 8개의 워프에 해당한다.
	dim3 blocksPerGrid((width + threadsPerBlock.x - 1) / threadsPerBlock.x, (height + threadsPerBlock.y - 1) / threadsPerBlock.y);
	// 필요한 블록 수 계산 (이미지 크기에 맞게)
	// blocksPerGrid.x = (width + 15) / 16, blocksPerGrid.y = (height + 15) / 16
	// 15를 더하는 이유는 올림을 하기 위해서다. 예를 들어, width가 30이라면 (30 + 15) / 16 = 45 / 16 = 2 블록이 필요하다.

	darkenImageKernel <<<blocksPerGrid, threadsPerBlock >>> (d_imgData, width, height);
	// <<<필요한 블록 수, 각 블록당 스레드 수>>>: CUDA 커널 launch 구문
	// 블록(block): CUDA에서 스레드 그룹을 나타내며, 각 블록은 여러 스레드로 구성된다. 블록은 1D, 2D 또는 3D로 구성될 수 있다.
	// 그리드(grid): CUDA에서 블록의 집합을 나타내며, 전체 작업을 처리하기 위해 여러 블록이 필요할 수 있다. 그리드도 1D, 2D 또는 3D로 구성될 수 있다.	
	// 그리드 수는 이미지 크기에 따라 자동으로 계산되며, 각 블록은 16x16 스레드를 포함한다. 예를 들어, 512x512 이미지의 경우, (512 + 15) / 16 = 32 블록이 필요하므로,
	// blocksPerGrid는 (32, 32)가 된다. 이는 총 1024 블록이 실행되며, 각 블록은 256 스레드를 포함하므로, 총 262144 스레드가 실행된다.
	// 스레드(thread): CUDA에서 실제로 작업을 수행하는 단위이다. 각 스레드는 고유한 인덱스를 가지며, 이를 통해 데이터에 접근한다.

	// GPU 연산이 완료될 때까지 대기
	cudaDeviceSynchronize();

	// GPU에서 연산이 완료된 데이터를 다시 CPU(cv::Mat)로 복사 (Device -> Host)
	cudaMemcpy(cpuImg.data, d_imgData, imgSize, cudaMemcpyDeviceToHost);

	// 다 쓴 GPU 메모리 해제
	cudaFree(d_imgData);

	// 결과 확인
	cv::imshow("Darkened Image", cpuImg);
	cv::waitKey(0);
	cv::destroyAllWindows();

	return 0;
}


반응형
Posted by J-sean
:
반응형

텍스트 길이에 맞게 사이즈가 자동으로 조절되는 UI 이미지를 만들어 보자.


짧은 텍스트


긴 텍스트


dialog box.png
0.00MB

대화 상자 이미지를 임포트한다.


대화상자 이미지 인스펙터 창에서 아래와 같이 변경하고 Apply를 클릭한다.

  • Sprite Mode - Single
  • Mesh Type - Full Rect
  • Filter Mode - Point (no filter)
  • Compression - None


Sprite Editor에서 적당히 Border를 설정한다.


UI - Image를 생성하고 그 하위에 UI - Text - TextMeshPro를 생성한다.


Text 오브젝트는 아래와 같이 설정한다.

  • Font Asset - 필요하다면 Window - TextMeshPro - Font Asset Creator에서 폰트를 생성해 지정한다.
  • Alignment - Center, Middle 설정


Image 오브젝트는 아래와 같이 설정한다.

  • Source Image - 위에서 설정한 대화 상자 이미지를 지정한다.
  • Image Type - Sliced

Vertical Layout Group 컴포넌트 추가

  • Padding - 이미지와 텍스트에 맞게 적당히 설정한다.
  • Child Alignment - Middle Center
  • Control Child Size - Width, Height 체크 (Height는 꼭 하지 않아도 된다)

Content Size Fitter 추가

  • Horizontal Fit - Preferred Size


이제 텍스트를 변경해 보자.


변경된 텍스트 길이에 맞게 이미지 사이즈가 자동으로 조절된다.


반응형
Posted by J-sean
:
반응형

SDL3에 Dear ImGui를 사용해 보자. 아래 링크를 참고해 SDL3를 준비한다.

2025.03.30 - [C, C++] - [SDL3] Simple DirectMedia Layer 3 Setup and Getting Started - SDL3 설정 및 초기화


프로젝트 폴더에 위와 같이 ImGui 관련 파일을 복사한다. (lib, dll 파일은 없다)


프로젝트에 ImGui 필터를 추가하고 파일을 추가한다.


1
2
3
4
5
6
7
8
9
10
11
12
13
14
15
16
17
18
19
20
21
22
23
24
25
26
27
28
29
30
31
32
33
34
35
36
37
38
39
40
41
42
43
44
45
46
47
48
49
50
51
52
53
54
55
56
57
58
59
60
61
62
63
64
65
66
67
68
69
70
71
72
73
74
75
76
77
78
79
80
81
82
83
84
85
86
87
88
89
90
91
92
93
94
95
96
97
98
99
100
101
102
103
104
105
106
107
108
109
110
111
112
113
114
115
116
117
118
119
120
121
122
123
124
125
126
127
128
129
130
131
132
133
134
#define SDL_MAIN_USE_CALLBACKS 1
#include <SDL3/SDL.h>
#include <SDL3/SDL_main.h>
#include <stdio.h>
#include <Windows.h>
 
#include "imgui.h"
#include "imgui_impl_sdl3.h"
#include "imgui_impl_sdlrenderer3.h"
 
static SDL_Window* window = NULL;
static SDL_Renderer* renderer = NULL;
ImGuiIO* pio = NULL;
 
SDL_AppResult SDL_AppInit(void** appstate, int argc, char* argv[])
{
    SDL_SetAppMetadata("Example Renderer Clear""1.0""com.example.renderer-clear");
 
    if (!SDL_Init(SDL_INIT_VIDEO)) {
        SDL_Log("Couldn't initialize SDL: %s", SDL_GetError());
        return SDL_APP_FAILURE;
    }
 
    if (!SDL_CreateWindowAndRenderer("examples/renderer/clear"6404800&window, &renderer)) {
        SDL_Log("Couldn't create window/renderer: %s", SDL_GetError());
        return SDL_APP_FAILURE;
    }
 
    // Setup Dear ImGui context
    IMGUI_CHECKVERSION();
    ImGui::CreateContext();
    ImGuiIO& io = ImGui::GetIO(); (void)io;
    // (void)io는 의미 없는 명령.  just to avoid compiler warning on unused variable
    pio = &io;
    // io가 SDL_AppIterate()에서 사용되기 때문에 전역 포인터 변수 pio에 대입.
    io.ConfigFlags |= ImGuiConfigFlags_NavEnableKeyboard;     // Enable Keyboard Controls
    //io.ConfigFlags |= ImGuiConfigFlags_NavEnableGamepad;      // Enable Gamepad Controls
 
    // Setup Dear ImGui style
    //ImGui::StyleColorsDark();
    ImGui::StyleColorsLight();
 
    // Setup Platform/Renderer backends
    ImGui_ImplSDL3_InitForSDLRenderer(window, renderer);
    ImGui_ImplSDLRenderer3_Init(renderer);
 
    return SDL_APP_CONTINUE;
}
 
SDL_AppResult SDL_AppEvent(void* appstate, SDL_Event* event)
{
    // Poll and handle events (inputs, window resize, etc.)
    // You can read the io.WantCaptureMouse, io.WantCaptureKeyboard flags to tell if dear imgui wants to use your inputs.
    // - When io.WantCaptureMouse is true, do not dispatch mouse input data to your main application, or clear/overwrite your copy of the mouse data.
    // - When io.WantCaptureKeyboard is true, do not dispatch keyboard input data to your main application, or clear/overwrite your copy of the keyboard data.
    // Generally you may always pass all inputs to dear imgui, and hide them from your application based on those two flags.
    ImGui_ImplSDL3_ProcessEvent(event);
 
    switch (event->type) {
    case SDL_EVENT_QUIT:
        return SDL_APP_SUCCESS;
    case SDL_EVENT_KEY_DOWN:
        printf("Key pressed: %s\n", SDL_GetKeyName(event->key.key));
        if (event->key.key == SDLK_ESCAPE)
            return SDL_APP_SUCCESS;
        break;
    default:
        break;
    }
 
    return SDL_APP_CONTINUE;
}
 
SDL_AppResult SDL_AppIterate(void* appstate)
{
    // Start the Dear ImGui frame
    ImGui_ImplSDLRenderer3_NewFrame();
    ImGui_ImplSDL3_NewFrame();
    ImGui::NewFrame();
 
    // Show a simple window that we create ourselves. We use a Begin/End pair to create a named window.
    {
        static float f = 0.0f;
        static int counter = 0;
 
        ImGui::Begin("Hello, world!"); // Create a window called "Hello, world!" and append into it.
        //ImGui::SetWindowSize(ImVec2(100, 20)); // 매 프레임마다 윈도우 사이즈를 (100, 20)으로 지정한다.
        //ImGui::SetWindowSize(ImVec2(100, 20), ImGuiCond_Once); // 프로그램을 시작할때 한 번만 윈도우 사이즈를 지정한다.
        //ImGui::SetWindowSize(ImVec2(100, 20), ImGuiCond_FirstUseEver); // 프로그램을 처음 시작할때(imgui.ini파일이 존재하지 않을때)
                                                                         // 한 번만 윈도우 사이즈를 지정한다.
        ImGui::Text("This is some useful text."); // Display some text (you can use a format strings too)
        if (ImGui::Button("Button")) // Buttons return true when clicked (most widgets return true when edited/activated)
            counter++;
        ImGui::SameLine();
        ImGui::Text("counter = %d", counter);
        ImGui::Text("Application average %.3f ms/frame (%.1f FPS)"1000.0f / pio->Framerate, pio->Framerate);
        ImGui::End();
    }
    // 윈도우 없이 위치가 고정된 버튼 생성하기.
    {
        ImGui::Begin("No Window"0, ImGuiWindowFlags_NoBackground | ImGuiWindowFlags_NoDecoration);
        ImGui::SetWindowPos(ImVec2(1020));
        ImGui::SetWindowSize(ImVec2(10020));
        // WindowSize()는 이 예제 블럭에서 생성하려는 버튼의 사이즈를 지정하는 함수가 아니다. 버튼을 포함하는 윈도우의 사이즈다.
        // 이 예제는 윈도우가 보이지 않으므로 사이즈를 지정하지 않으면 버튼 사이즈보다 훨씬 크게 지정되서 근처의 다른 UI가
        // 이 윈도우에 가려져 제대로 동작하지 않을 수 있다. (보이기는 하지만 클릭이 되지 않는다)
        // 아니면, Begin()에서 ImGuiWindowFlags_NoBringToFrontOnFocus 옵션을 추가하면 다른 윈도우의 UI 동작을 방해하지 않는다.
        // 이 예제에서 ImGuiWindowFlags_NoInputs 옵션은 버튼을 비활성화 시키므로 사용하면 안된다.        
        ImGui::Button("Fixed Button");
        ImGui::End();
    }
 
    // Rendering
    ImGui::Render();
 
    SDL_SetRenderDrawColor(renderer, 255255255, SDL_ALPHA_OPAQUE);
    SDL_RenderClear(renderer);
    ImGui_ImplSDLRenderer3_RenderDrawData(ImGui::GetDrawData(), renderer);
    SDL_RenderPresent(renderer);
 
    return SDL_APP_CONTINUE;
}
 
void SDL_AppQuit(void* appstate, SDL_AppResult result)
{
    // Cleanup    
    ImGui_ImplSDLRenderer3_Shutdown();
    ImGui_ImplSDL3_Shutdown();
    ImGui::DestroyContext();
 
    SDL_DestroyRenderer(renderer);
    SDL_DestroyWindow(window);
    SDL_Quit();
}


소스를 입력하고 빌드한다.


실행하면 GUI가 표시된다.


이번엔 ImGui를 이용해 이미지를 출력해 보자.


stb_image.h를 추가한다.
stb_image.h
0.27MB


Image Loading and Displaying Examples

위 링크를 참고해 소스를 작성한다.


1
2
3
4
5
6
7
8
9
10
11
12
13
14
15
16
17
18
19
20
21
22
23
24
25
26
27
28
29
30
31
32
33
34
35
36
37
38
39
40
41
42
43
44
45
46
47
48
49
50
51
52
53
54
55
56
57
58
59
60
61
62
63
64
65
66
67
68
69
70
71
72
73
74
75
76
77
78
79
80
81
82
83
84
85
86
87
88
89
90
91
92
93
94
95
96
97
98
99
100
101
102
103
104
105
106
107
108
109
110
111
112
113
114
115
116
117
118
119
120
121
122
123
124
125
126
127
128
129
130
131
132
133
134
135
136
137
138
139
140
141
142
143
144
145
146
147
148
149
150
151
152
153
154
155
156
157
158
159
160
161
162
163
164
165
166
167
168
169
170
171
172
173
174
175
176
177
178
179
180
181
182
183
184
185
186
187
188
189
#define _CRT_SECURE_NO_WARNINGS
#define STB_IMAGE_IMPLEMENTATION
#define SDL_MAIN_USE_CALLBACKS 1
#include <SDL3/SDL.h>
#include <SDL3/SDL_main.h>
#include <stdio.h>
#include <Windows.h>
 
#include "imgui.h"
#include "imgui_impl_sdl3.h"
#include "imgui_impl_sdlrenderer3.h"
 
#include "stb_image.h"
 
static SDL_Window* window = NULL;
static SDL_Renderer* renderer = NULL;
ImGuiIO* pio = NULL;
 
SDL_Texture* my_texture;
int my_image_width, my_image_height;
 
bool LoadTextureFromMemory(const void* data, size_t data_size, SDL_Renderer* renderer, SDL_Texture** out_texture, int* out_width, int* out_height)
{
    int image_width = 0;
    int image_height = 0;
    int channels = 4;
    unsigned char* image_data = stbi_load_from_memory((const unsigned char*)data, (int)data_size, &image_width, &image_height, NULL4);
    if (image_data == nullptr)
    {
        fprintf(stderr, "Failed to load image: %s\n", stbi_failure_reason());
        return false;
    }
 
    SDL_Surface* surface = SDL_CreateSurfaceFrom(image_width, image_height, SDL_PIXELFORMAT_RGBA32, (void*)image_data, channels * image_width);
    if (surface == nullptr)
    {
        fprintf(stderr, "Failed to create SDL surface: %s\n", SDL_GetError());
        return false;
    }
 
    SDL_Texture* texture = SDL_CreateTextureFromSurface(renderer, surface);
    if (texture == nullptr)
        fprintf(stderr, "Failed to create SDL texture: %s\n", SDL_GetError());
 
    *out_texture = texture;
    *out_width = image_width;
    *out_height = image_height;
 
    SDL_DestroySurface(surface);
    stbi_image_free(image_data);
 
    return true;
}
 
// Open and read a file, then forward to LoadTextureFromMemory()
bool LoadTextureFromFile(const char* file_name, SDL_Renderer* renderer, SDL_Texture** out_texture, int* out_width, int* out_height)
{
    FILE* f = fopen(file_name, "rb");
    if (f == NULL)
        return false;
    fseek(f, 0, SEEK_END);
    size_t file_size = (size_t)ftell(f);
    if (file_size == -1)
        return false;
    fseek(f, 0, SEEK_SET);
    void* file_data = IM_ALLOC(file_size);
    fread(file_data, 1, file_size, f);
    fclose(f);
    bool ret = LoadTextureFromMemory(file_data, file_size, renderer, out_texture, out_width, out_height);
    IM_FREE(file_data);
    return ret;
}
 
SDL_AppResult SDL_AppInit(void** appstate, int argc, char* argv[])
{
    SDL_SetAppMetadata("Example Renderer Clear""1.0""com.example.renderer-clear");
 
    if (!SDL_Init(SDL_INIT_VIDEO)) {
        SDL_Log("Couldn't initialize SDL: %s", SDL_GetError());
        return SDL_APP_FAILURE;
    }
 
    if (!SDL_CreateWindowAndRenderer("examples/renderer/clear"6404800&window, &renderer)) {
        SDL_Log("Couldn't create window/renderer: %s", SDL_GetError());
        return SDL_APP_FAILURE;
    }
 
    // Setup Dear ImGui context
    IMGUI_CHECKVERSION();
    ImGui::CreateContext();
    ImGuiIO& io = ImGui::GetIO(); (void)io;
    // (void)io는 의미 없는 명령.  just to avoid compiler warning on unused variable
    pio = &io;
    // io가 SDL_AppIterate()에서 사용되기 때문에 전역 포인터 변수 pio에 대입.
    io.ConfigFlags |= ImGuiConfigFlags_NavEnableKeyboard;     // Enable Keyboard Controls
    //io.ConfigFlags |= ImGuiConfigFlags_NavEnableGamepad;      // Enable Gamepad Controls
 
    // Setup Dear ImGui style
    //ImGui::StyleColorsDark();
    ImGui::StyleColorsLight();
 
    // Setup Platform/Renderer backends
    ImGui_ImplSDL3_InitForSDLRenderer(window, renderer);
    ImGui_ImplSDLRenderer3_Init(renderer);
 
    // Load our texture after initialising SDL
    bool ret = LoadTextureFromFile("palvin.jpg", renderer, &my_texture, &my_image_width, &my_image_height);
    IM_ASSERT(ret);
 
    return SDL_APP_CONTINUE;
}
 
SDL_AppResult SDL_AppEvent(void* appstate, SDL_Event* event)
{
    // Poll and handle events (inputs, window resize, etc.)
    // You can read the io.WantCaptureMouse, io.WantCaptureKeyboard flags to tell if dear imgui wants to use your inputs.
    // - When io.WantCaptureMouse is true, do not dispatch mouse input data to your main application, or clear/overwrite your copy of the mouse data.
    // - When io.WantCaptureKeyboard is true, do not dispatch keyboard input data to your main application, or clear/overwrite your copy of the keyboard data.
    // Generally you may always pass all inputs to dear imgui, and hide them from your application based on those two flags.
    ImGui_ImplSDL3_ProcessEvent(event);
 
    switch (event->type) {
    case SDL_EVENT_QUIT:
        return SDL_APP_SUCCESS;
    case SDL_EVENT_KEY_DOWN:
        printf("Key pressed: %s\n", SDL_GetKeyName(event->key.key));
        if (event->key.key == SDLK_ESCAPE)
            return SDL_APP_SUCCESS;
        break;
    default:
        break;
    }
 
    return SDL_APP_CONTINUE;
}
 
SDL_AppResult SDL_AppIterate(void* appstate)
{
    // Start the Dear ImGui frame
    ImGui_ImplSDLRenderer3_NewFrame();
    ImGui_ImplSDL3_NewFrame();
    ImGui::NewFrame();
 
    // Show a simple window that we create ourselves. We use a Begin/End pair to create a named window.
    {
        static float f = 0.0f;
        static int counter = 0;
 
        ImGui::Begin("Hello, world!"); // Create a window called "Hello, world!" and append into it.
        ImGui::Text("This is some useful text."); // Display some text (you can use a format strings too)
        if (ImGui::Button("Button")) // Buttons return true when clicked (most widgets return true when edited/activated)
            counter++;
        ImGui::SameLine();
        ImGui::Text("counter = %d", counter);
        ImGui::Text("Application average %.3f ms/frame (%.1f FPS)"1000.0f / pio->Framerate, pio->Framerate);
        ImGui::End();
    }
    // 윈도우 없이 위치가 고정된 이미지 생성하기.
    {
        ImGui::Begin("No Window"0, ImGuiWindowFlags_NoBackground | ImGuiWindowFlags_NoDecoration | ImGuiWindowFlags_NoBringToFrontOnFocus | ImGuiWindowFlags_NoInputs);
        ImGui::SetWindowPos(ImVec2(00));
        ImGui::Text("pointer = %p", my_texture);
        ImGui::Text("size = %d x %d", my_image_width, my_image_height);
        ImGui::Image((ImTextureID)(intptr_t)my_texture, ImVec2((float)my_image_width, (float)my_image_height));
        ImGui::End();
    }
 
    // Rendering
    ImGui::Render();
 
    SDL_SetRenderDrawColor(renderer, 255255255, SDL_ALPHA_OPAQUE);
    SDL_RenderClear(renderer);
    ImGui_ImplSDLRenderer3_RenderDrawData(ImGui::GetDrawData(), renderer);
    SDL_RenderPresent(renderer);
 
    return SDL_APP_CONTINUE;
}
 
void SDL_AppQuit(void* appstate, SDL_AppResult result)
{
    // Cleanup    
    ImGui_ImplSDLRenderer3_Shutdown();
    ImGui_ImplSDL3_Shutdown();
    ImGui::DestroyContext();
 
    SDL_DestroyRenderer(renderer);
    SDL_DestroyWindow(window);
    SDL_Quit();
}


실행하면 이미지가 표시된다.


반응형
Posted by J-sean
:
반응형

C#과 Python 프로그램간 이미지 데이터를 공유해 보자.


1) Python 프로그램 데이터를 C# 프로그램에 공유.

mmap


import time
import mmap
import cv2

frame = cv2.imread("image.jpg", cv2.IMREAD_COLOR)
h, w, c = frame.shape
buffer_size = h * w * c

# 3개의 4바이트(12바이트) 데이터를 위한 추가 공간 확보
#buffer_size = h * w * c + 12

# Open a memory-mapped file.
mm = mmap.mmap(-1, buffer_size, "Local\\MySharedMemory")

try:
    # 만약 3개의 4바이트 데이터를 저장하고 싶다면 아래와
    # 같이 한다.
    #mm.write(h.to_bytes(4))
    #mm.write(w.to_bytes(4))
    #mm.write(c.to_bytes(4))

    mm.write(frame.tobytes())
    
    # Keep the Python script running for demonstration.
    while True:
        time.sleep(1000)  # Sleep to prevent busy waiting.
finally:
    mm.close()


using OpenCvSharp;
using System.IO.MemoryMappedFiles;
using System.Runtime.InteropServices;

public class Program
{
    public static void Main()
    {
        int width = 396;
        int height = 495;
        int channels = 3;

        using (MemoryMappedFile mmf = MemoryMappedFile.OpenExisting("MySharedMemory"))
        {
            using (MemoryMappedViewAccessor accessor = mmf.CreateViewAccessor())
            {
                byte[] buffer = new byte[width * height * channels];
                accessor.ReadArray(0, buffer, 0, buffer.Length);

                // 만약 buffer 앞 부분에 3개의 4바이트 int 데이터가 저장되어 있다면 아래와 같이 읽는다.
                // (물론 위에서 buffer[] 생성시 12바이트의 추가 공간 확보가 필요하다)
                //int h = ((buffer[0] << 24) +  (buffer[1] << 16) + (buffer[2] << 8) + (buffer[3]));
                //Console.WriteLine(h);
                //int w = ((buffer[4] << 24) + (buffer[5] << 16) + (buffer[6] << 8) + (buffer[7]));
                //Console.WriteLine(w);
                //int c = ((buffer[8] << 24) + (buffer[9] << 16) + (buffer[10] << 8) + (buffer[11]));
                //Console.WriteLine(c);

                // When buffer[] represents encoded image data (ex. JPEG, PNG, etc.), you can use
                // FromImageData or ImDecode.
                //buffer = System.IO.File.ReadAllBytes("image.jpg");
                //Mat mat = Mat.FromImageData(buffer, ImreadModes.Color);                
                //Mat mat = Cv2.ImDecode(buffer, ImreadModes.Color);

                // When buffer[] represens pixel data (BGRBGR...) , you need to hard-code copying operation.
                //Mat mat = new Mat(height, width, MatType.CV_8UC3);
                //Mat.Indexer<Vec3b> indexer = mat.GetGenericIndexer<Vec3b>();
                //for (int y = 0; y < height; y++)
                //{
                //    for (int x = 0; x < width; x++)
                //    {
                //        int pos = y * width * channels + x * channels;
                //        byte blue = buffer[pos + 0];
                //        byte green = buffer[pos + 1];
                //        byte red = buffer[pos + 2];
                //        Vec3b newValue = new Vec3b(blue, green, red);
                //        indexer[y, x] = newValue;
                //    }
                //}

                // If buffer[]'s step length is equal to the Mat's, there is a more effective way.
                Mat mat = new Mat(height, width, MatType.CV_8UC3);
                int length = height * width * channels;
                Marshal.Copy(buffer, 0, mat.Data, length);

                Cv2.ImShow("image", mat);
                Cv2.WaitKey(0);
                Cv2.DestroyAllWindows();
            }
        }
    }
}


Python 프로그램을 먼저 실행하고 C# 프로그램을 실행한다.


2) C# 프로그램 데이터를 Python 프로그램에 공유.


using System;
using System.IO.MemoryMappedFiles;
using System.Runtime.InteropServices;
using OpenCvSharp;

public class Program
{
    public static void Main()
    {   
        Mat image = Cv2.ImRead("image.jpg", ImreadModes.Color);
        int width = image.Width;
        int height = image.Height;
        int channels = image.Channels();
        int buffer_size = width * height * channels;

        using (MemoryMappedFile mmf = MemoryMappedFile.CreateNew("MySharedMemory", buffer_size))
        {
            using (MemoryMappedViewAccessor accessor = mmf.CreateViewAccessor())
            {
                byte[] buffer = new byte[buffer_size];
                Marshal.Copy(image.Data, buffer, 0, buffer_size);
                accessor.WriteArray<byte>(0, buffer, 0, buffer_size);
            }
            
            Console.WriteLine("waiting...");
            Console.ReadLine();
        }        
    }
}


import mmap
import numpy as np
import cv2

height = 495
width = 396
channels = 3
buffer_size = height * width * channels

mm = mmap.mmap(-1, buffer_size, "Local\\MySharedMemory")

try:    
    buffer = mm.read(buffer_size)
    image_arr = np.frombuffer(buffer, np.ubyte)
    image = image_arr.reshape(height, width, channels)
    
    cv2.imshow("image", image)
    cv2.waitKey(0)
finally:
    mm.close()
    cv2.destroyAllWindows()


결과는 같다.


※ 참고

2025.02.23 - [OpenCV] - C and Python OpenCV Image Data Share (Memory Mapped File)

2026.02.18 - [OpenCV] - [OpenCV] C# 에서 C++ DLL 사용하기

2026.02.19 - [OpenCV] - [OpenCV] Python 에서 C++ DLL 사용하기


반응형
Posted by J-sean
:
반응형

PyQt를 이용해 OpenCV 이미지를 출력해 보자.


디자이너에서 Dialog에 Label을 하나 배치하고 사이즈를 충분히 크게 한다. (test.ui)


1
2
3
4
5
6
7
8
9
10
11
12
13
14
15
16
17
18
19
20
21
22
23
24
25
26
27
28
29
30
31
32
33
34
35
36
37
38
39
40
41
42
43
44
import sys
import cv2
from PyQt5 import QtWidgets
from PyQt5 import QtGui
from PyQt5 import uic
 
myui = uic.loadUiType("test.ui")
 
class MyApp(QtWidgets.QWidget, myui[0]):
    def __init__(self):
        super().__init__()
        self.setupUi(self)
 
        # 1) QtWidgets.QGraphicsView()에 이미지 출력하기
        # pixmap = QtGui.QPixmap()
        # pixmap.load("palvin.jpg")
        # scene = QtWidgets.QGraphicsScene()
        # scene.addPixmap(pixmap)
        # self.graphicsView.setScene(scene)
 
        # 2) QtWidgets.QGraphicsView()에 OpenCV 이미지 출력하기
        # img = cv2.imread("palvin.jpg")
        # img = cv2.cvtColor(img, cv2.COLOR_BGR2RGB)
        # h, w, c = img.shape
        # qimg = QtGui.QImage(img.data, w, h, w*c, QtGui.QImage.Format_RGB888)
        # pixmap = QtGui.QPixmap.fromImage(qimg)
        # scene = QtWidgets.QGraphicsScene()
        # scene.addPixmap(pixmap)
        # self.graphicsView.setScene(scene)
 
        # QtWidgets.Label에 OpenCV 이미지 출력하기
        img = cv2.imread("palvin.jpg")
        img = cv2.resize(img, (self.label.size().width(), self.label.size().height()))
        img = cv2.cvtColor(img, cv2.COLOR_BGR2RGB)
        h, w, c = img.shape
        qimg = QtGui.QImage(img.data, w, h, w*c, QtGui.QImage.Format_RGB888)
        pixmap = QtGui.QPixmap.fromImage(qimg)
        self.label.setPixmap(pixmap)
 
if __name__ == "__main__":
    app = QtWidgets.QApplication(sys.argv)
    myWindow = MyApp()
    myWindow.show()
   app.exec_()


소스를 입력하고 실행한다.


Label 사이즈에 맞게 이미지가 조절되었다.


이번엔 GraphicsView를 사용해 보자. 위 소스에서 1번이나 2번 주석을 해제한다.

1, 2번 주석부분의 소스는 이미지 크기를 조절하지 않는다.


Label은 삭제하고 Graphics View를 배치하고 크기를 조정한다.


이미지가 Graphics View보다 크지만 스크롤바가 표시된다.


Widget 없이 Dialog에 직접 이미지를 출력할 수 도 있다. Dialog만 남기고 모두 삭제한다.


1
2
3
4
5
6
7
8
9
10
11
12
13
14
15
16
17
18
19
20
21
22
23
24
25
26
27
28
29
30
31
32
import sys
import cv2
from PyQt5 import QtWidgets
from PyQt5 import QtGui
from PyQt5 import uic
 
myui = uic.loadUiType("test.ui")
 
class MyApp(QtWidgets.QWidget, myui[0]):
    def __init__(self):
        super().__init__()
        self.setupUi(self)
 
        self.img = cv2.imread("palvin.jpg")        
        self.img = cv2.cvtColor(self.img, cv2.COLOR_BGR2RGB)
        h, w, c = self.img.shape
        h, w = int(h/6), int(w/6)        
        self.img = cv2.resize(self.img, (w, h))
        self.qimg = QtGui.QImage(self.img.data, w, h, w*c, QtGui.QImage.Format_RGB888)
    
    def paintEvent(self, e):
        qp = QtGui.QPainter(self)
        self.drawCVImage(qp)
 
    def drawCVImage(self, qp):
        qp.drawImage(1010self.qimg)
        
if __name__ == "__main__":
    app = QtWidgets.QApplication(sys.argv)
    myWindow = MyApp()
    myWindow.show()
   app.exec_()


소스를 입력하고 실행한다.


Dialog에 직접 이미지가 출력된다.


반응형
Posted by J-sean
:
반응형

로드한 이미지에 컬러키를 설정하고 투명하게 처리해 보자.


player.bmp

파란 배경의 BMP 파일을 준비한다.


1
2
3
4
5
6
7
8
9
10
11
12
13
14
15
16
17
18
19
20
21
22
23
24
25
26
27
28
29
30
31
32
33
34
35
36
37
38
39
40
41
42
43
44
45
46
47
48
49
50
51
52
#include <iostream>
#include "SDL.h"
 
#pragma comment(lib, "sdl2.lib")
#pragma comment(lib, "sdl2main.lib")
 
int main(int argc, char* argv[]) {
    SDL_Init(SDL_INIT_VIDEO);
    SDL_Window* window = SDL_CreateWindow("SDL Test", SDL_WINDOWPOS_UNDEFINED,
        SDL_WINDOWPOS_UNDEFINED, 640480, SDL_WINDOW_RESIZABLE);
    SDL_Renderer* renderer = SDL_CreateRenderer(window, -10);
 
    SDL_Surface* bmpSurface = SDL_LoadBMP("player.bmp");
    SDL_SetColorKey(bmpSurface, SDL_TRUE, SDL_MapRGB(bmpSurface->format, 000xFF));
    // Set the color key (transparent pixel) in a surface.
    // The color key defines a pixel value that will be treated as transparent in a blit.
    // For example, one can use this to specify that cyan pixels should be considered
    // transparent, and therefore not rendered.
    SDL_Rect destRect = { 00, bmpSurface->w, bmpSurface->h };
    SDL_Texture* texture = SDL_CreateTextureFromSurface(renderer, bmpSurface);
 
    SDL_Event event;
    bool quit = false;
 
    while (!quit) {
        while (SDL_PollEvent(&event)) {
            switch (event.type) {
            case SDL_QUIT:
                quit = true;
                break;
            case SDL_KEYDOWN:
                printf("Key pressed: %s\n", SDL_GetKeyName(event.key.keysym.sym));
                if (event.key.keysym.sym == SDLK_ESCAPE)
                    quit = true;
                break;
            default:
                break;
            }
        }
 
        SDL_RenderCopy(renderer, texture, NULL&destRect);
        SDL_RenderPresent(renderer);
    }
 
    SDL_FreeSurface(bmpSurface);
    SDL_DestroyTexture(texture);
    SDL_DestroyRenderer(renderer);
    SDL_DestroyWindow(window);
    SDL_Quit();
 
    return 0;
}


파란색(0, 0, 255)을 컬러키로 설정하는 코드를 작성하고 빌드한다.


파란색이 투명하게 처리되어 표시된다.


컬러키 설정 부분을 주석처리하고 빌드해 보자.


//SDL_SetColorKey(bmpSurface, SDL_TRUE, SDL_MapRGB(bmpSurface->format, 0, 0, 0xFF));


파란색이 그대로 표시된다.


반응형
Posted by J-sean
:
반응형

SDL 기본 라이브러리는 BMP 형식의 이미지만 처리할 수 있다. JPG나 PNG 형식을 처리하기 위해서는 SDL_image 라이브러리가 필요하다.


우선 SDL 기본 라이브러리로 BMP 이미지를 렌더링 해 보자.


1
2
3
4
5
6
7
8
9
10
11
12
13
14
15
16
17
18
19
20
21
22
23
24
25
26
27
28
29
30
31
32
33
34
35
36
37
38
39
40
41
42
43
44
45
46
47
48
49
50
51
52
53
54
55
56
57
58
59
60
61
62
63
64
65
66
67
68
69
70
71
72
73
74
75
76
77
78
79
80
81
#include <iostream>
#include "SDL.h"
 
#pragma comment(lib, "sdl2.lib")
#pragma comment(lib, "sdl2main.lib")
 
int main(int argc, char* argv[]) {
    if (SDL_Init(SDL_INIT_VIDEO) < 0) {
        printf("SDL Initialization Fail: %s\n", SDL_GetError());
        return -1;
    }
 
    SDL_Window* window = SDL_CreateWindow("SDL Test", SDL_WINDOWPOS_UNDEFINED,
        SDL_WINDOWPOS_UNDEFINED, 640480, SDL_WINDOW_RESIZABLE);
 
    if (!window) {
        printf("SDL_CreateWindow Error: %s\n", SDL_GetError());
        SDL_Quit();
        return -1;
    }
 
    SDL_Renderer* renderer = SDL_CreateRenderer(window, -10);
 
    SDL_Surface* bmpSurface = SDL_LoadBMP("image.bmp");
    // Load a BMP image from a file path.
    if (bmpSurface == NULL) {
        SDL_DestroyRenderer(renderer);
        SDL_DestroyWindow(window);
        printf("SDL_LoadBMP Error: %s\n", SDL_GetError());
        SDL_Quit();
        return -1;
    }
    SDL_Rect destRect = { 00, bmpSurface->w, bmpSurface->h };
 
    SDL_Texture* texture = SDL_CreateTextureFromSurface(renderer, bmpSurface);
    // Create a texture from an existing surface.
    if (texture == NULL) {
        SDL_FreeSurface(bmpSurface);
        // Free an RGB surface.
        SDL_DestroyRenderer(renderer);
        SDL_DestroyWindow(window);
        printf("SDL_CreateTextureFromSurface Error: %s\n", SDL_GetError());
        SDL_Quit();
        return -1;
    }
    SDL_FreeSurface(bmpSurface);
 
    SDL_Event event;
    bool quit = false;
 
    while (!quit) {
        while (SDL_PollEvent(&event)) {
            switch (event.type) {
            case SDL_QUIT:
                quit = true;
                break;
            case SDL_KEYDOWN:
                printf("Key pressed: %s\n", SDL_GetKeyName(event.key.keysym.sym));
                if (event.key.keysym.sym == SDLK_ESCAPE)
                    quit = true;
                break;
            default:
                break;
            }
        }
 
        SDL_SetRenderDrawColor(renderer, 255255255, SDL_ALPHA_OPAQUE);
        SDL_RenderClear(renderer);
        SDL_RenderCopy(renderer, texture, NULL&destRect);
        // Copy a portion of the texture to the current rendering target.
        SDL_RenderPresent(renderer);
    }
 
    SDL_DestroyTexture(texture);
    // Destroy the specified texture.
    SDL_DestroyRenderer(renderer);
    SDL_DestroyWindow(window);
    SDL_Quit();
 
    return 0;
}


코드를 작성하고 빌드한다.


실행하면 윈도우에 이미지가 렌더링 된다.


만약 그래픽 카드의 지원을 받을 수 없는 Embedded System 등에서 소프트웨어 방식의 렌더링만 사용할 수 있다면 Texture, Renderer 를 사용하지 않고 Window Surface, BMP Surface 를 사용해 직접 화면에 이미지를 출력할 수 있다.


1
2
3
4
5
6
7
8
9
10
11
12
13
14
15
16
17
18
19
20
21
22
23
24
25
26
27
28
29
30
31
32
33
34
35
36
37
38
39
40
41
42
43
44
45
46
47
48
49
50
51
52
53
54
55
56
57
58
59
60
61
62
63
64
65
66
67
68
69
70
#include <iostream>
#include "SDL.h"
 
#pragma comment(lib, "sdl2.lib")
#pragma comment(lib, "sdl2main.lib")
 
int main(int argc, char* argv[]) {
    if (SDL_Init(SDL_INIT_VIDEO) < 0) {
        printf("SDL Initialization Fail: %s\n", SDL_GetError());
        return -1;
    }
 
    SDL_Window* window = SDL_CreateWindow("SDL Test", SDL_WINDOWPOS_UNDEFINED,
        SDL_WINDOWPOS_UNDEFINED, 640480, SDL_WINDOW_RESIZABLE);
 
    if (!window) {
        printf("SDL_CreateWindow Error: %s\n", SDL_GetError());
        SDL_Quit();
        return -1;
    }
 
    SDL_Surface* windowSurface = SDL_GetWindowSurface(window);
    // Get the SDL surface associated with the window.
    // A new surface will be created with the optimal format for the window,
    // if necessary. This surface will be freed when the window is destroyed.
    // Do not free this surface.
    // This surface will be invalidated if the window is resized. After resizing
    // a window this function must be called again to return a valid surface.
    // You may not combine this with 3D or the rendering API on this window.
 
    SDL_Surface* bmpSurface = SDL_LoadBMP("image.bmp");
    if (bmpSurface == NULL) {
        SDL_DestroyWindow(window);
        printf("SDL_LoadBMP Error: %s\n", SDL_GetError());
        SDL_Quit();
        return -1;
    }
 
    SDL_Event event;
    bool quit = false;
 
    while (!quit) {
        while (SDL_PollEvent(&event)) {
            switch (event.type) {
            case SDL_QUIT:
                quit = true;
                break;
            case SDL_KEYDOWN:
                printf("Key pressed: %s\n", SDL_GetKeyName(event.key.keysym.sym));
                if (event.key.keysym.sym == SDLK_ESCAPE)
                    quit = true;
                break;
            default:
                break;
            }
        }
 
        SDL_BlitSurface(bmpSurface, NULL, windowSurface, NULL);
        // Use this function to perform a fast surface copy to a destination surface.
        SDL_UpdateWindowSurface(window);
        // Copy the window surface to the screen. This is the function you use to
        // reflect any changes to the surface on the screen.
    }
 
    SDL_FreeSurface(bmpSurface);
    SDL_DestroyWindow(window);
    SDL_Quit();
 
    return 0;
}


코드를 작성하고 빌드한다.


윈도우에 이미지가 출력된다.


이번엔 SDL_image를 이용해 JPG, PNG 등의 이미지를 출력해 보자. 아래 링크에서 SDL_image를 다운받고 적당히 설치한다.

SDL Libraries


1
2
3
4
5
6
7
8
9
10
11
12
13
14
15
16
17
18
19
20
21
22
23
24
25
26
27
28
29
30
31
32
33
34
35
36
37
38
39
40
41
42
43
44
45
46
47
48
49
50
51
52
53
54
55
56
57
58
59
60
61
62
63
#include <iostream>
#include "SDL.h"
#include "SDL_image.h"
 
#pragma comment(lib, "sdl2.lib")
#pragma comment(lib, "sdl2main.lib")
#pragma comment(lib, "sdl2_image.lib")
 
int main(int argc, char* argv[]) {
    SDL_Init(SDL_INIT_VIDEO);
    SDL_Window* window = SDL_CreateWindow("SDL Test", SDL_WINDOWPOS_UNDEFINED,
        SDL_WINDOWPOS_UNDEFINED, 640480, SDL_WINDOW_RESIZABLE);
    SDL_Renderer* renderer = SDL_CreateRenderer(window, -1, SDL_RENDERER_ACCELERATED);
    // SDL_RENDERER_SOFTWARE: the renderer is a software fallback
    // SDL_RENDERER_ACCELERATED : the renderer uses hardware acceleration
    // SDL_RENDERER_PRESENTVSYNC : present is synchronized with the refresh rate
    // SDL_RENDERER_TARGETTEXTURE : the renderer supports rendering to texture
    // Note that providing no flags gives priority to available SDL_RENDERER_ACCELERATED
    // renderers.
 
    IMG_Init(IMG_INIT_JPG | IMG_INIT_PNG);
    // Initialize SDL_image.
 
    SDL_Surface* imageSurface = IMG_Load("image.png");
    // Load an image from a filesystem path into a software surface.
    SDL_Texture* texture = SDL_CreateTextureFromSurface(renderer, imageSurface);
    SDL_Rect destRect = { 00, imageSurface->w, imageSurface->h };
 
    SDL_Event event;
    bool quit = false;
 
    while (!quit) {
        while (SDL_PollEvent(&event)) {
            switch (event.type) {
            case SDL_QUIT:
                quit = true;
                break;
            case SDL_KEYDOWN:
                printf("Key pressed: %s\n", SDL_GetKeyName(event.key.keysym.sym));
                if (event.key.keysym.sym == SDLK_ESCAPE)
                    quit = true;
                break;
            default:
                break;
            }
        }
 
        //SDL_SetRenderDrawColor(renderer, 255, 255, 255, SDL_ALPHA_OPAQUE);
        //SDL_RenderClear(renderer);
        SDL_RenderCopy(renderer, texture, NULL&destRect);
        SDL_RenderPresent(renderer);
    }
 
    SDL_DestroyTexture(texture);
    SDL_FreeSurface(imageSurface);
    IMG_Quit();
    // Deinitialize SDL_image.
    SDL_DestroyRenderer(renderer);
    SDL_DestroyWindow(window);
    SDL_Quit();
 
    return 0;
}


코드를 입력하고 빌드한다.


실행하면 윈도우에 이미지가 렌더링 된다.


주석처리된 배경 처리 부분을 아래와 같이 해제하고 알파 채널이 있는 PNG 파일을 렌더링 해 보자.


SDL_SetRenderDrawColor(renderer, 0, 0, 255, SDL_ALPHA_OPAQUE);
SDL_RenderClear(renderer);


player.png
0.00MB


특별한 처리 없이도 알파 채널이 보존되어 투명한 부분이 잘 표현된다.


※ 참고

SDL_image API


반응형
Posted by J-sean
: