반응형

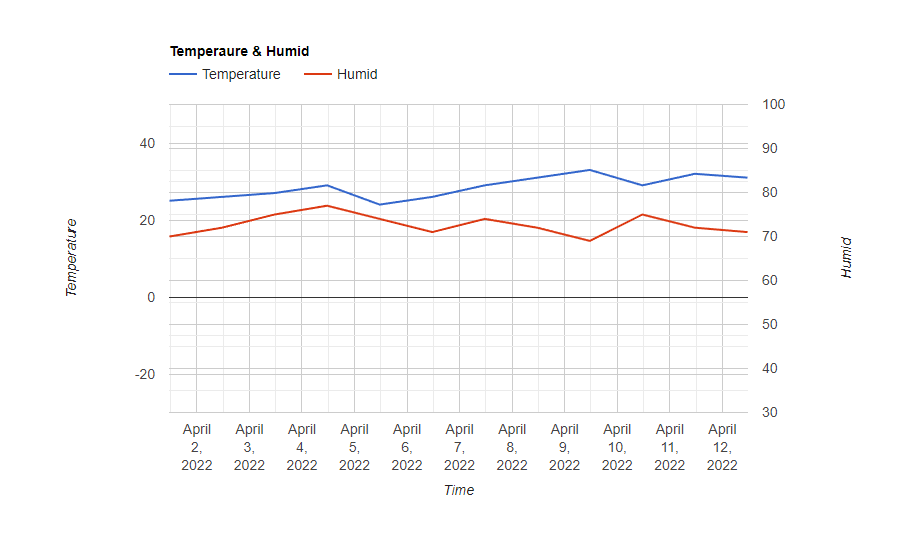
구글 차트를 이용해 웹페이지에 그래프(Dual-Y Chart)를 그려보자.


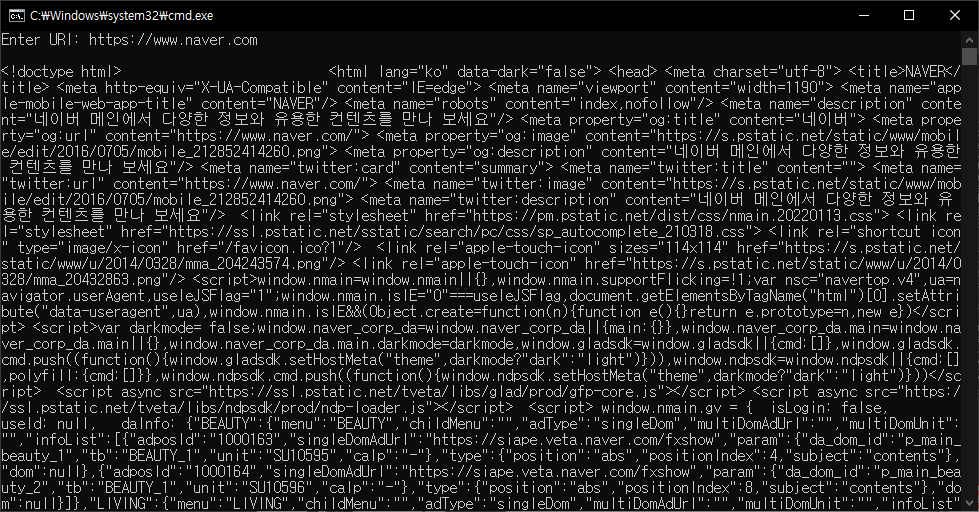
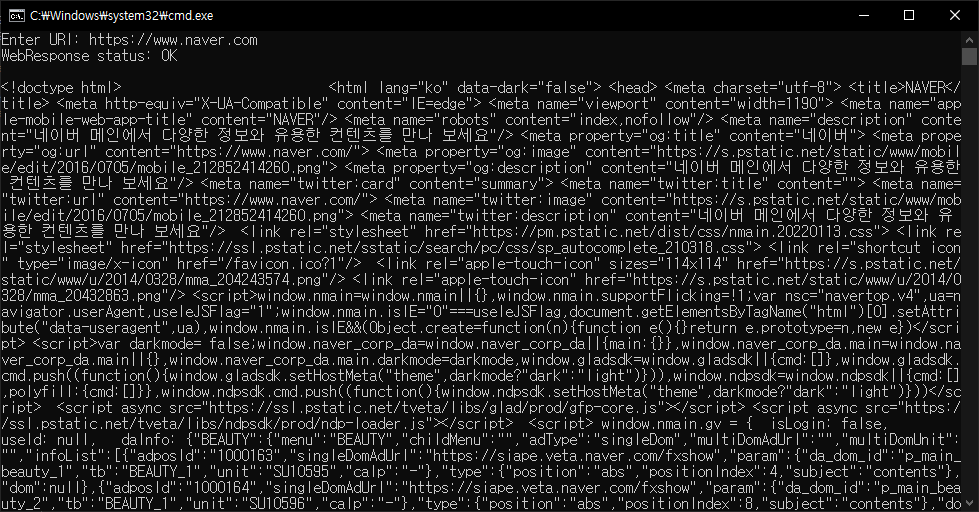
서버가 필요하다면 아래 링크를 참고해 서버를 만든다.

2021.08.25 - [Linux] - Linux(Ubuntu) Build Your Own Web Server - 리눅스(우분투)로 웹서버 만들기


1
2
3
4
5
6
7
8
9
10
11
12
13
14
15
16
17
18
19
20
21
22
23
24
25
26
27
28
29
30
31
32
33
34
35
36
37
38
39
40
41
42
43
44
45
46
47
48
49
50
51
52
53
54
55
56
57
58
59
60
61
62
<html>
<head>
    <script type="text/javascript" src="https://www.gstatic.com/charts/loader.js"></script>
    <script type="text/javascript">
        google.charts.load('current', { packages: ['corechart''line'] });
        google.charts.setOnLoadCallback(drawChart);
 
        function drawChart() {
            var data = new google.visualization.DataTable();
            data.addColumn('datetime''Time');
            data.addColumn('number''Temperature');
            data.addColumn('number''Humid');
 
            data.addRows([
                // 00: 1월, 01: 2월, 02: 3월...
                [new Date(202203011130), 2570],
                [new Date(202203021130), 2672],
                [new Date(202203031130), 2775],
                [new Date(202203041130), 2977],
                [new Date(202203051130), 2474],
                [new Date(202203061130), 2671],
                [new Date(202203071130), 2974],
                [new Date(202203081130), 3172],
                [new Date(202203091130), 3369],
                [new Date(202203101130), 2975],
                [new Date(202203111130), 3272],
                [new Date(202203121130), 3171]
            ]);
 
            var options = {
                title: 'Temperaure & Humid',
                hAxis: {
                    title: 'Time'
                },
                series: {
                    0: { targetAxisIndex: 0 },
                    1: { targetAxisIndex: 1 }
                },
                vAxes: {
                    0: {
                        title: 'Temperature',
                        viewWindow: { min: -30, max: 50 }
                    },
                    1: {
                        title: 'Humid',
                        viewWindow: { min: 30, max: 100 }
                    }
                }
                //,
                //curveType: 'function',
                //legend: { position: 'bottom' }
            };
 
            var chart = new google.visualization.LineChart(document.getElementById('chart_div'));
            chart.draw(data, options);
        }
    </script>
</head>
<body>
    <div id="chart_div" style="width: 900px; height: 500px"></div>
</body>
</html>


HTML소스를 입력하고 저장한다.


인터넷 브라우저로 열어보면 그래프가 나타난다.


※ 참고

Google Charts

반응형
Posted by J-sean
:
반응형

HTTP 요청을 보내고 응답을 받아 보자.


1
2
3
4
5
6
7
8
9
10
11
12
13
14
15
16
17
18
19
20
21
22
23
24
25
26
27
28
29
30
31
32
33
34
35
36
37
38
using System;
using System.Collections.Generic;
using System.Linq;
using System.Text;
using System.Threading.Tasks;
 
using System.Net.Http;
 
namespace ConsoleApp1
{
    class Program
    {
        // HttpClient is intended to be instantiated once per application, rather than per-use.
        static readonly HttpClient httpClient = new HttpClient();
 
        static async Task Main(string[] args)
        {
            try
            {
                Console.Write("Enter URI: ");
                string uriString = Console.ReadLine();
 
                HttpResponseMessage httpResponseMessage = await httpClient.GetAsync(uriString.Trim());
                httpResponseMessage.EnsureSuccessStatusCode();
                // Throws an exception if the IsSuccessStatusCode property for the HTTP response is false.
                string responseBody = await httpResponseMessage.Content.ReadAsStringAsync();
                // Above three lines can be replaced with new helper method below
                //string responseBody = await httpClient.GetStringAsync(uriString.Trim());
 
                Console.WriteLine(responseBody);
            }
            catch (HttpRequestException e)
            {
                Console.WriteLine(e.Message);
            }
        }
    }
}


소스를 입력하고 빌드한다.


원하는 URI를 입력하면 데이터가 출력된다.


반응형
Posted by J-sean
:
반응형

WebRequest 클래스를 이용해 웹페이지 데이터(내용)를 요청해 보자.


1
2
3
4
5
6
7
8
9
10
11
12
13
14
15
16
17
18
19
20
21
22
23
24
25
26
27
28
29
30
31
32
33
34
35
36
37
38
39
40
41
42
43
44
45
46
47
48
49
50
51
52
53
54
55
using System;
using System.Collections.Generic;
using System.Linq;
using System.Text;
using System.Threading.Tasks;
 
using System.Net;
using System.IO;
 
namespace ConsoleApp1
{
    class Program
    {
        static void Main(string[] args)
        {
            WebRequest webRequest = null;
            WebResponse webResponse = null;
 
            Stream stream = null;
            StreamReader streamReader = null;
 
            try
            {
                Console.Write("Enter URI: ");
                string uriString = Console.ReadLine();
 
                webRequest = WebRequest.Create(uriString.Trim());
                // If required by the server, set the credentials.
                webRequest.Credentials = CredentialCache.DefaultCredentials;
 
                webResponse = webRequest.GetResponse();
                Console.WriteLine("WebResponse status: " + ((HttpWebResponse)webResponse).StatusDescription);
 
                stream = webResponse.GetResponseStream();
                streamReader = new StreamReader(stream);
 
                string readString = streamReader.ReadToEnd();
                Console.WriteLine(readString);
            }
            catch (Exception exc)
            {
                Console.WriteLine(exc.Message);
            }
            finally
            {
                if (webResponse != null)
                    webResponse.Close();
                if (streamReader != null)
                    streamReader.Close();
                if (stream != null)
                    stream.Close();
            }
        }
    }
}


소스를 작성하고 빌드한다.


원하는 URI를 입력하면 데이터가 출력된다.


반응형
Posted by J-sean
:
반응형

간단한 웹서버용 HTML 문서 작성 예제


2019/10/08 - [Linux] - Build your own web server with Fedora linux - 페도라 리눅스로 간단한 웹서버 만들기


아래 내용으로 index.html 파일을 작성 하고 /var/www/html에 저장 한다.

1
2
3
4
5
6
7
8
9
10
11
12
13
14
15
16
17
18
19
20
21
22
23
24
25
26
27
28
29
30
31
32
33
34
35
36
<!doctype html>
<html lang="ko">
    <head>
        <meta charset="utf-8">
        <title>J.Sean's simple web server</title>
        <style>
            a{
                text-decoration:none;
                color:black;
            }
 
        </style>
    </head>
 
    <body>
        <h1>
        <br>--- J.sean's simple web server ---
        <br>OS: Fedora
        <br>HTTP Server: Apache
        <br>
        <a href="https://s-engineer.tistory.com/" target="_blank">Click me to visit J.Sean's blog</a><br><br>
 
        Alien 3<br>
        <video src="./data/Alien.mp4" width="960" height="520" autoplay controls>
        <track label="Korean" kind="subtitles" srclang="ko" src="./data/Alien.vtt" default></video><br><br>
        
        <a href="https://s-engineer.tistory.com/" target="_blank">
        <img src="./download/animal.jpg">
        </a>
 
        <br>
        <a href="./download/file.zip" download>File (file.zip)</a><br>
 
        </h1>
    </body>
</html>


./data, ./download 디렉토리를 만들고 index.html 내용에 필요한 데이터를 저장 한다.


서버에 접속하면 비디오 플레이어, 웹링크, 파일링크, 사진등이 표시된 웹 페이지가 열린다.


반응형
Posted by J-sean
:
반응형

웹서버에 데이터를 요청하고 app에서 응답 받아 처리할 수 있다.


서버에서 전달 되는 데이터 형식(Json)

1
2
3
4
5
6
7
8
9
10
11
12
13
{
    "LastUpdate":"2019.10.12",
    "SalesRecord":
    [
        {"date":"2016.03.08","item":"apple","price":2400,"quantity":84,"total":201600},
        {"date":"2016.07.29","item":"grape","price":3100,"quantity":37,"total":114700},
        {"date":"2017.10.25","item":"peach","price":4600,"quantity":55,"total":253000},
        {"date":"2018.12.08","item":"banana","price":1500,"quantity":83,"total":124500},
        {"date":"2019.05.09","item":"melon","price":7200,"quantity":75,"total":540000},
        {"date":"2019.10.17","item":"coconut","price":6800,"quantity":59,"total":401200},
        {"date":"2019.11.07","item":"strawberry","price":4900,"quantity":30,"total":147000}
    ]
}


<AndroidManifest.xml>

1
2
3
4
5
6
7
8
9
10
11
12
13
14
15
    <uses-permission android:name="android.permission.INTERNET"/>
 
    <application
        android:usesCleartextTraffic="true">
        <!--
        android:usesCleartextTraffic
        Indicates whether the app intends to use cleartext network traffic, such as cleartext HTTP.
        The default value for apps that target API level 27 or lower is "true". Apps that target
        API level 28 or higher default to "false". When the attribute is set to "false", platform
        components (for example, HTTP and FTP stacks, DownloadManager, and MediaPlayer) will refuse
        the app's requests to use cleartext traffic. Third-party libraries are strongly encouraged
        to honor this setting as well. The key reason for avoiding cleartext traffic is the lack of
        confidentiality, authenticity, and protections against tampering; a network attacker can
        eavesdrop on transmitted data and also modify it without being detected.
        -->


<MainActivity.java>

1
2
3
4
5
6
7
8
9
10
11
12
13
14
15
16
17
18
19
20
21
22
23
24
25
26
27
28
29
30
31
32
33
34
35
36
37
38
39
40
41
42
43
44
45
46
47
48
49
50
51
52
53
54
55
56
57
58
59
60
61
62
63
64
65
66
67
68
69
70
71
72
73
public class MainActivity extends AppCompatActivity {
 
    EditText editText;
    TextView textView;
 
    static RequestQueue requestQueue;
 
    @Override
    protected void onCreate(Bundle savedInstanceState) {
        super.onCreate(savedInstanceState);
        setContentView(R.layout.activity_main);
 
        editText = findViewById(R.id.editText);
        textView = findViewById(R.id.textView);
 
        Button button = findViewById(R.id.button);
        button.setOnClickListener(new View.OnClickListener() {
            @Override
            public void onClick(View view) {
                makeRequest();
            }
        });
 
        if (requestQueue == null) {
            requestQueue = Volley.newRequestQueue(getApplicationContext());
        }
    }
 
    public void makeRequest() {
        String url = editText.getText().toString();
        StringRequest request = new StringRequest(Request.Method.GET, url,
                new Response.Listener<String>() {
                    @Override
                    public void onResponse(String response) {
                        try {
                            //Server(Ubuntu) data encoding
                            response = new String(response.getBytes("iso-8859-1"), "utf-8");
                            //textView.append("Raw data: " + response);
                        } catch (Exception e) {
                            e.printStackTrace();
                        }
 
                        Gson gson = new Gson();
                        RequestResult requestResult = gson.fromJson(response, RequestResult.class);
                        textView.setText("Items count: " + requestResult.SalesRecord.size() + '\n');
                        textView.append("Last Update: " + requestResult.LastUpdate + '\n');
                        ArrayList<Data> items = requestResult.SalesRecord;
                        for (int i = 0; i < items.size(); i++) {
                            textView.append(String.format("■ Date: %s, Item: %s, Price: %s, Quantity: %s, Total: %s\n",
                                    items.get(i).date, items.get(i).item, items.get(i).price, items.get(i).quantity, items.get(i).total));
                        }
                    }
                },
                new Response.ErrorListener() {
                    @Override
                    public void onErrorResponse(VolleyError error) {
                        textView.append("Error: " + error.getMessage());
                    }
                }
        ) {
            @Override
            protected Map<StringString> getParams() throws AuthFailureError {
                Map<StringString> params = new HashMap<StringString>();
 
                return params;
            }
        };
 
        request.setShouldCache(false);
        requestQueue.add(request);
        textView.setText("Request sent.");
    }
}


<RequestResult.java>

1
2
3
4
public class RequestResult {
    String LastUpdate;
    ArrayList<Data> SalesRecord = new ArrayList<Data>();
}


서버 데이터의 key와 같은 이름의 변수를 만들어야 한다.


<Data.java>

1
2
3
4
5
6
7
public class Data {
    String date;
    String item;
    String price;
    String quantity;
    String total;
}


서버 데이터의 key와 같은 이름의 변수를 만들어야 한다


실행 화면. 서버 주소를 입력하고 DATA REQUEST 버튼을 클릭한다.


서버부터 전달된 데이터가 지정한 대로 표시된다.


반응형
Posted by J-sean
:
반응형

Fedora Linux를 설치하고 간단히 웹서버를 만들 수 있다.


2021.08.25 - [Linux] - Linux(Ubuntu) Build Your Own Web Server - 리눅스(우분투)로 웹서버 만들기


Fedora 설치 중 Root 암호를 설정 한다. User Creation은 하지 않아도 된다.


Root 암호를 입력하고 설치를 완료 한다.


설치가 완료되면 재부팅하고 위에서 설정한 암호로 로그인 한다.


dnf -y install httpd 를 입력하고 Apache HTTP Server를 설치 한다.


Apache HTTP Server 설치가 완료되면 systemctl status httpd를 입력하고 상태를 확인한다. inactive 상태로 나타난다.


systemctl start httpd를 입력해 활성화 시키고 다시 systemctl status httpd를 입력해 확인 한다. active 상태로 나타난다.


systemctl enable httpd를 입력해 Apache HTTP Sever가 항상 작동 하도록 한다.


firewall-cmd --permanent --add-service=http

firewall-cmd --permanent --add-service=https

firewall-cmd --reload

위 명령어들로 방화벽에 http, https service를 등록한다.


ifconfig 명령어로 서버의 주소를 확인 한다. (192.168.11.131)


다른 컴퓨터로 서버 주소에 접속할 때 위와 같이 나오면 제대로 설정 된 것이다.


/var/www/html로 이동해서 index.html 파일을 생성 한다.


a나 i 키를 눌러 파일을 수정 한다.


간단한 html코드를 입력 하고 저장한다.


다시 다른 컴퓨터에서 서버에 접속했을 때 위와 같이 나오면 제대로 설정 된 것이다.


위와 같이 nmcli를 이용해 고정 IP 주소(192.168.11.200)를 정해 줄 수 있다.


※ -ipv4.addresses로 지정하면(앞에 -기호 추가) 원하는 주소를 삭제 할 수 있다고 하는데 처음 지정된 주소는 error가 발생 한다.

새로 추가한 주소는 error 없이 삭제 된다.


nmtui를 사용하자.


※ 설치: dnf install NetworkManager-tui


php를 설치 한다. 이번엔 -y 옵션을 주지 않았다.


y를 입력하고 설치를 진행 한다.


/var/www/html/index.php파일을 만든다. 파일명은 원하는대로 지정해도 된다.


서버에 설치된 php 정보를 보여주는 코드를 작성 하고 저장 한다.


httpd를 재시작 한다.


http://192.168.11.200/index.php 에 접속 했을때 위와 같은 화면이 나오면 제대로 설정된 것이다.


php-<extension>의 형식으로 필요한 PHP extension을 설치 한다.


※ 예를 들어 JSON 데이터를 다룬다면 아래와 같이 php-json을 설치 한다.

dnf install php-json


관련 업데이트가 함께 진행 된다.


반응형
Posted by J-sean
:
반응형

Selenium과 Chrome driver를 이용해 웹싸이트에서 로그인이 필요한 정보를 가져 올 수 있다.

아래 코드는 인터넷 서점(Yes24)에 접속해서 로그인 하고 주문 내역을 가져 온다.

Chrome이 동작하는걸 보고 싶다면 options 관련 부분만 삭제하면 된다.


1
2
3
4
5
6
7
8
9
10
11
12
13
14
15
16
17
18
19
20
21
22
23
24
25
26
27
28
29
30
31
32
33
34
35
36
37
38
39
40
from selenium import webdriver
 
login_url = "https://www.yes24.com/Templates/FTLogin.aspx"
id = "아이디"
password = "패스워드"
 
options = webdriver.ChromeOptions()
options.add_argument("headless"# headless 모드
options.add_argument("window-size=1920x1080"# headless 모드가 아니면 의미가 없는거 같다.
options.add_argument("--log-level=3"# 이 코드가 없으면 headless 모드시 log가 많이 표시 된다.
 
#driver = webdriver.Chrome("c:\download\chromedriver.exe", options = options)
driver = webdriver.Chrome(options = options) # webdriver와 소스가 같은 폴더에 있을 때.
driver.implicitly_wait(3)
driver.get(login_url)
print("Title: %s\nLogin URL: %s" %(driver.title, driver.current_url))
 
id_elem = driver.find_element_by_id("SMemberID")
id_elem.clear()
id_elem.send_keys(id)
 
driver.find_element_by_id("SMemberPassword").clear()
driver.find_element_by_id("SMemberPassword").send_keys(password)
# clear()와 send_keys()는 None을 리턴 한다.
 
login_btn = driver.find_element_by_xpath('//*[@id="btnLogin"]')
login_btn.click() # None 리턴
# driver.find_element_by_xpath('//*[@id="btnLogin"]').click()
 
list_url = "https://ssl.yes24.com//MyPageOrderList/MyPageOrderList"
driver.get(list_url)
 
print("-" * 30"Order list""-" * 30)
lists = driver.find_elements_by_css_selector("#MyOrderListTbl span")
for i, item in enumerate(lists):
    print("%d: %s" %(i + 1, item.text))
 
driver.save_screenshot("screenshot.png")
 
#driver.quit()
cs


38번 라인에서 캡쳐한 'screenshot.png'


※ Selenium Documentation


반응형
Posted by J-sean
: