

[Arduino] Arduino Serial Communication with Python - 아두이노 시리얼 통신 2
Embedded 2020. 10. 18. 18:41 |반응형
파이썬 모듈인 pySerial을 이용해 간단히 아두이노와 시리얼 통신을 할 수 있다.
|
1
2
3
4
5
6
7
8
9
10
11
12
13
14
15
16
17
18
19
20
21
22
23
24
25
26
27
28
29
30
31
32
|
char state;
void setup() {
// put your setup code here, to run once:
pinMode(LED_BUILTIN, OUTPUT);
Serial.begin(9600);
Serial.println("Arduino ready.");
}
void loop() {
// put your main code here, to run repeatedly:
if (Serial.available())
{
state = Serial.read();
while (Serial.available())
{
Serial.read(); // 첫 번째 문자만 입력받고 나머지는 버린다.
}
if (state == '0')
{
digitalWrite(LED_BUILTIN, LOW);
Serial.println("LED OFF");
} else
{
digitalWrite(LED_BUILTIN, HIGH);
Serial.println("LED ON");
}
}
delay(100);
}
|
위 소스를 컴파일하고 아두이노에 업로드한다. 시리얼 모니터를 통해서도 Builtin LED를 제어할 수 있다.

먼저 pip install pyserial 명령으로 pyserial 라이브러리를 설치한다.
(serial이 아닌 pyserial이다, serial은 다른 라이브러리다)
|
1
2
3
4
5
6
7
8
9
10
11
12
13
14
15
16
17
18
19
20
21
22
23
24
25
26
27
28
29
30
31
32
33
|
import serial
import time
import sys
try:
ser = serial.Serial('COM5', 9600, timeout = 1)
time.sleep(1)
except:
print("Device can not be found or can not be configured.")
sys.exit(0)
if (ser.readable()):
print(ser.readline().decode(), end ='') # 아두이노 준비 상태 확인.
# 아두이노에서 Serial.println("Arduino ready"); 명령으로 데이터를 보내기 때문에
# Serial 통신으로 읽어온 데이터에는 줄바꿈 문자(\r\n)가 이미 포함되어 있다.
# Serial.print("Arduino ready");으로 바꾸면 end = ''가 필요 없다.
while (True):
print("\n0: Off, 1: On, q(Q): Quit\nChoose: ", end = '')
state = input()
if state == 'q' or state == 'Q':
break
elif state == '0':
ser.write(b'0')
print(ser.readline().decode(), end = '')
else:
ser.write(b'1')
print(ser.readline().decode(), end = '')
time.sleep(0.1)
ser.close()
|
Windows에서 위 소스를 실행하면 연결된 아두이노의 Builtin LED를 제어할 수 있다.


이번에는 적외선 온도 센서를 이용해 온도 측정 데이터를 받아 보자.
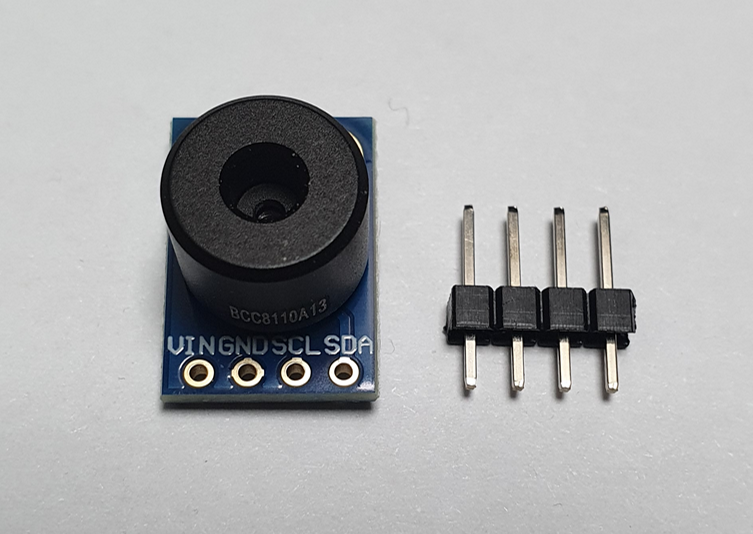

VIN - 5V
GND - GND
SCL - A5
SDA - A4
#include <Adafruit_MLX90614.h>

Adafruit_MLX90614 mlx = Adafruit_MLX90614();

void setup() {
  // put your setup code here, to run once:
  Serial.begin(9600);
  mlx.begin();
}

void loop() {
  // put your main code here, to run repeatedly:
  Serial.print("Ambient Temp: ");
  Serial.println(mlx.readAmbientTempC());
  Serial.print("Object Temp: ");
  Serial.println(mlx.readObjectTempC());
  delay(1000);
}
아두이노에 위 코드를 업로드한다.
import serial
import time
import sys
try:
serialPort = serial.Serial('COM3', 9600, 8, 'N', 1, timeout=1)
# 시리얼 통신 설정. COM3 포트, 9600 보드레이트, 8 데이터 비트, 패리티 없음, 1 스톱 비트, 타임아웃 1초.
time.sleep(1) # 시리얼 연결이 초기화될 때까지 대기
except Exception as e:
print("Serial error: ", e)
sys.exit(0)
try:
while (serialPort.readable()): # 시리얼 포트가 읽을 수 있는 상태인지 확인.
if (serialPort.in_waiting > 0): # 시리얼 버퍼에 대기 중인 데이터가 있는지 확인.
print(serialPort.readline().decode("utf-8", errors="ignore"), end="")
# readline() 메서드를 사용하여 시리얼 포트에서 한 줄씩 데이터를 읽고 UTF-8로 디코딩하여 출력.
# 오류가 발생할 경우 무시하도록 설정.
else:
print("No data waiting in the serial buffer.")
time.sleep(0.1)
except KeyboardInterrupt:
print("\n[알림] Ctrl+C 입력 감지. 프로그램을 종료합니다.")
finally:
if 'serialPort' in locals() and serialPort.is_open:
# locals() 함수를 사용하여 serialPort 변수가 정의되어 있는지 확인하고, 시리얼 포트가 열려 있는지 확인.
serialPort.close()
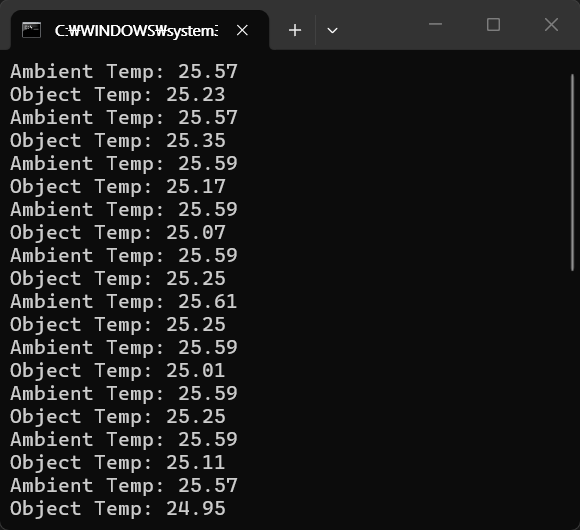
print("시리얼 포트가 안전하게 닫혔습니다.")파이썬으로 위 코드를 입력하고 실행한다.
반응형