반응형

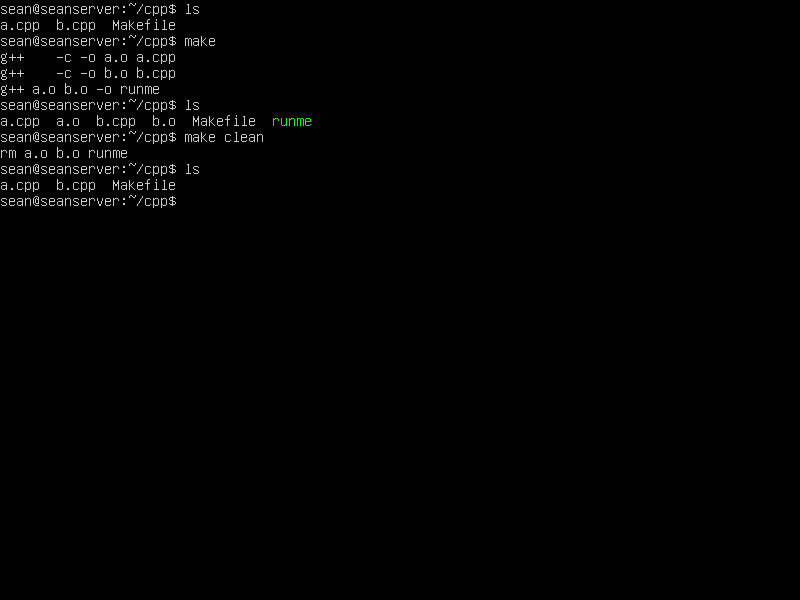
2021/02/07 - [Linux] - Linux make를 이용한 컴파일(빌드) 자동화


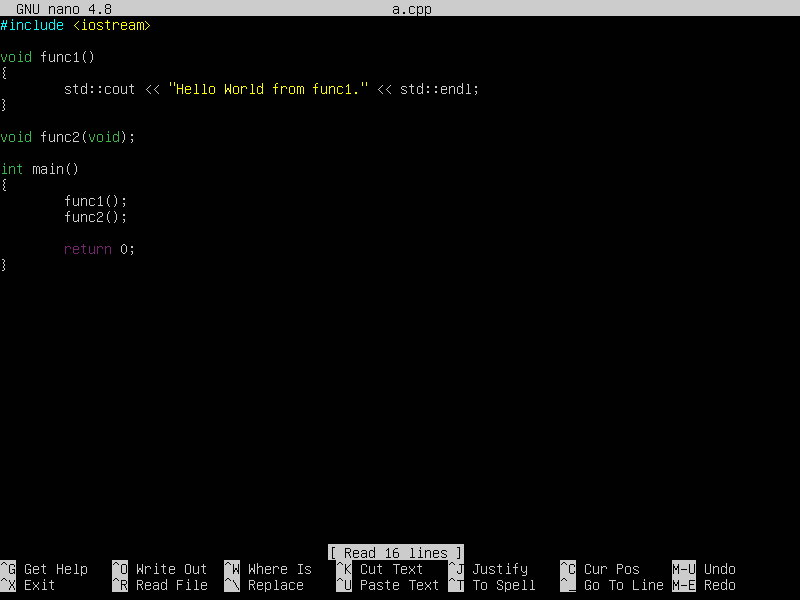
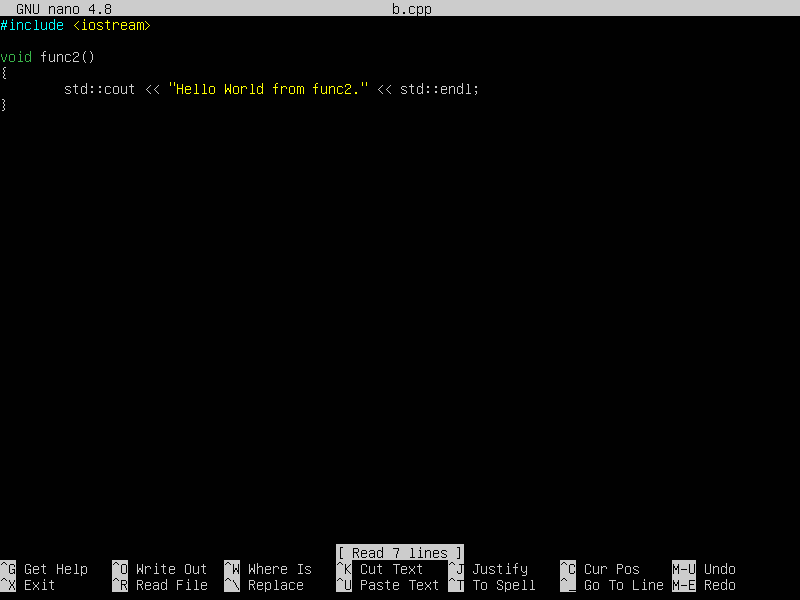
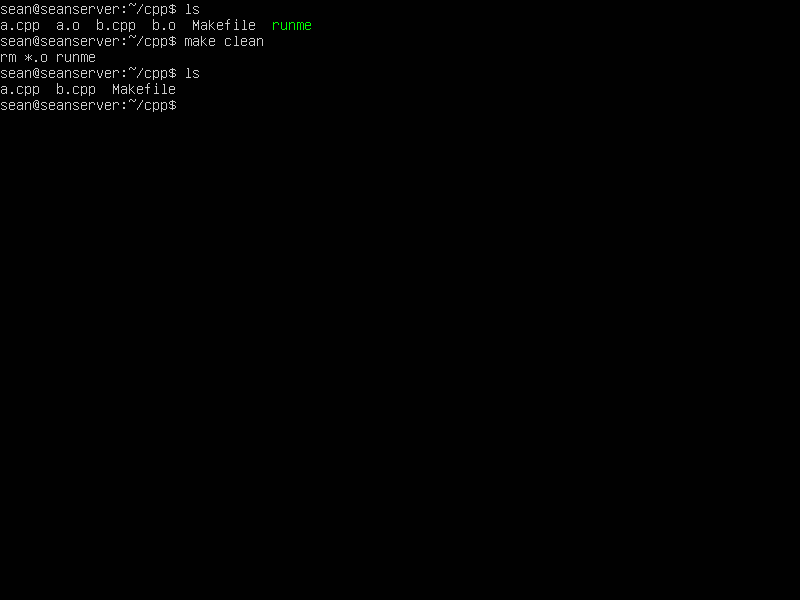
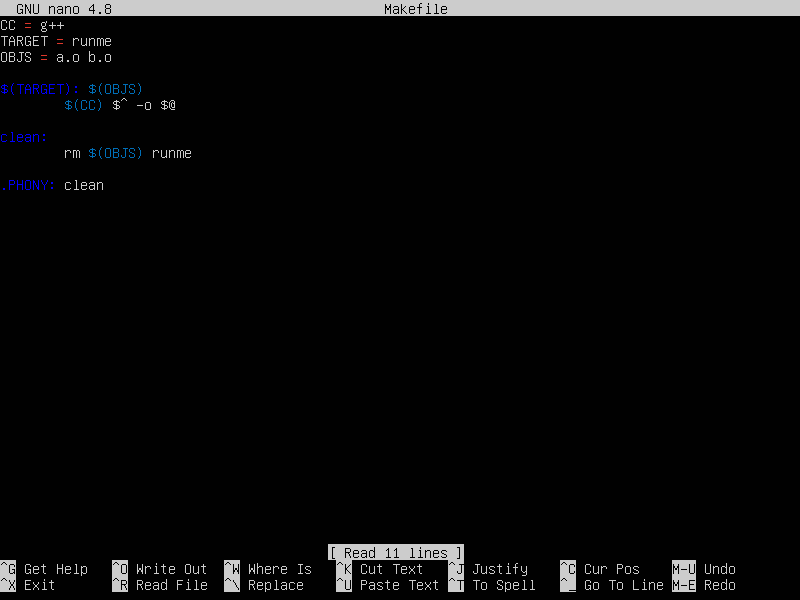
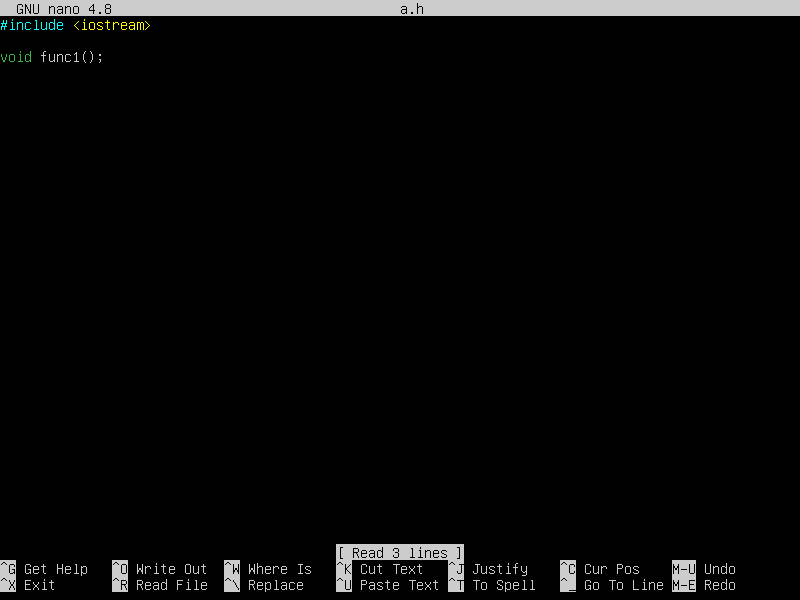
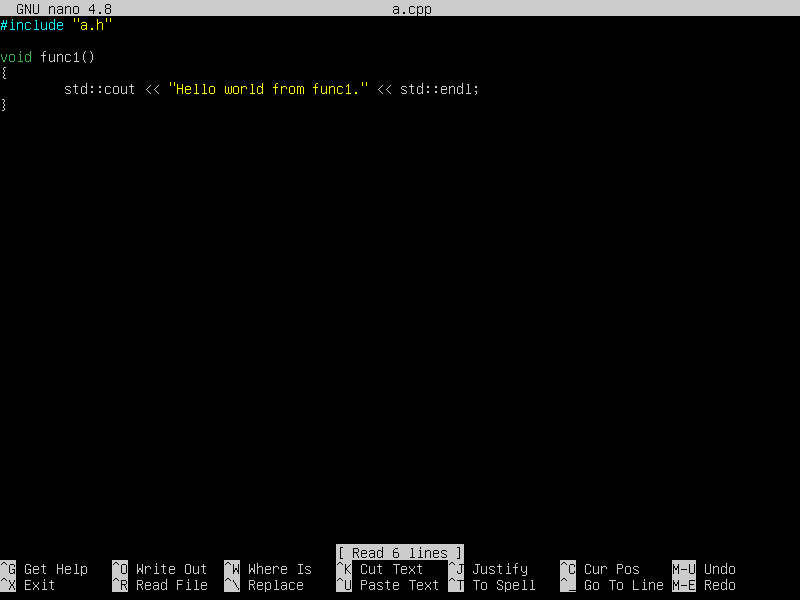
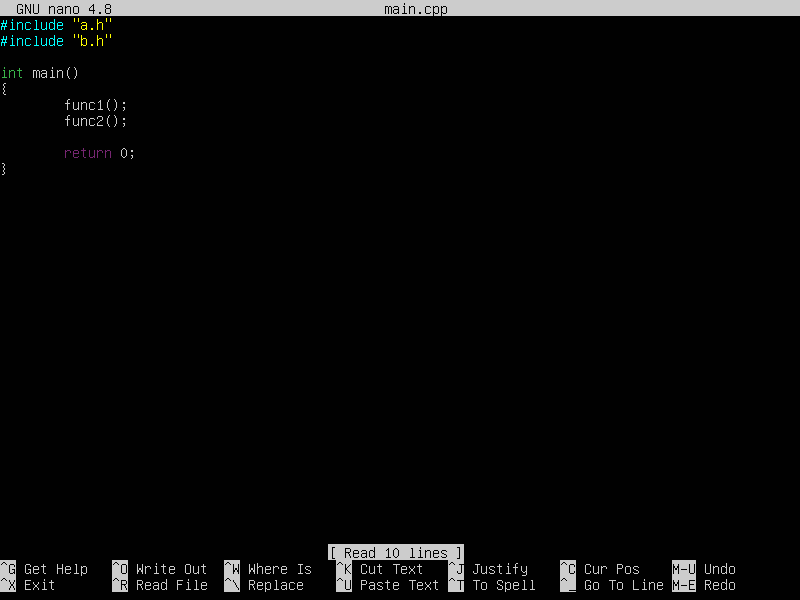
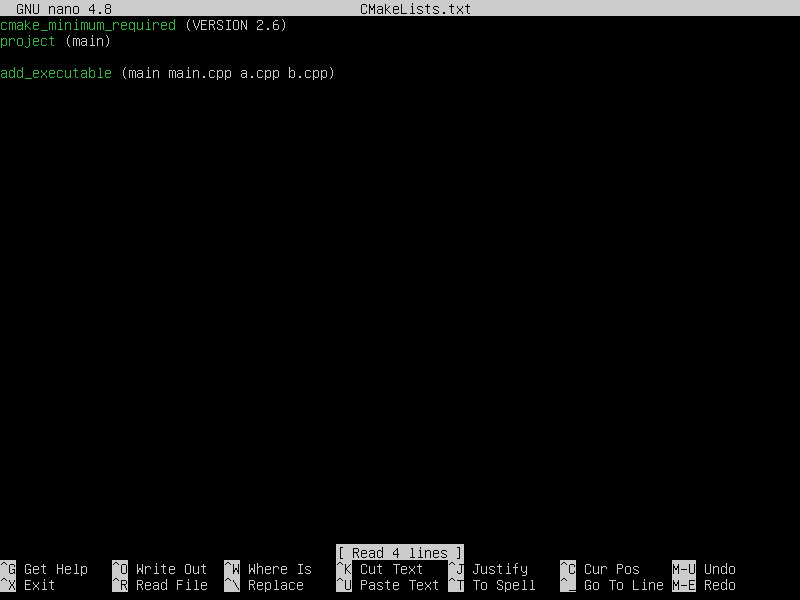
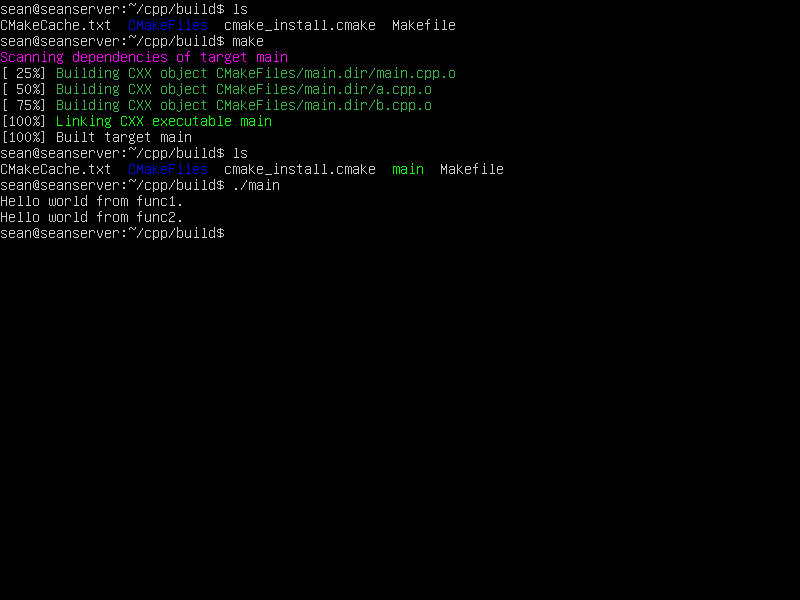
리눅스에서 소스 코드를 컴파일(빌드)할때 유용한 CMake의 간단한 사용법을 알아 보자.


첫 번째 헤더 파일을 만든다. (a.h)


헤더 파일의 소스 파일을 만든다. (a.cpp)


두 번째 헤더 파일을 만든다. (b.h)


헤더 파일의 소스 파일을 만든다. (b.cpp)


두 헤더 파일과 소스 파일을 사용하는 main() 함수가 포함된 소스 파일을 작성한다.


CMakeLists.txt 파일을 만든다.


헤더/소스 파일이 있는 디렉토리에 하위 디렉토리 build를 만들고 이동후 cmake 명령을 실행한다. (CMakeLists.txt 파일이 상위 디렉토리에 있으므로 cmake ../ 를 실행해야 한다)


Makefile이 생성 되면 make 명령을 실행한다. 빌드가 완료되고 실행파일(main)이 생성된다.


반응형
Posted by J-sean
:
반응형

2021/02/08 - [Linux] - Linux CMake를 이용한 컴파일(빌드) 자동화


리눅스에서 소스 코드를 컴파일(빌드)할때 유용한 make의 간단한 사용법을 알아 보자.


첫 번째 간단한 소스 파일을 만든다. (a.cpp)


두 번째 간단한 소스 파일을 만든다. (b.cpp)


Makefile을 만든다.


더보기

target … : prerequisites …
             recipe
             …
             …

A target is usually the name of a file that is generated by a program; examples of targets are executable or object files. A target can also be the name of an action to carry out, such as ‘clean’ (see Phony Targets).
A prerequisite is a file that is used as input to create the target. A target often depends on several files.
A recipe is an action that make carries out. A recipe may have more than one command, either on the same line or each on its own line. Please note: you need to put a tab character at the beginning of every recipe line! This is an obscurity that catches the unwary. If you prefer to prefix your recipes with a character other than tab, you can set the .RECIPEPREFIX variable to an alternate character.


3개의 파일이 생성 되었다. 'make runme'를 실행하면 모든 소스 코드가 컴파일 되고 빌드되어 실행파일(runme)이 생성 된다.


'make clean'을 실행하면 소스 코드 및 Makefile을 제외한 모든 파일이 정리된다.


이번엔 Makefile의 'runme: ...' 부분을 제일 위로 옮긴다.


'make runme'가 아닌 'make' 명령만으로도 빌드가 완료 된다.


Makefile을 매크로와 자동변수를 사용하도록 바꿔보자.


make와 make clean 명령이 동일하게 실행된다.


반응형
Posted by J-sean
:
반응형

리눅스(우분투)에 OpenCV-Python을 설치하자.


opencv-python을 설치하면 numpy도 함께 설치된다.


간단한 opencv 예제를 입력하고 파이썬 파일로 저장한다.


예제를 실행하면 이미지가 출력된다.


GUI가 없는 리눅스 서버에서는 실행되지 않는다. 이미지를 디스플레이 하는 코드가 포함되었기 때문인데 이미지 읽기, 저장, 연산등의 작업만 하는 프로그램은 문제 없이 실행된다.


반응형
Posted by J-sean
:
반응형

리눅스(우분투) 서버 같은 콘솔 환경에서도 비디오 플레이어를 사용할 수 있다.


mpv를 설치한다.


--vo=drm 옵션, 영상 파일 이름과 함께 실행한다.


자막 파일이 있다면 자막도 표시된다. 주요 단축키 목록은 아래와 같다.


  • LEFT and RIGHT: Seek backward/forward 5 seconds. Shift+arrow does a 1 second exact seek

  • UP and DOWN: Seek forward/backward 1 minute. Shift+arrow does a 5 second exact seek

  • p / SPACE: Pause (pressing again unpauses).

  • q: Stop playing and quit.

  • Q: Like q, but store the current playback position. Playing the same file later will resume at the old playback position if possible.

  • 9 and 0: Decrease/increase volume.

  • m: Mute sound.

  • o (also P): Show progression bar, elapsed time and total duration on the OSD.

  • O: Toggle OSD states between normal and playback time/duration.

  • v: Toggle subtitle visibility.

  • z and Z: Adjust subtitle delay by +/- 0.1 seconds. The x key does the same as Z currently, but use is discouraged.

  • r and R: Move subtitles up/down. The t key does the same as R currently, but use is discouraged.

  • s: Take a screenshot.

  • S: Take a screenshot, without subtitles. (Whether this works depends on VO driver support.)

  • Shift+PGUP and Shift+PGDWN: Seek backward or forward by 10 minutes. (This used to be mapped to PGUP/PGDWN without Shift.)

  • 1 and 2: Adjust contrast.

  • 3 and 4: Adjust brightness.

  • 5 and 6: Adjust gamma.

  • 7 and 8: Adjust saturation.


반응형
Posted by J-sean
:
반응형

2021.01.04 - [Linux] - Open Image Files From Terminal in Linux(Ubuntu) - 리눅스(우분투) 터미널에서 이미지 파일 열기


리눅스(우분투) 서버 같은 콘솔 환경에서도 이미지 뷰어를 사용할 수 있다.


fbi를 설치한다. fbi는 리눅스의 framebuffer를 이용해 이미지를 디스플레이한다. 


sudo fbi '이미지 파일' 형식으로 실행한다.


이미지가 디스플레이 된다.


h키를 누르면 keyboard commands를 볼 수 있다.


반응형
Posted by J-sean
:
반응형

리눅스(우분투) 서버 같은 콘솔 환경에서도 Ogg, MP3, WAV 등의 음악 파일을 재생 할 수 있다.


cmus(C* Music Player)를 설치한다.


설치가 완료되면 cmus를 실행한다.


cmus가 실행되고 아무것도 표시되지 않는다. 방향키, 엔터등을 눌러도 아무런 반응이 없지만 당황하지 말고 숫자 5를 누른다.


Browser가 표시된다. 음악 파일이 있는 디렉토리로 이동한다.


원하는 파일에서 엔터키를 누르면 플레이 된다. 하지만 선택한 1개의 파일만 플레이 되므로 간단한 사용방법을 알아 보자.


각 파일에서 a키(add to library)를 눌러 준다. (y키를 누르면 playlist로 추가된다)


숫자 1을 누른다. Library 화면이 표시되고 위에서 add한 파일이 모두 추가 되었다. 원하는 곡에서 엔터키를 눌러 플레이 할 수 있다. (Artist/Album과 Track은 Tab키로 이동한다)


숫자 2를 누르면 Sorted 화면이 표시된다.


숫자 3을 누르면 Playlist 화면이 표시된다.


숫자 4를 누르면 Queue 화면이 표시된다. Queue에 추가(e)되는 노래는 순서를 무시하고 지금 재생되는 노래 다음에 재생된다. 재생 후 queue에서 자동 삭제된다.


숫자 5를 누르면 Browser 화면이 표시된다.


숫자 6을 누르면 Filters 화면이 표시된다.


숫자 7을 누르면 Settings 화면이 표시된다. 각 단축키를 확인할 수 있다. 아래는 주요 단축키 목록이다.

  • x: play

  • v: stop

  • c: pause

  • b: next

  • z: prev

  • right: seek +5

  • left: seek -5

  • -: vol -10%

  • +/=: vol +10%

  • C(대문자): toggle continue

  • r: toggle repeat

  • s: toggle shuffle

  • t: toggle show_remaining_time

  • a: add(to library)

  • e: add(to queue)

  • y: add(to playlist)

  • delete: remove

  • q: quit


WAV 파일은 aplay로 간단히 재생할 수 있다.


반응형
Posted by J-sean
:
반응형

리눅스(우분투)에서 CD-ROM/USB를 마운트하고 사용해 보자.


ls -l /dev | less 명령어로 확인해 보면 /dev/cdrom은 /dev/sr0를 가리키는 symbolic link 이다. (l)


/dev/sr0는 block device 이다. (b)


CD-ROM을 마운트할 디렉토리를 만들고 mount 한다. 마운트가 되며 쓸 수 없는(read-only) 장치라는 경고가 나온다.


mount 명령을 실행해 보면 /dev/sr0가 /home/sean/cdrom에 마운트 되어 있다.


CD의 내용을 확인할 수 있다.


다시 홈 디렉토리로 이동하고 unmount 한다.


mount 명령어로 확인해 보면 CD-ROM 마운트 정보가 없어졌다.


USB도 마찬가지 방법으로 진행한다. USB는 보통 /dev/sdb? 의 이름을 가진다.


mkdir usb

sudo mount /dev/sdb1 usb


반응형
Posted by J-sean
:
반응형

보통 이미지 뷰어는 투명 영역을 체크무늬나 검정색으로 표시한다. 이미지의 투명한 영역이 투과되어 보이는 이미지 뷰어를 사용해 보자.


투명 배경에 흰색 글자가 표시되어 있다. 흰색 배경의 브라우저를 사용한다면 위 이미지가 보이지 않는다.


pqiv를 설치한다.


pqiv -c -i -P '50, 50' sean.png 명령을 실행한다. '&' 옵션을 주지 않아도 백그라운드로 실행된다.


-c, --transparent-background

Draw pqiv's window borderless and transparent. In window mode, a mouse click activates and deactivates window decorations.


-i, --hide-info-box

Initially hide the infobox. Whether the box is visible can be toggled by pressing 'i' at runtime by default.


-P, --window-position=POSITION

Set the initial window position. POSITION may either be 'x,y'  screen coordinates or 'off' to not position the window at all.


그 외 옵션은 Ubuntu Manpage를 참고하자.


반응형
Posted by J-sean
: