반응형

리눅스(우분투)에서 삼바를 설치하고 사용해 보자.


2020.01.03 - [Linux] - How to install and use Samba in Fedora Linux 페도라 리눅스에서 Samba 사용하기


samba를 설치한다.


smb.conf 파일을 수정한다.

/etc/samba/smb.conf 파일 끝에 아래 내용을 추가한다.

[share]
path = /share
public = yes
writable = yes


smb.conf 내용대로 공유할 디렉토리를 만든다. (path = /share)


smb.conf 설정에 문제가 없는지 확인한다.


samba 접속을 위해 IP 주소를 확인한다. (192.168.171.200)


다른 컴퓨터에서 접속이 가능하다.

\\192.168.171.200
\\192.168.171.200\share


반응형
Posted by J-sean
:
반응형

리눅스에 MariaDB(MySQL)를 설치하고 데이터베이스 서버에 원격으로 접속 해 보자.


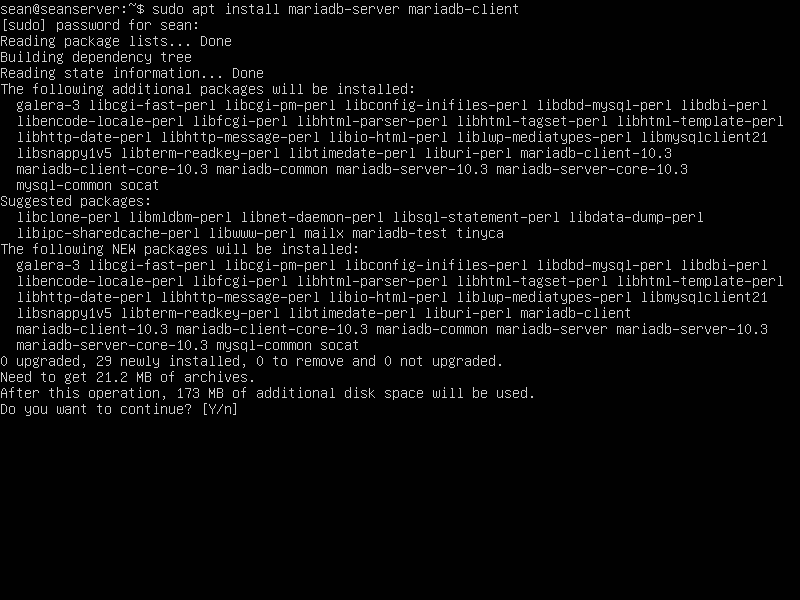
MariaDB 서버 및 클라이언트를 설치한다.

윈도우용 MariaDB 설치 파일은 서버와 클라이언트를 함께 설치 하지만 리눅스(우분투)용 MariaDB는 따로 설치해야 한다.


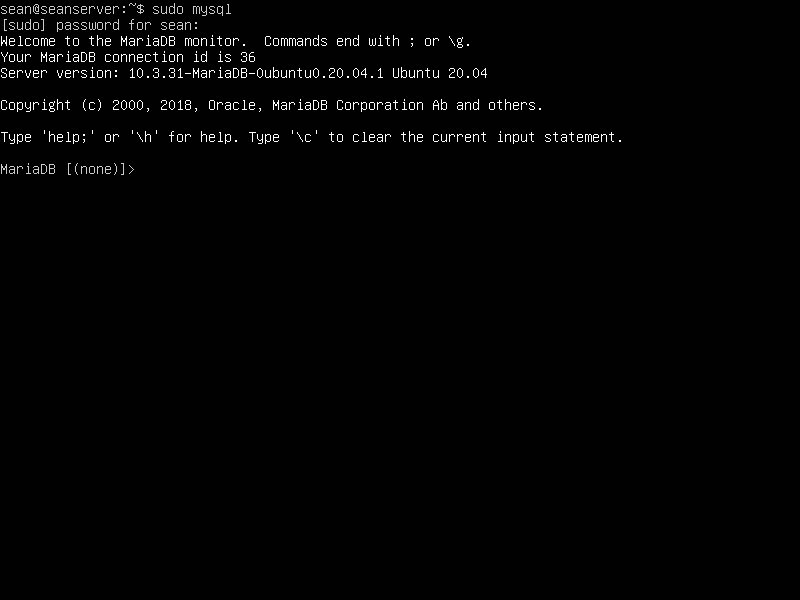
설치가 완료 되었다면 클라이언트를 실행해 본다.


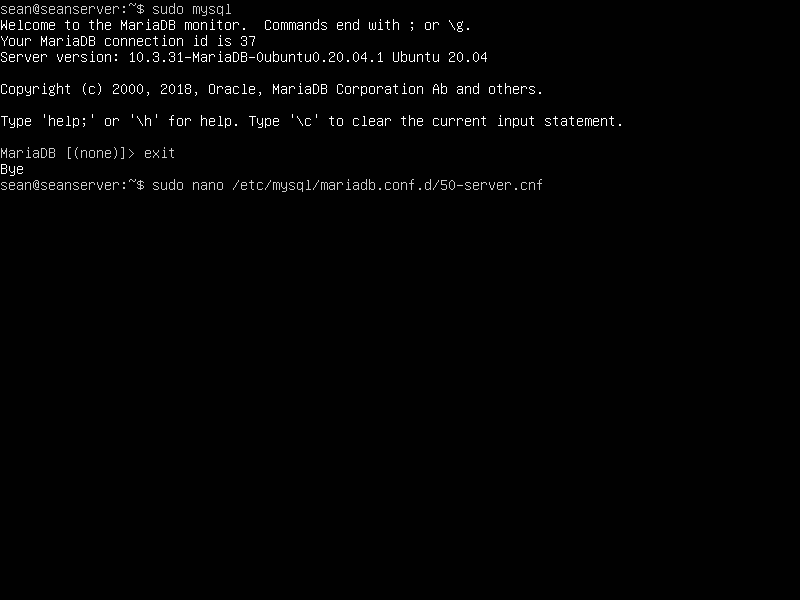
클라이언트 실행에 문제가 없다면 설정파일을 열어준다.

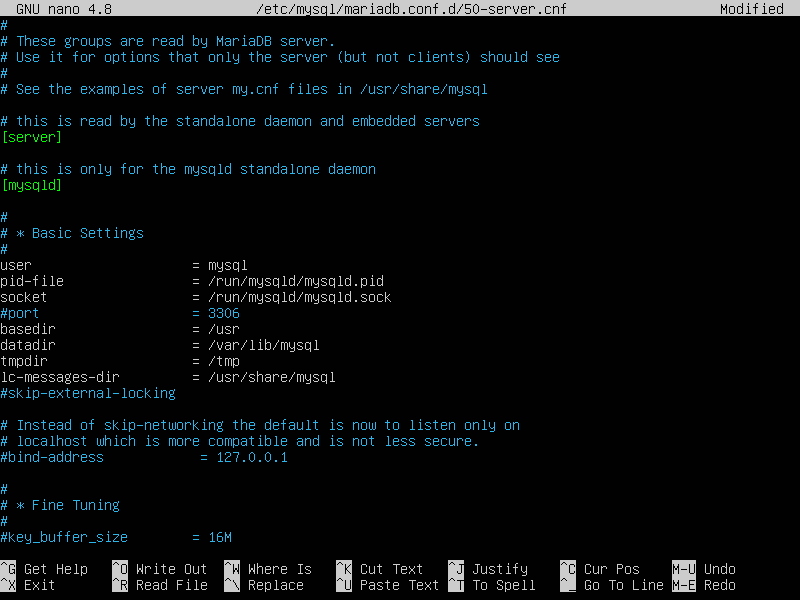
MariaDB는 기본적으로 원격 접속이 막혀있다. 설정을 변경하기 위해 아래 경로의 파일을 수정해야 한다.

/etc/mysql/mariadb.conf.d/50-server.cnf


'bind-address = 127.0.0.1' 을 주석처리 하고 저장한다.

※ 방화벽이 설정되어 있다면 MariaDB가 사용하는 포트를 열어준다.

sudo ufw allow 3306


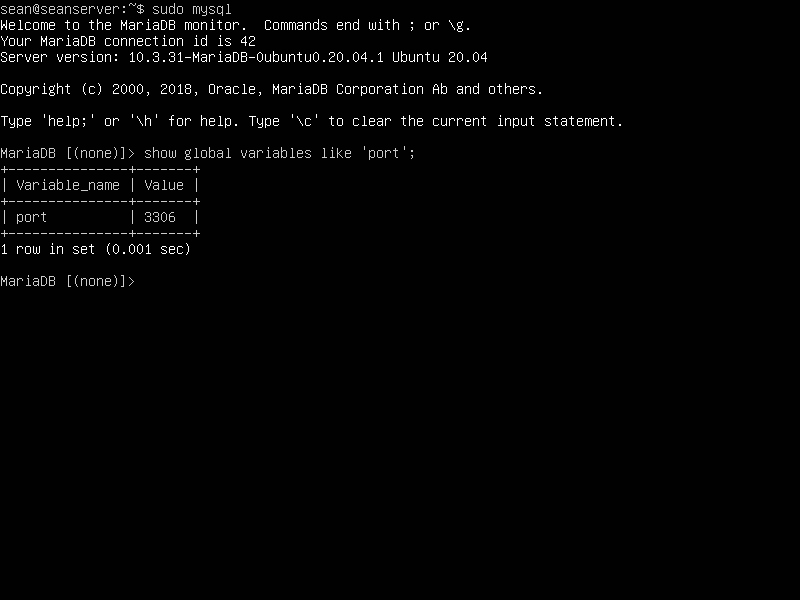
MariaDB(MySQL) 사용 포트 확인.

show global variables like 'port';


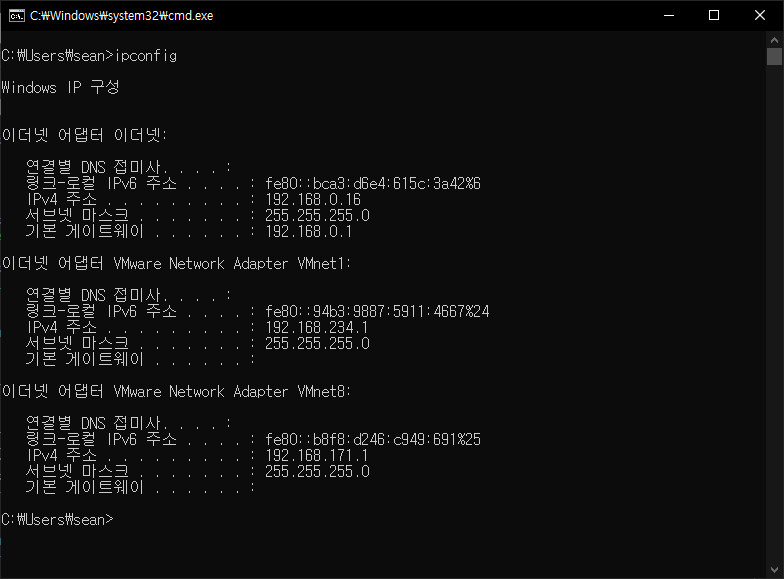
서버에 접속할 클라이언트가 사용하는 IP 주소를 확인한다.

데이터베이스 서버에 접속할 클라이언트의 IP 주소를 미리 서버에 등록해야 한다.

서버를 WMware 에 설치했기 때문에 IP 주소는 192.168.0.16 이 아니라 192.168.171.1 을 사용한다.


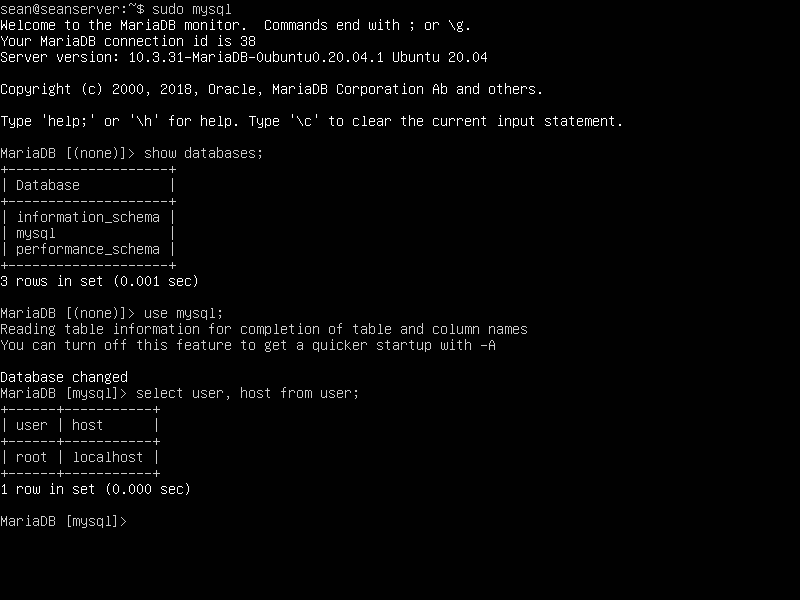
서버가 설치된 컴퓨터에서 사용자 정보가 들어 있는 mysql.user 테이블을 확인해 본다.

로컬호스트의 root 사용자(리눅스의 root 사용자와 무관)만 등록되어 있다. 로컬호스트 이므로 원격으로 접속할 수 없다.


모든 데이터베이스에 모든 권한을 가지고 192.168.171.XXX에서 접속하는 sean이라는 사용자를 만든다. password는 1234.

유동 IP의 경우 재부팅 할 때마다 IP가 바뀔 수 있으므로 192.168.171.XXX 범위의 IP 주소를 가지는 컴퓨터는 모두 접속 할 수 있도록 설정 한다.

grant all on *.* to sean@'192.168.171.%' identified by '1234';


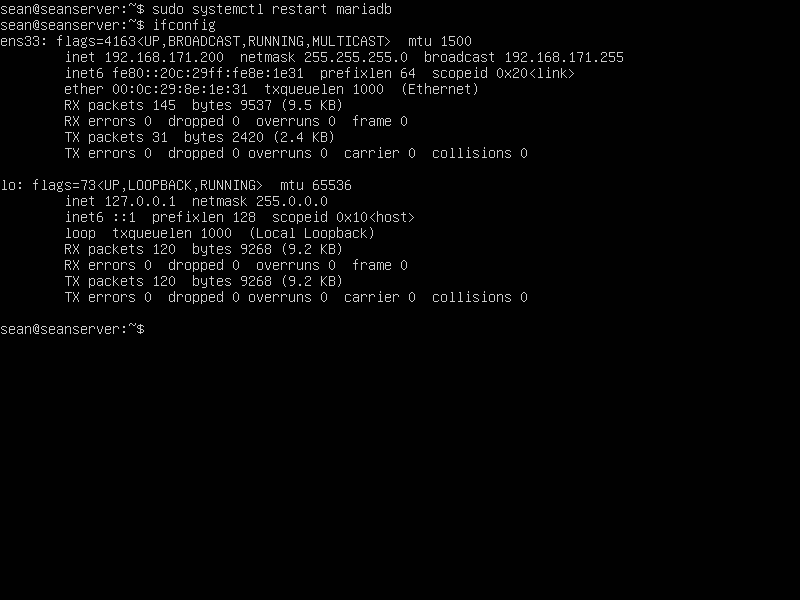
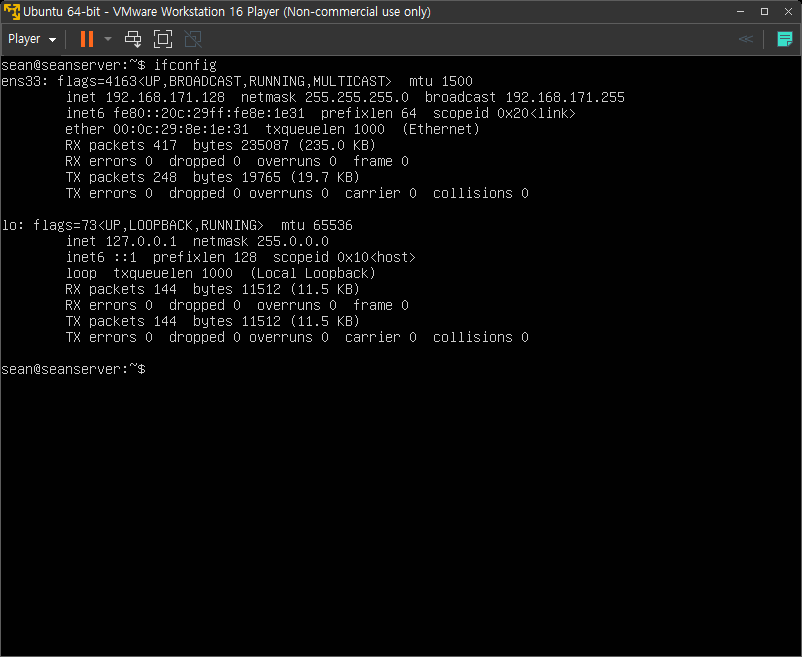
원격 사용자 설정 후, MariaDB를 재시작하고 데이터베이스 서버가 설치된 컴퓨터의 IP 주소(192.168.171.200)를 확인한다.

sudo systemctl restart mariadb


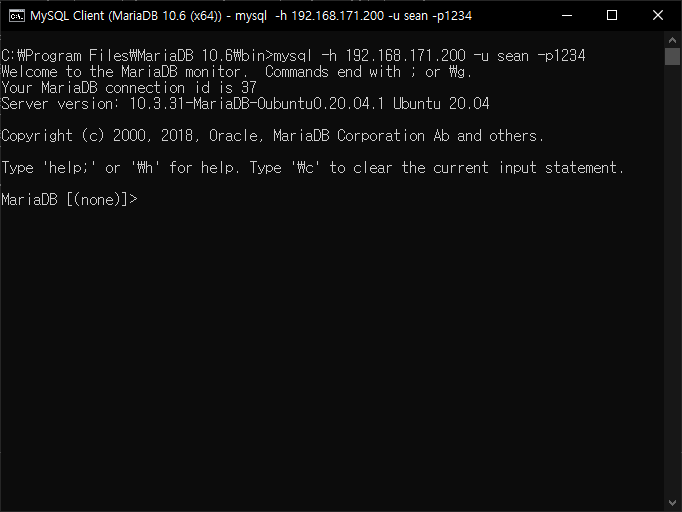
클라이언트에서 서버로 접속한다.

MariaDB(MySQL) 클라이언트를 실행하고 아래와 같이 입력한다.

mysql -h (IP 주소) -u (사용자) -p


-p 옵션에 password를 바로 입력해도 된다.

-p 옵션에 password는 공백 없이 붙여야 한다.

-p 1234 (X)

-p1234 (O)


반응형
Posted by J-sean
:
반응형

2019.10.08 - [Linux] - Build your own web server with Fedora linux - 페도라 리눅스로 간단한 웹서버 만들기

2021.08.25 - [Linux] - Linux(Ubuntu) Static IP Configuration - 리눅스(우분투) 고정 IP


리눅스(우분투)로 간단한 웹서버를 만들어 보자.


패키지 리스트를 업데이트 한다.


패키지를 업데이트 한다.


apache2를 설치 한다.


active 상태인지 확인 한다.


■ systemctl 명령어
- start: 서비스 시작
- stop: 서비스 중지
- status: 서비스 상태 확인
- restart: 서비스 재시작
- reload: 서비스를 중지하지 않고 설정값을 반영
- enable: 시스템 재부팅시 자동으로 서비스 실행
- disable: enable 해제


서버에 접속하기 위해 IP 주소를 확인 한다.


다른 컴퓨터로 접속했을때 위와 같은 Default Page가 나오면 정상이다.


Default Page를 수정해 보자.


Default Page의 HTML 코드. 모두 삭제 한다.


위와 같은 코드를 입력한다.


다시 서버에 접속해 보면 직접 입력한 내용이 출력 된다.


PHP를 설치 한다.


PHP 코드를 입력하기 위한 파일을 만든다.


PHP 정보를 표시하는 간단한 코드를 입력 한다.


IP 주소/PHP 파일(http://192.168.171.128/index.php) 로 접속하면 PHP 정보를 표시하는 화면이 표시된다.


반응형
Posted by J-sean
:
반응형

리눅스(우분투) 서버 IP를 고정해 보자.


현재 IP 주소는 192.168.171.128 이다.


DNS Server IP 주소는 192.168.171.2 다.

※ 참고

Ubuntu 24.04에서 systemd-resolve는 resolvectl로 이름이 바뀌었다. resolvectl을 실행하면 DNS Server 주소가 표시된다.


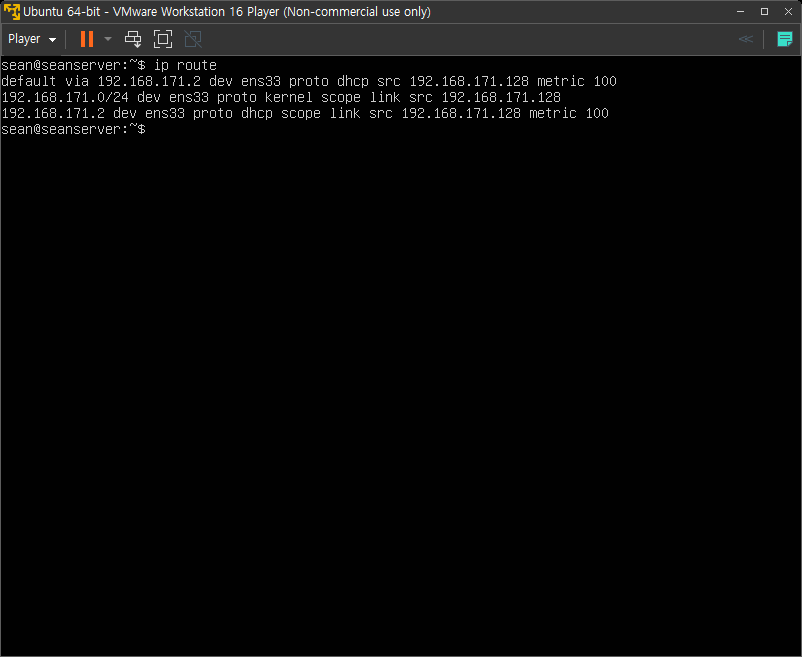
Gateway IP 주소는 192.168.171.2 다.


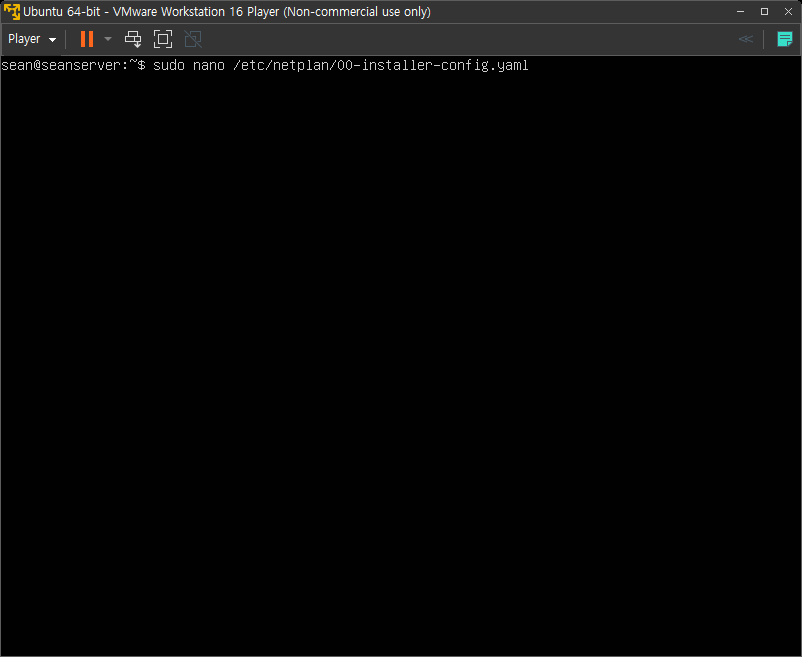
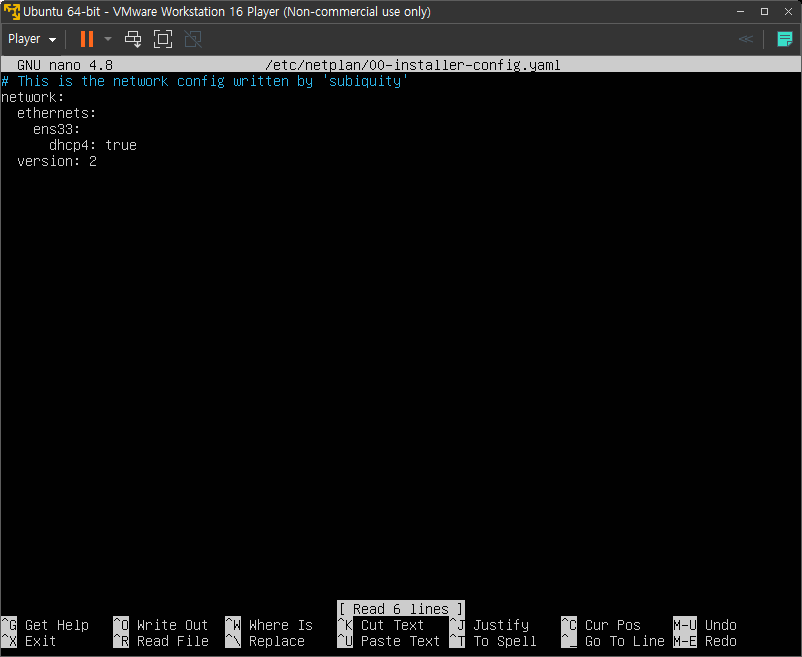
/etc/netplan/00-installer-config.yaml 파일을 열어준다.


00-installer-config.yaml 의 초기 설정.


원하는 IP 주소(192.168.171.200)와 위에서 찾은 IP 정보를 이용해 수정한다.


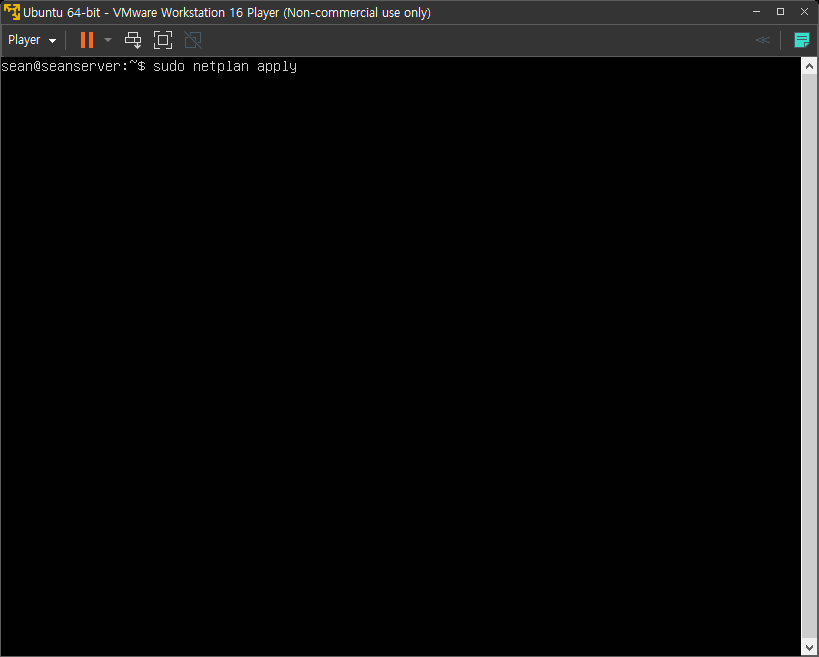
netplan apply를 실행하면 재부팅 하지 않아도 된다.


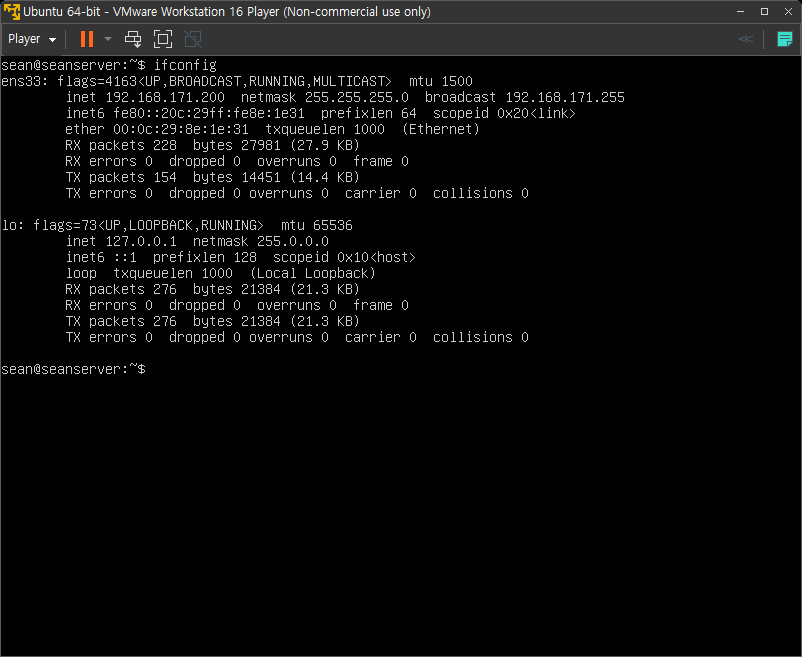
IP가 고정되었다.


※ 참고

Ubuntu 24.04 이후는 아래 링크를 참고하자.

Ubuntu Manuals

Setting a static IP address in Ubuntu 24.04 using netplan


반응형
Posted by J-sean
:
반응형

Python-evdev를 사용하면 리눅스 시스템에 연결되어 있는(/dev/input/) 조이스틱이나 게임패드를 조작할 때 발생하는 커널의 이벤트(입력)를 사용자 공간(Userspace)으로 보낼 수 있다.


조이스틱 뿐 아니라 마우스, 키보드, 터치스크린등의 이벤트를 읽고 쓸 수 있다.


evdev를 설치하자.

$ sudo pip3 install evdev    # available globally
$ pip3 install --user evdev  # available to the current user


이 글에서 사용할 SNES Controller


evdev와 함께 설치되는 입력 기기 모니터링 프로그램을 실행하고 게임패드를 조작해 보자.

python3 -m evdev.evtest

게임패드의 버튼을 누를때마다 어떤 버튼이 눌렸는지 확인 할 수 있다.


각 키에 설정된 상수는 아래와 같다.

Up - EV_ABS, ABS_Y, PRESS: 0, RELEASE: 127
Down - EV_ABS, ABS_Y, PRESS: 255, RELEASE: 127
Right - EV_ABS, ABS_X, PRESS: 255, RELEASE: 127
Left - EV_ABS, ABS_X, PRESS: 0, RELEASE: 127

X - EV_KEY, BTN_JOYSTICK or BTN_TRIGGER (288)
Y - EV_KEY, BTN_TOP (291)
A - EV_KEY, BTN_THUMB (289)
B - EV_KEY, BTN_THUMB2 (290)
L - EV_KEY, BTN_TOP2 (292)
R - EV_KEY, BTN_PINKIE (293)
SELECT - EV_KEY, BTN_BASE3 (296)
START - EV_KEY, BTN_BASE4 (297)

(VALUE - PRESS: 1, RELEASE: 0)


위 정보를 바탕으로 어떤 버튼을 눌렀는지 좀 더 쉽게 알 수 있는 프로그램을 만들어 보자.


1
2
3
4
5
6
7
8
9
10
11
12
13
14
15
16
17
18
19
20
21
22
23
24
25
26
27
28
29
30
31
32
33
34
35
36
37
38
39
40
41
42
43
44
45
46
47
48
49
50
51
52
53
54
55
56
57
58
59
60
61
62
63
64
65
66
67
import sys
import evdev
from evdev import InputDevice, categorize, ecodes
 
devices = [evdev.InputDevice(path) for path in evdev.list_devices()]
count = 0
 
for device in devices:
    print(device.path, device.name, device.phys)
    if device.name.startswith('usb gamepad'):
        gamepad = InputDevice(device.path)
        count = 1
        break
if count < 1:
    print("No usb gamepad found.")
    sys.exit()
    
aBtn = 289
bBtn = 290
xBtn = 288
yBtn = 291
lBtn = 292
rBtn = 293
selBtn = 296
staBtn = 297
 
for event in gamepad.read_loop():
    if event.type == ecodes.EV_KEY:
        #print(event)
        if event.value == 1:    #if pressed.
            if event.code == aBtn:
                print("A Button Pressed.")
            elif event.code == bBtn:
                print("B Button Pressed.")
            elif event.code == xBtn:
                print("X Button Pressed.")
            elif event.code == yBtn:
                print("Y Button Pressed.")
            elif event.code == lBtn:
                print("L Button Pressed.")
            elif event.code == rBtn:
                print("R Button Pressed.")
            elif event.code == selBtn:
                print("Select Button Pressed.")
            elif event.code == staBtn:
                print("Start Button Pressed.")
        elif event.value == 0:    #if released.
            print("Button Released.")    
 
 
    elif event.type == ecodes.EV_ABS:
        absevent = categorize(event)
        #print(ecodes.bytype[absevent.event.type][absevent.event.code], absevent.event.value)
        if ecodes.bytype[absevent.event.type][absevent.event.code] == "ABS_X":
            if absevent.event.value == 0:
                print("Left.")
            elif absevent.event.value == 255:
                print("Right.")
            elif absevent.event.value == 127:
                print("Center.")
        elif ecodes.bytype[absevent.event.type][absevent.event.code] == "ABS_Y":
            if absevent.event.value == 0:
                print("Up.")
            elif absevent.event.value == 255:
                print("Down.")
            elif absevent.event.value == 127:
                print("Center.")


어떤 버튼을 눌렀는지 쉽게 파악할 수 있다.


이번엔 특정 버튼을 누르는 프로그램을 만들어 보자.


1
2
3
4
5
6
7
8
9
10
11
12
13
14
15
16
17
18
19
20
21
22
23
24
25
26
27
28
29
30
31
32
33
34
35
36
37
38
39
40
41
42
43
44
45
46
47
48
49
50
51
import sys, time
import evdev
from evdev import InputDevice, ecodes as e
 
devices = [evdev.InputDevice(path) for path in evdev.list_devices()]
count = 0
 
for device in devices:
    print(device.path, device.name, device.phys)
    if device.name.startswith('usb gamepad'):
        dev = InputDevice(device.path)
        count = 1
        break
 
if count < 1:
    print("No usb gamepad found.")
    sys.exit()
 
time.sleep(10)
 
'''
# Jump
dev.write(e.EV_ABS, e.ABS_X, 255)
dev.write(e.EV_ABS, e.ABS_Y, 0)
dev.write(e.EV_SYN, 0, 0)
time.sleep(0.1)
dev.write(e.EV_ABS, e.ABS_X, 127)
dev.write(e.EV_ABS, e.ABS_Y, 127)
dev.write(e.EV_SYN, 0, 0)
time.sleep(0.1)
'''
 
'''
# Button Keep Hit
while True:
    dev.write(e.EV_KEY, e.BTN_THUMB2, 1)
    dev.write(e.EV_SYN, 0, 0)
    time.sleep(0.1)
    dev.write(e.EV_KEY, e.BTN_THUMB2, 0)
    dev.write(e.EV_SYN, 0, 0)
    time.sleep(0.1)
'''
 
# Key Holding for 1 sec
dev.write(e.EV_ABS, e.ABS_Y, 255)
dev.write(e.EV_SYN, 00)
time.sleep(1)
dev.write(e.EV_ABS, e.ABS_Y, 127)
dev.write(e.EV_SYN, 00)
 
dev.close()
 

일반적인 게임에서 '앞으로 점프', '버튼 연타', '1초간 누르고 있기' 등의 동작이 정의되었다.


조금 더 복잡한 동작을 프로그래밍 해 보자.

스트리트 파이터 2의 류 필살기인 승룡권은 아래와 같은 커맨드로 이루어져 있다.

→ + ↘ + ↓ + ↘ (→ + ↓ + ↘)

1
2
3
4
5
6
7
8
9
10
11
12
13
14
15
16
17
18
19
20
21
22
23
24
25
26
27
28
29
30
31
32
33
34
35
36
37
38
39
40
41
42
43
44
45
46
47
48
49
50
51
52
53
54
55
56
57
58
59
60
61
62
63
64
import sys, time
import evdev
from evdev import InputDevice, ecodes as e
 
devices = [evdev.InputDevice(path) for path in evdev.list_devices()]
count = 0
 
for device in devices:
    print(device.path, device.name, device.phys)
    if device.name.startswith('usb gamepad'):
        gamepad = InputDevice(device.path)
        count = 1
        break
 
if count < 1:
    print("No usb gamepad found.")
    sys.exit()
 
# read_loop()
# 모든 키 입력을 하나도 빼지 않고 읽어 온다. (이 루프에서 write() 되는 키 입력 포함)
# 그러므로 이 루프내에서 같은키를 두 번 이상 쓰면 무한루프에 걸린다.
for event in gamepad.read_loop():
    if event.type == e.EV_KEY:
        if event.value == 1 and event.code == e.BTN_TOP:
            
            # Shoryuken
 
            # + Right (→)
            gamepad.write(e.EV_ABS, e.ABS_X, 255)
            gamepad.write(e.EV_SYN, 00)
            time.sleep(0.05)
            
            # + Down (↘)
            gamepad.write(e.EV_ABS, e.ABS_Y, 255)
            gamepad.write(e.EV_SYN, 00)
            time.sleep(0.05)
            
            # - Right (↓|)
            gamepad.write(e.EV_ABS, e.ABS_X, 127)
            gamepad.write(e.EV_SYN, 00)
            time.sleep(0.05)
            
            # + Right (↘)
            gamepad.write(e.EV_ABS, e.ABS_X, 255)
            gamepad.write(e.EV_SYN, 00)
            time.sleep(0.05)
            
            # Punch Press
            gamepad.write(e.EV_KEY, e.BTN_JOYSTICK, 1)
            gamepad.write(e.EV_SYN, 00)
            time.sleep(0.05)
            
            # Punch Release
            gamepad.write(e.EV_KEY, e.BTN_JOYSTICK, 0)
            gamepad.write(e.EV_SYN, 00)
            time.sleep(0.05)
            
            # - Right, - Down = Center
            gamepad.write(e.EV_ABS, e.ABS_X, 127)
            gamepad.write(e.EV_ABS, e.ABS_Y, 127)
            gamepad.write(e.EV_SYN, 00)
            time.sleep(0.05)
 
dev.close()
 

위 코드를 실행하고 스트리트 파이터 2를 실행한다. 류나 켄을 선택하고 Y버튼을 누르면 작은 손 공격이 한 번 나간후 승룡권이 나간다.


버튼이 많은 컨트롤러를 사용한다면 사용하지 않는 버튼을 24번째 줄 event.code에 지정해주자.


반응형
Posted by J-sean
:
반응형

리눅스에서 동적 공유 라이브러리(Dynamic Shared Library)를 사용해 보자.


동적 공유 라이브러리로 사용할 소스 파일을 만든다. (a.c)


동적 공유 라이브러리를 사용하는 소스 파일을 만든다. (main.c)

참고: Linux Manual Page


두 파일(a.c, main.c)을 모두 컴파일 한다.

더보기

-fPIC
If supported for the target machine, emit position-independent code, suitable for dynamic linking and avoiding any limit on the size of the global offset table. This option makes a difference on the m68k, PowerPC and SPARC .
Position-independent code requires special support and therefore works only on certain machines.

-shared
Produce a shared object which can then be linked with other objects to form an executable. Not all systems support this option. For predictable results, you must also specify the same set of options that were used to generate code (-fpic, -fPIC, or model suboptions) when you specify this option.


main을 실행하면 동적 공유 라이브러리의 함수가 실행된다.


동적 공유 라이브러리의 함수를 수정해 보자.


다시 동적 공유 라이브러리를 컴파일 하고 main을 실행하면 수정된 함수가 실행된다.


반응형
Posted by J-sean
:
반응형

2021/02/07 - [Linux] - Linux make를 이용한 컴파일(빌드) 자동화


리눅스에서 소스 코드를 컴파일(빌드)할때 유용한 CMake의 간단한 사용법을 알아 보자.


첫 번째 헤더 파일을 만든다. (a.h)


헤더 파일의 소스 파일을 만든다. (a.cpp)


두 번째 헤더 파일을 만든다. (b.h)


헤더 파일의 소스 파일을 만든다. (b.cpp)


두 헤더 파일과 소스 파일을 사용하는 main() 함수가 포함된 소스 파일을 작성한다.


CMakeLists.txt 파일을 만든다.


헤더/소스 파일이 있는 디렉토리에 하위 디렉토리 build를 만들고 이동후 cmake 명령을 실행한다. (CMakeLists.txt 파일이 상위 디렉토리에 있으므로 cmake ../ 를 실행해야 한다)


Makefile이 생성 되면 make 명령을 실행한다. 빌드가 완료되고 실행파일(main)이 생성된다.


반응형
Posted by J-sean
:
반응형

2021/02/08 - [Linux] - Linux CMake를 이용한 컴파일(빌드) 자동화


리눅스에서 소스 코드를 컴파일(빌드)할때 유용한 make의 간단한 사용법을 알아 보자.


첫 번째 간단한 소스 파일을 만든다. (a.cpp)


두 번째 간단한 소스 파일을 만든다. (b.cpp)


Makefile을 만든다.


더보기

target … : prerequisites …
             recipe
             …
             …

A target is usually the name of a file that is generated by a program; examples of targets are executable or object files. A target can also be the name of an action to carry out, such as ‘clean’ (see Phony Targets).
A prerequisite is a file that is used as input to create the target. A target often depends on several files.
A recipe is an action that make carries out. A recipe may have more than one command, either on the same line or each on its own line. Please note: you need to put a tab character at the beginning of every recipe line! This is an obscurity that catches the unwary. If you prefer to prefix your recipes with a character other than tab, you can set the .RECIPEPREFIX variable to an alternate character.


3개의 파일이 생성 되었다. 'make runme'를 실행하면 모든 소스 코드가 컴파일 되고 빌드되어 실행파일(runme)이 생성 된다.


'make clean'을 실행하면 소스 코드 및 Makefile을 제외한 모든 파일이 정리된다.


이번엔 Makefile의 'runme: ...' 부분을 제일 위로 옮긴다.


'make runme'가 아닌 'make' 명령만으로도 빌드가 완료 된다.


Makefile을 매크로와 자동변수를 사용하도록 바꿔보자.


make와 make clean 명령이 동일하게 실행된다.


반응형
Posted by J-sean
: