YOLO-World 오픈 어휘(Open-Vocabulary) 탐지 작업은 서술형 텍스트를 기반으로 이미지 내 모든 객체를 탐지할 수 있다.
predict()를 사용한 객체 탐지.
from ultralytics import YOLOWorld

# Initialize a YOLO-World model
model = YOLOWorld("yolov8s-world.pt")  # or select yolov8m/l-world.pt for different sizes

# Execute inference with the YOLOv8s-world model on the specified image
results = model.predict("bus.jpg")

# Show results
results[0].show()
사용자 정의 추론 프롬프트 사용. person과 bus 객체만 탐지.
from ultralytics import YOLO

# Initialize a YOLO-World model
model = YOLO("yolov8s-world.pt")  # or choose yolov8m/l-world.pt

# Define custom classes
model.set_classes(["person", "bus"])

# Execute prediction for specified categories on an image
results = model.predict("path/to/image.jpg")

# Show results
results[0].show()
338M는 뭘 받은 건지 모르겠다.
비디오에서 객체 추적
from ultralytics import YOLO

# Create a YOLO-World model
model = YOLO("yolov8s-world.pt")  # or select yolov8m/l-world.pt for different sizes

# Track with a YOLO-World model on a video
results = model.track(source="path/to/video.mp4")
from ultralytics import YOLO

# Create a YOLO-World model
model = YOLO("yolov8s-world.pt")  # or select yolov8m/l-world.pt for different sizes

# Track with a YOLO-World model on a video
results = model.track(source="crosswalk_cctv_01.mp4", stream=True)

for r in results:
	print("Boxes: ", r.boxes)
	print("Maskes: ", r.masks)
	print("Probs: ", r.probs)
	print("-" * 60)
매 프레임마다 정보를 확인할 수 있다.
사람 1개, 차 1개, 신호등 1개, 소화전 1개를 찾았다.
그래서 4개의 위치 정보를 표시한다. 이 정보를 가지고 OpenCV를 이용해 영상에 표시해 출력할 수 있을거 같다.
import ollama
import requests
import time
import os
import subprocess
def is_ollama_running(url="http://localhost:11434"):
try:
response = requests.get(url)
return response.status_code == 200
except requests.ConnectionError:
return False
def start_ollama():
try:
if os.name == 'nt': # Windows 환경
# subprocess.Popen(["ollama", "serve"], shell=True)
# 이렇게 하면 ollama 백엔드가 실행은되지만 cmd창에 프로그램 결과가 같이 출력되고, cmd창이 ollama 프로세스가 종료될 때까지 닫히지 않음.
# 새로운 cmd 창을 띄워 ollama 프로세스를 따로 실행하고 창을 유지한다.
subprocess.Popen(["start", "cmd", "/k", "ollama", "serve"], shell=True)
#subprocess.Popen("start cmd /k ollama serve", shell=True)
# cmd /k 는 명령 실행 후에도 종료되지 않고 창을 유지(Keep)시키는 옵션
else: # macOS / Linux 환경
subprocess.Popen(["ollama", "serve"])
print("Ollama 백엔드를 실행 중입니다...")
# 서버가 완전히 켜질 때까지 대기
time.sleep(5)
except Exception as e:
print(f"Ollama 실행 중 오류 발생: {e}")
if not is_ollama_running():
print("Ollama가 실행되어 있지 않습니다. 자동 실행을 시도합니다.")
start_ollama()
else:
print("Ollama 백엔드가 이미 실행 중입니다.")
# 모델이 존재하는지 확인하고 없으면 다운로드(Pull)
try:
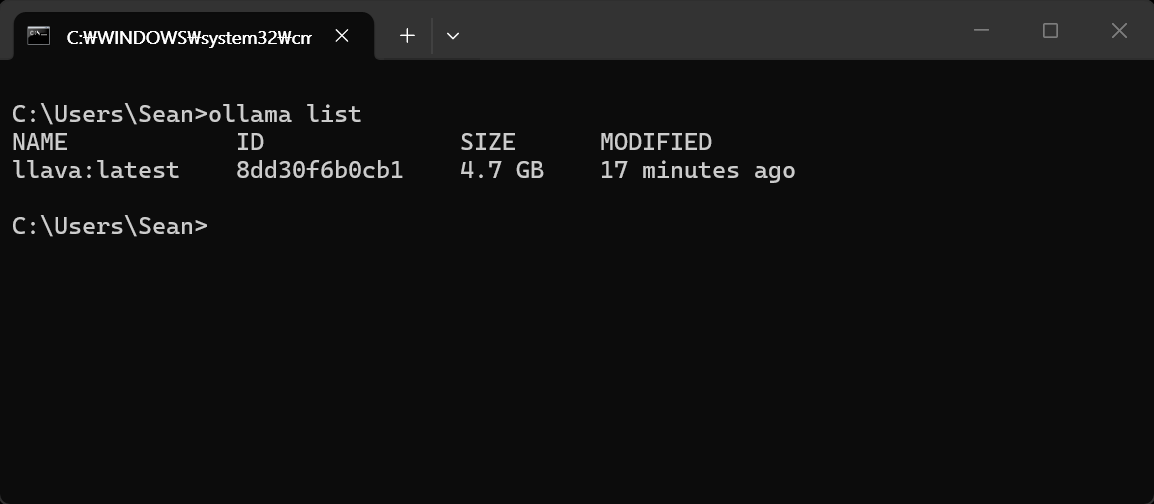
models_info = ollama.list()
#print("Models:\n", models_info) # 모델 정보 출력 (디버깅용)
# ollama.list() 의 응답 형식에 따라 모델 이름 목록 추출 ('llava' 또는 'llava:latest' 등)
existing_models = [m['model'] for m in models_info.get('models', [])]
# [m['model'] for m in models_info.get('models', [])] 는 models_info 딕셔너리에서 'models' 키에
# 해당하는 리스트를 가져와서, 각 모델(Model) 정보(m)에서 'model' 키의 값을 추출하여 새로운
# 리스트(existing_models)를 만드는 코드이다. 이렇게 하면 existing_models 리스트에는 설치된
# 모델들의 이름이 담기게 된다.
# models_info의 내용:
# models=[
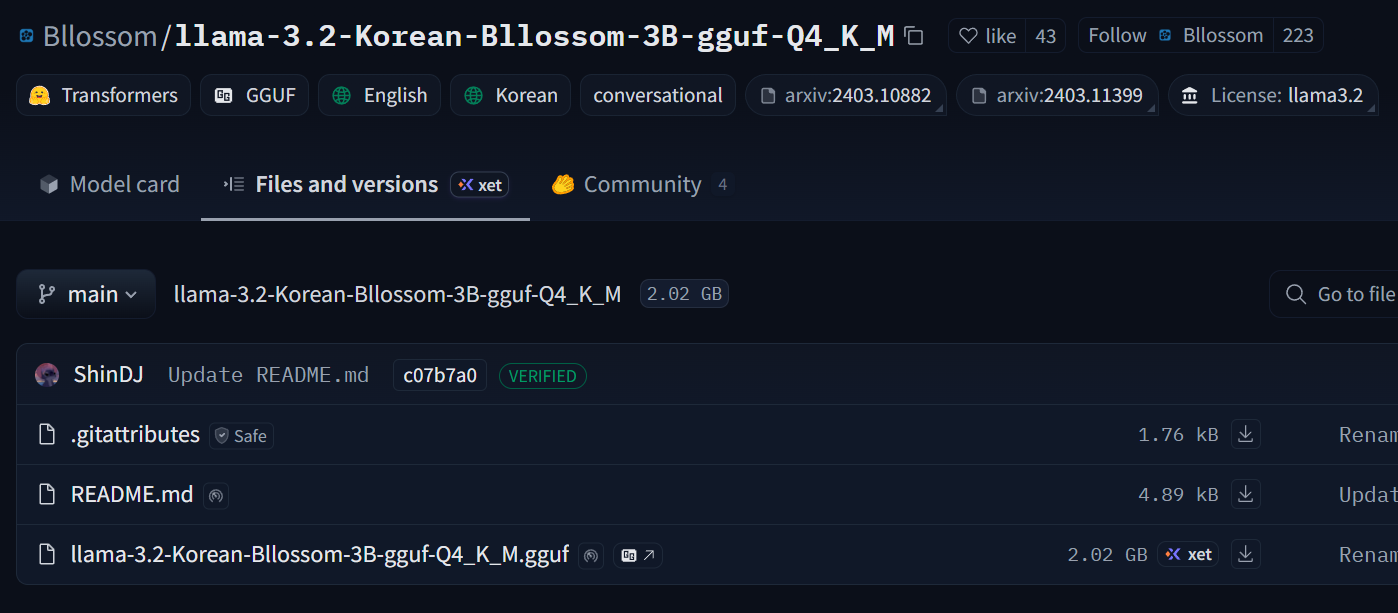
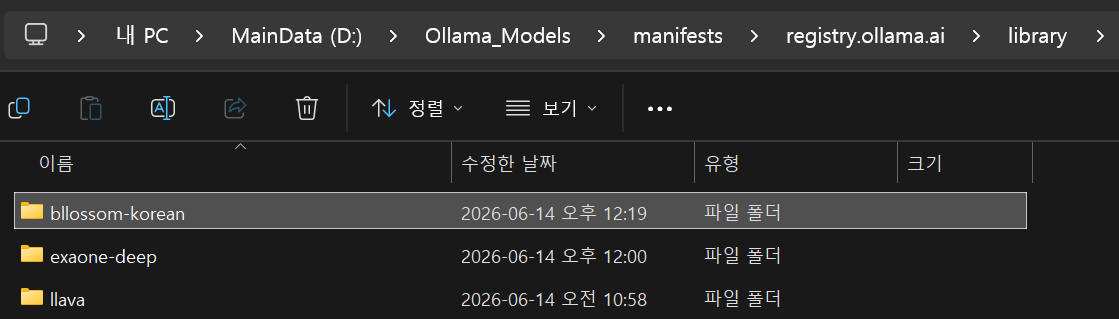
# Model(model='bllossom-korean:latest', modified_at=datetime.datetime(2026, 6, 14, 12, 19, 14, 791297, tzinfo=TzInfo(32400)),
# digest='806749e0821a7bdf9ba640baf9f285d5c368246564ca754eaf8508c717910b51', size=2019377929,
# details=ModelDetails(parent_model='', format='gguf', family='llama', families=['llama'], parameter_size='3.2B', quantization_level='Q4_K_M')),
# Model(model='exaone-deep:latest', modified_at=datetime.datetime(2026, 6, 14, 12, 0, 7, 39358, tzinfo=TzInfo(32400)),
# digest='106afe416a9effa9570d04231c25192fc254ac1b51f0f1cafed20a32060958c9', size=4770665152,
# details=ModelDetails(parent_model='', format='gguf', family='exaone', families=['exaone'], parameter_size='7.8B', quantization_level='Q4_K_M')),
# Model(model='llava:latest', modified_at=datetime.datetime(2026, 6, 14, 10, 58, 59, 368284, tzinfo=TzInfo(32400)),
# digest='8dd30f6b0cb19f555f2c7a7ebda861449ea2cc76bf1f44e262931f45fc81d081', size=4733363377,
# details=ModelDetails(parent_model='', format='gguf', family='llama', families=['llama', 'clip'], parameter_size='7B', quantization_level='Q4_0'))
# ]
#print("Existing Models:", existing_models) # 설치된 모델 목록 출력 (디버깅용)
# Existing Models: ['bllossom-korean:latest', 'exaone-deep:latest', 'llava:latest']
if not any('llava' in m for m in existing_models):
answer = input("'llava' 모델이 설치되어 있지 않습니다. 다운로드를 시작하려면 'y'를 입력하세요: ")
if answer.lower() == 'y':
ollama.pull('llava')
print("모델 다운로드 완료!")
else:
print("모델 다운로드를 취소했습니다. 프로그램을 종료합니다.")
exit(0)
else:
print("'llava' 모델이 설치되어 있습니다.")
except Exception as e:
print(f"모델 확인/다운로드 중 오류 발생: {e}")
try:
response = ollama.chat(
model='llava',
messages=[
{
'role': 'system',
'content': '너는 이미지 분석 전문가야. 주어지는 1개의 이미지는 반도체 제조 장비 챔버 내부의 노즐에서 웨이퍼 위에 용액을 뿌리는 상황이야.'
},
{
'role': 'user',
'content': '이미지를 분석해서 용액이 분사되는 노즐 바디에 약간 흐릿하게 적힌 숫자를 알려주고 전체적인 상황을 설명해줘.',
'images': ["D:/D/My project/C/suck3.png"]
}
]
)
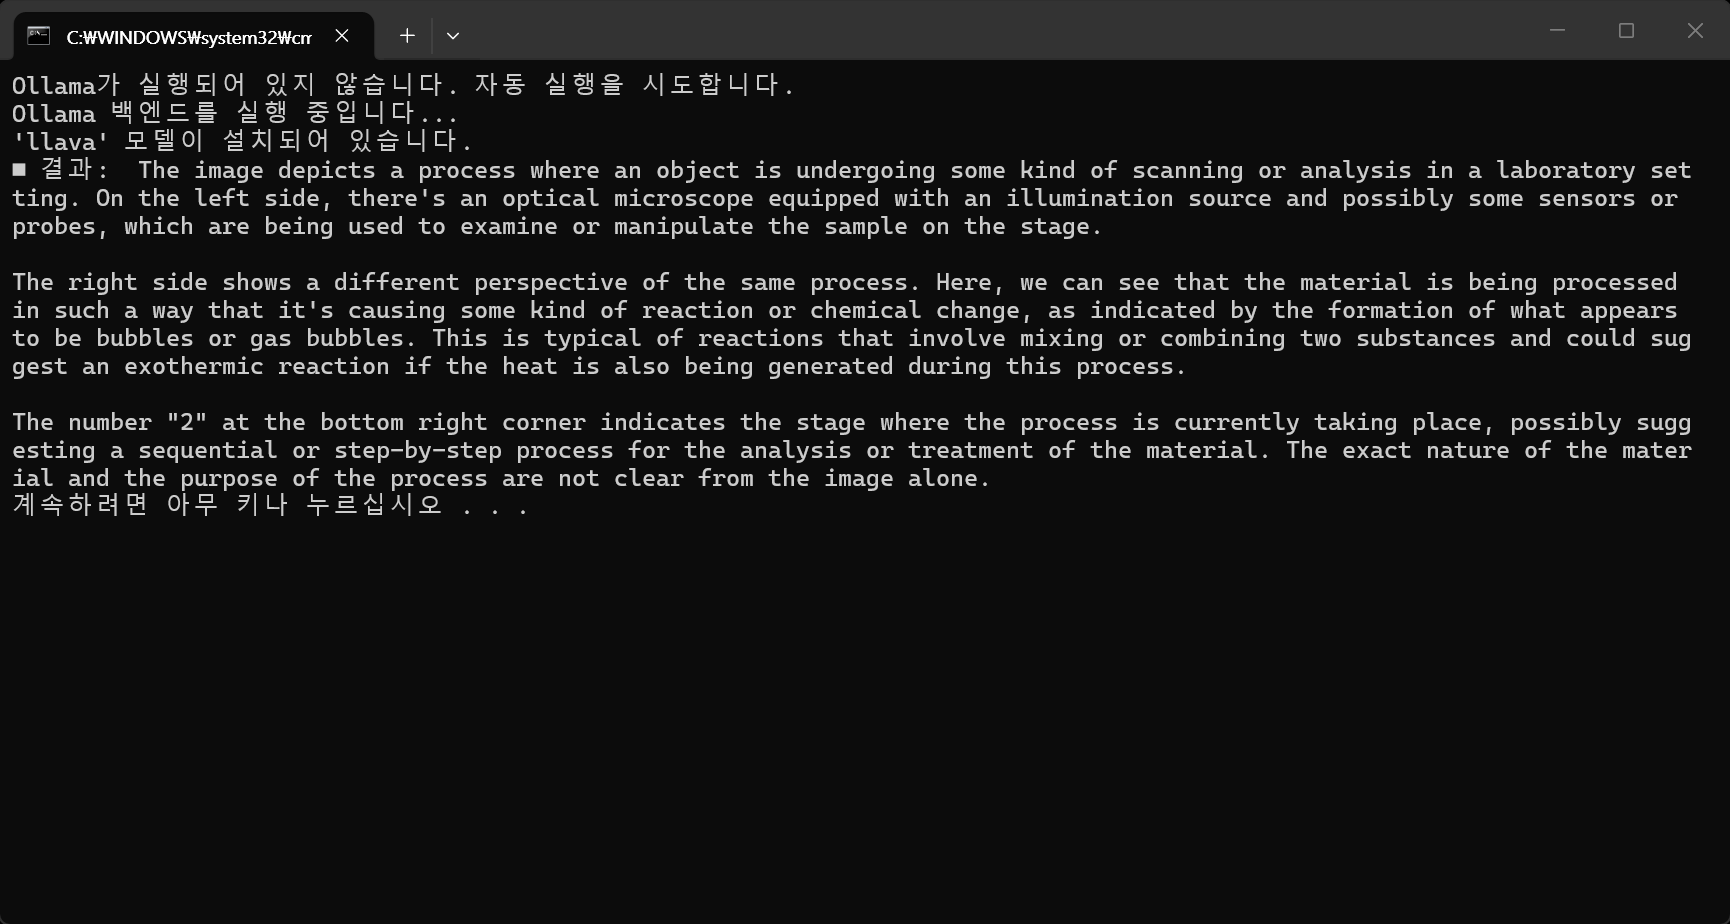
print(f"■ 결과: {response['message']['content']}")
except Exception as e:
print(f"채팅 중 오류 발생: {e}")
Ollama 백엔드가 실행되는 창. 종료되지 않고 실행 상태가 계속 유지된다.
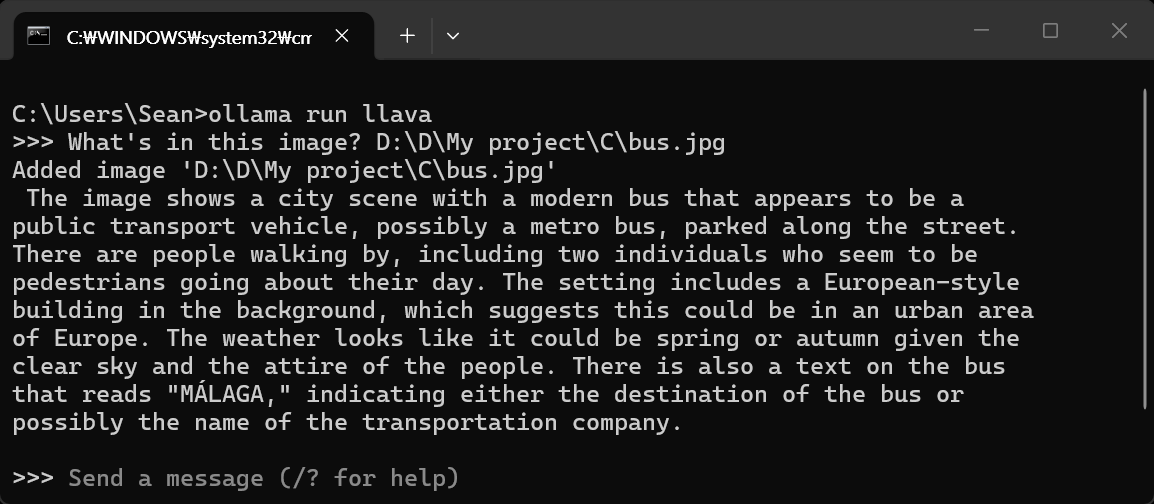
이미지 분석 결과.
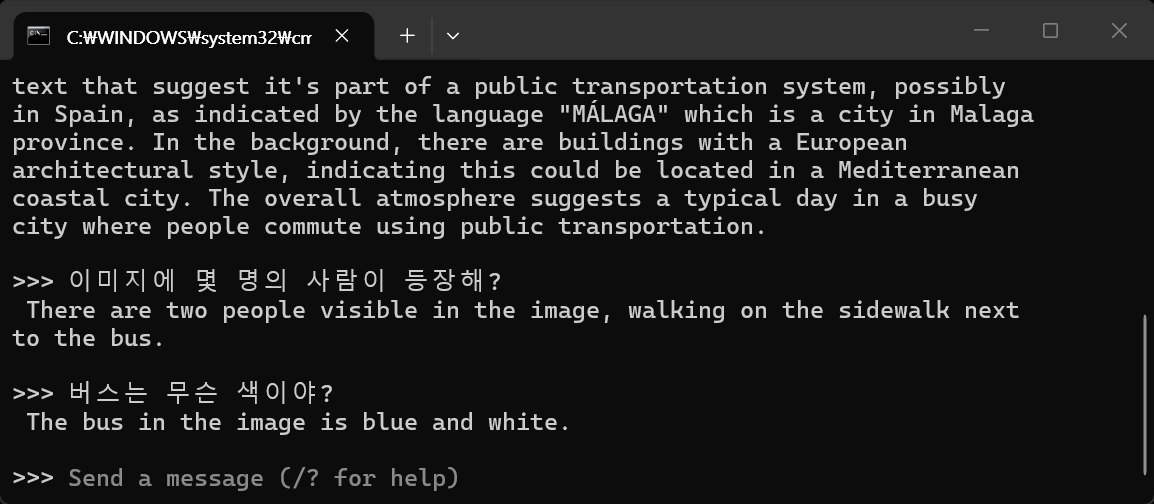
코드 변경 없이 다시 실행한 결과. Ollama 백엔드는 위에서 이미 실행되어 있고, 특별히 지시하지 않았지만 이번엔 한글로 결과가 표시되었다.
불필요한 추측을 하지 못하게 하고 자연스럽지 못한 한국어가 아닌 영어로 질문을 해 보자.
messages=[
    {
        'role': 'system',
        'content': 'You are an image analysis expert.'
    },
    {
        'role': 'user',
        'content': 'Do not provide any explanations. Analyze the image and tell me only the slightly blurred single number on the nozzle body where the solution is being sprayed.',
        'images': ["D:/D/My project/C/suck3.png"]
    }
]
정확한 답을 찾았다.
messages=[
    {
        'role': 'system',
        'content': 'You are an image analysis expert.'
    },
    {
        'role': 'user',
        'content': 'Tell me the single number written on the nozzle body where the solution is being sprayed and analyze the image.',
        'images': ["D:/D/My project/C/suck3.png"]
    }
]
※ 참고
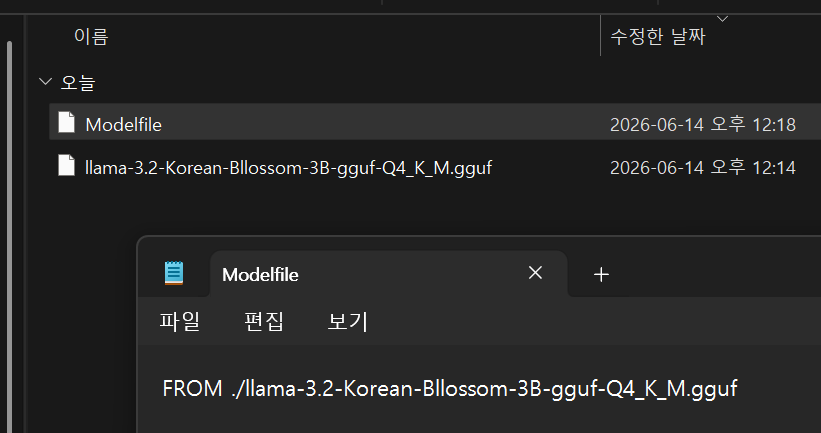
모델이 저장된 폴더가 환경 변수로 등록되어 있어야 한다. 등록되어 있지 않으면 모델을 찾지 못한다.
LLaVA 모델은 기본적으로 이미지 인식(Vision) 모델이기 때문에, MP4 비디오 파일 자체를 한 번에 입력받아 분석할 수는 없다. 대신 OpenCV 같은 라이브러리를 사용하여 비디오에서 특정 프레임(이미지)을 추출한 뒤, 해당 이미지를 LLaVA 모델에 전달하여 상황을 분석하는 방식을 사용해야 한다.
import cv2
import ollama
def analyze_video_frame(video_path, frame_number=0):
# 비디오에서 특정 프레임을 추출하여 LLaVA 모델로 분석합니다.
print(f"[{video_path}] 비디오를 불러오는 중...")
# 비디오 파일 열기
cap = cv2.VideoCapture(video_path)
if not cap.isOpened():
print("오류: 비디오 파일을 열 수 없습니다. 경로를 확인해주세요.")
return
# 원하는 프레임 위치로 이동하여 읽기
cap.set(cv2.CAP_PROP_POS_FRAMES, frame_number)
ret, frame = cap.read()
cap.release()
if not ret:
print(f"오류: {frame_number}번 프레임을 읽을 수 없습니다.")
return
print(f"{frame_number}번 프레임 추출 완료. LLaVA 모델에 전송합니다...")
# OpenCV 이미지(NumPy 배열)를 JPEG 바이트 데이터로 인코딩
# Ollama API는 바이트 형태의 이미지 데이터를 직접 받을 수 있다.
success, buffer = cv2.imencode('.jpg', frame)
# 물리적인 이미지 파일을 생성하지 않는다.
if not success:
print("오류: 프레임 인코딩에 실패했습니다.")
return
frame_bytes = buffer.tobytes()
# Ollama LLaVA 모델에 프롬프트와 이미지 전달
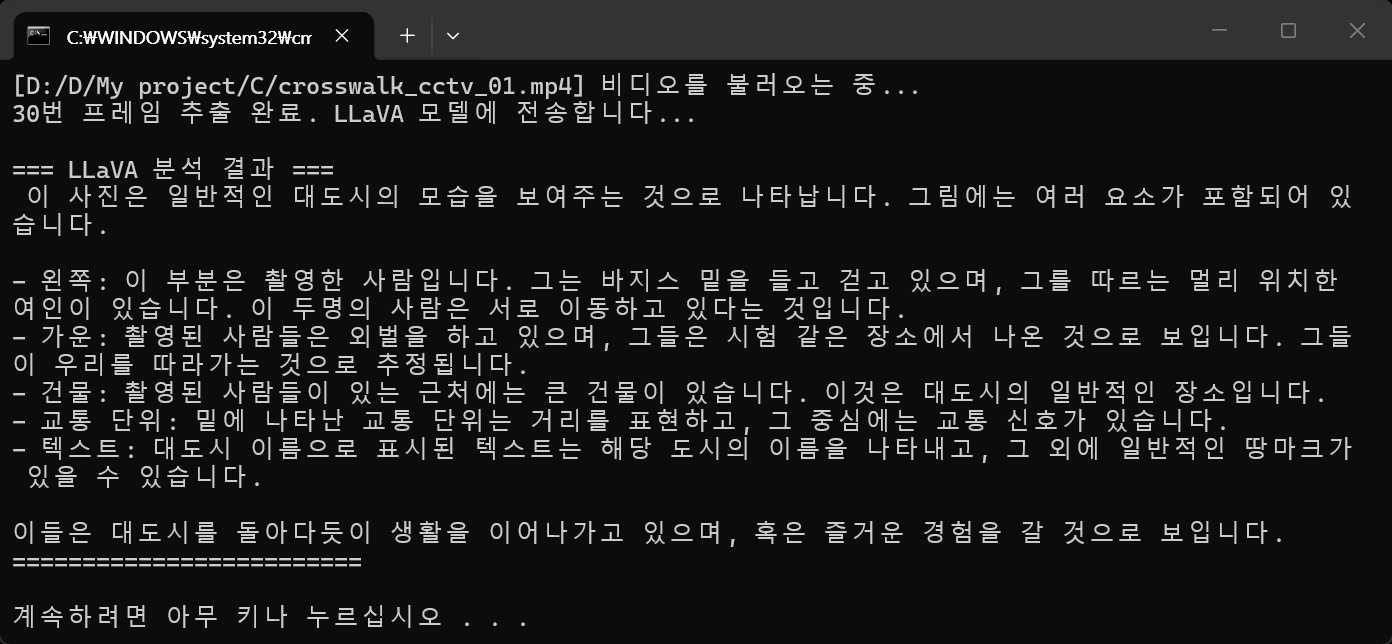
#prompt_text = "이 이미지에서 어떤 상황이 벌어지고 있는지 한국어로 자세히 설명해줘."
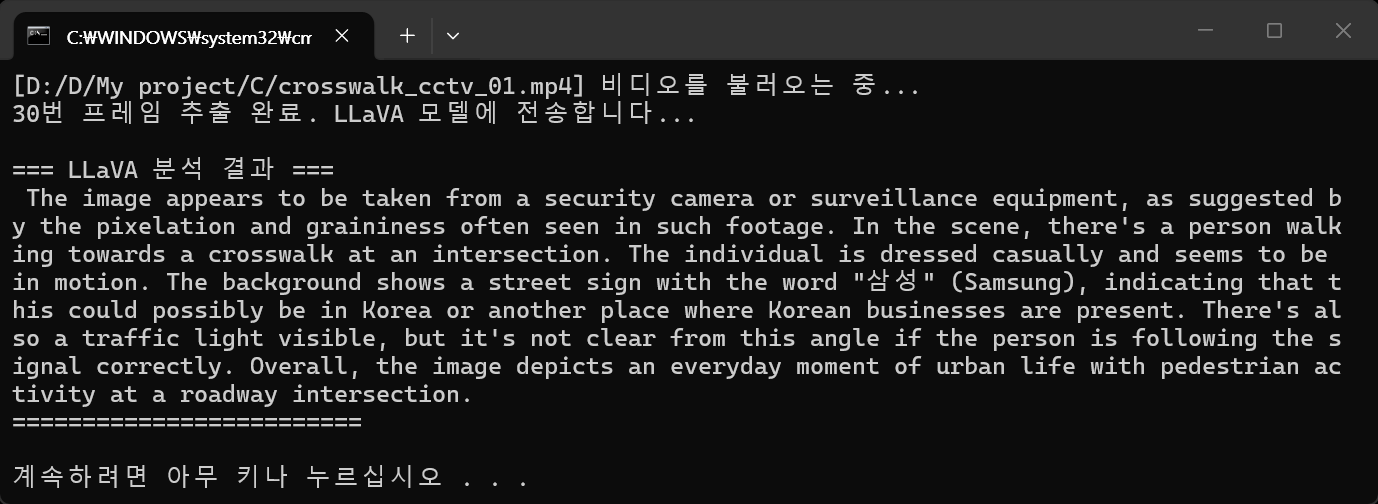
prompt_text = "이 이미지에서 어떤 상황이 벌어지고 있는지 자세히 설명해줘."
try:
response = ollama.chat(
model='llava',
messages=[
{
'role': 'user',
'content': prompt_text,
'images': [frame_bytes]
}
]
)
# 결과 출력
print("\n=== LLaVA 분석 결과 ===")
print(response['message']['content'])
print("========================\n")
except Exception as e:
print(f"Ollama 실행 중 오류 발생: {e}")
if __name__ == "__main__":
video_file = "D:/D/My project/C/crosswalk_cctv_01.mp4" # 분석할 비디오 파일 경로
target_frame = 30 # 분석하고 싶은 프레임 번호 (예: 1초가 30FPS라면 1초 시점)
analyze_video_frame(video_file, target_frame)
import cv2
import ollama
def analyze_video_flow(video_path, interval_sec=5):
# 비디오에서 일정 시간(초) 간격으로 프레임을 추출해 전체 흐름을 LLaVA 모델로 분석한다.
print(f"[{video_path}] 비디오 분석 준비 중...")
# 비디오 파일 열기 및 정보 확인
cap = cv2.VideoCapture(video_path)
if not cap.isOpened():
print("오류: 비디오 파일을 열 수 없습니다.")
return
fps = cap.get(cv2.CAP_PROP_FPS)
total_frames = int(cap.get(cv2.CAP_PROP_FRAME_COUNT))
video_length_sec = total_frames / fps
# 5초에 해당하는 프레임 간격 계산
frame_interval = int(fps * interval_sec)
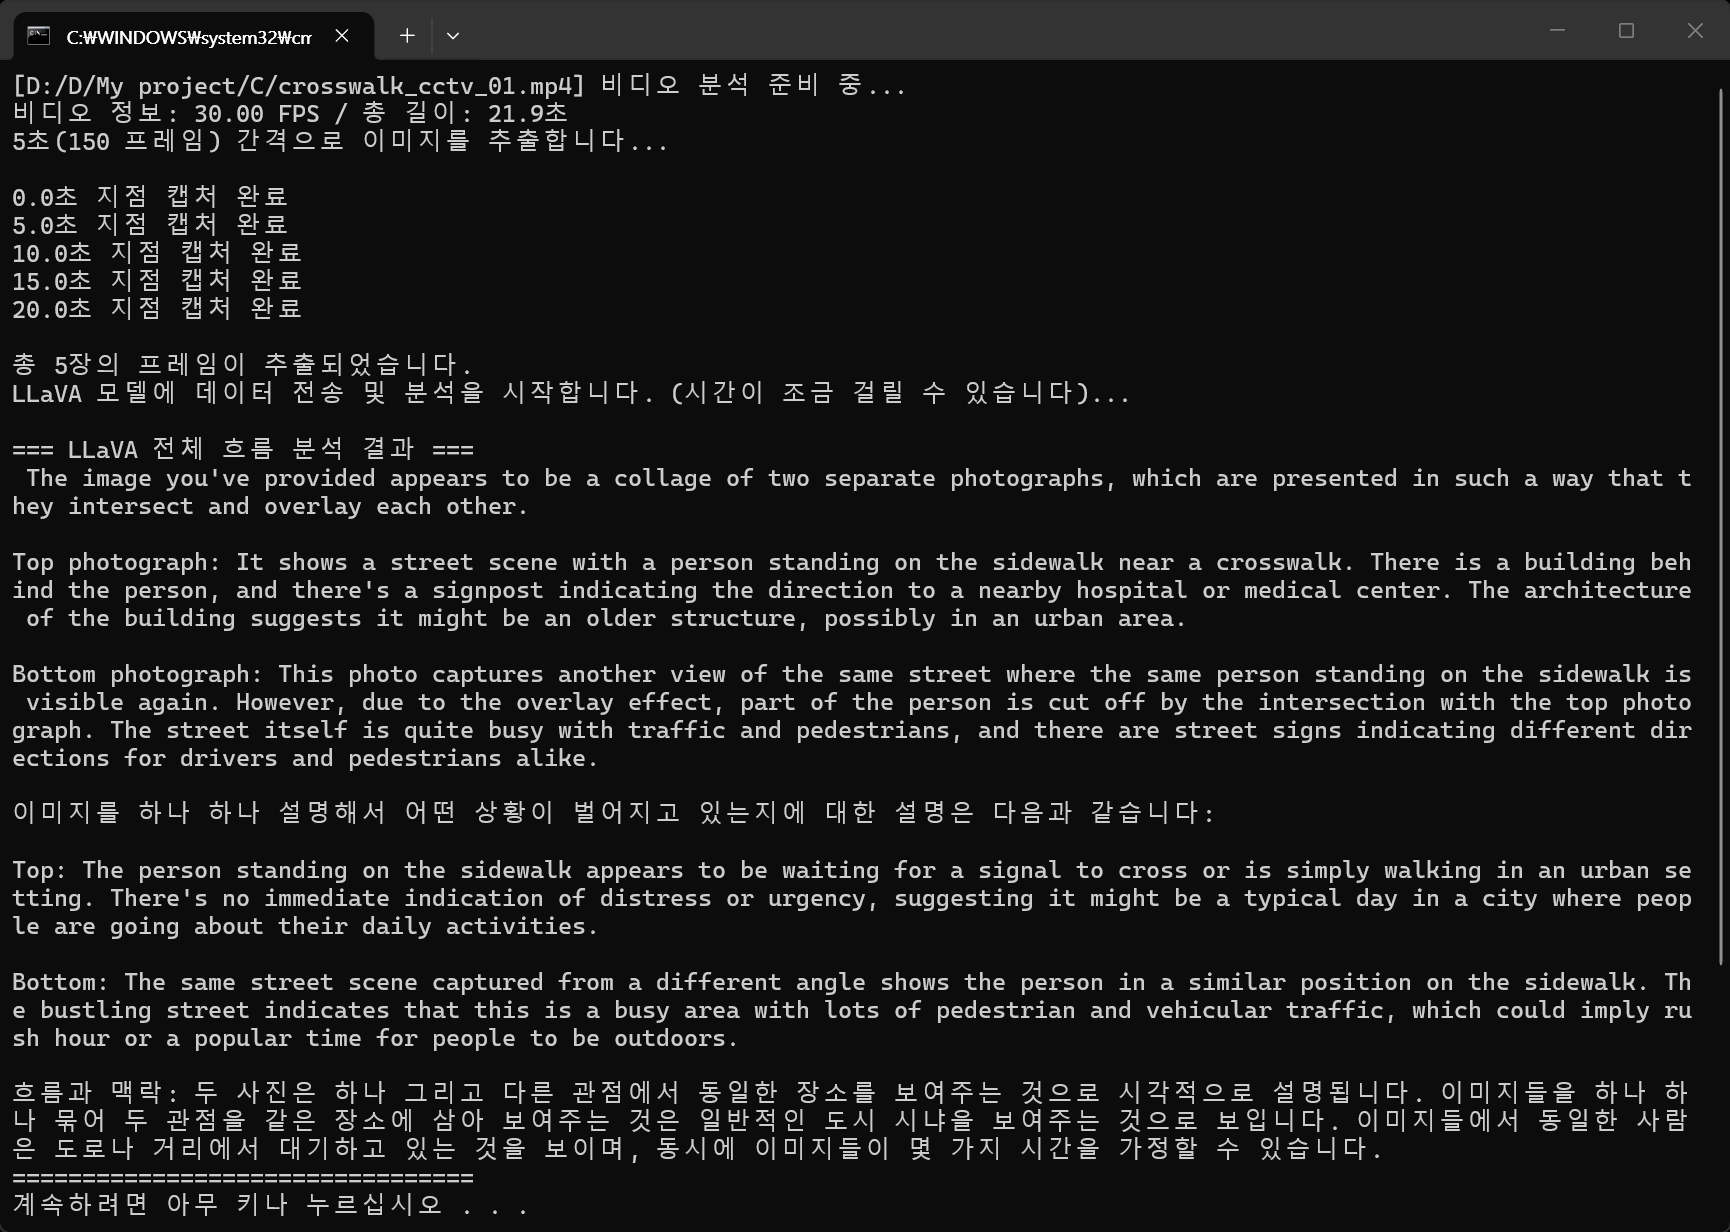
print(f"비디오 정보: {fps:.2f} FPS / 총 길이: {video_length_sec:.1f}초")
print(f"{interval_sec}초({frame_interval} 프레임) 간격으로 이미지를 추출합니다...\n")
frames_bytes = []
current_frame_pos = 0
# 5초 간격으로 프레임 순회하며 추출
while current_frame_pos < total_frames:
cap.set(cv2.CAP_PROP_POS_FRAMES, current_frame_pos)
ret, frame = cap.read()
if not ret:
break
# 콘솔에 진행 상황 표시
current_time_sec = current_frame_pos / fps
print(f"{current_time_sec:.1f}초 지점 캡처 완료")
# 이미지를 바이트 배열로 변환하여 리스트에 추가
success, buffer = cv2.imencode('.jpg', frame)
if success:
frames_bytes.append(buffer.tobytes())
# 다음 캡처할 프레임 위치로 이동
current_frame_pos += frame_interval
cap.release()
if not frames_bytes:
print("추출된 프레임이 없습니다.")
return
print(f"\n총 {len(frames_bytes)}장의 프레임이 추출되었습니다.")
print("LLaVA 모델에 데이터 전송 및 분석을 시작합니다. (시간이 조금 걸릴 수 있습니다)...\n")
# 여러 장의 이미지를 포함하여 LLaVA에 프롬프트 전송
prompt_text = (
"첨부된 이미지들은 하나의 비디오에서 5초 간격으로 추출된 프레임들이야."
"이미지를 하나 하나 설명하지 말고 이 영상에서 어떤 상황이 벌어지고 있는지 전체적인 흐름과 맥락을 요약해서 설명해줘."
)
try:
response = ollama.chat(
model='llava',
messages=[
{
'role': 'user',
'content': prompt_text,
'images': frames_bytes # 여러 장의 이미지가 담긴 리스트를 통째로 전달
}
]
)
# 최종 결과 출력
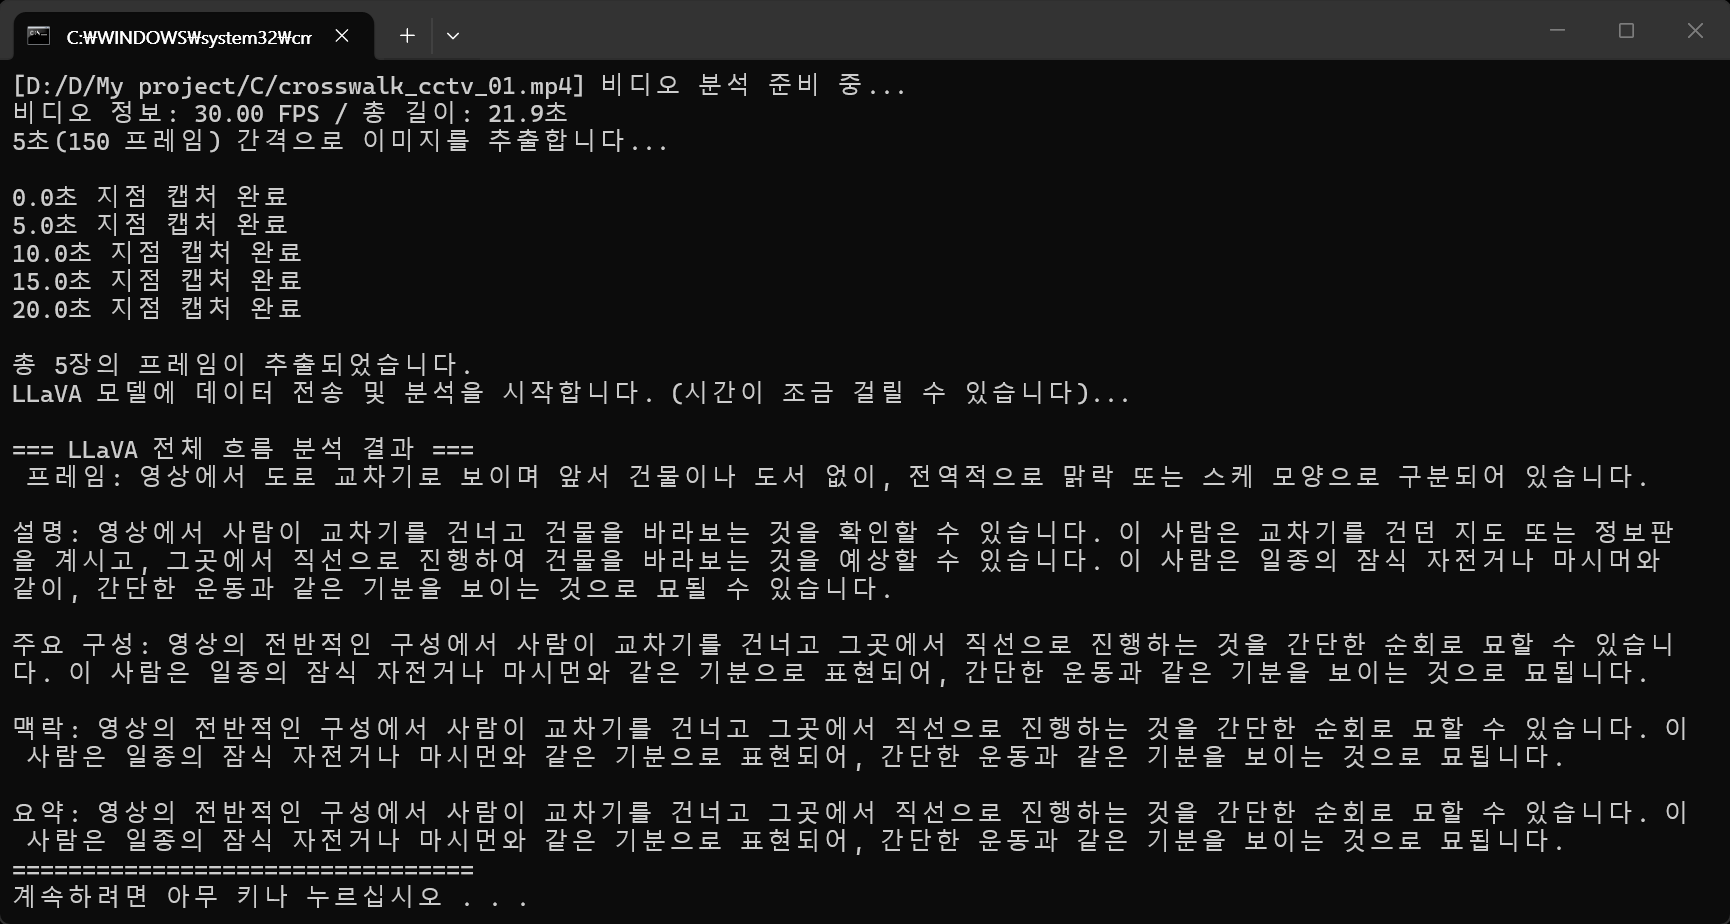
print("=== LLaVA 전체 흐름 분석 결과 ===")
print(response['message']['content'])
print("=================================")
except Exception as e:
print(f"Ollama 실행 중 오류 발생: {e}")
if __name__ == "__main__":
video_file = "D:/D/My project/C/crosswalk_cctv_01.mp4" # 테스트할 비디오 파일 경로
# 5초 간격으로 분석 실행
analyze_video_flow(video_file, interval_sec=5)
첫 번째 실행 결과
두 번째 실행 결과
prompt_text = (
    "첨부된 이미지들은 하나의 비디오에서 5초 간격으로 추출된 프레임들이야."
    "이미지를 하나 하나 설명하지 말고 이 영상에서 어떤 상황이 벌어지고 있는지"
    "전체적인 흐름과 맥락을 요약해서 한글로 설명해줘."
)
한글로 설명을 요청한 결과
※ 참고
3초 간격으로 프레임을 추출하면 8장의 프레임이 모델로 전달되는데, 사용 가능한 context size를 넘었다는 오류가 발생했다.
n_ctx와 n_prompt_tokens는 로컬 LLM을 실행하거나 API 파라미터를 설정할 때 마주치는 핵심 컨텍스트 윈도우(Context Window) 개념입니다 - n_ctx (Context Length): 모델이 한 번에 기억하고 처리할 수 있는 최대 토큰 한도입니다. (예: 4096, 8192, 32768) - n_prompt_tokens (Prompt Size): 사용자가 입력한 프롬프트(질문, 시스템 지시사항 등)가 차지하는 실제 토큰 크기입니다. - 동작 원리: 질문이 전송되면 LLM 엔진은 n_ctx 한도 내에서 n_prompt_tokens와 답변 생성에 필요한 토큰을 모두 합산합니다. 만약 질문과 답변(생성 토큰)의 합이 n_ctx 값을 초과하면 에러가 발생하거나 답변이 중간에 잘리게 됩니다.
아래와 같이 num_ctx 옵션을 주거나 프레임 추출 간격 늘리기 등의 방법으로 해결 가능하다.
response = ollama.chat(
    model='llava',
    messages=[
        {
            'role': 'user',
            'content': prompt_text,
            'images': frames_bytes  # 여러 장의 이미지가 담긴 리스트를 통째로 전달
        }
    ],
options={
    'num_ctx': 8192  # 기본값보다 크게 설정 (컴퓨터 사양에 따라 16384까지도 가능)
    }
)
그런데 이미지 해상도 줄이기로는 해결되지 않는다.
# 해상도를 640x360(또는 더 작게)으로 축소
frame = cv2.resize(frame, (640, 360))
# 이미지를 바이트 배열로 변환하여 리스트에 추가
success, buffer = cv2.imencode('.jpg', frame)
if success:
    frames_bytes.append(buffer.tobytes())
간단히 생각하기엔 '해상도가 작으면 용량도 작으니 AI가 처리할 데이터도 줄어들겠지?' 싶지만, LLaVA 같은 비전 언어 모델(VLM)은 그렇게 작동하지 않습니다.
왜 해상도를 줄여도 소용이 없을까? 1. 이미지는 픽셀이 아니라 '토큰(Token)'으로 계산됩니다. LLaVA 모델 내부에는 이미지를 읽어들이는 '비전 인코더(Vision Encoder)'라는 부품이 있습니다. 이 인코더는 이미지가 들어오면 가로세로를 바둑판처럼 잘게 쪼개서 텍스트와 같은 '토큰'으로 변환합니다.
2. 최소 '기본요금(고정 토큰)'이 존재합니다. 이 비전 인코더는 자신이 처리하기 편한 고정된 내부 해상도(예: 336x336)를 가지고 있습니다. 1920x1080 (FHD) 해상도를 넣으면 => 크기를 줄여서 인식합니다. 100x100 (저해상도) 이미지를 넣으면 => 빈 공간을 채우거나 크기를 늘려서 인식합니다. 결과적으로, 1080p 고화질을 넣든 100x100 썸네일을 넣든 AI 입장에서는 이미지 1장당 약 500~1000개의 고정된 토큰을 무조건 소모해 버립니다.
3. 컨텍스트 윈도우(Context Window)가 꽉 참 Ollama의 기본 기억력(Context Window)은 보통 2048개 또는 4096개 토큰입니다. 해상도를 아무리 줄여도 1장당 700개의 토큰을 차지한다면, 단 4~5장만 보내도 메모리 한도에 도달하게 되는 것입니다.
■ 대표적인 주요 파라미터 - temperature: 답변의 창의성을 결정합니다. (0.0 ~ 1.0) 숫자가 높을수록 창의적이고 다양한 답변을, 낮을수록 일관되고 보수적인 답변을 생성합니다. (기본값: 0.8) - num_ctx: 한 번에 기억하고 처리할 수 있는 최대 토큰(컨텍스트 윈도우) 크기입니다. 값을 크게 할수록 이전 대화를 더 많이 기억하지만, 하드웨어 메모리를 더 많이 사용합니다. (기본값: 2048) - num_predict: 생성할 답변의 최대 토큰 수입니다. (기본값: -1, 무제한 생성) - repeat_last_n: 모델이 반복되는 답변을 방지하기 위해 앞의 내용을 얼마나 참고할지 결정합니다. (0 = 끄기, -1 = 컨텍스트 크기만큼) (기본값: 64) - repeat_penalty: 답변이 반복될 때 이를 얼마나 강하게 페널티를 줄지 설정합니다. (기본값: 1.1) - top_k: 모델이 다음 토큰을 예측할 때 고려하는 후보군의 수를 제한해 엉뚱한 답변을 줄여줍니다. (기본값: 40) - top_p: 확률이 높은 토큰을 누적하여 top_p 값에 도달할 때까지 후보군을 추립니다. 값이 낮을수록 더 집중된 답변을 생성합니다. (기본값: 0.9) - min_p: 가장 확률이 높은 토큰을 기준으로, 그 비율만큼의 확률을 가진 토큰만 후보로 남깁니다. 퀄리티와 다양성을 균형 있게 맞출 때 사용합니다. (기본값: 0.0) - seed: 난수 생성 시드(Seed)입니다. 동일한 숫자로 지정하면 매번 똑같은 질문에 대해 정확히 똑같은 답변을 얻을 수 있습니다. (기본값: 0) - stop: 생성을 중단할 특정 문구(Stop sequence)를 지정합니다. 예: stop "User:"
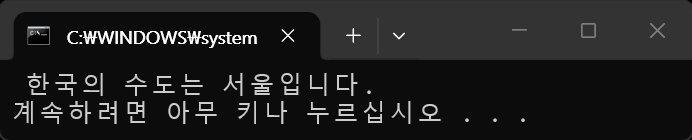
import ollama

response = ollama.generate(model='llava', prompt='한국의 수도는 어디야?')
print(response.response)
#print(response['response'])
import ollama
import requests
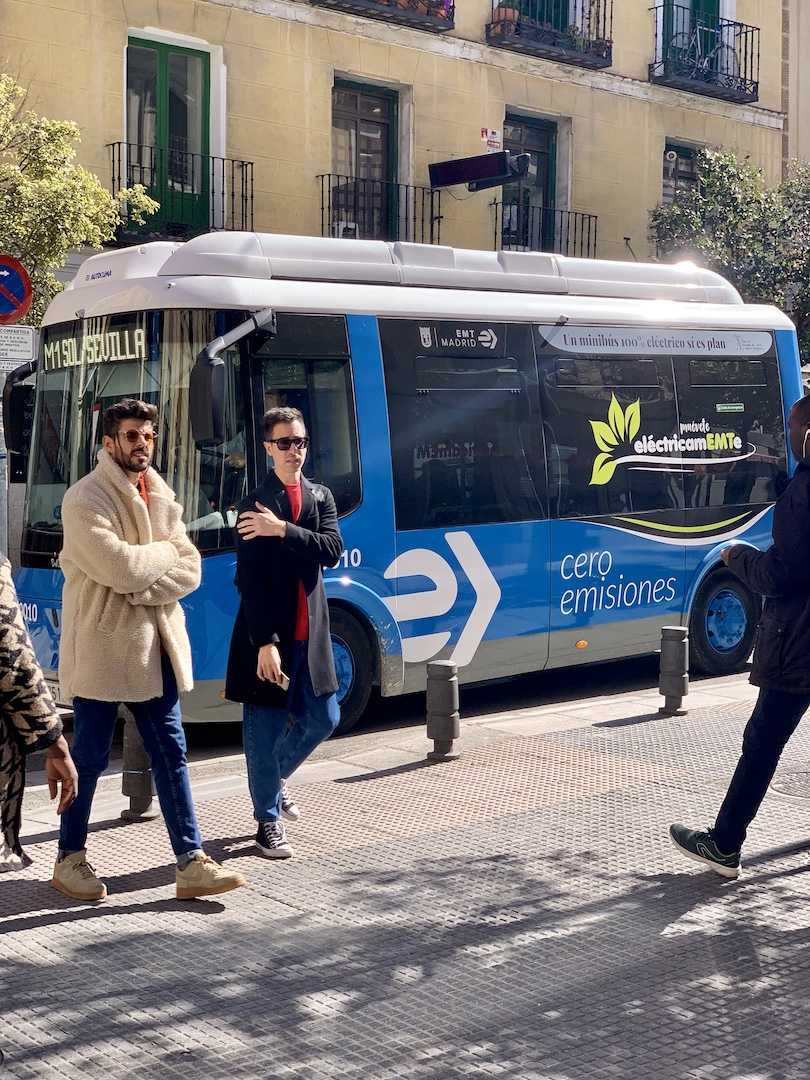
# 인터넷에서 이미지를 다운로드 받아 바이너리 데이터로 준비.
# ollama는 로컬에서 동작하므로 인터넷 URL을 직접 넘겨주면 다운로드하지 못한다.
# requests 패키지 등으로 이미지를 미리 다운로드하여 메모리에 올리거나 파일로 저장한 뒤 전달해야 한다.
image_url = 'https://img1.daumcdn.net/thumb/R1280x0/?scode=mtistory2&fname=https%3A%2F%2Fblog.kakaocdn.net' \
'%2Fdna%2FWOyez%2FdJMcacQXuKj%2FAAAAAAAAAAAAAAAAAAAAAFgT1DZJQGvFBLB9ol_9VqLwj5K0O47aH7TEakuYfAZc%2Fimg.jpg' \
'%3Fcredential%3DyqXZFxpELC7KVnFOS48ylbz2pIh7yKj8%26expires%3D1782831599%26allow_ip%3D%26allow_referer' \
'%3D%26signature%3DQqFJijrkmyGM1xuFRwkdn6HxV80%253D'
# 너무 긴 URL이므로 줄바꿈 처리. 실제 코드에서는 한 줄로 작성해도 무방.
response_image = requests.get(image_url)
image_bytes = response_image.content
response = ollama.chat(
model='llava',
messages=[
{
'role': 'system',
'content': '너는 이미지 분석 전문가야.'
},
{
'role': 'user',
'content': '이미지에 무엇이 있는지 한글로 알려줘.',
'images': [image_bytes] # 다운로드한 이미지 바이너리 데이터 삽입
}
]
)
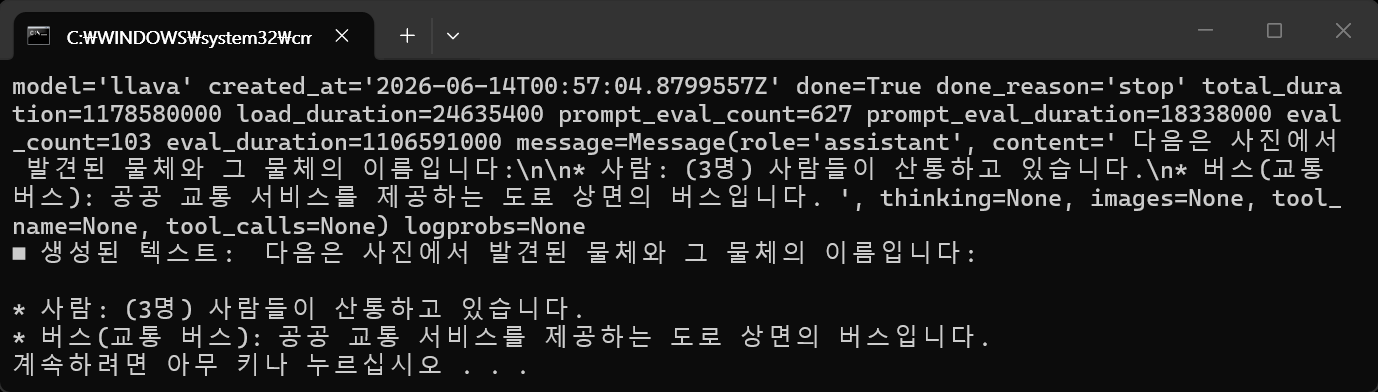
print(response)
print("■ 생성된 텍스트:", response['message']['content'])
생성되는 텍스트를 실시간 스트리밍해 보자.
import ollama
import requests

# 인터넷에서 이미지를 다운로드 받아 바이너리 데이터로 준비.
# ollama는 로컬에서 동작하므로 인터넷 URL을 직접 넘겨주면 다운로드하지 못한다.
# requests 패키지 등으로 이미지를 미리 다운로드하여 메모리에 올리거나 파일로 저장한 뒤 전달해야 한다.
image_url = 'https://img1.daumcdn.net/thumb/R1280x0/?scode=mtistory2&fname=https%3A%2F%2Fblog.kakaocdn.net' \
'%2Fdna%2FWOyez%2FdJMcacQXuKj%2FAAAAAAAAAAAAAAAAAAAAAFgT1DZJQGvFBLB9ol_9VqLwj5K0O47aH7TEakuYfAZc%2Fimg.jpg' \
'%3Fcredential%3DyqXZFxpELC7KVnFOS48ylbz2pIh7yKj8%26expires%3D1782831599%26allow_ip%3D%26allow_referer' \
'%3D%26signature%3DQqFJijrkmyGM1xuFRwkdn6HxV80%253D'
# 너무 긴 URL이므로 줄바꿈 처리. 실제 코드에서는 한 줄로 작성해도 무방.

response_image = requests.get(image_url)
image_bytes = response_image.content

response = ollama.chat(
	model='llava',
	messages=[
		{
			'role': 'system',
			'content': '너는 이미지 분석 전문가야.'
		},
		{
			'role': 'user',
			'content': '이미지에 무엇이 있는지 한글로 알려줘.',
			'images': [image_bytes]  # 다운로드한 이미지 바이너리 데이터 삽입
		}
	],
	stream =True  # 스트리밍 응답을 받도록 설정
)

for chunk in response:
    print(chunk['message']['content'], end='', flush=True)
텍스트 생성이 완료된 후 한 번에 출력되지 않고, 순차적으로 생성되는 즉시 연속적으로 스트리밍된다.
import ollama
import asyncio

async def main():
	response = await ollama.AsyncClient().chat(
		model='llava',
		messages=[
			{
				'role': 'system',
				'content': '너는 이미지 분석 전문가야.'
			},
			{
				'role': 'user',
				'content': '이미지에 무엇이 있는지 한글로 알려줘.',
				'images': ['D:/D/My project/C/bus.jpg']
			}
		],
		stream=True  # 스트리밍 응답을 받도록 설정
	)

	# 비동기 제너레이터에서 값을 읽기 위해 async for 사용
	async for chunk in response:
		print(chunk['message']['content'], end='', flush=True)

async def run_concurrently():
	# main() 함수를 백그라운드 태스크로 등록하여 실행을 시작함
	task = asyncio.create_task(main())

	# main()이 비동기적으로 실행되는 동안 바로 다음 코드가 실행됨
	for i in range(5):
		print("Another task running...")
		await asyncio.sleep(1)  # 이벤트 루프를 막지 않는 비동기 sleep 사용

	# 백그라운드 태스크(main)가 완료될 때까지 대기
	# 이 줄이 없으면 백그라운드 태스크가 완료되기 전에 프로그램이 종료될 수 있음
	await task

if __name__ == "__main__":
	# 진입점을 run_concurrently로 변경
	asyncio.run(run_concurrently())
import ollama
import base64
import asyncio

async def main():
	# 로컬 이미지 파일을 읽어 Base64로 인코딩
	image_path = r"D:\D\My project\C\bus.jpg"
	with open(image_path, "rb") as image_file:
		base64_image = base64.b64encode(image_file.read()).decode('utf-8')

	response = await ollama.AsyncClient().chat(
		model='llava',
		messages=[
			{
				'role': 'system',
				'content': '너는 이미지 분석 전문가야.'
			},
			{
				'role': 'user',
				'content': '이미지에 무엇이 있는지 한글로 알려줘.',
				'images': [base64_image]  # Base64로 인코딩한 이미지 데이터 삽입
			}
		],
		stream=True  # 스트리밍 응답을 받도록 설정
	)

	# 비동기 제너레이터에서 값을 읽기 위해 async for 사용
	async for chunk in response:
		print(chunk['message']['content'], end='', flush=True)

async def run_concurrently():
	# main() 함수를 백그라운드 태스크로 등록하여 실행을 시작함
	task = asyncio.create_task(main())

	# main()이 비동기적으로 실행되는 동안 바로 다음 코드가 실행됨
	for i in range(5):
		print("Another task running...")
		await asyncio.sleep(1)  # 이벤트 루프를 막지 않는 비동기 sleep 사용

	# 백그라운드 태스크(main)가 완료될 때까지 대기
	# 이 줄이 없으면 백그라운드 태스크가 완료되기 전에 프로그램이 종료될 수 있음
	await task

if __name__ == "__main__":
	# 진입점을 run_concurrently로 변경
	asyncio.run(run_concurrently())
from ultralytics import YOLO
kpt_names = ["nose", "left_eye", "right_eye", "left_ear", "right_ear", "left_shoulder",
"right_shoulder", "left_elbow", "right_elbow", "left_wrist", "right_wrist",
"left_hip", "right_hip", "left_knee", "right_knee", "left_ankle", "right_ankle"]
model = YOLO("yolo26n-pose.pt") # "yolo26n-pose.pt"가 없다면 자동으로 다운로드 받는다
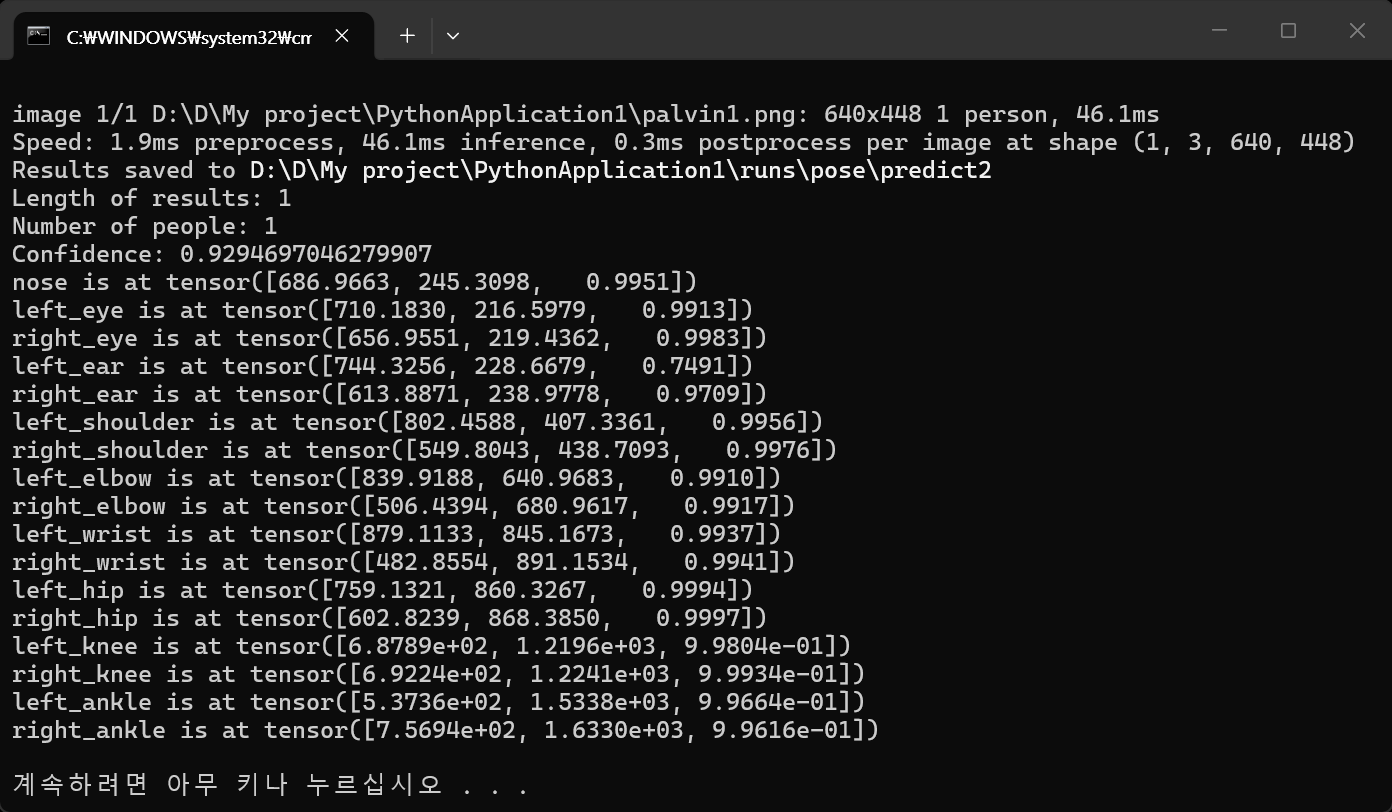
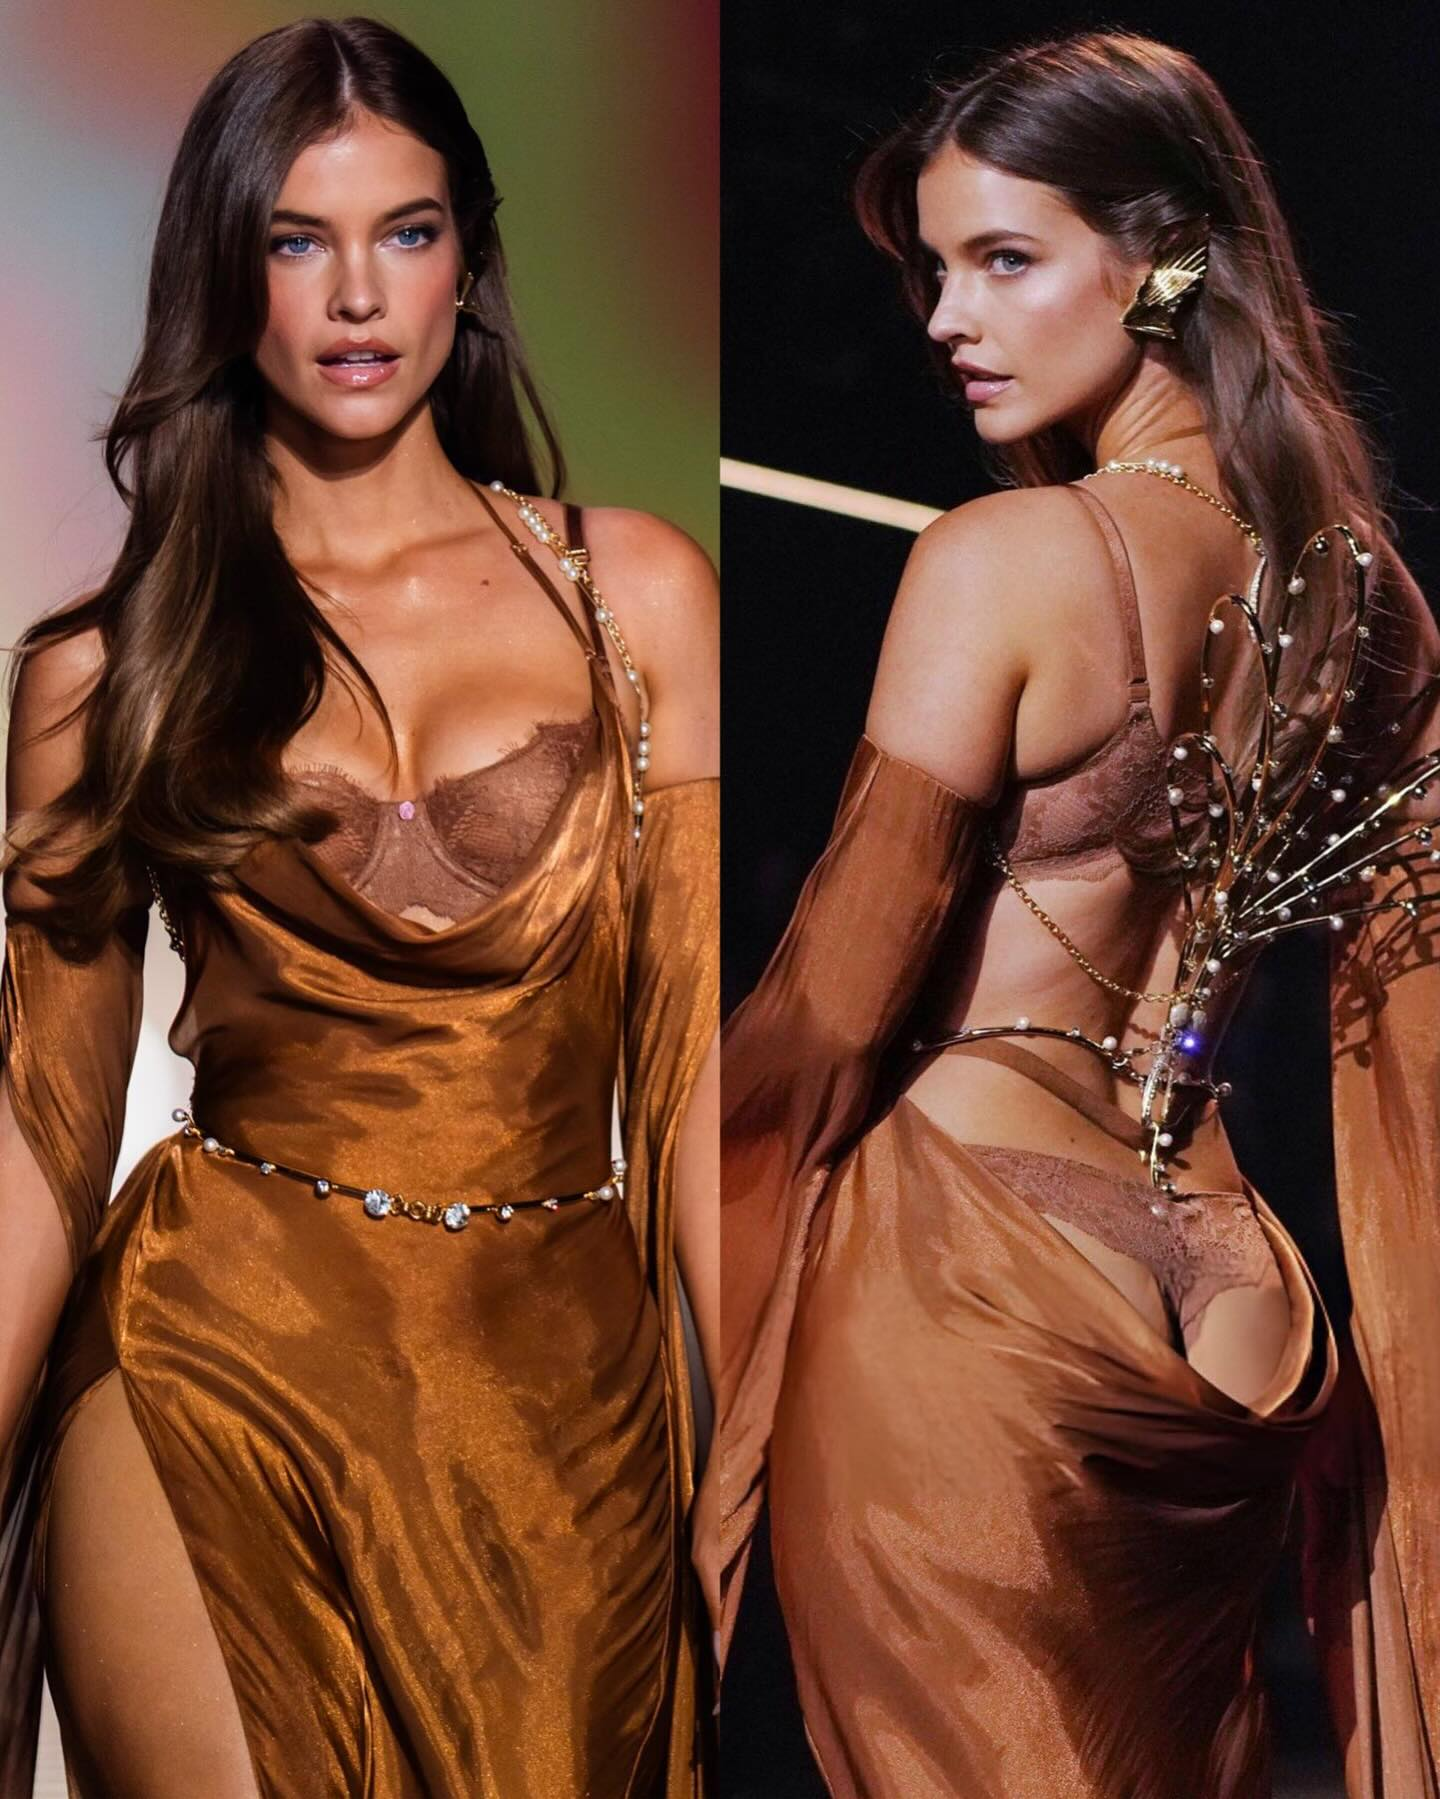
results = model("palvin1.png", save=True)
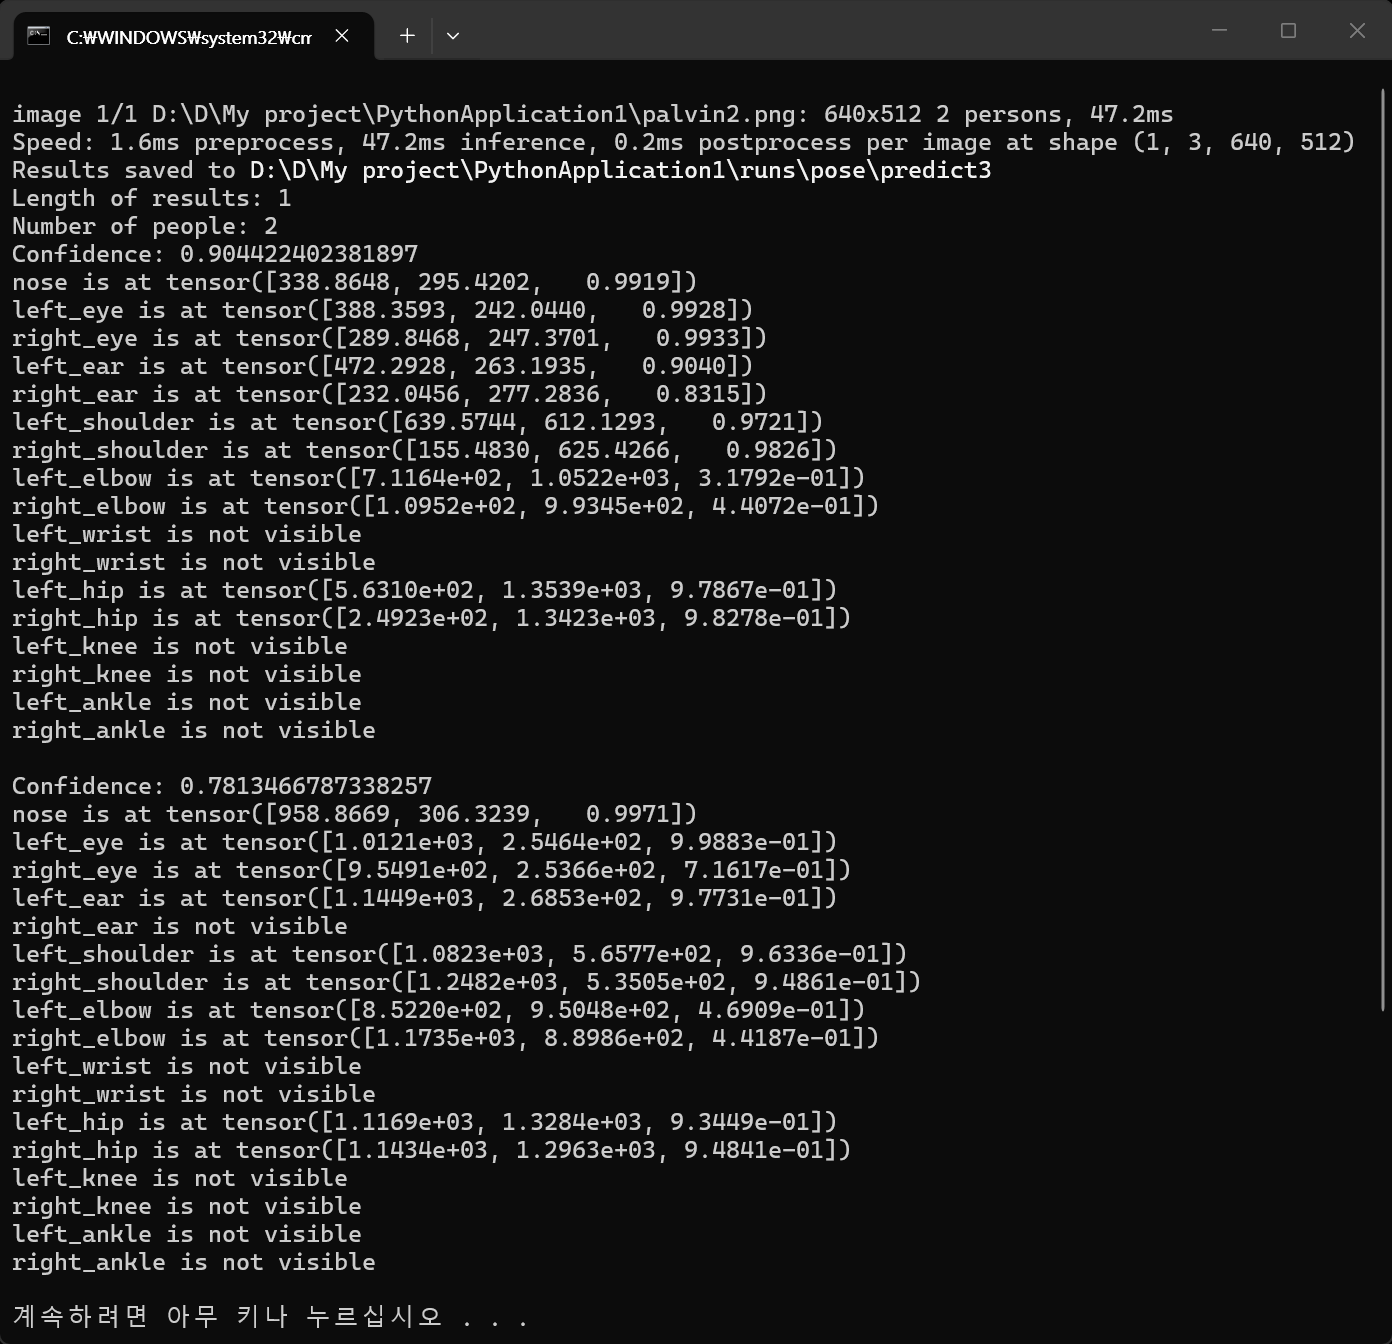
print(f"Length of results: {len(results)}")
# 1개의 이미지만 사용했으므로 results에는 1개의 원소만 있다
# Access the results
for result in results: # results에는 1개의 원소만 있기 때문에 for 루프를 사용하는 의미는 없다
xy = result.keypoints.xy # x and y coordinates
xyn = result.keypoints.xyn # normalized
kpts = result.keypoints.data # x, y, visibility (if available)
print(f"Number of people: {len(result)}")
for i, kpt in enumerate(kpts):
print(f"Confidence: {result.boxes.conf[i]}")
for name, k in zip(kpt_names, kpt):
if k[2] > 0.3: # k[2]: visibility
print(f"{name} is at {k}")
else:
print(f"{name} is not visible")
print()
UserWarning: Do not pass an `input_shape`/`input_dim` argument to a layer. When using Sequential models, prefer using an `Input(shape)` object as the first layer in the model instead.
경고이므로 무시하고 넘어간다.
model = keras.Sequential(dense) 이어서 위 명령은 아래와 같은 에러가 출력된다.
TypeError: 'Dense' object is not iterable 아래와 같이 바꿔서 해결한다. model = keras.Sequential([dense])
아니면 처음부터 아래와 같이 입력하면 경고나 에러 없이 진행 된다. model = keras.Sequential([keras.Input(shape=(784, )), keras.layers.Dense(10, activation='softmax')])