방송통신대학교(방송대/방통대) Sorting Algorithms in Python 파이썬 정렬 알고리즘 1
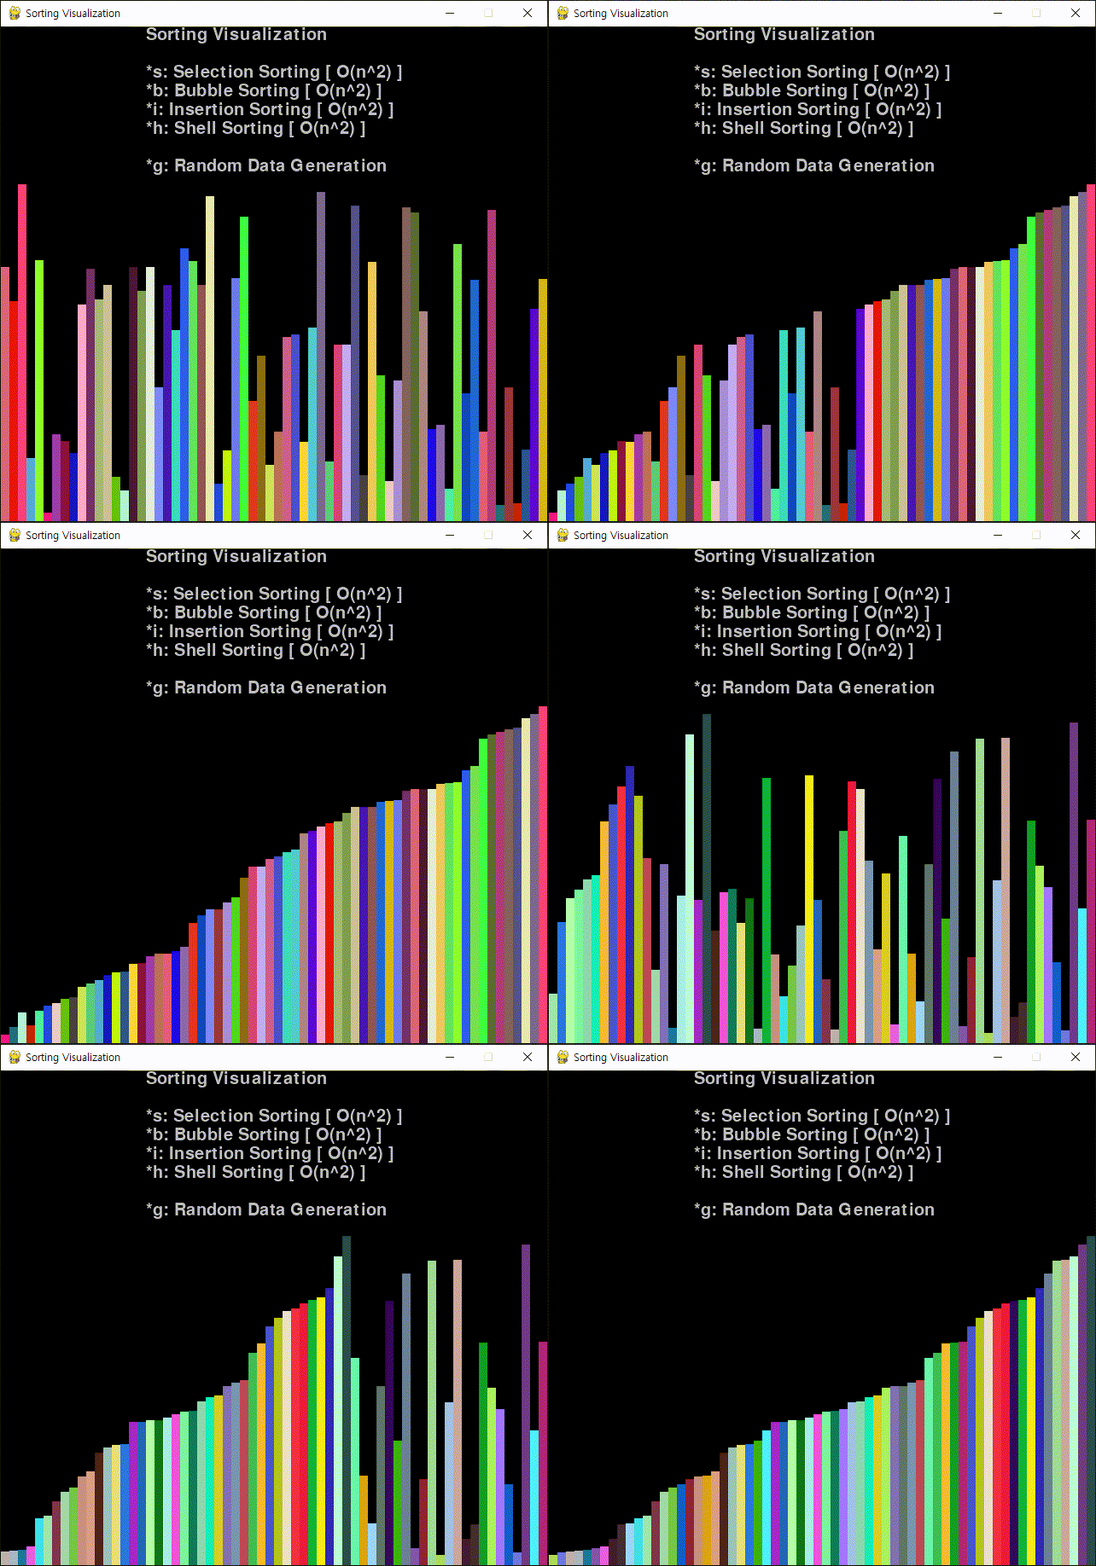
General 2024. 3. 9. 19:10 |기본 정렬 알고리즘 네 가지(선택, 버블, 삽입, 셸)를 파이게임(Pygame)으로 시각화 해 보자.
|
1
2
3
4
5
6
7
8
9
10
11
12
13
14
15
16
17
18
19
20
21
22
23
24
25
26
27
28
29
30
31
32
33
34
35
36
37
38
39
40
41
42
43
44
45
46
47
48
49
50
51
52
53
54
55
56
57
58
59
60
61
62
63
64
65
66
67
68
69
70
71
72
73
74
75
76
77
78
79
80
81
82
83
84
85
86
87
88
89
90
91
92
93
94
95
96
97
98
99
100
101
102
103
104
105
106
107
108
109
110
111
112
113
114
115
116
117
118
119
120
121
122
123
124
125
126
127
128
129
130
131
132
133
134
135
136
137
138
139
140
141
142
143
144
145
146
147
148
149
150
151
152
153
154
155
156
157
158
159
160
|
import os
import random
os.environ['PYGAME_HIDE_SUPPORT_PROMPT'] = '1'
import pygame
pygame.init()
pygame.display.set_caption("Sorting Visualization")
screensize = (640, 580)
screen = pygame.display.set_mode(screensize)
clock = pygame.time.Clock()
framerate = 10
running = True
font = pygame.font.Font(None, 30)
text = font.render("Sorting Visualization\n\n" +
"*s: Selection Sorting [ O(n^2) ]\n" +
"*b: Bubble Sorting [ O(n^2) ]\n" +
"*i: Insertion Sorting [ O(n^2) ]\n" +
"*h: Shell Sorting [ O(n^2) ]\n" +
"\n*g: Random Data Generation", True, "gray")
text_pos = text.get_rect()
text_pos.center = (screen.get_width()/2, text_pos.height/2)
data_size = 64
data = list()
data_color = list()
def DataGenerator():
global data
global data_color
data = [random.randint(10, 400) for i in range(data_size)]
data_color = [(random.randint(0, 255), random.randint(0, 255), random.randint(0, 255))
for i in range(data_size)]
DataGenerator()
def Visualize():
screen.fill("black")
screen.blit(text, text_pos)
for i in range(data_size):
pygame.draw.rect(screen, data_color[i], (i*10, screensize[1]-data[i], 10, data[i]))
pygame.display.flip()
clock.tick(framerate)
def Finalize():
screen.fill("white")
pygame.display.flip()
clock.tick(framerate)
def EventHandler():
# 이벤트 처리하는 코드가 없으면 정렬시 프로그램이 freeze된다.
for event in pygame.event.get():
if event.type == pygame.KEYDOWN and event.key == pygame.K_ESCAPE:
return -1 # 정렬 중지.
elif event.type == pygame.QUIT:
exit() # 프로그램 종료.
def SelectSort():
for i in range(data_size-1):
if EventHandler() == -1:
return
min = i
for j in range(i+1, data_size, 1):
if data[min] > data[j]:
min = j
data[i], data[min] = data[min], data[i]
data_color[i], data_color[min] = data_color[min], data_color[i]
Visualize()
Finalize()
def BubbleSort():
for i in range(data_size-1):
if EventHandler() == -1:
return
sorted = True
for j in range(data_size-1-i):
if data[j] > data[j+1]:
data[j], data[j+1] = data[j+1], data[j]
data_color[j], data_color[j+1] = data_color[j+1], data_color[j]
sorted = False
if sorted == True:
break
Visualize()
Finalize()
def InsertSort():
for i in range(1, data_size, 1):
if EventHandler() == -1:
return
val = data[i]
colval = data_color[i]
for j in range(i, 0, -1):
if data[j-1] > val:
data[j] = data[j-1]
data_color[j] = data_color[j-1]
j = j-1
else:
break
data[j] = val
data_color[j] = colval
Visualize()
Finalize()
def ShellSort():
# 점화식 리스트 만들기
recurrence = [1]
while(True):
next = recurrence[-1]*3+1
if next < data_size:
recurrence.append(next)
else:
recurrence.reverse()
break
for D in recurrence:
for i in range(D, data_size, 1):
if EventHandler() == -1:
return
val = data[i]
colval = data_color[i]
j = i
while True:
if j>=D and data[j-D]>val:
data[j] = data[j-D]
data_color[j] = data_color[j-D]
j = j-D
else:
break
data[j] = val
data_color[j] = colval
Visualize()
Finalize()
while running:
for event in pygame.event.get():
if event.type == pygame.QUIT:
running = False
elif event.type == pygame.KEYDOWN and event.key == pygame.K_ESCAPE:
running = False
elif event.type == pygame.KEYDOWN and event.key == pygame.K_s:
SelectSort()
elif event.type == pygame.KEYDOWN and event.key == pygame.K_b:
BubbleSort()
elif event.type == pygame.KEYDOWN and event.key == pygame.K_i:
InsertSort()
elif event.type == pygame.KEYDOWN and event.key == pygame.K_h:
ShellSort()
elif event.type == pygame.KEYDOWN and event.key == pygame.K_g:
DataGenerator()
Visualize()
|
코드를 작성하고 실행한다.

※ 참고
2024.03.22 - [Python] - [Pygame] Sorting Algorithms in Python 파이썬 정렬 알고리즘 2
'General' 카테고리의 다른 글
| PDF 파일 프린트 속도가 너무 느릴 때 해결 방법 (1) | 2024.10.28 |
|---|---|
| 방송통신대학교(방송대/방통대) Sorting Algorithms in Python 파이썬 정렬 알고리즘 2 (0) | 2024.03.22 |
| GIMP Alpha Channel Transparent Layer/Background 투명 배경 (0) | 2024.02.20 |
| Pixel(JPG/PNG) Image To Vector(AI) Image 픽셀 이미지를 벡터 이미지로 변환하기 (0) | 2023.12.17 |
| MAME Cocktail Mode Cabinet 마메 칵테일 모드 케비넷 (0) | 2023.08.29 |


