Python Multi Thread Class 파이썬 멀티 스레드 클래스
Python 2023. 9. 10. 23:23 |반응형
스레드 클래스를 상속받는 클래스를 정의하고 사용해 보자.
|
1
2
3
4
5
6
7
8
9
10
11
12
13
14
15
16
17
18
19
20
21
22
23
24
25
26
27
28
29
30
31
32
33
34
35
36
37
38
39
|
import time
import threading
class Worker(threading.Thread):
def __init__(self, name, count, delay):
super().__init__()
self.name = name
self.count = count
self.delay = delay
# 스레드 클래스를 상속하는 클래스는 run()를 재정의 해야 한다.
# 객체를 만들고 start()를 실행하면 run()가 실행된다.
def run(self):
print(f"{self.name} job started.")
for i in range(self.count):
print(f"{self.name} job: {i}.")
time.sleep(self.delay)
print(f"{self.name} job finished.")
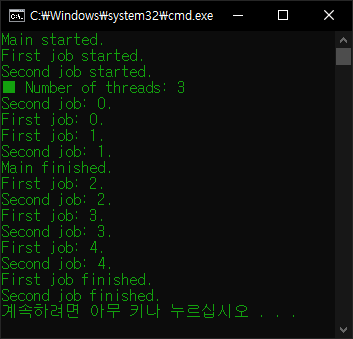
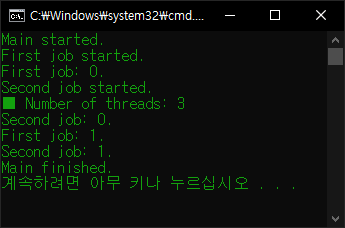
print("Main started.")
thread_1 = Worker("First", 5, 0.5)
#thread_1.daemon = True
# 데몬 스레드로 설정되면 메인 스레드 종료시 서브 스레드도 종료된다.
thread_1.start()
#thread_1.join()
# join()을 실행한 스레드가 종료할 때까지 나머지 스레드는 대기한다.
thread_2 = Worker("Second", 5, 0.5)
#thread_2.daemon = True
thread_2.start()
#thread_2.join()
print(f"■ Number of threads: {threading.active_count()}")
time.sleep(1)
print("Main finished.")
|

|
1
2
3
4
5
6
7
8
9
10
11
12
13
14
15
16
17
18
19
20
21
22
23
24
25
26
27
28
|
import time
import threading
class Worker(threading.Thread):
def __init__(self, name, count, delay):
super().__init__()
self.name = name
self.count = count
self.delay = delay
def run(self):
print(f"{self.name} job started.")
for i in range(self.count):
print(f"{self.name} job: {i}.")
time.sleep(self.delay)
print(f"{self.name} job finished.")
thread_1 = Worker("First", 5, 0.5)
thread_2 = Worker("Second", 5, 0.5)
thread_3 = Worker("Third", 5, 0.5)
threads = [thread_1, thread_2, thread_3]
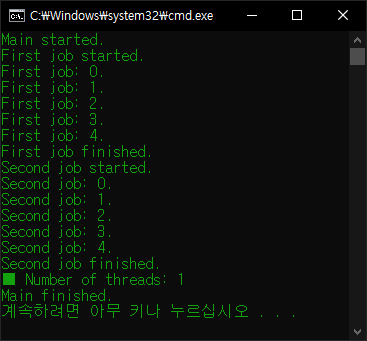
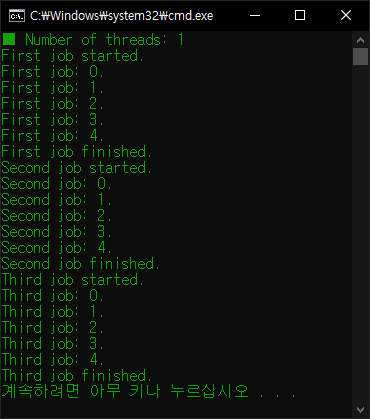
print(f"■ Number of threads: {threading.active_count()}")
# 활성화된 스레드는 메인스레드 뿐이므로 1이 표시된다.
for thread in threads:
thread.start()
thread.join()
|
※ thread - Thread-based parallelism
반응형
'Python' 카테고리의 다른 글
| Python Coroutines 파이썬 코루틴 (0) | 2023.09.11 |
|---|---|
| Python Coroutines and Tasks 파이썬 코루틴과 태스크 (0) | 2023.09.11 |
| Python Multi Thread 파이썬 멀티 스레드 (0) | 2023.09.10 |
| [Pygame] Cursor 파이게임 커서 (0) | 2023.09.10 |
| [Pygame] Joystick 파이게임 조이스틱 (0) | 2023.09.06 |