[VB Decompiler] Basic Usage 비주얼 베이직 디컴파일러 기본 사용법
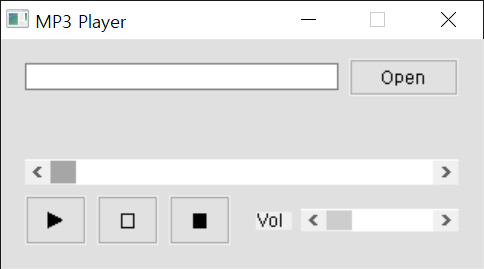
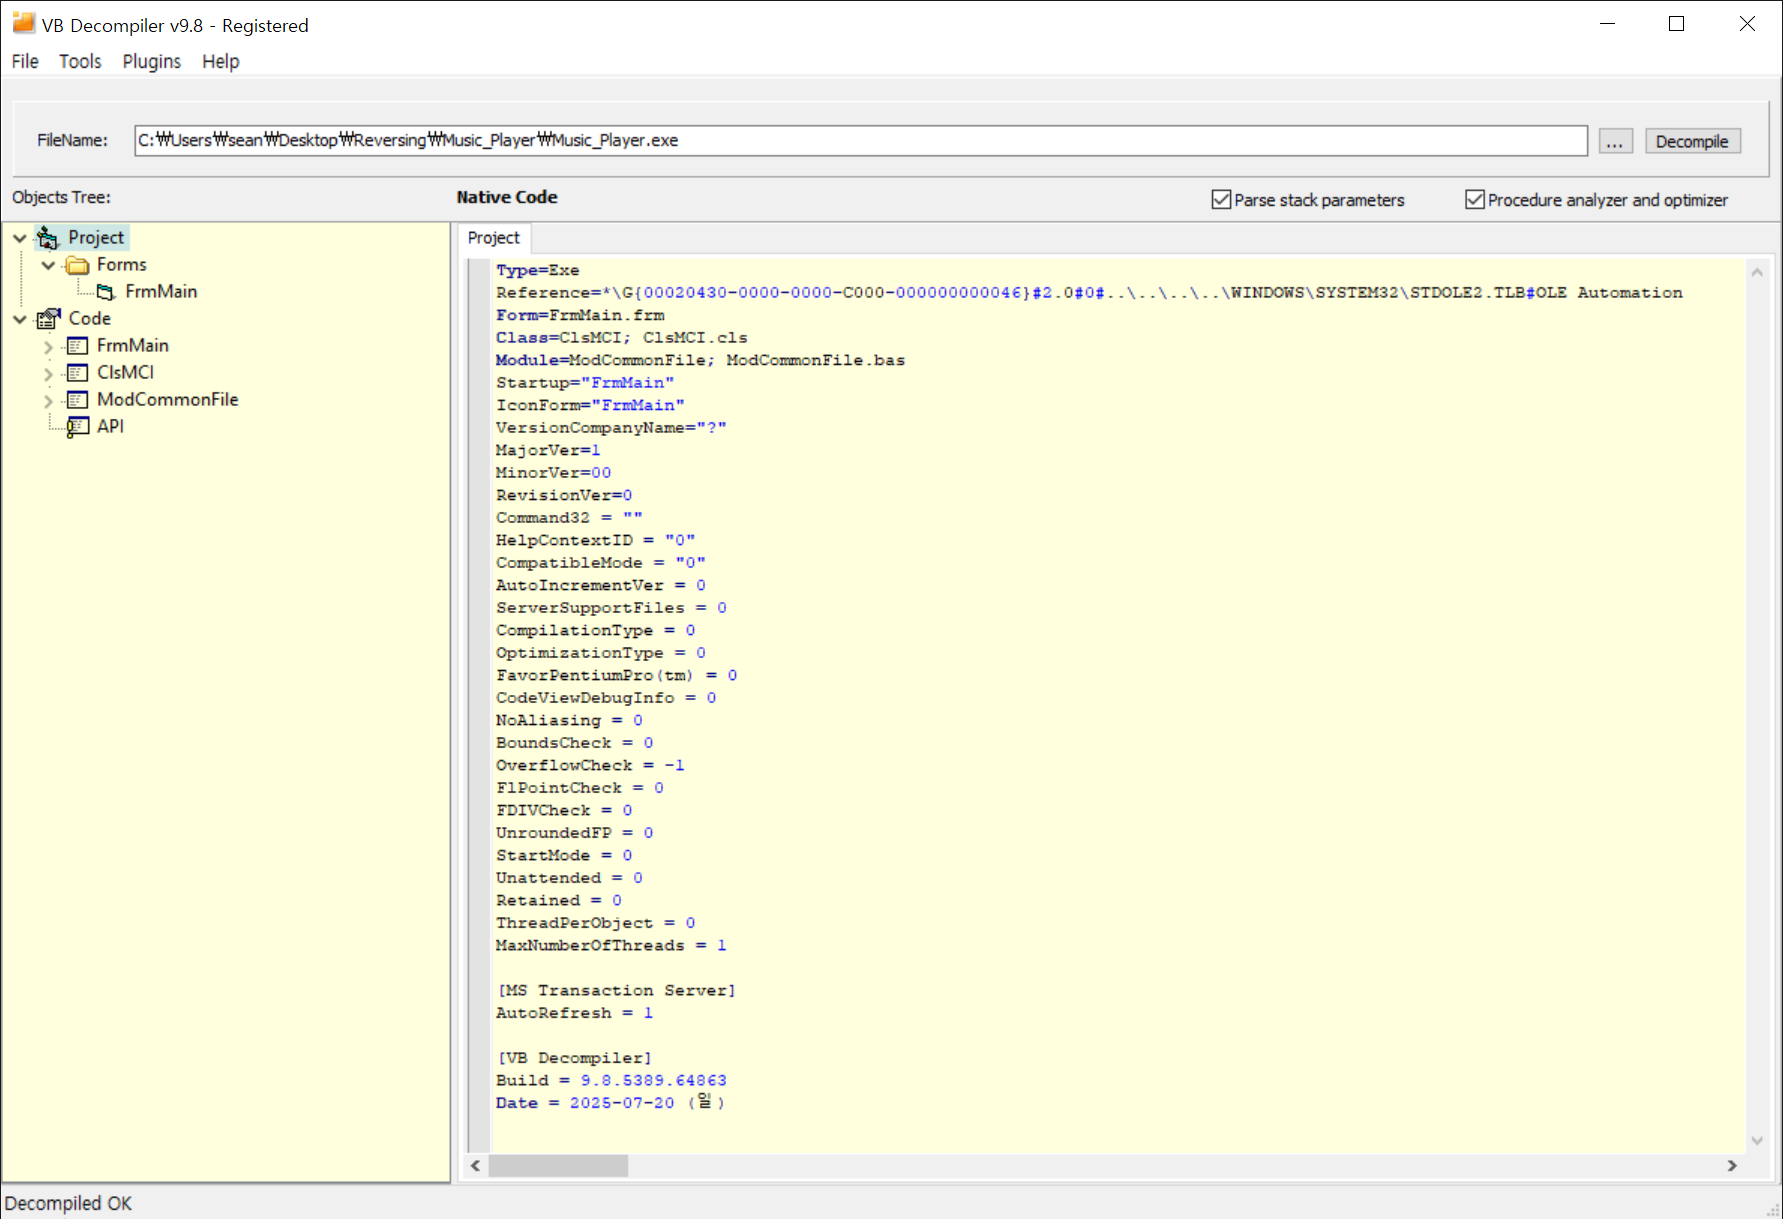
Reverse Engineering 2025. 7. 20. 17:33 |간단한 비주얼 베이직 프로그램으로 VB Decompiler 사용법을 익혀보자.


예를 들어 STOP 버튼은 Caption으로 '■' 문자를 사용하고 (1680, 1560, 615, 495)에 위치하며 이벤트 처리 함수는 CMD_STOP이다.


간단한 비주얼 베이직 프로그램으로 VB Decompiler 사용법을 익혀보자.


예를 들어 STOP 버튼은 Caption으로 '■' 문자를 사용하고 (1680, 1560, 615, 495)에 위치하며 이벤트 처리 함수는 CMD_STOP이다.


Pygame으로 게임을 개발하기 위한 기본 코드를 작성해 보자.
|
1
2
3
4
5
6
7
8
9
10
11
12
13
14
15
16
17
18
19
20
21
22
23
24
25
26
27
28
29
30
31
32
33
34
35
36
37
38
39
|
# Example file showing a basic pygame "game loop"
# pygame 기본 셋업
import os
os.environ['PYGAME_HIDE_SUPPORT_PROMPT'] = '1'
# pygame 실행시 표시되는 메세지를 보이지 않게 한다.
# pygame을 import 하기 전에 설정해야 한다.
import pygame
# pygame setup
pygame.init()
pygame.display.set_caption("Super fun game development")
# 게임창 제목 표시
screen = pygame.display.set_mode((640, 480))
# 게임창 크기를 640X480으로 설정.
clock = pygame.time.Clock()
running = True
while running:
# poll for events
# pygame.QUIT event means the user clicked X to close your window
for event in pygame.event.get():
if event.type == pygame.QUIT:
running = False
elif event.type == pygame.KEYDOWN and event.key == pygame.K_ESCAPE:
running = False
# fill the screen with a color to wipe away anything from last frame
screen.fill("black")
# RENDER YOUR GAME HERE
pygame.draw.circle(screen, "gray", screen.get_rect().center, 100)
# 스크린 중앙에 회색원을 하나 그린다.
# flip() the display to put your work on screen
pygame.display.flip()
clock.tick(60) # limits FPS to 60
pygame.quit()
|


| [Pygame] Loading Sound 파이게임 사운드 로드하고 출력하기 (0) | 2023.09.02 |
|---|---|
| [Pygame] Loading Image 파이게임 이미지 로드하고 출력하기 (0) | 2023.09.02 |
| Speech to Text - Speech Recognition (0) | 2023.05.01 |
| Text To Speech - gTTS (0) | 2023.04.30 |
| MySQL(MariaDB) Connector (0) | 2022.05.05 |
AOB Injection 템플릿으로 치트 엔진 오토 어셈블러의 기본을 알아보자.

|
1
2
3
4
5
6
7
8
9
10
11
12
13
14
15
16
17
18
19
20
21
22
23
24
25
26
27
28
29
30
31
32
33
34
35
36
37
38
39
40
41
42
43
44
45
46
47
48
49
50
51
52
53
54
55
56
57
58
59
60
61
62
63
|
{ Game : Tutorial-i386.exe
Version:
Date : 2023-01-02
Author : sean
This script does blah blah blah
}
[ENABLE]
aobscanmodule(INJECT,Tutorial-i386.exe,29 83 B0 04 00 00) // should be unique
alloc(newmem,$1000)
label(code)
label(return)
newmem:
code:
sub [ebx+000004B0],eax
jmp return
INJECT:
jmp newmem
nop
return:
registersymbol(INJECT)
[DISABLE]
INJECT:
db 29 83 B0 04 00 00
unregistersymbol(INJECT)
dealloc(newmem)
{
// ORIGINAL CODE - INJECTION POINT: Tutorial-i386.exe+25AEF
Tutorial-i386.exe+25AC9: 8D 55 DC - lea edx,[ebp-24]
Tutorial-i386.exe+25ACC: 8D 4D F4 - lea ecx,[ebp-0C]
Tutorial-i386.exe+25ACF: E8 0C 7D FE FF - call Tutorial-i386.exe+D7E0
Tutorial-i386.exe+25AD4: E8 B7 E3 FD FF - call Tutorial-i386.exe+3E90
Tutorial-i386.exe+25AD9: 50 - push eax
Tutorial-i386.exe+25ADA: 85 C0 - test eax,eax
Tutorial-i386.exe+25ADC: 0F 85 CE 00 00 00 - jne Tutorial-i386.exe+25BB0
Tutorial-i386.exe+25AE2: B8 05 00 00 00 - mov eax,00000005
Tutorial-i386.exe+25AE7: E8 44 93 FE FF - call Tutorial-i386.exe+EE30
Tutorial-i386.exe+25AEC: 83 C0 01 - add eax,01
// ---------- INJECTING HERE ----------
Tutorial-i386.exe+25AEF: 29 83 B0 04 00 00 - sub [ebx+000004B0],eax
// ---------- DONE INJECTING ----------
Tutorial-i386.exe+25AF5: 8D 45 D4 - lea eax,[ebp-2C]
Tutorial-i386.exe+25AF8: E8 D3 DE FD FF - call Tutorial-i386.exe+39D0
Tutorial-i386.exe+25AFD: 8B 83 B0 04 00 00 - mov eax,[ebx+000004B0]
Tutorial-i386.exe+25B03: 68 FF 00 00 00 - push 000000FF
Tutorial-i386.exe+25B08: 8D 8D D4 FE FF FF - lea ecx,[ebp-0000012C]
Tutorial-i386.exe+25B0E: BA FF FF FF FF - mov edx,FFFFFFFF
Tutorial-i386.exe+25B13: E8 E8 F1 FD FF - call Tutorial-i386.exe+4D00
Tutorial-i386.exe+25B18: 8D 4D D4 - lea ecx,[ebp-2C]
Tutorial-i386.exe+25B1B: 66 31 D2 - xor dx,dx
Tutorial-i386.exe+25B1E: 8D 85 D4 FE FF FF - lea eax,[ebp-0000012C]
}
|
{}와 //의 내용은 주석이므로 설명하지 않는다.
|
1
2
3
4
5
|
//// -------- Main Section --------
[ENABLE]
//// -------- Enable Section --------
[DISABLE]
//// -------- Disable Section --------
|
전체 내용은 위와 같이 [ENABLE]과 [DISABLE]을 기준으로 Main, Enable, Disable 섹션으로 나눌 수 있다. Main 섹션은 항상 실행된다. Enable 섹션은 스크립트를 실행하면(Cheat Table Address List에서 Active 체크 박스를 클릭해서 선택하면) 실행된다. Disable 섹션은 스크립트를 정지하면(Active 체크 박스 선택 해제하면) 실행된다.
|
1
2
3
4
5
6
7
8
9
10
11
|
aobscanmodule(INJECT,Tutorial-i386.exe,29 83 B0 04 00 00)
alloc(newmem,$1000)
dealloc(newmem)
registersymbol(INJECT)
unregistersymbol(INJECT)
label(code)
|
템플릿에 사용된 명령어들을 하나씩 살펴보자.
aobscanmodule(INJECT,Tutorial-i386.exe,29 83 B0 04 00 00)
aobScanModule(SymbolName, ModuleName, AOBString)
- Scans the memory used by the module ModuleName for a specific byte pattern defined by AOBString and sets the resulting address to the symbol SymbolName.
지정된 모듈(Tutorial-i386.exe)에서 특정 바이트 패턴(29 83 B0 04 00 00)이 있는 메모리 영역을 찾는다. 만약 찾으면 그 주소를 심볼(INJECT)로 세팅한다. 3개의 캐릭터를 와일드카드로 사용할 수 있다. 'x', '?', '*'
예)
5x 48 8D 6x 24 E0
5? 48 8D 6? 24 E0
5* 48 8D 6* 24 E0
xx 48 8D xx 24 E0
?? 48 8D ?? 24 E0
** 48 8D ** 24 E0
x 48 8D x 24 E0
? 48 8D ? 24 E0
* 48 8D * 24 E0
alloc(newmem,$1000)
alloc(SymbolName, Size, AllocateNearThisAddress OPTIONAL)
- Allocates a memory block of Size bytes and defines the SymbolName in the script, pointing to the beginning of the allocated memory block.
지정한 사이즈(1000)의 메모리 블럭을 할당하고 시작 주소를 심볼(newmem)로 정의한다. ($1000은 16진수 1000을 의미한다)
dealloc(newmem)
dealloc(SymbolName)
- Deallocates a block of memory allocated with alloc.
alloc()으로 할당된 메모리 블럭(newmem)을 해제한다.
registersymbol(INJECT)
registerSymbol(SymbolName)
- Adds a symbol to the user-defined symbol list so cheat tables and the memory browser can use that name instead of an address.
심볼(INJECT)을 사용자 정의 심볼 리스트에 추가한다. 추가된 심볼은 치트 테이블과 메모리 브라우저에서 주소 대신 사용할 수 있다.
unregistersymbol(INJECT)
unregisterSymbol(SymbolName)
- Removes a symbol from the user-defined symbol list.
사용자 정의 심볼 리스트에서 심볼(INJECT)을 제거한다.
label(code)
label(LabelName)
- Enables the word 'LabelName' to be used as a symbol.
지정된 단어(code)가 심볼로 사용될 수 있게한다.
※ 참고 1
aobScan(SymbolName, AOBString)
- Scans all the memory for a specific byte pattern defined by AOBString and sets the resulting address to the symbol SymbolName.
메모리에서 특정 바이트 패턴(AOBString)을 찾고 그 주소를 심볼(SymbolName)로 지정한다. 3개의 캐릭터를 와일드카드로 사용할 수 있다. 'x', '?', '*'
예)
5x 48 8D 6x 24 E0
5? 48 8D 6? 24 E0
5* 48 8D 6* 24 E0
xx 48 8D xx 24 E0
?? 48 8D ?? 24 E0
** 48 8D ** 24 E0
x 48 8D x 24 E0
? 48 8D ? 24 E0
* 48 8D * 24 E0
assert(Address, ArrayOfBytes)
- Will check the memory address for the given bytes. If the address's memory is not what is defined by the array of bytes given, the auto assemble script will not execute.
지정된 Address에 ArrayOfBytes가 있는지 확인한다. 만약 없다면 auto assemle script는 작동하지 않는다.
ex) assert(Game.exe+123ABC, 01 02 03 0A 0B 0C)
globalAlloc(Symbol, Size, AllocateNearThisAddress OPTIONAL)
- Allocates a certain amount of memory and registers the specified name. Using GlobalAlloc in other scripts will then not allocate the memory again, but reuse the already existing memory. (Or allocate it anyhow if found it wasn't allocated yet) If 'AllocateNearThisAddress' is specified CE will try to allocate the memory near that address. This is useful for 64-bit targets where the jump distance could be bigger than 2GB otherwise.
지정한 사이즈의 메모리를 할당하고 할당된 메모리 주소를 이름(Symbol)으로 등록한다. 등록된 메모리 이름은 다른 스크립트나 메모리 뷰어에서 사용할 수 있다.
예)
globalAlloc(SomeSymbol, 0x4)
globalAlloc(SomeSymbol, 0x4, SomeAOBSymbol)
globalAlloc(SomeSymbol, 0x1000, Tutorial-x86_64.exe)
define(Name, Value)
- Creates a token with the specified name that will be replaced with the text of its value.
Note: Uses basic replacement before script is ran, whitespace is not stripped.
스크립트가 실행되기 전 교체될 텍스트 토큰을 생성한다.
ex 1)
아래 코드가..
define(address, 00 12 3A BC)
...
address:
db 90 90 90
이렇게 바뀐다.
00 12 3A BC:
db 90 90 90
ex 2)
아래 코드가..
define(fullValue,(float)100.0)
...
mov eax,fullValue
이렇게 바뀐다.
mov eax,(float)100.0
※ 참고 2

|
1
2
3
4
5
6
7
8
9
10
11
12
13
14
15
16
17
18
19
20
21
22
23
24
25
26
27
28
29
30
31
32
33
34
35
36
|
[ENABLE]
aobscanmodule(INJECT,Tutorial-i386.exe,29 83 B0 04 00 00) // should be unique
// 코드를 Enable하면 우선 Tutorial-i386.exe 모듈 메모리 영역에서 29 83 B0 04 00 00 패턴을
// 찾고 그 주소를 INJECT라는 심볼로 세팅한다.
alloc(newmem,$1000)
// 4096바이트($1000) 크기의 메모리 블럭을 할당하고 그 시작 주소를 newmem으로 정의한다.
label(code)
label(return)
// code와 return 이라는 심볼을 정의한다.
newmem:
// 위에서 할당된 newmem 영역에 삽입할 코드를 작성한다.
code:
sub [ebx+000004B0],eax
jmp return
// 원래 있던 어셈블리 코드가 그대로 따라왔다. 위 newmem 에서 작성하는 코드 뒤에 바로 붙는다.
// 마지막엔 return 주소로 점프한다.
INJECT:
jmp newmem
nop
// INJECT 심볼 위치에 위 코드가 overwrite된다. 원래 있던 어셈블리 명령어 sub [ebx+000004B0],eax
// 의 기계어는 29 83 B0 04 00 00 이고 jmp newmem의 기계어는 E9 0C A5 CE FF이기 때문에 1바이트가
// 부족해 nop 명령어가 추가 되었다.
return:
// INJECT 심볼의 내용이 모두 끝나는 위치 바로 아래(Tutorial-i386.exe+25AF5)가 return 심볼이
// 가리키는 주소가 된다.
registersymbol(INJECT)
// INJECT를 사용자 정의 심볼 리스트에 추가한다. 위 화면에서 보면 Tutorial-i386.exe+XXXXX 같은
// 실제 주소가 아닌 INJECT라는 문자로 표시되는걸 확인할 수 있다.
|


|
1
2
3
4
5
6
7
8
9
10
11
12
13
14
|
[DISABLE]
INJECT:
db 29 83 B0 04 00 00
// INJECT 심볼 위치에 원래 있던 위 기계어를 그대로 overwrite 한다.
// 이 기계어의 의미는 sub [ebx+000004B0],eax 이다. 기계어로 overwrite하지
// 않고 어셈블리 명령어를 사용하면 컴퓨터 환경(16비트, 32비트등)에 따라 다른
// 기계어가 적용되는 경우가 발생하기도 한다.
unregistersymbol(INJECT)
// 사용자 정의 심볼 리스트에서 INJECT 심볼을 제거한다. 위 화면에서 주소 대신
// 쓰였던 INJECT 문자가 사라지고 원래 주소로 복구된것을 확인할 수 있다.
dealloc(newmem)
// alloc()으로 할당한 메모리 블럭을 해제한다.
|
| Cheat Engine Address - 치트 엔진 주소 표시 (0) | 2023.01.06 |
|---|---|
| [x32dbg/x64dbg] PE Relocation - PE 재배치 표시 (0) | 2023.01.06 |
| Cheat Engine AOB Injection with DosBox - 치트 엔진 코드 인젝션 도스박스 (0) | 2023.01.01 |
| Cheat Engine Code Injection Cheat Table Framework code bug - 치트 엔진 코드 인젝션 버그 (0) | 2022.12.30 |
| Cheat Engine으로 Multilevel pointers 찾기 (0) | 2019.03.20 |