반응형

OpenGL 화면에 Pygame 이미지(스프라이트)를 렌더링 해 보자.


1
2
3
4
5
6
7
8
9
10
11
12
13
14
15
16
17
18
19
20
21
22
23
24
25
26
27
28
29
30
31
32
33
34
35
36
37
38
39
40
41
42
43
44
45
46
47
48
49
50
51
52
53
54
55
import pygame
from pygame.locals import *
 
from OpenGL.GL import *
from OpenGL.GLU import *
 
verticies = ((1-1-1), (11-1), (-11-1), (-1-1-1),
             (1-11), (111), (-1-11), (-111))
edges = ((0,1), (0,3), (0,4), (2,1), (2,3), (2,7), (6,3), (6,4),
         (6,7), (5,1), (5,4), (5,7))
 
def drawCube():
    glBegin(GL_LINES)
    for edge in edges:
        for vertex in edge:
            glVertex3fv(verticies[vertex])
    glEnd()
 
def drawImage(x, y):
    image = pygame.image.load("player.png").convert()
    image.set_colorkey(image.get_at((00)))
    image = pygame.transform.scale(image, (image.get_width()*1.5,
                                           image.get_height()*1.5))
    imageData = pygame.image.tostring(image, "RGBA"True)
    glWindowPos2d(x-image.get_width()/2, y-image.get_height()/2)
    glDrawPixels(image.get_width(), image.get_height(), GL_RGBA,
                 GL_UNSIGNED_BYTE, imageData)
 
pygame.init()
clock = pygame.time.Clock()
display = (640480)
pygame.display.set_mode(display, DOUBLEBUF | OPENGL)
 
glEnable(GL_BLEND)
glBlendFunc(GL_SRC_ALPHA, GL_ONE_MINUS_SRC_ALPHA)
 
gluPerspective(45, (display[0]/display[1]), 0.150.0)
glTranslatef(0.00.0-5)
 
run = True
while run:    
    for event in pygame.event.get():
        if event.type == pygame.QUIT:
            run = False
 
    glRotatef(1311)
    glClear(GL_COLOR_BUFFER_BIT|GL_DEPTH_BUFFER_BIT)
    drawCube()
    drawImage(display[0]/2, display[1]/2)
    
    pygame.display.flip()
    clock.tick(60)
 
pygame.quit()
exit()


반응형
Posted by J-sean
:
반응형

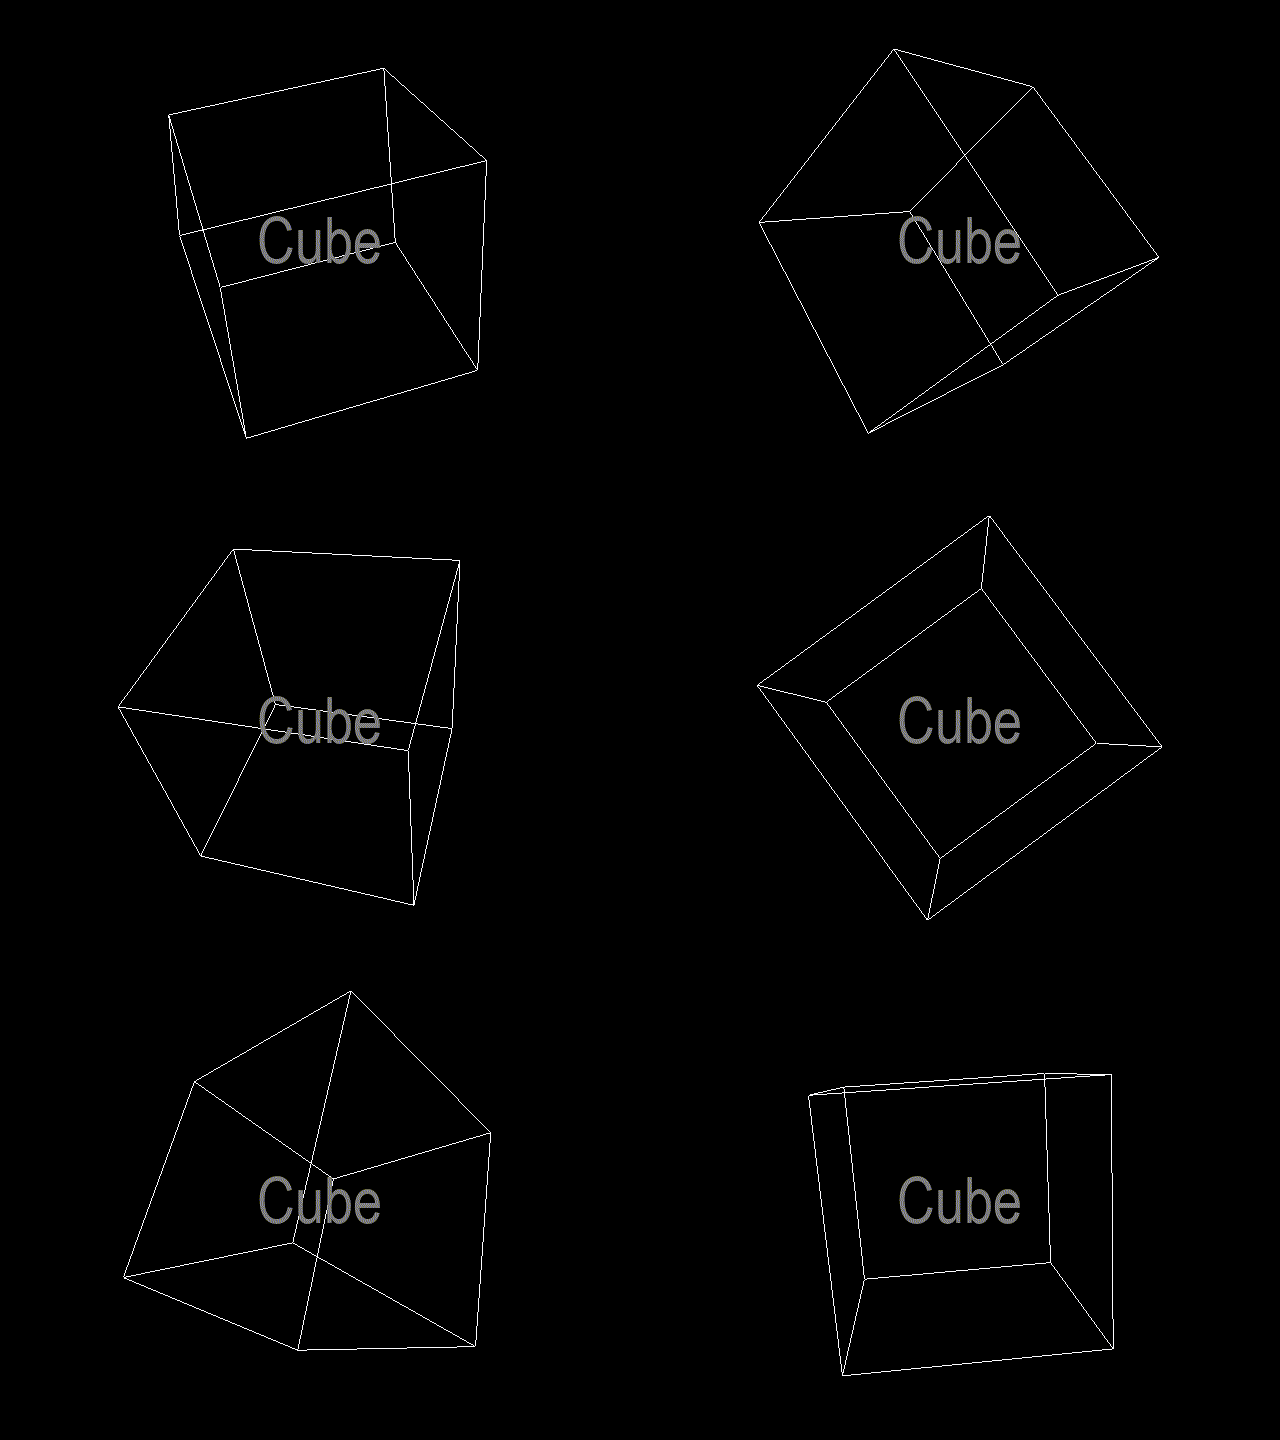
OpenGL 화면에 Pygame 폰트를 렌더링 해 보자.


1
2
3
4
5
6
7
8
9
10
11
12
13
14
15
16
17
18
19
20
21
22
23
24
25
26
27
28
29
30
31
32
33
34
35
36
37
38
39
40
41
42
43
44
45
46
47
48
49
50
import pygame
from pygame.locals import *
 
from OpenGL.GL import *
from OpenGL.GLU import *
 
verticies = ((1-1-1), (11-1), (-11-1), (-1-1-1),
             (1-11), (111), (-1-11), (-111))
edges = ((0,1), (0,3), (0,4), (2,1), (2,3), (2,7), (6,3), (6,4),
         (6,7), (5,1), (5,4), (5,7))
 
def drawCube():
    glBegin(GL_LINES)
    for edge in edges:
        for vertex in edge:
            glVertex3fv(verticies[vertex])
    glEnd()
 
def drawText(x, y, text):
    font = pygame.font.SysFont('arial'64)
    textSurface = font.render(text, True, (125125125255), (2552550255))
    textData = pygame.image.tostring(textSurface, "RGBA"True)
    glWindowPos2d(x-textSurface.get_width()/2, y-textSurface.get_height()/2)
    glDrawPixels(textSurface.get_width(), textSurface.get_height(), GL_RGBA,
                 GL_UNSIGNED_BYTE, textData)
 
pygame.init()
clock = pygame.time.Clock()
display = (640480)
pygame.display.set_mode(display, DOUBLEBUF | OPENGL)
 
gluPerspective(45, (display[0]/display[1]), 0.150.0)
glTranslatef(0.00.0-5)
 
run = True
while run:    
    for event in pygame.event.get():
        if event.type == pygame.QUIT:
            run = False
 
    glRotatef(1311)
    glClear(GL_COLOR_BUFFER_BIT|GL_DEPTH_BUFFER_BIT)
    drawCube()
    drawText(display[0]/2, display[1]/2"Cube")
    
    pygame.display.flip()
    clock.tick(60)
 
pygame.quit()
exit()


이번엔 폰트의 배경이 표시되지 않도록 해 보자.


1
2
3
4
5
6
7
8
9
10
11
12
13
14
15
16
17
18
19
20
21
22
23
24
25
26
27
28
29
30
31
32
33
34
35
36
37
38
39
40
41
42
43
44
45
46
47
48
49
50
51
52
53
import pygame
from pygame.locals import *
 
from OpenGL.GL import *
from OpenGL.GLU import *
 
verticies = ((1-1-1), (11-1), (-11-1), (-1-1-1),
             (1-11), (111), (-1-11), (-111))
edges = ((0,1), (0,3), (0,4), (2,1), (2,3), (2,7), (6,3), (6,4),
         (6,7), (5,1), (5,4), (5,7))
 
def drawCube():
    glBegin(GL_LINES)
    for edge in edges:
        for vertex in edge:
            glVertex3fv(verticies[vertex])
    glEnd()
 
def drawText(x, y, text):
    font = pygame.font.SysFont('arial'64)
    textSurface = font.render(text, True, (125125125255)).convert_alpha()
    textData = pygame.image.tostring(textSurface, "RGBA"True)
    glWindowPos2d(x-textSurface.get_width()/2, y-textSurface.get_height()/2)
    glDrawPixels(textSurface.get_width(), textSurface.get_height(), GL_RGBA,
                 GL_UNSIGNED_BYTE, textData)
 
pygame.init()
clock = pygame.time.Clock()
display = (640480)
pygame.display.set_mode(display, DOUBLEBUF | OPENGL)
 
glEnable(GL_BLEND)
glBlendFunc(GL_SRC_ALPHA, GL_ONE_MINUS_SRC_ALPHA)
 
gluPerspective(45, (display[0]/display[1]), 0.150.0)
glTranslatef(0.00.0-5)
 
run = True
while run:    
    for event in pygame.event.get():
        if event.type == pygame.QUIT:
            run = False
 
    glRotatef(1311)
    glClear(GL_COLOR_BUFFER_BIT|GL_DEPTH_BUFFER_BIT)
    drawCube()
    drawText(display[0]/2, display[1]/2"Cube")
    
    pygame.display.flip()
    clock.tick(60)
 
pygame.quit()
exit()


반응형
Posted by J-sean
:

[Pygame] PyOpenGL 파이게임

Python 2023. 9. 11. 23:09 |
반응형

파이게임과 PyOpenGL을 연동해 보자.


1
2
3
4
5
6
7
8
9
10
11
12
13
14
15
16
17
18
19
20
21
22
23
24
25
26
27
28
29
30
31
32
33
34
35
36
37
38
39
40
41
42
43
44
45
46
47
48
49
50
import pygame
from pygame.locals import *
 
from OpenGL.GL import *
from OpenGL.GLU import *
 
verticies = (
    (1-1-1), (11-1),
    (-11-1), (-1-1-1),
    (1-11), (111),
    (-1-11), (-111) )
 
edges = (
    (0,1), (0,3), (0,4),
    (2,1), (2,3), (2,7),
    (6,3), (6,4), (6,7),
    (5,1), (5,4), (5,7) )
 
def Cube():
    glBegin(GL_LINES)
    for edge in edges:
        for vertex in edge:
            glVertex3fv(verticies[vertex])
    glEnd()
 
def main():
    pygame.init()
    display = (640,480)
    pygame.display.set_mode(display, DOUBLEBUF|OPENGL)
    clock = pygame.time.Clock()
 
    gluPerspective(45, (display[0]/display[1]), 0.150.0)
 
    glTranslatef(0.00.0-5)
 
    while True:
        for event in pygame.event.get():
            if event.type == pygame.QUIT:
                pygame.quit()
                quit()
 
        glRotatef(1312)
        glClear(GL_COLOR_BUFFER_BIT|GL_DEPTH_BUFFER_BIT)
        Cube()
 
        pygame.display.flip()
        clock.tick(30)
 
if __name__ == '__main__':
   main()


※ 참고

PyOpenGL Tutorial1

PyOpenGL Tutorial2

OpenGL 강좌1

OpenGL 강좌2


반응형
Posted by J-sean
:

Python PyOpenGL

Python 2023. 9. 11. 22:59 |
반응형

파이썬에서 OpenGL을 사용해 보자.


1
2
3
4
5
6
7
8
9
10
11
12
13
14
15
16
17
18
19
20
21
22
23
24
25
from OpenGL.GL import *
from OpenGL.GLU import *
from OpenGL.GLUT import *
 
def Display():
    glClear(GL_COLOR_BUFFER_BIT)
 
    glBegin(GL_QUADS)
    glVertex2f(0.50.5)
    glVertex2f(-0.50.5)
    glVertex2f(-0.5-0.5)
    glVertex2f(0.5-0.5)
    glEnd()
    
    glFlush()
    
if __name__ == "__main__":
    glutInit()
 
    #glutInitDisplayMode(GLUT_RGB)
    #glutInitWindowSize(640, 480)
    #glutInitWindowPosition(400, 300)
    glutCreateWindow("OpenGL")
    glutDisplayFunc(Display)
    glutMainLoop()


윈도우에 사각형이 표시된다.


pip install PyOpenGL
pip install PyOpenGL_accelerate

위 명령으로 공식 PyOpenGL, PyOpenGL_accelerate를 설치하면 OpenGL.GLUT에 문제가 있는 경우가 있다. 예를 들어 glutinit()를 실행하면 아래와 같은 에러가 발생한다.

NullFunctionError: Attempt to call an undefined function glutInit, check for bool(glutInit) before calling.

만약 에러가 발생한다면 설치한 패키지를 삭제하고 아래 링크에서 받아 다시 설치한다.

Unofficial Windows Binaries for Python Extension Packages


PyOpenGL_accelerate-3.1.6-cp311-cp311-win_amd64.whl
0.34MB
PyOpenGL-3.1.6-cp311-cp311-win_amd64.whl
2.64MB


하지만 OpenGL.GLUT을 사용하지 않는다면 공식 패키지를 사용해도 상관 없다. Pygame을 사용해 보자.


1
2
3
4
5
6
7
8
9
10
11
12
13
14
15
16
17
18
19
20
21
22
23
24
25
26
27
28
29
30
31
32
33
34
35
36
37
38
39
import pygame
from pygame.locals import *
 
from OpenGL.GL import *
from OpenGL.GLU import *
 
def Display():
    glBegin(GL_QUADS)
    glVertex2f(0.50.5)
    glVertex2f(-0.50.5)
    glVertex2f(-0.5-0.5)
    glVertex2f(0.5-0.5)
    glEnd()
 
def main():
    pygame.init()
    display = (640,480)
    pygame.display.set_mode(display, DOUBLEBUF|OPENGL)
    clock = pygame.time.Clock()
 
    gluPerspective(45, (display[0]/display[1]), 0.150.0)
 
    glTranslatef(0.00.0-5)
 
    while True:
        for event in pygame.event.get():
            if event.type == pygame.QUIT:
                pygame.quit()
                quit()
 
        glClear(GL_COLOR_BUFFER_BIT|GL_DEPTH_BUFFER_BIT)
        glRotatef(1312)
        Display()
 
        pygame.display.flip()
        clock.tick(30)
 
if __name__ == '__main__':
   main()


※ 참고

OpenGL 강좌


반응형
Posted by J-sean
:
반응형

Each vertex of a polygon, separate triangle, or separate quadrilateral specified between a glBegin/glEnd pair is marked as the start of either a boundary or nonboundary edge. If the current edge flag is TRUE when the vertex is specified, the vertex is marked as the start of a boundary edge. If the current edge flag is FALSE, the vertex is marked as the start of a nonboundary edge.


OpenGL에서 선을 그릴때 다각형의 경계선인지 숨겨야할 내부선인지 결정 할 수 있다.


1
2
3
4
5
6
7
8
9
10
11
12
13
14
15
16
17
18
19
20
21
22
23
24
25
26
27
28
29
30
31
32
33
34
35
36
37
38
39
40
41
42
43
44
45
46
47
48
49
50
51
52
53
54
55
56
57
58
59
60
#include <gl/glut.h>
 
void DoDisplay();
 
int main(int argc, char** argv)
{
    glutInit(&argc, argv);
    glutCreateWindow("OpenGL");
    glPolygonMode(GL_FRONT_AND_BACK, GL_LINE);
    glutDisplayFunc(DoDisplay);
    glutMainLoop();
 
    return 0;
}
 
void DoDisplay()
 
{
    glClear(GL_COLOR_BUFFER_BIT);
 
    glPushMatrix();
 
    glTranslatef(-0.5f, 0.0f, 0.0f);
 
    // 첫 번째 선 Nonboundary 지정
    glBegin(GL_TRIANGLES);
    glEdgeFlag(GL_FALSE);   // 경계선 적용 여부를 선택할 선의 시작점 선언 전에 glEdgeFlag()를 호출.
    // Flags edges as either boundary or nonboundary.
    glVertex2f(0.0f, 0.2f);
    glEdgeFlag(GL_TRUE);
    glVertex2f(-0.2f, -0.2f);
    glVertex2f(0.2f, -0.2f);
    glEnd();
 
    glTranslatef(0.5f, 0.0f, 0.0f);
 
    // 두 번째 선 Nonboundary 지정
    glBegin(GL_TRIANGLES);
    glVertex2f(0.0f, 0.2f);
    glEdgeFlag(GL_FALSE);
    glVertex2f(-0.2f, -0.2f);
    glEdgeFlag(GL_TRUE);
    glVertex2f(0.2f, -0.2f);
    glEnd();
 
    glTranslatef(0.5f, 0.0f, 0.0f);
 
    // 세 번째 선 Nonboundary 지정
    glBegin(GL_TRIANGLES);
    glVertex2f(0.0f, 0.2f);
    glVertex2f(-0.2f, -0.2f);
    glEdgeFlag(GL_FALSE);
    glVertex2f(0.2f, -0.2f);
    glEdgeFlag(GL_TRUE);    
    glEnd();
 
    glPopMatrix();
 
    glFlush();
}


Run the program.


반응형
Posted by J-sean
:
반응형

It describes how to draw the simple solar system that is composed of the Sun, the Earth and the Moon.

OpenGL로 태양, 지구, 달로 구성된 간단한 태양계 그리기


1 day = 10 frames

1 month = 30 days (300 frames)

1 year = 12 months (3,600 frames)


1
2
3
4
5
6
7
8
9
10
11
12
13
14
15
16
17
18
19
20
21
22
23
24
25
26
27
28
29
30
31
32
33
34
35
36
37
38
39
40
41
42
43
44
45
46
47
48
49
50
51
52
53
54
55
56
57
58
59
60
61
62
63
64
65
66
67
68
69
70
71
72
73
74
75
76
77
78
79
80
81
82
83
84
85
86
87
88
89
90
91
92
93
94
95
96
97
98
99
100
101
102
103
104
#include <gl/glut.h>
#include <iostream>
 
GLfloat EarthRotation = 0.0f;
GLfloat MoonRevolution = 0.0f;
GLfloat EarthRevolution = 0.0f;
 
GLfloat FramePerYear = 3600.0f;
GLint delay = 10;
 
GLint Year = 2020;
GLint Month = 1;
GLint Day = 1;
 
void MyDisplay();
void MyTimer(int value);
 
int main(int argc, char** argv)
{
    glutInit(&argc, argv);
    glutInitDisplayMode(GLUT_DOUBLE | GLUT_RGB);
    glutCreateWindow("OpenGL Solar System");
 
    gluLookAt(
        0.01.00.0,    // Eye
        0.00.00.0,    // Center
        1.00.01.0    // Up
    );
    // gluLookAt creates a viewing matrix derived from an eye point, a reference point indicating
    // the center of the scene, and an UP vector.
 
    glutTimerFunc(delay, MyTimer, 1);
    glutDisplayFunc(MyDisplay);
    
    glutMainLoop();
 
    return 0;
}
 
void MyDisplay()
{
    glClear(GL_COLOR_BUFFER_BIT);
    
    // The Sun
    glutWireSphere(0.44020);
    
    // The Earth
    glPushMatrix();
    glRotatef(EarthRevolution, 0.0f1.0f0.0f); // Earth's revolution
    glTranslatef(0.7f0.0f0.0f);
    
    glRotatef(-EarthRevolution, 0.0f1.0f0.0f);    // Earth의 Revolution에 의한 Earth의 회전 삭제.
    glRotatef(EarthRotation, 0.0f1.0f0.0f);    // Earth's rotation
    glutWireSphere(0.12010);
 
        // The Moon
        glPushMatrix();
        glRotatef(-EarthRotation, 0.0f1.0f0.0f);    // Earth의 Rotation에 의한 Moon의 회전 삭제.
        glRotatef(MoonRevolution, 0.0f1.0f0.0f); // Moon's revolution
        glTranslatef(0.2f0.0f0.0f);
        glutWireSphere(0.03105);
        glPopMatrix();
 
    glPopMatrix();
    
    glutSwapBuffers();
}
 
void MyTimer(int value)
{
    EarthRotation += (360.0f * 360.0f/ FramePerYear;    // 지구 자전: (360도 * 360일) / FramePerYear(3600) = 36도
    if (EarthRotation >= 360.0f) {
        EarthRotation = 0.0f;
 
        std::cout << Year << "-" << Month << "-" << Day << std::endl;
        // 날짜 출력 코드가 계산 코드(Day++, Month++, Year++)보다 먼저 처리 되야 제대로 표시 된다.
 
        Day++;
        if (Day > 30)
            Day = 1;
    }
 
    MoonRevolution += (360.0f * 12.0f/ FramePerYear;
    // 달의 공전 주기는 약27일 이지만 30일(1달)로 설정.
    // Rotation은 Revolution 과 같은 주기로 따로 계산할 필요 없음.
    // Revolution 처리 만으로 항상 달의 같은면이 지구를 바라 봄.
    if (MoonRevolution >= 360.0f) {
        MoonRevolution = 0.0f;
 
        Month++;
        if (Month > 12)
            Month = 1;
    }
 
    EarthRevolution += 360.0f / FramePerYear;    // 1 프레임에 0.1도 회전. 3600 프레임이 1년.
    if (EarthRevolution >= 360.0f) {
        EarthRevolution = 0.0f;
 
        Year++;
    }
    
    glutPostRedisplay();
    glutTimerFunc(delay, MyTimer, 1);
}


Run the program and see how it works.


반응형
Posted by J-sean
:

Rotation 회전

OpenGL 2019. 12. 13. 14:43 |
반응형

It describes how to rotate objects.

OpenGL에서 오브젝트 회전 하기.


1
2
3
4
5
6
7
8
9
10
11
12
13
14
15
16
17
18
19
20
21
22
23
24
25
26
27
28
29
30
31
32
33
34
35
36
37
38
39
40
41
42
43
44
45
46
47
48
49
50
51
52
53
54
55
56
57
#include <gl/glut.h>
 
GLfloat angle = 0.0f;
 
void MyDisplay();
void MyTimer(int value);
 
int main(int argc, char** argv)
{
    glutInit(&argc, argv);
    glutInitDisplayMode(GLUT_DOUBLE | GLUT_RGB);
    glutCreateWindow("OpenGL Rotation");
 
    glutDisplayFunc(MyDisplay);
    glutTimerFunc(20, MyTimer, 1);
 
    glutMainLoop();
 
    return 0;
}
 
void MyDisplay()
{
    glClear(GL_COLOR_BUFFER_BIT);
    
    // 1st teapot, right, CCW
    glPushMatrix();
    glRotatef(45.0f1.0f0.0f0.0f);    // 45 degrees rotation around X-Axis to see the direction of the rotation.
    glTranslatef(0.5f0.0f0.0f);        // Changing the order of calling this Translate()..
    glRotatef(angle, 0.0f1.0f0.0f);    // and this Rotate() will affect how it spins. (rotation and revolution)
    glutWireTeapot(0.3);
    glPopMatrix();
    
    // 2nd teapot, left, CW
    glPushMatrix();
    // glPushMatrix pushes the current matrix stack down by one, duplicating the current matrix. That is, after a
    // glPushMatrix call, the matrix on top of the stack is identical to the one below it.
    glRotatef(45.0f1.0f0.0f0.0f);
    glTranslatef(-0.5f0.0f0.0f);
    glRotatef(-angle, 0.0f1.0f0.0f);
    glutWireTeapot(0.3);
    glPopMatrix();
    //glPopMatrix pops the current matrix stack, replacing the current matrix with the one below it on the stack.
 
    glutSwapBuffers();
}
 
void MyTimer(int value)
{
    angle += 1.0f;
    if (angle >= 360.0f) {
        angle = 0.0f;
    }
 
    glutPostRedisplay();
    glutTimerFunc(20, MyTimer, 1);
}


Run the program and see the directions of each rotation.


반응형
Posted by J-sean
:
반응형

It describes how to keep the aspect ratio.

OpenGL에서 종횡비를 유지하기 위해서는 Viewport와 Projection의 비율을 같게 해야 한다.


1
2
3
4
5
6
7
8
9
10
11
12
13
14
15
16
17
18
19
20
21
22
23
24
25
26
27
28
29
30
31
32
33
34
35
36
37
38
39
40
41
42
43
44
45
46
47
48
49
50
51
52
53
54
#include <gl/glut.h>
 
const int InitWidth = 300;
const int InitHeight = 300;
 
void MyDisplay();
void MyReshape(int NewWidth, int NewHeight);
 
int main(int argc, char** argv)
{
    glutInit(&argc, argv);
 
    glutInitDisplayMode(GLUT_RGB);
    glutInitWindowSize(InitWidth, InitHeight);
    glClearColor(0.0f0.0f0.0f0.0f);
    glutCreateWindow("OpenGL Aspect Ratio");
    
    glutReshapeFunc(MyReshape);
    // glutReshapeFunc sets the reshape callback for the current window.
    glutDisplayFunc(MyDisplay);
    
    glutMainLoop();
 
    return 0;
}
 
void MyDisplay() {
    glClear(GL_COLOR_BUFFER_BIT);
 
    glBegin(GL_TRIANGLES);
    glColor3f(0.0f0.0f1.0f);
    glVertex3f(0.0f0.5f0.0f);
    glColor3f(1.0f0.0f0.0f);
    glVertex3f(-0.5f-0.5f0.0f);
    glColor3f(0.0f1.0f0.0f);
    glVertex3f(0.5f-0.5f0.0f);
    glEnd();
 
    glFlush();
}
 
void MyReshape(int NewWidth, int NewHeight)
{
    glViewport(00, NewWidth, NewHeight);
    // glViewport specifies the affine transformation of x and y from normalized device coordinates to window coordinates.
 
    GLfloat WidthFactor = (GLfloat)NewWidth / (GLfloat)InitWidth;
    GLfloat HeightFactor = (GLfloat)NewHeight / (GLfloat)InitHeight;
    
    glMatrixMode(GL_PROJECTION);    // glMatrixMode sets the current matrix mode.
    glLoadIdentity();    // glLoadIdentity replaces the current matrix with the identity matrix.
    glOrtho(-1.0 * WidthFactor, 1.0 * WidthFactor, -1.0 * HeightFactor, 1.0 * HeightFactor, -1.01.0);
    // glOrtho describes a transformation that produces a parallel projection.
}


Run the program.


Resize the window.


Resize the window.


반응형
Posted by J-sean
: