반응형

Python Pillow 라이브러리를 이용해 PDF 변환기를 만들어 보자.


1
2
3
4
5
6
7
8
9
10
11
12
13
14
15
16
17
18
19
20
21
import os
from tkinter import filedialog
from PIL import Image
 
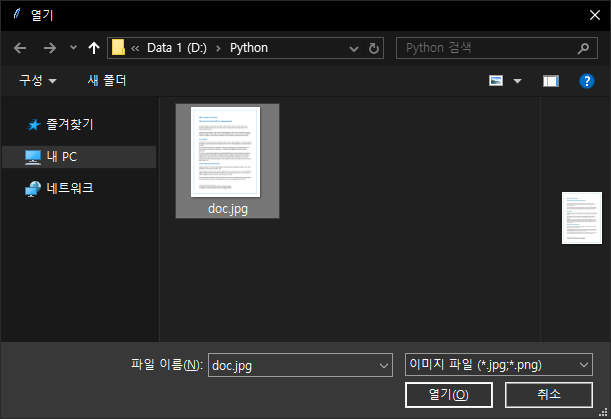
filename = filedialog.askopenfilename(
    filetypes = (("이미지 파일""*.jpg *.png"), ("모든 파일""*.*")),
    initialdir = os.getcwd())
# tkinter.filedialog.askopenfilename(**options)
# tkinter.filedialog.askopenfilenames(**options)
# The above two functions create an Open dialog and return the selected
# filename(s) that correspond to existing file(s).
 
newname = filename[0:-4]
ext = ".pdf"
 
try:
    with Image.open(filename) as pf:
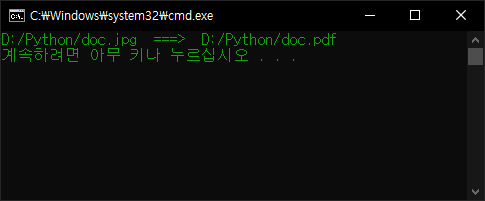
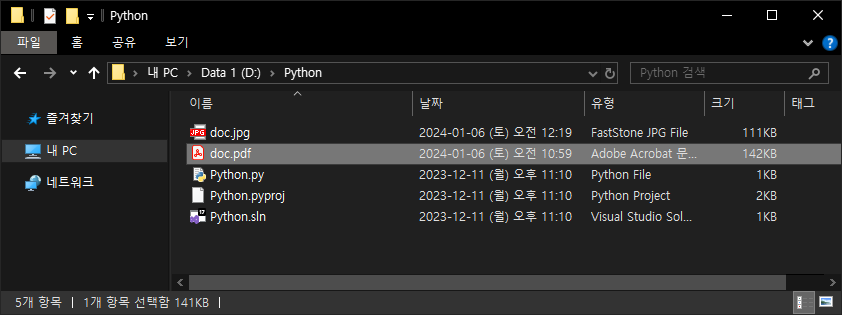
        pf.save(newname + ext)
        print(filename + "  ===>  " + newname + ext)
except:
    print("Error")


파이썬 코드를 작성하고 실행한다.


파일 선택 다이얼로그에서 원하는 이미지 파일을 선택한다.


변환에 문제가 없다면 결과 화면이 출력된다.


PDF 파일이 생성된다.


※ 참고

Tkinter Dialogs


반응형
Posted by J-sean
:
반응형

아래와 같은 도로 이미지에서 차선 부분만 감지 한다.


1
2
3
4
5
6
7
8
9
10
11
12
13
14
15
16
17
18
19
20
21
from PIL import Image
from PIL import ImageFilter
 
source = Image.open("road.jpg")
result = Image.new("RGB", source.size)
# Creates a new image with the given mode and size.
sx, sy = source.size
horizon = 550 # 550픽셀 아래에 도로가 있다고 가정.
 
for y in range(horizon, sy):
    for x in range(sx):
        if min(source.getpixel((x, y))) > 0xf0:
            result.putpixel((x, y), (0xff0xff0xff))
            # RGB값 중 최소값이 0xf0이상이면 흰색으로 변경
 
result = result.filter(ImageFilter.FIND_EDGES)
#result = result.filter(ImageFilter.BoxBlur(1))
# Filters this image using the given filter.
result.save("result.jpg")
# Saves this image under the given filename.
result.show()
cs


결과:

반응형
Posted by J-sean
:
반응형

'Pillow 이미지 서치(Image search) 1' 은 target과 source의 모든 픽셀이 정확히 일치하는 경우만 True로 판단 하기 때문에 PNG나 BMP같은 무손실 압축 그래픽 파일에만 적용 가능하다. JPEG같은 손실 압축 그래픽 파일은 target과 source의 오차를 감안해야 한다.


2018/11/30 - [Software/Python] - Pillow 이미지 서치(Image Search) 1

2019/07/08 - [Software/OpenCV] - Template Matching(Image Searching) - 부분 이미지 검색

2019/07/10 - [Software/OpenCV] - Template Matching(Image Searching) for multiple objects - 반복되는 이미지 모두 찾기

2019/07/12 - [Software/OpenCV] - Template Matching(Image Searching) with a mask for multiple objects - 마스크를 이용해 (배경이 다른) 반복되는 이미지 모두 찾기


Target: 93 X 47


Source: 600 X 600


강아지의 앞발에 위치한 타겟 위치를 찾아 보자.


Tolerance: 30

Step: 2

1
2
3
4
5
6
7
8
9
10
11
12
13
14
15
16
17
18
19
20
21
22
23
24
25
26
27
28
29
30
31
32
33
34
35
36
37
38
39
40
41
42
43
44
45
46
47
48
49
50
51
52
53
54
55
56
57
58
59
60
61
62
63
from PIL import Image
from PIL import ImageDraw
from PIL import ImageChops
from PIL import ImageStat
import sys
import time
 
source = Image.open("source.jpg")
sx, sy = source.size
target = Image.open("target.jpg")
tx, ty = target.size
tolerance = 30 # 오차 범위는 30 정도면 적당한거 같다.
step = 2 # 모든 픽셀을 검사하면 너무 오랜 시간이 걸린다. 한 개 건너 한 개 픽셀만 검사.
 
print("Source size: ", source.size)
print("Target size: ", target.size)
 
trial = 0 # Image search 시도 횟수.
 
def Search(cx, cy, tolerance):
    compare = source.crop((cx, cy, cx + tx, cy + ty)) # 소스에서 타겟으로 판단되는 위치의 이미지를 타겟 사이즈 만큼 잘라낸다.
    # Returns a rectangular region from this image. The box is a 4-tuple defining the left, upper, right, and lower pixel coordinate.
    print("Compare size: ", compare.size)
 
    diff = ImageChops.difference(compare, target) # 타겟과 타겟으로 판단되는 부분의 픽셀값 비교.
    stat = ImageStat.Stat(diff)
    global trial
    if max(max(stat.extrema[0]), max(stat.extrema[1]), max(stat.extrema[2])) <= tolerance:
        print("Target found(Min, max): ", stat.extrema)
        return True
    else:
        trial += 1
        return False
 
draw = ImageDraw.Draw(source)    # Creates an object that can be used to draw in the given image.
start = time.time()
 
for y in range(sy - ty):                # 소스의 처음부터 타겟 사이즈를 뺀 위치 까지 전체 검색을 시작 한다.
    for x in range(0, sx - tx, step):    # 처음 (10 X 10)개 픽셀의 값이 비슷 하다면 Search()로 타겟 사이즈 전체를 다시 확인한다.
        compare = source.crop((x, y, x + 10, y + 10))
        partial_target = target.crop((001010))
        diff = ImageChops.difference(compare, partial_target) # 각 픽셀값 차의 절대값이 반환 된다.
        # Returns the absolute value of the pixel-by-pixel difference between the two images.
        stat = ImageStat.Stat(diff)
 
        if max(max(stat.extrema[0]), max(stat.extrema[1]), max(stat.extrema[2])) < tolerance:
            if Search(x, y, tolerance) == True:
                print("Top left point: (%d, %d)" %(x, y))
                print("Center of targe point: (%d, %d)" %(x + target.width / 2, y + target.height / 2))
                print("Number of total wrong detection: ", trial)
                draw.rectangle((x, y, x + target.width, y + target.height), outline = (25500))
                # Draws a rectangle. 소스 이미지의 타겟 부분에 빨간 사각형을 그린다.
                end = time.time()
                print("Seraching time: ", end - start)
                source.show()
                sys.exit()
            else:
                print("At (%d, %d): Target not found" %(x, y))
                print("Wrong detection count: ", trial)
 
end = time.time()
print("Image search failed.")
print("Seraching time: ", end - start)


소스를 입력하고 빌드한다.


결과


123번 잘못된 지점을 검색했고 (232, 497)위치의 Target을 찾는데 총 15.66초가 걸렸다.

JPEG파일의 손실 압축 때문에 Target과 Source의 픽셀이 최대 RGB(16, 9, 15)만큼 차이가 발생 했다.

Target을 찾지 못한다면 Step과 Tolerance 값을 적당히 수정해야 한다.


반응형
Posted by J-sean
:
반응형

Pillow 모듈을 사용해 큰 이미지에서 작은 부분을 찾을 수 있다. 예를 들어 아래 Target과 같이 작은 부분을 큰 Source에서 찾아야 하는 경우이다.


2018/12/02 - [Software/Python] - Pillow 이미지 서치(Image Search) 2

2019/07/08 - [Software/OpenCV] - Template Matching(Image Searching) - 부분 이미지 검색

2019/07/10 - [Software/OpenCV] - Template Matching(Image Searching) for multiple objects - 반복되는 이미지 모두 찾기

2019/07/12 - [Software/OpenCV] - Template Matching(Image Searching) with a mask for multiple objects - 마스크를 이용해 (배경이 다른) 반복되는 이미지 모두 찾기


Target:


Source:


1
2
3
4
5
6
7
8
9
10
11
12
13
14
15
16
17
18
19
20
21
22
23
24
25
26
27
28
29
30
31
32
33
34
35
36
37
38
39
40
41
42
43
44
45
46
47
48
49
50
51
52
53
54
55
56
57
58
from PIL import Image
from PIL import ImageDraw
from PIL import ImageChops
from PIL import ImageStat
import sys
 
source = Image.open("source.bmp")
sx, sy = source.size
target = Image.open("target.bmp")
tx, ty = target.size
 
print("Source size: ", source.size)
print("Target size: ", target.size)
 
trial = 0 # Image search 시도 횟수.
 
def Search(cx, cy):
    #for y in range(ty):
    #    for x in range(tx):
    #        if target.getpixel((x, y)) == source.getpixel((cx + x, cy + y)):
    #            continue
    #        else:
    #            return False
    #return True
 
    compare = source.crop((cx, cy, cx + tx, cy + ty)) # 소스에서 타겟으로 판단되는 위치의 이미지를 타겟 사이즈 만큼 잘라낸다.
    # Returns a rectangular region from this image. The box is a 4-tuple defining the left, upper, right, and lower pixel coordinate.
    print("Compare size: ", compare.size)
 
    diff = ImageChops.difference(compare, target) # 타겟과 타겟으로 판단되는 부분의 픽셀값 비교.
    stat = ImageStat.Stat(diff)
    global trial
    if stat.sum == [000]:
        print("Target found(checksum): ", stat.sum)
        return True
    else:
        trial += 1
        return False
 
draw = ImageDraw.Draw(source)    # Creates an object that can be used to draw in the given image.
 
for y in range(sy - ty):        # 소스의 처음부터 타겟 사이즈를 뺀 위치 까지 검색을 시작 한다.
    for x in range(sx - tx):    # 처음 (2 X 2)개 픽셀의 값이 같다면 Search()로 타겟 사이즈 전체를 다시 확인한다.
        if source.getpixel((x, y)) == target.getpixel((00)) and source.getpixel((x + 1, y)) == target.getpixel((10)) \
            and source.getpixel((x, y + 1)) == target.getpixel((01)) and source.getpixel((x + 1, y + 1)) == target.getpixel((11)):
            if Search(x, y) == True:
                print("Top left point: (%d, %d)" %(x, y))
                print("Center of targe point: (%d, %d)" %(x + target.width / 2, y + target.height / 2))
                print("Number of total wrong detection: ", trial)
                draw.rectangle((x, y, x + target.width, y + target.height), outline = (25500))
                # Draws a rectangle. 소스 이미지의 타겟 부분에 빨간 사각형을 그린다.
                source.show()
                sys.exit()
            else:
                print("At (%d, %d): Target not found" %(x, y))
                print("Wrong detection count: ", trial)
 
print("Image search failed.")
cs


결과: 리트리버의 앞발 쪽에서 Target을 찾았다.

반응형
Posted by J-sean
:
반응형

'Pillow 화면 변화 감지(Pixel Checksum) 1'에서는 모든 픽셀의 값을 확인해서 좌표까지 알아내기 때문에 시간이 오래 걸린다.

ImageStat 모듈을 사용해 모든 픽셀을 확인하지 않고 전체적인 변화 여부만 감지하면 빠르게 확인 할 수 있다.


1
2
3
4
5
6
7
8
9
10
11
12
13
14
15
16
17
18
19
20
21
22
23
24
25
26
27
28
29
30
31
32
from PIL import Image
from PIL import ImageGrab
from PIL import ImageChops
from PIL import ImageStat
import time
 
def PixelCheck(x1, y1, x2, y2):
    im1 = ImageGrab.grab((x1, y1, x2, y2))
    # Take a snapshot of the screen. The pixels inside the bounding box are returned as an “RGB” image
    # on Windows or “RGBA” on macOS. If the bounding box is omitted, the entire screen is copied.
    while 1:
        time.sleep(0.1)
        im2 = ImageGrab.grab((x1, y1, x2, y2))
        im = ImageChops.difference(im1, im2)
        # Returns the absolute value of the pixel-by-pixel difference between the two images.
        # 마우스로 인한 변경은 반영 되지 않는다. 같은 이미지이면 difference()의 결과 이미지는 모든 픽셀이 0.
        stat = ImageStat.Stat(im)
        # Calculate statistics for the given image. If a mask is included, only the regions covered by
        # that mask are included in the statistics. You can also pass in a previously calculated histogram.
        if stat.sum != [000]: # Sum of all pixels for each band in the image.
            print("Change detected: sum[%s]: %s" %(im.getbands().__str__(), stat.sum.__str__()))
            # Returns a tuple containing the name of each band in this image. For example, getbands on
            # an RGB image returns (“R”, “G”, “B”).
            return
 
x1, y1, x2, y2 = map(int, input("Enter x1, y1, x2, y2 values: ").split()) # 추적할 영역의 좌상단, 우하단 좌표
PixelCheck(x1, y1, x2, y2)
# x1, y1, x2, y2 = input("Enter x1, y1, x2, y2 values: ").split()
# x1 = int(x1)
# y1 = int(y1)
# x2 = int(x2)
# y2 = int(y2)
cs


반응형

'Python' 카테고리의 다른 글

Pillow 이미지 서치(Image Search) 1  (0) 2018.11.30
pywin32 Windows Extensions for Python 2  (0) 2018.11.27
pywin32 Windows Extensions for Python 1  (0) 2018.11.27
Pillow 화면 변화 감지(Pixel Checksum) 1  (0) 2018.11.20
PyMySQL  (2) 2018.11.19
Posted by J-sean
:
반응형

Pillow 라이브러리를 사용해서 바탕화면의 변화를 추적할 영역을 지정하고 영역에 변화가 있을때 변화된 영역의 좌상단 좌표를 반환 한다.

지정된 영역의 모든 pixel을 확인하기 때문에 넓은 영역을 지정할 수록 시간이 오래 걸린다.


1
2
3
4
5
6
7
8
9
10
11
12
13
14
15
16
17
18
19
20
21
22
23
24
25
26
27
28
29
from PIL import Image
from PIL import ImageGrab
from PIL import ImageChops
import time
 
def PixelCheck(x1, y1, x2, y2):
    im1 = ImageGrab.grab((x1, y1, x2, y2))
    # Take a snapshot of the screen. The pixels inside the bounding box are returned as an “RGB” image
    # on Windows or “RGBA” on macOS. If the bounding box is omitted, the entire screen is copied.
    while 1:
        time.sleep(0.1)
        im2 = ImageGrab.grab((x1, y1, x2, y2))
        im = ImageChops.difference(im1, im2)
        # Returns the absolute value of the pixel-by-pixel difference between the two images.
        # 마우스로 인한 변경은 반영 되지 않는다. 같은 이미지이면 difference()의 결과 이미지는 모든 픽셀이 0.
        for y in range(im.height):
            for x in range(im.width):
                if im.getpixel((x, y)) != (000): # Returns the pixel value at a given position.
                    return x, y
 
x1, y1, x2, y2 = map(int, input("Enter x1, y1, x2, y2 values: ").split())
# x1, y1, x2, y2 = input("Enter x1, y1, x2, y2 values: ").split()
# x1 = int(x1)
# y1 = int(y1)
# x2 = int(x2)
# y2 = int(y2)
 
coord = PixelCheck(x1, y1, x2, y2) # 추적할 영역의 좌상단, 우하단 좌표
print(x1 + coord[0], y1 + coord[1]) # 추적 영역 중 변화된 영역의 좌상단 좌표(스크린 기준)
cs


PixelAccess class 를 사용해 PIL.Image data를 pixel level 에서 읽어 판단하기. (쓰기도 가능)

1
2
3
4
5
6
7
8
9
10
11
12
13
14
15
16
17
18
19
20
21
22
23
24
25
26
27
28
29
30
31
32
33
34
35
from PIL import Image
from PIL import ImageGrab
from PIL import ImageChops
import time
 
def PixelCheck(x1, y1, x2, y2):
    im1 = ImageGrab.grab((x1, y1, x2, y2))
    # Take a snapshot of the screen. The pixels inside the bounding box are returned as an “RGB” image
    # on Windows or “RGBA” on macOS. If the bounding box is omitted, the entire screen is copied.
    while 1:
        time.sleep(0.1)
        im2 = ImageGrab.grab((x1, y1, x2, y2))
        im = ImageChops.difference(im1, im2)
        # Returns the absolute value of the pixel-by-pixel difference between the two images.
        # 마우스로 인한 변경은 반영 되지 않는다. 같은 이미지이면 difference()의 결과 이미지는 모든 픽셀이 0.
        px = im.load()
        # Allocates storage for the image and loads the pixel data. In normal cases, you don’t need to
        # call this method, since the Image class automatically loads an opened image when it is accessed
        # for the first time.
        for y in range(im.height):
            for x in range(im.width):
                if px[x, y] != (000):
                    return x, y
        # Accessing individual pixels is fairly slow. If you are looping over all of the pixels in an image,
        # there is likely a faster way using other parts of the Pillow API.
 
x1, y1, x2, y2 = map(int, input("Enter x1, y1, x2, y2 values: ").split())
# x1, y1, x2, y2 = input("Enter x1, y1, x2, y2 values: ").split()
# x1 = int(x1)
# y1 = int(y1)
# x2 = int(x2)
# y2 = int(y2)
 
coord = PixelCheck(x1, y1, x2, y2) # 추적할 영역의 좌상단, 우하단 좌표
print(x1 + coord[0], y1 + coord[1]) # 추적 영역 중 변화된 영역의 좌상단 좌표(스크린 기준)
cs


반응형

'Python' 카테고리의 다른 글

Pillow 이미지 서치(Image Search) 1  (0) 2018.11.30
pywin32 Windows Extensions for Python 2  (0) 2018.11.27
pywin32 Windows Extensions for Python 1  (0) 2018.11.27
Pillow 화면 변화 감지(Pixel Checksum) 2  (0) 2018.11.21
PyMySQL  (2) 2018.11.19
Posted by J-sean
: