


Digital Temperature Sensor DS18B20 with Arduino - 아두이노 방수 온도 센서
Embedded 2021. 3. 24. 12:03 |온도 센서 DS18B20을 사용해 보자.
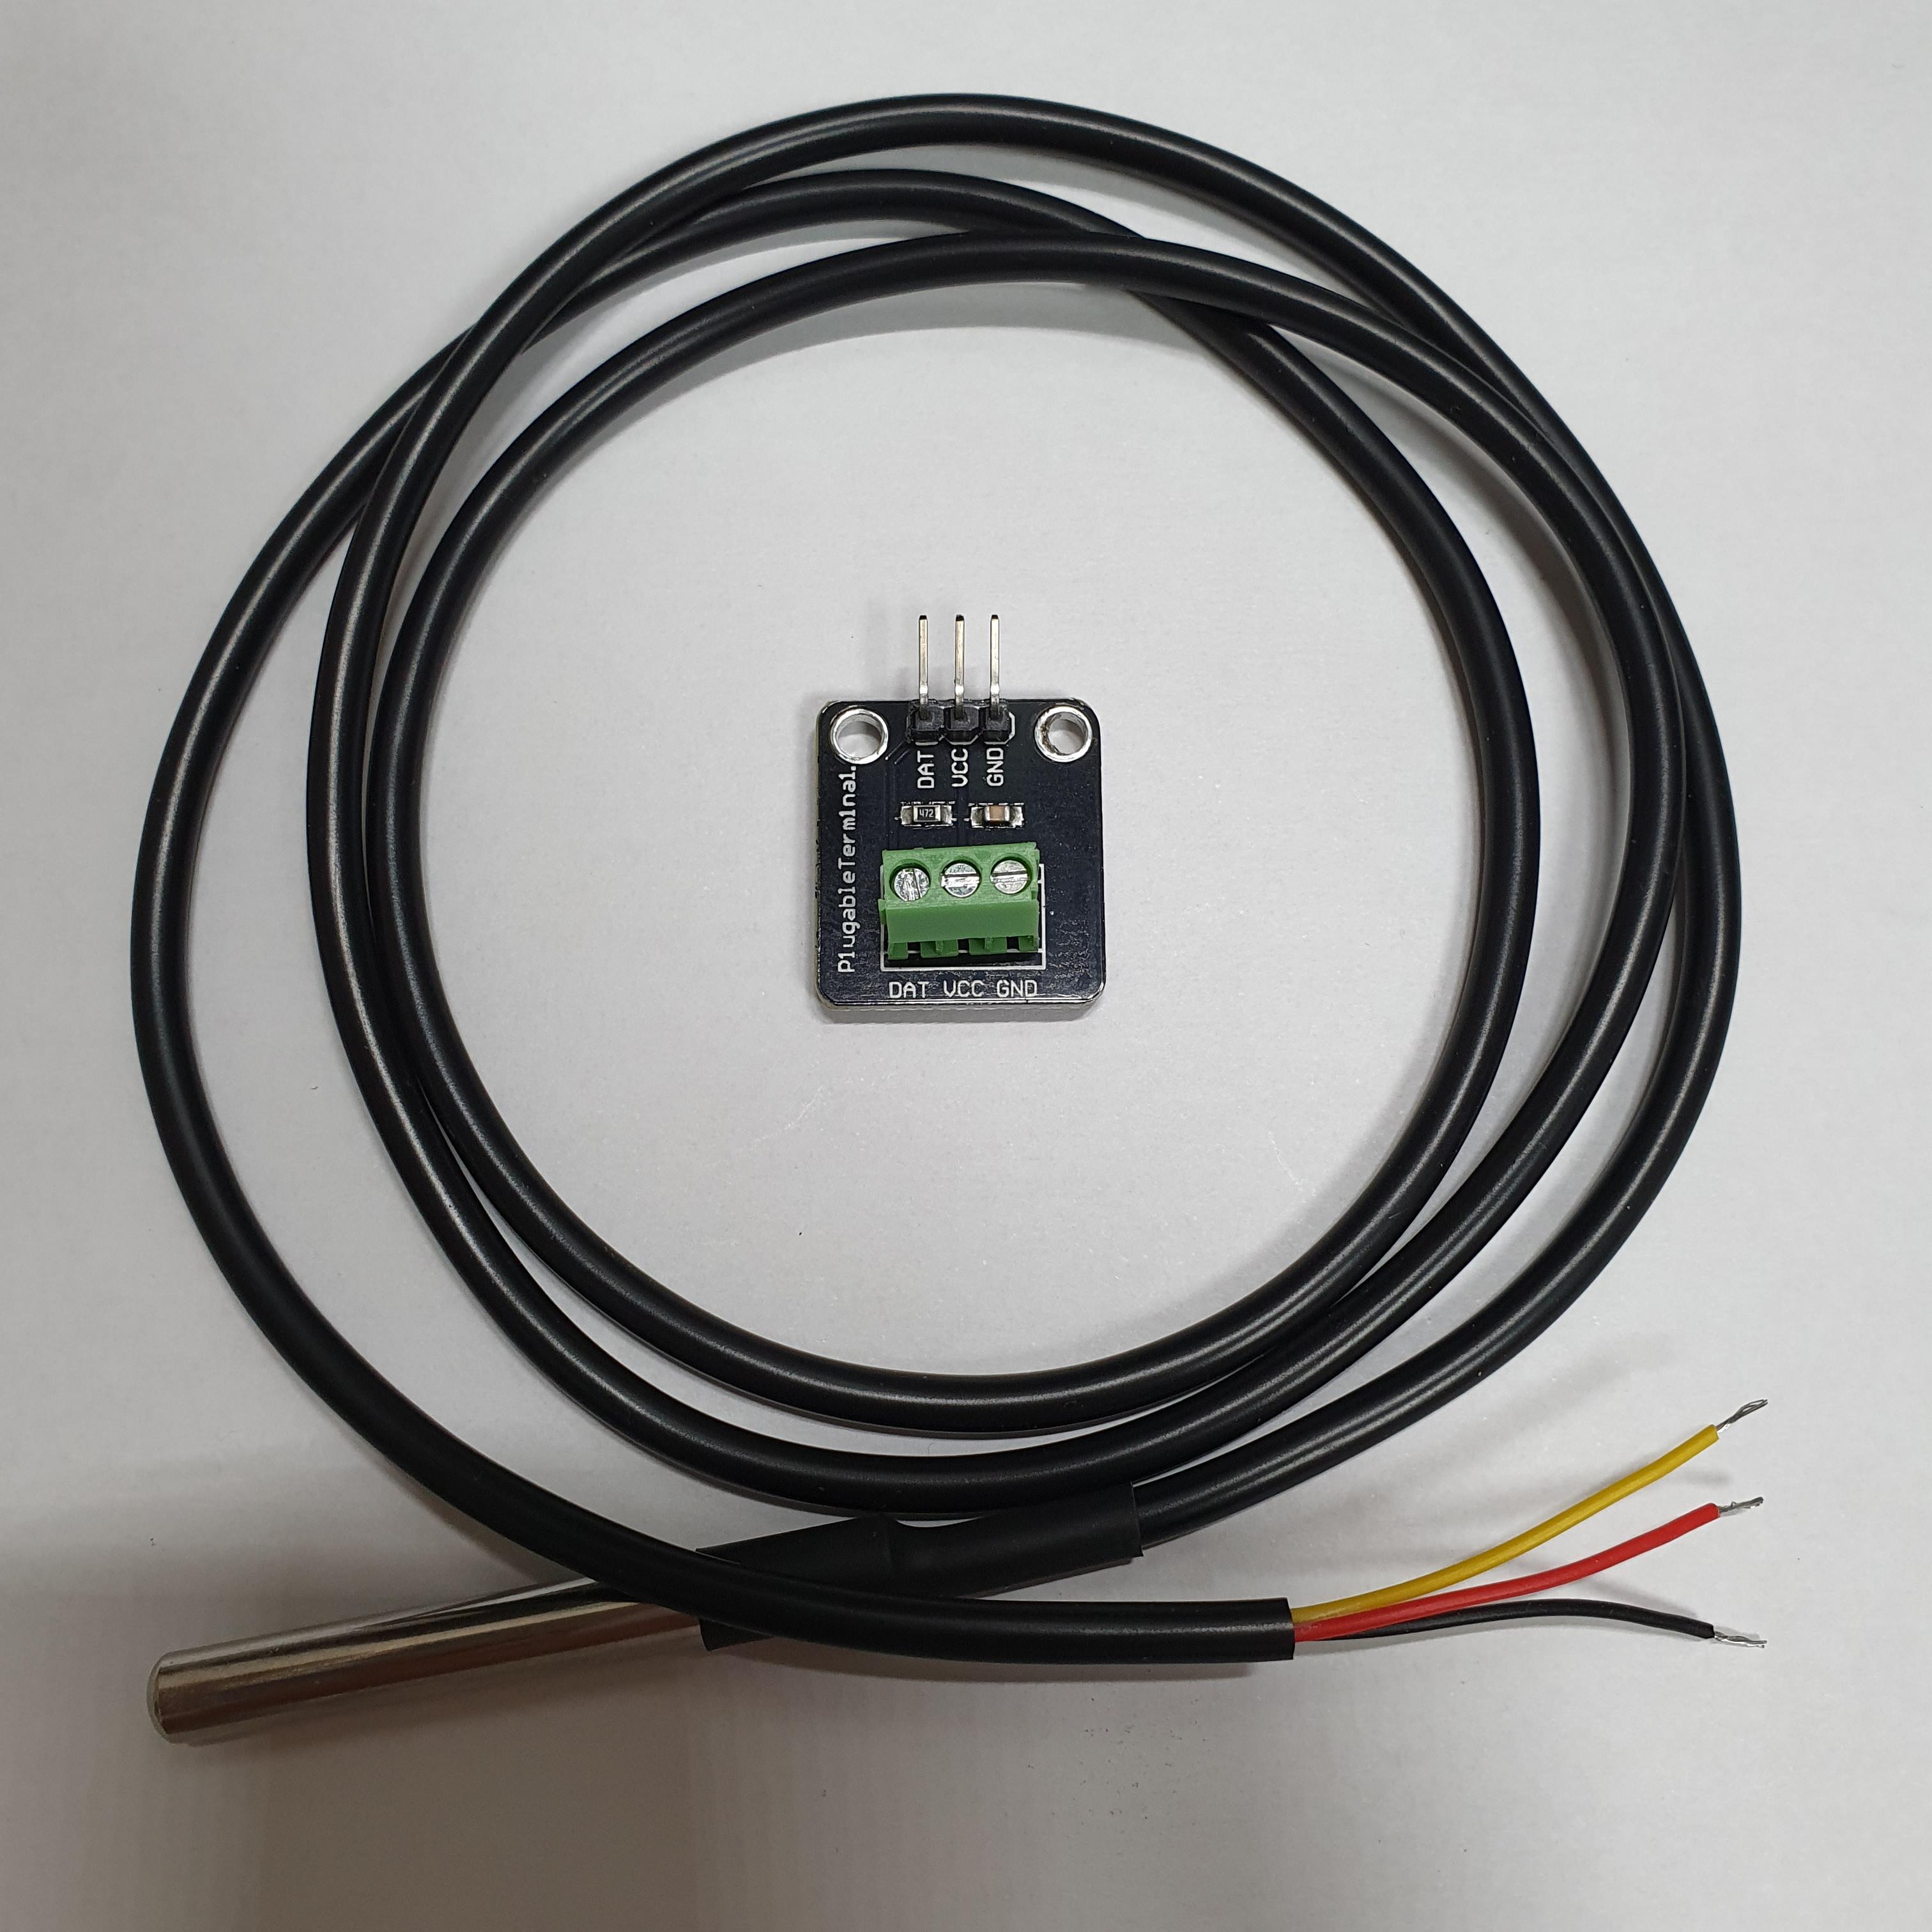
Operating voltage: 3V to 5V
Temperature Range: -55°C to +125°C
Accuracy: ±0.5°C
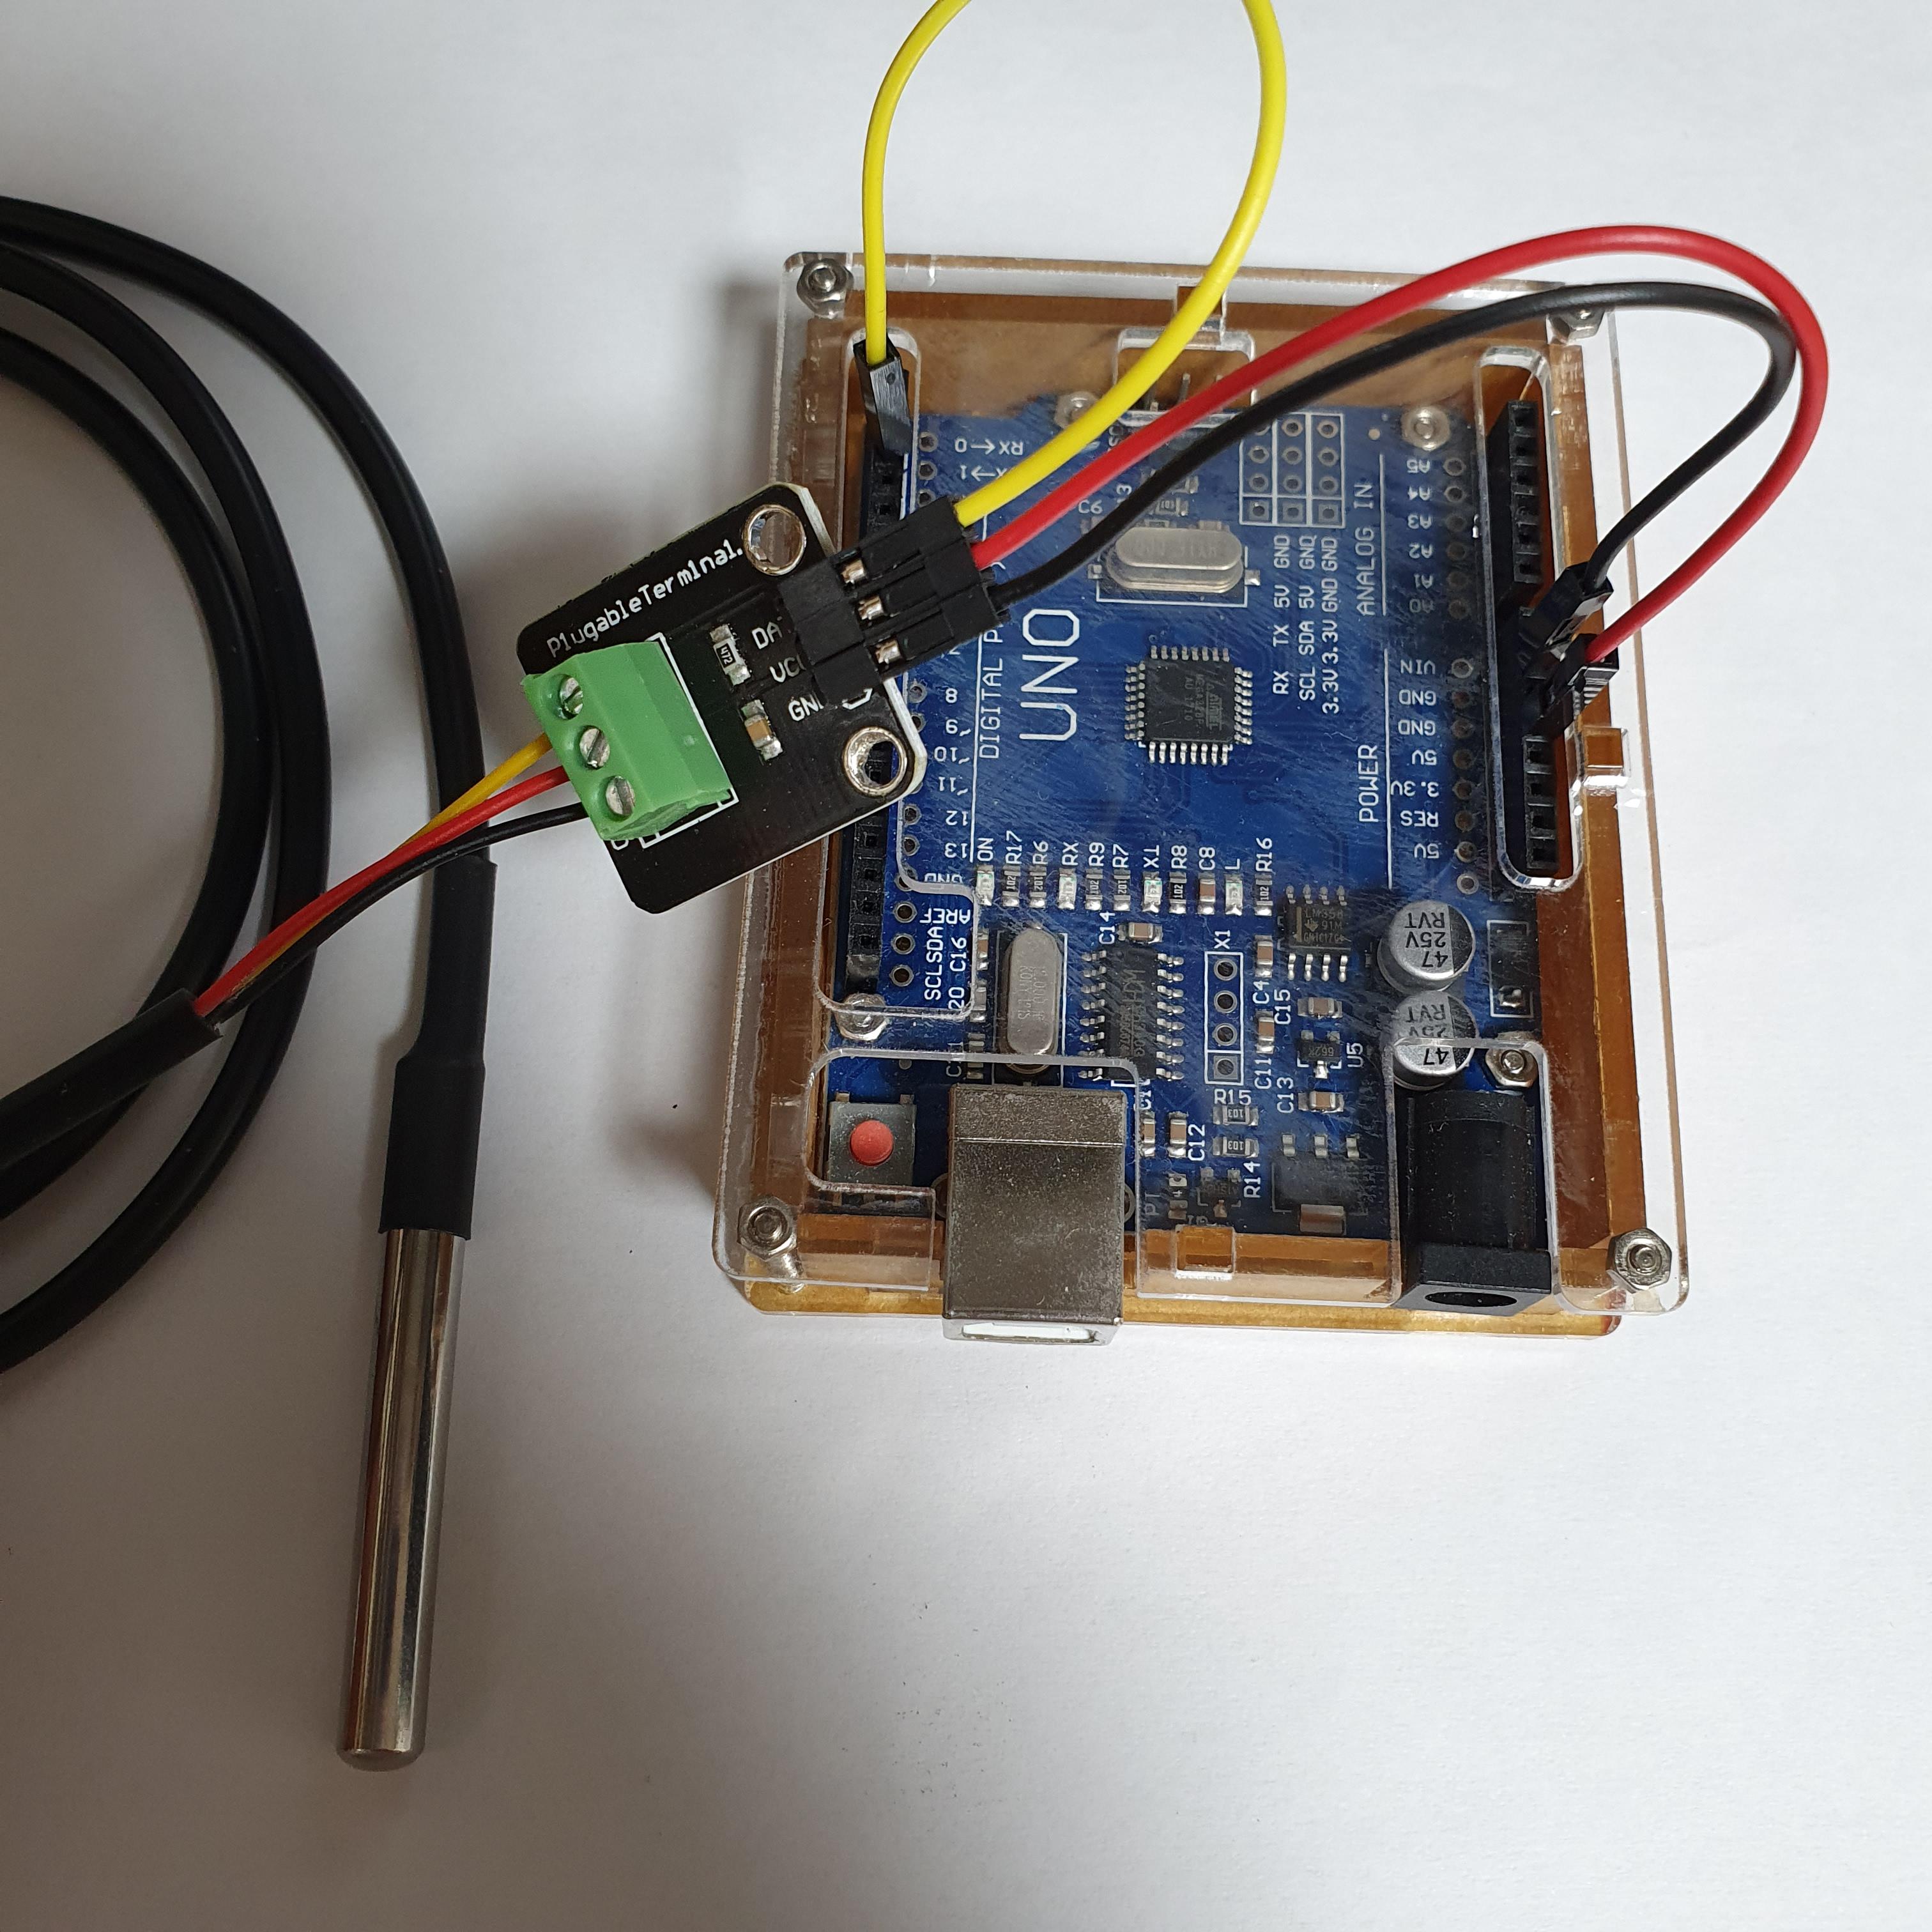
Sensor - Terminal - Arduino
Yellow - DAT - D2
Red - VCC - 5V
Black - GND - GND


#include <OneWire.h>

// OneWire DS18S20, DS18B20, DS1822 Temperature Example
//
// http://www.pjrc.com/teensy/td_libs_OneWire.html
//
// The DallasTemperature library can do all this work for you!
// https://github.com/milesburton/Arduino-Temperature-Control-Library

OneWire  ds(2);  // on pin 2 (a 4.7K resistor is necessary)

void setup(void) {
  Serial.begin(9600);
}

void loop(void) {
  byte i;
  byte present = 0;
  byte type_s;
  byte data[9];
  byte addr[8];
  float celsius, fahrenheit;

  if ( !ds.search(addr)) {
    Serial.println("No more addresses.");
    Serial.println();
    ds.reset_search();
    delay(250);
    return;
  }

  Serial.print("ROM =");
  for( i = 0; i < 8; i++) {
    Serial.write(' ');
    Serial.print(addr[i], HEX);
  }

  if (OneWire::crc8(addr, 7) != addr[7]) {
      Serial.println("CRC is not valid!");
      return;
  }
  Serial.println();

  // the first ROM byte indicates which chip
  switch (addr[0]) {
    case 0x10:
      Serial.println("  Chip = DS18S20");  // or old DS1820
      type_s = 1;
      break;
    case 0x28:
      Serial.println("  Chip = DS18B20");
      type_s = 0;
      break;
    case 0x22:
      Serial.println("  Chip = DS1822");
      type_s = 0;
      break;
    default:
      Serial.println("Device is not a DS18x20 family device.");
      return;
  }

  ds.reset();
  ds.select(addr);
  ds.write(0x44, 1);        // start conversion, with parasite power on at the end

  delay(1000);     // maybe 750ms is enough, maybe not
  // we might do a ds.depower() here, but the reset will take care of it.

  present = ds.reset();
  ds.select(addr);
  ds.write(0xBE);         // Read Scratchpad

  Serial.print("  Data = ");
  Serial.print(present, HEX);
  Serial.print(" ");
  for ( i = 0; i < 9; i++) {           // we need 9 bytes
    data[i] = ds.read();
    Serial.print(data[i], HEX);
    Serial.print(" ");
  }
  Serial.print(" CRC=");
  Serial.print(OneWire::crc8(data, 8), HEX);
  Serial.println();

  // Convert the data to actual temperature
  // because the result is a 16 bit signed integer, it should
  // be stored to an "int16_t" type, which is always 16 bits
  // even when compiled on a 32 bit processor.
  int16_t raw = (data[1] << 8) | data[0];
  if (type_s) {
    raw = raw << 3; // 9 bit resolution default
    if (data[7] == 0x10) {
      // "count remain" gives full 12 bit resolution
      raw = (raw & 0xFFF0) + 12 - data[6];
    }
  } else {
    byte cfg = (data[4] & 0x60);
    // at lower res, the low bits are undefined, so let's zero them
    if (cfg == 0x00) raw = raw & ~7;  // 9 bit resolution, 93.75 ms
    else if (cfg == 0x20) raw = raw & ~3; // 10 bit res, 187.5 ms
    else if (cfg == 0x40) raw = raw & ~1; // 11 bit res, 375 ms
    //// default is 12 bit resolution, 750 ms conversion time
  }
  celsius = (float)raw / 16.0;
  fahrenheit = celsius * 1.8 + 32.0;
  Serial.print("  Temperature = ");
  Serial.print(celsius);
  Serial.print(" Celsius, ");
  Serial.print(fahrenheit);
  Serial.println(" Fahrenheit");
}
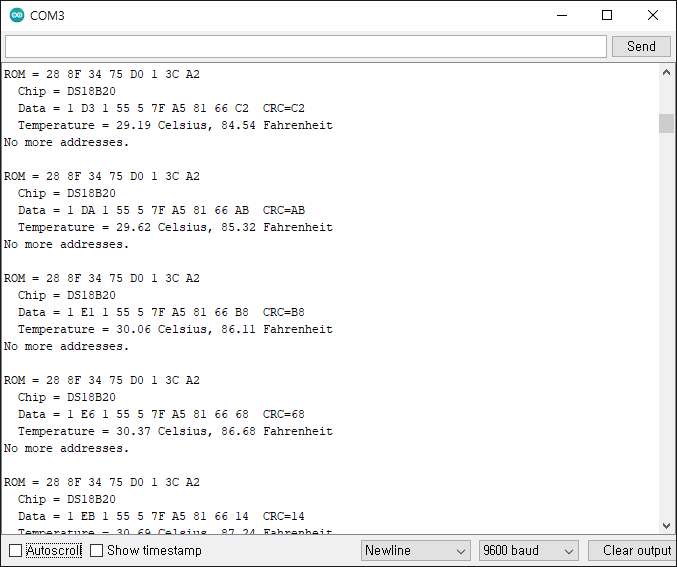
코드 상단의 OneWire ds(10)을 OneWire ds(2)로 바꾼다.
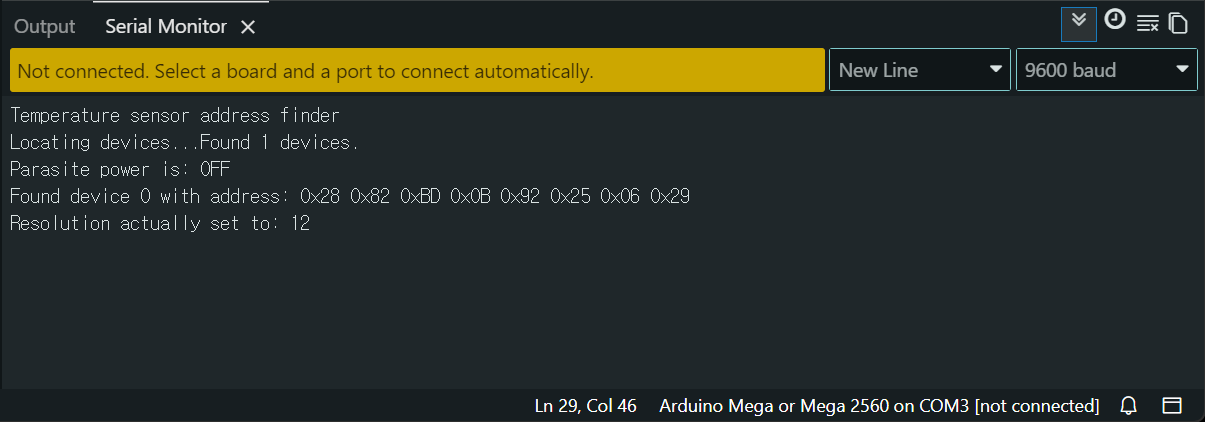
DallasTemperature 라이브러리를 이용해 좀 더 쉽게 사용해 보자.
우선 온도 센서의 주소값을 출력해 보자. 여러 개의 센서를 한 번에 감지할 수 있지만 구분할 수 없으므로 하나씩만 연결해 확인하자.
#include <OneWire.h>
#include <DallasTemperature.h> // DallasTemperature by Miles Burton 라이브러리
//#include <LowPower.h> // Low-Power by Rocket Scream Electronics 라이브러리

// Data wire is plugged into port 2 on the Arduino
#define ONE_WIRE_BUS 2
//#define TEMPERATURE_PRECISION 9 // Lower resolution

// Setup a oneWire instance to communicate with any OneWire devices (not just Maxim/Dallas temperature ICs)
OneWire oneWire(ONE_WIRE_BUS);

// Pass our oneWire reference to Dallas Temperature.
DallasTemperature sensors(&oneWire);

int numberOfDevices; // Number of temperature devices found
DeviceAddress tempDeviceAddress; // We'll use this variable to store a found device address

void setup(void)
{
  // start serial port
  Serial.begin(9600);
  Serial.println("Temperature sensor address finder");

  // Start up the library
  sensors.begin();


  // Grab a count of devices on the wire
  numberOfDevices = sensors.getDeviceCount();

  // locate devices on the bus
  Serial.print("Locating devices...");

  Serial.print("Found ");
  Serial.print(numberOfDevices, DEC);
  Serial.println(" devices.");

  // report parasite power requirements
  Serial.print("Parasite power is: ");
  if (sensors.isParasitePowerMode()) Serial.println("ON");
  else Serial.println("OFF");

  // Loop through each device, print out address
  for (int i = 0; i < numberOfDevices; i++)
  {
    // Search the wire for address
    if (sensors.getAddress(tempDeviceAddress, i))
    {
      Serial.print("Found device ");
      Serial.print(i, DEC);
      Serial.print(" with address: ");
      printAddress(tempDeviceAddress);

      //Serial.print("Setting resolution to ");
      //Serial.println(TEMPERATURE_PRECISION, DEC);

      // set the resolution to TEMPERATURE_PRECISION bit (Each Dallas/Maxim device is capable of several different resolutions)
      //sensors.setResolution(tempDeviceAddress, TEMPERATURE_PRECISION);

      Serial.print("Resolution actually set to: ");
      Serial.print(sensors.getResolution(tempDeviceAddress), DEC);
      Serial.println();
    } else {
      Serial.print("Found ghost device at ");
      Serial.print(i, DEC);
      Serial.print(" but could not detect address. Check power and cabling");
    }
  }
}

// function to print a device address
void printAddress(DeviceAddress deviceAddress)
{
  for (uint8_t i = 0; i < 8; i++)
  {
    Serial.print("0x");
    if (deviceAddress[i] < 0x10) Serial.print("0");
    Serial.print(deviceAddress[i], HEX);
    if (i < 7) Serial.print(" ");
  }
  Serial.println();
}

void loop (void)
{
  delay(1000);
  //Serial.flush();
  //LowPower.powerDown(SLEEP_8S, ADC_OFF, BOD_OFF);
  // SLEEP_1S: 아두이노를 1초 동안 잠들게 한다.
  // ADC_OFF: 잠자는 동안 아날로그 센서를 읽는 기능(ADC)을 꺼서 전기를 아낀다.
  // BOD_OFF: 저전압 감지 기능(BrownOut Detection)을 꺼서 전기를 더 많이 아낀다.
}
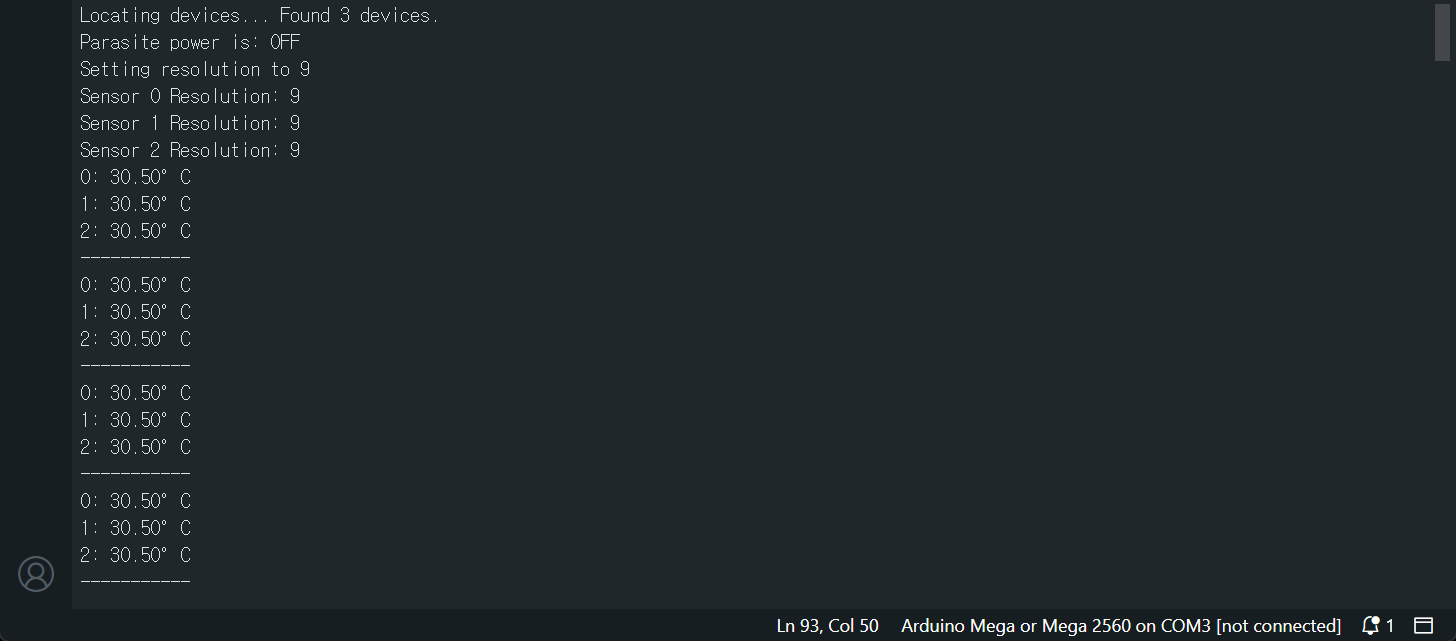
센서 3개를 연결하고 위에서 찾아둔 주소값을 이용해 각 센서의 온도를 측정해 보자.
#include <OneWire.h>
#include <DallasTemperature.h>
#include <LowPower.h>

// Data wire is plugged into port 2 on the Arduino
#define ONE_WIRE_BUS 2
#define TEMPERATURE_PRECISION 9 // Lower resolution

// Setup a oneWire instance to communicate with any OneWire devices (not just Maxim/Dallas temperature ICs)
OneWire oneWire(ONE_WIRE_BUS);

// Pass our oneWire reference to Dallas Temperature.
DallasTemperature sensors(&oneWire);

int numberOfDevices; // Number of temperature devices found
uint8_t sensor[3][8] = { { 0x28, 0xB8, 0x22, 0x94, 0x65, 0x25, 0x06, 0x5F},
                         { 0x28, 0xBB, 0x38, 0x60, 0x65, 0x25, 0x06, 0xB8},
                         { 0x28, 0x82, 0xBD, 0x0B, 0x92, 0x25, 0x06, 0x29} };

void setup(void)
{
  // start serial port
  Serial.begin(9600);

  // Start up the library
  sensors.begin();

  // locate devices on the bus
  Serial.print("Locating devices... ");
  // Grab a count of devices on the wire
  numberOfDevices = sensors.getDeviceCount();
  Serial.print("Found ");
  Serial.print(numberOfDevices, DEC);
  Serial.println(" devices.");

  // report parasite power requirements
  Serial.print("Parasite power is: ");
  if (sensors.isParasitePowerMode())
    Serial.println("ON");
  else
    Serial.println("OFF");

  Serial.print("Setting resolution to ");
  Serial.println(TEMPERATURE_PRECISION, DEC);

  // set the resolution to 9 bit per device
  for (uint8_t i = 0; i < numberOfDevices; i++){
    if (!sensors.setResolution(sensor[i], TEMPERATURE_PRECISION))
      Serial.print("Failed to set resolution");
  }

  for (uint8_t i = 0; i < numberOfDevices; i++){
    Serial.print("Sensor ");
    Serial.print(i);
    Serial.print(" Resolution: ");
    Serial.println(sensors.getResolution(sensor[i]), DEC);
  }
}

// function to print the temperature for a device
void printTemperature(DeviceAddress deviceAddress, uint8_t id)
{
  float tempC = sensors.getTempC(deviceAddress);
  if (tempC == DEVICE_DISCONNECTED_C)
  {
    Serial.println("Error: Could not read temperature data");
    return;
  }
  Serial.print(id);
  Serial.print(": ");
  Serial.print(tempC);
  Serial.println("°C");
}

void loop (void)
{
  // call sensors.requestTemperatures() to issue a global temperature
  // request to all devices on the bus
  sensors.requestTemperatures();

  for (uint8_t i = 0; i < numberOfDevices; i++){
    printTemperature(sensor[i], i);
  }
  Serial.println("-----------");
  Serial.flush();
  // Serial.print()가 종료되어도 데이터를 전송하는데 시간이 걸린다.
  // 데이터를 다 보내기도 전에 LowPower.powerDown()가 실행되면 아두이노가 바로 잠들어 버린다.
  // 아두이노가 잠들기 전에 Serial.flush()로 시리얼 버퍼에 남은 데이터를 모두 전송해야 한다.
  // digitalWrite() 등으로 LED나 다른 하드웨어를 작동시키고 있었다면 delay(100) 같은 명령으로
  // 반응할 수 있는 최소한의 시간을 주어야 한다.

  LowPower.powerDown(SLEEP_1S, ADC_OFF, BOD_OFF);
  // SLEEP_1S: 아두이노를 1초 동안 잠들게 한다.
  // ADC_OFF: 잠자는 동안 아날로그 센서를 읽는 기능(ADC)을 꺼서 전기를 아낀다.
  // BOD_OFF: 저전압 감지 기능(BrownOut Detection)을 꺼서 전기를 더 많이 아낀다.
}
Interfacing DS18B20 1-Wire Digital Temperature Sensor with Arduino
Interfacing Multiple DS18B20 Digital Temperature Sensors with Arduino
Interfacing MAX6675 Thermocouple Module with Arduino