OpenCvSharp Simple Camera Example

C# 2022. 1. 14. 18:07 |
반응형

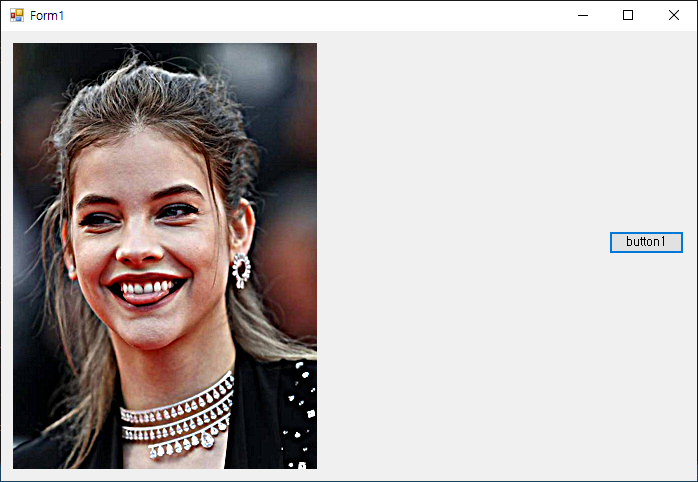
C#과 OpenCvSharp를 이용한 간단한 카메라 응용 프로그램 예.


폼에 Button, RadioButton, PictureBox등을 적당히 배치한다.


1
2
3
4
5
6
7
8
9
10
11
12
13
14
15
16
17
18
19
20
21
22
23
24
25
26
27
28
29
30
31
32
33
34
35
36
37
38
39
40
41
42
43
44
45
46
47
48
49
50
51
52
53
54
55
56
57
58
59
60
61
62
63
64
65
66
67
68
69
70
71
72
73
74
75
76
77
78
79
80
81
82
83
84
85
86
87
88
89
90
91
92
93
94
95
96
97
98
99
100
101
102
103
104
105
106
107
108
109
110
111
112
113
114
115
116
117
118
119
120
121
122
123
124
125
126
127
128
129
130
131
132
133
134
135
136
137
138
139
140
141
142
143
144
145
146
147
148
149
150
151
152
153
154
155
156
157
158
159
160
161
162
163
164
165
166
167
168
169
170
171
172
173
174
175
176
177
178
179
180
181
182
183
184
185
186
187
188
189
190
191
192
193
194
195
196
197
198
199
200
201
202
203
204
205
206
207
208
209
210
211
212
213
214
215
216
217
using System;
using System.Collections.Generic;
using System.ComponentModel;
using System.Data;
using System.Drawing;
using System.Linq;
using System.Text;
using System.Threading.Tasks;
using System.Windows.Forms;
 
using System.Threading;
using OpenCvSharp;
using OpenCvSharp.Extensions;
 
namespace OpenCV
{
    delegate void dele(Mat m);
 
    public partial class Form1 : Form
    {
        bool isCameraOn;
 
        dele filter;    // 카메라에 적용할 필터(효과) 델리게이트
        Thread thread;
        Mat mat;
        VideoCapture videoCapture;
 
        public Form1()
        {
            InitializeComponent();
 
            this.FormBorderStyle = FormBorderStyle.FixedSingle;
            pictureBox1.SizeMode = PictureBoxSizeMode.StretchImage;
            button1.Text = "Camera Start";
            isCameraOn = false;
            filter = null;
            radioButton1.Checked = true;
        }
 
        private void CameraCallback()
        {
            mat = new Mat();
            videoCapture = new VideoCapture(0);
 
            if (!videoCapture.IsOpened())
            {
                Text = "Camera open failed!";
                MessageBox.Show("카메라를 열 수 없습니다. 연결 상태를 확인 해 주세요.");
 
                return;
            }
 
            while (true)
            {
                videoCapture.Read(mat);
 
                if (!mat.Empty() && filter != null)
                {
                    filter(mat);    // 선택된 라디오 버튼에 따른 필터 적용.                    
                }
 
                if (!mat.Empty())
                {
                    // 로고를 디스플레이하기 위해 그레이 이미지(1채널)는 컬러 포맷(3채널)으로 변환
                    if (mat.Channels() == 1)
                    {
                        Cv2.CvtColor(mat, mat, ColorConversionCodes.GRAY2BGR);
                    }
                    Cv2.PutText(mat, "SEAN"new OpenCvSharp.Point(550470), HersheyFonts.HersheyDuplex, 1new Scalar(00255), 2);
 
                    // 이 전 프레임에서 PictureBox에 로드된 비트맵 이미지를 Dispose하지 않으면 메모리 사용량이 크게 증가한다.
                    if (pictureBox1.Image != null)
                    {
                        pictureBox1.Image.Dispose();
                    }
                    pictureBox1.Image = BitmapConverter.ToBitmap(mat);
                }
            }
        }
 
        private void button1_Click(object sender, EventArgs e)
        {
            if (isCameraOn == false)
            {
                thread = new Thread(new ThreadStart(CameraCallback));
 
                thread.Start();
                isCameraOn = true;
                button1.Text = "Camera Stop";
            }
            else
            {
                if (videoCapture.IsOpened())
                {
                    thread.Abort();
                    if (pictureBox1.Image != null)
                    {
                        pictureBox1.Image.Dispose();
                    }
                    videoCapture.Release();
                    mat.Release();
                }
                isCameraOn = false;
                button1.Text = "Camera Start";
            }
        }
 
        private void button2_Click(object sender, EventArgs e)
        {
            System.Diagnostics.Process.Start("https://s-engineer.tistory.com/");
        }
 
        private void Form1_FormClosing(object sender, FormClosingEventArgs e)
        {
            if (thread != null && thread.IsAlive && videoCapture.IsOpened())
            {
                thread.Abort();
                if (pictureBox1.Image != null)
                {
                    pictureBox1.Image.Dispose();
                }
                videoCapture.Release();
                mat.Release();
            }
        }
 
        // 필터 함수들
        private void ToGray(Mat mat)
        {
            Cv2.CvtColor(mat, mat, ColorConversionCodes.BGR2GRAY);
        }
 
        private void ToEmboss(Mat mat)
        {
            float[] data = { -1.0f, -1.0f, 0.0f, -1.0f, 0f, 1.0f, 0.0f, 1.0f, 1.0f };
            Mat emboss = new Mat(33, MatType.CV_32FC1, data);
 
            Cv2.CvtColor(mat, mat, ColorConversionCodes.BGR2GRAY);
            Cv2.Filter2D(mat, mat, -1, emboss, new OpenCvSharp.Point(-1-1), 128);
 
            emboss.Release();
        }
 
        private void ToBlur(Mat mat)
        {
            Cv2.GaussianBlur(mat, mat, new OpenCvSharp.Size(), (double)3);
        }
 
        private void ToSharpen(Mat mat)
        {
            Mat blurred = new Mat();
            Cv2.GaussianBlur(mat, blurred, new OpenCvSharp.Size(), (double)3);
 
            // 아래 연산이 반복되면 메모리 사용량이 크게 증가한다.
            float alpha = 2.0f;
            ((1 + alpha) * mat - alpha * blurred).ToMat().CopyTo(mat);
            //mat = (1 + alpha) * mat - alpha * blurred;
 
            blurred.Release();
        }
 
        private void ToEdge(Mat mat)
        {
            Cv2.CvtColor(mat, mat, ColorConversionCodes.BGR2GRAY);
            Cv2.Canny(mat, mat, 5070);
        }
 
        // 라디오 버튼 이벤트 핸들러들
        private void radioButton1_CheckedChanged(object sender, EventArgs e)
        {
            if (((RadioButton)sender).Checked)
            {
                filter = null;
            }
        }
 
        private void radioButton2_CheckedChanged(object sender, EventArgs e)
        {
            if (((RadioButton)sender).Checked)
            {
                filter = ToGray;
            }
        }
 
        private void radioButton3_CheckedChanged(object sender, EventArgs e)
        {
            if (((RadioButton)sender).Checked)
            {
                filter = ToEmboss;
            }
        }
 
        private void radioButton4_CheckedChanged(object sender, EventArgs e)
        {
            if (((RadioButton)sender).Checked)
            {
                filter = ToBlur;
            }
        }
 
        private void radioButton5_CheckedChanged(object sender, EventArgs e)
        {
            if (((RadioButton)sender).Checked)
            {
                filter = ToSharpen;
            }
        }
 
        private void radioButton6_CheckedChanged(object sender, EventArgs e)
        {
            if (((RadioButton)sender).Checked)
            {
                filter = ToEdge;
            }
        }
    }
}


소스를 입력하고 빌드한다.


프로그램을 실행하고 Camera Start 버튼을 클릭한다.


다른 필터를 선택하면 그에 맞는 화면이 출력된다.


※ 소스에서 ToSharpen() 의 주석 부분은 제대로 실행되지 않는다. 관련 내용은 아래 링크를 참고하자.

2022.01.14 - [C#] - OpenCvSharp Simple Example and MatExpr


※ ToSharpen() 의 반복 실행으로 인한 메모리 사용량 증가는 OpenCV의 메모리 할당을 파악하지 못하는 .NET Garbage Collector의 문제다. 아래와 같이 Garbage Collector 호출 코드 추가로 해결은 가능하다.

1
2
3
4
5
6
7
8
9
10
11
12
private void ToSharpen(Mat mat)
{
    Mat blurred = new Mat();
    Cv2.GaussianBlur(mat, blurred, new OpenCvSharp.Size(), (double)3);
 
    float alpha = 2.0f;
    ((1 + alpha) * mat - alpha * blurred).ToMat().CopyTo(mat);
 
    GC.Collect();
 
    blurred.Release();
}


https://github.com/shimat/opencvsharp/issues/391


반응형
Posted by J-sean
:
반응형

C#과 OpenCvSharp를 이용한 간단한 이미지 변환 예.


폼에 Button과 PictureBox를 적당히 배치한다.


1
2
3
4
5
6
7
8
9
10
11
12
13
14
15
16
17
18
19
20
21
22
23
24
25
26
27
28
29
30
31
32
33
34
35
36
37
38
39
40
41
42
43
44
45
46
47
48
49
50
51
52
53
54
55
56
57
58
59
using System;
using System.Collections.Generic;
using System.ComponentModel;
using System.Data;
using System.Drawing;
using System.Linq;
using System.Text;
using System.Threading.Tasks;
using System.Windows.Forms;
 
using OpenCvSharp;
 
namespace OpenCV
{
    public partial class Form1 : Form
    {
        public Form1()
        {
            InitializeComponent();
        }
 
        private void button1_Click(object sender, EventArgs e)
        {
            try
            {
                OpenFileDialog dlg = new OpenFileDialog();
                if (dlg.ShowDialog() == DialogResult.OK)
                {
                    Mat mat = Cv2.ImRead(dlg.FileName);
 
                    if (pictureBox1.Image != null)
                    {
                        pictureBox1.Image.Dispose();
                    }
 
                    // Canny Edge Detection(컬러 이미지를 그레이 이미지로 변환 후 Canny Edge Detection)
                    //Cv2.CvtColor(mat, mat, ColorConversionCodes.BGR2GRAY);
                    //Cv2.Canny(mat, mat, 50, 100);
 
                    // 이미지 샤프닝(가우시안블러 후 샤프닝)
                    Mat blurred = new Mat();
                    Cv2.GaussianBlur(mat, blurred, new OpenCvSharp.Size(), (double)3);
 
                    float alpha = 2.0f;
                    mat = (1 + alpha) * mat - alpha * blurred;
                    //((1 + alpha) * mat - alpha * blurred).ToMat().CopyTo(mat);
 
                    // PictureBox에 이미지 디스플레이(Mat to Bitmap)
                    System.IO.MemoryStream memoryStream = new System.IO.MemoryStream(mat.ToBytes());
                    pictureBox1.Image = new Bitmap(memoryStream);
                }
            }
            catch (Exception exc)
            {
                MessageBox.Show(exc.Message);
            }
        }
    }
}


이미지 샤프닝 예제를 입력하고 빌드한다.


프로그램을 실행하고 이미지를 불러오면 샤프닝 처리가 되어 표시된다.


원본 이미지


1
2
3
4
5
6
7
// 이미지 샤프닝(가우시안블러 후 샤프닝)
Mat blurred = new Mat();
Cv2.GaussianBlur(mat, blurred, new OpenCvSharp.Size(), (double)3);
 
float alpha = 2.0f;
mat = (1 + alpha) * mat - alpha * blurred;
//((1 + alpha) * mat - alpha * blurred).ToMat().CopyTo(mat);


이미지 샤프닝 코드 부분을 보면 위와같이 Mat 클래스에 +, -, * 등의 연산을 직접한다. 이 때 Mat 클래스는 효율을 높이기 위해 MatExpr 클래스로 변환 되어 연산이 진행된다.


위 예제에서는 별 문제 없지만 Mat 클래스 인스턴스의 레퍼런스(포인터)가 함수의 파라미터로 넘어 오고 그 함수에서 계산해서 다시 리턴하는 등의 작업이 진행될 때는 이렇게 계산 결과를 대입하는 경우 계산된 데이터가 제대로 전달 되지 않는다. C++에서는 같은 방식으로 해도 문제가 없다. 내가 모르는 C#의 특성이 있는거 같다.


이럴때는 주석 부분과 같이 MatExpr 클래스로 변환 되는 부분을 괄호로 감싸고 MatExpr.ToMat()로 Mat 클래스로 변환해서 다시 Mat.CopyTo()로 복사한다. 아니면 함수의 파라미터 선언을 (ref Mat mat) 처럼 바꿔서 레퍼런스를 주고 받도록 바꾸면 된다. 아래 링크의 경우 델리게이트 선언도 레퍼런스를 주고 받도록 바꿔야 한다.

2022.01.14 - [C#] - OpenCvSharp Simple Camera Example


반응형
Posted by J-sean
:
반응형

IObserver<T> interface와 IObservable<T> interface를 이용해 Observer Design Pattern을 구현해 보자.


1
2
3
4
5
6
7
8
9
10
11
12
13
14
15
16
17
18
19
20
21
22
23
24
25
26
27
28
29
30
31
32
33
34
35
36
37
38
39
40
41
42
43
44
45
46
47
48
49
50
51
52
53
54
55
56
57
58
59
60
61
62
63
64
65
66
67
68
69
70
71
72
73
74
75
76
77
78
79
80
81
82
83
84
85
86
87
88
89
90
91
92
93
94
95
96
97
98
99
100
101
102
103
104
105
106
107
108
109
110
111
112
113
114
115
116
117
118
119
120
121
122
123
124
125
126
127
128
129
130
131
132
133
134
135
136
137
138
139
140
141
142
143
144
145
146
147
148
149
150
151
152
153
154
155
156
157
158
159
160
161
162
163
164
165
166
167
168
169
170
171
172
173
174
175
176
177
using System;
using System.Collections.Generic;
using System.Linq;
using System.Text;
using System.Threading.Tasks;
 
namespace Observer
{
    class Program
    {
        static void Main(string[] args)
        {
            LocationTracker provider = new LocationTracker();
            // Provider 생성
 
            LocationReporter reporter1 = new LocationReporter("FixedGPS");
            reporter1.Subscribe(provider);
            // Observer(FixedGPS) 생성 및 Provider에 등록
 
            LocationReporter reporter2 = new LocationReporter("MobileGPS");
            reporter2.Subscribe(provider);
            // Observer(MobileGPS) 생성 및 Provider에 등록
 
            provider.TrackLocation(new Location(47.6456-122.1312));
            // FixedGPS: The current location is 47.6456, -122.1312
            // MobileGPS: The current location is 47.6456, -122.1312
 
            reporter1.Unsubscribe();
            // FixedGPS unsubscribed.
 
            provider.TrackLocation(new Location(47.6677-122.1199));
            // MobileGPS: The current location is 47.6677, -122.1199
 
            provider.TrackLocation(null);
            // MobileGPS: The location cannot be determined.
 
            provider.EndTransmission();
            // MobileGPS unsubscribed.
            // The Location Tracker has completed transmitting data to MobileGPS.
        }
    }
 
    // 위치 정보를 담고 있는 데이터 클래스
    public struct Location
    {
        double lat, lon;
 
        public Location(double latitude, double longitude)
        {
            lat = latitude;
            lon = longitude;
        }
 
        public double Latitude
        {
            get { return lat; }
        }
 
        public double Longitude
        {
            get { return lon; }
        }
    }
 
    // Provider 클래스 (등록된(subscribe) Observer에 Notification을 보낸다)
    // IObservable<out T> 인터페이스는 IDisposable Subscribe(IObserver<T> observer)를 구현해야 한다.
    public class LocationTracker : IObservable<Location>
    {
        private List<IObserver<Location>> observers;
 
        public LocationTracker()
        {
            observers = new List<IObserver<Location>>();
        }
 
        // Subscribe()는 LocationTracker 클래스에서 호출되지 않는다. LocationReporter.Subscribe()에서 호출
        public IDisposable Subscribe(IObserver<Location> observer)
        {
            if (!observers.Contains(observer))
                observers.Add(observer);
 
            return new Unsubscriber(observers, observer);
        }
 
        private class Unsubscriber : IDisposable
        {
            private List<IObserver<Location>> _observers;
            private IObserver<Location> _observer;
 
            public Unsubscriber(List<IObserver<Location>> observers, IObserver<Location> observer)
            {
                _observers = observers;
                _observer = observer;
            }
 
            public void Dispose()
            {
                if (_observer != null && _observers.Contains(_observer))
                    _observers.Remove(_observer);
            }
        }
 
        public void TrackLocation(Nullable<Location> loc)
        {
            // observers 순회하는 예 1
            foreach (IObserver<Location> observer in observers)
            {
                if (!loc.HasValue)
                    observer.OnError(new LocationUnknownException());
                else
                    observer.OnNext(loc.Value);
            }
        }
 
        public void EndTransmission()
        {
            // observers 순회하는 예 2
            foreach (IObserver<Location> observer in observers.ToArray())
                if (observers.Contains(observer))
                    observer.OnCompleted();
 
            observers.Clear();
        }
    }
 
    // LocationTracker.TrackLocation()에 Location 정보가 없을때 보내는 예외 클래스
    public class LocationUnknownException : Exception
    {
        internal LocationUnknownException() : base("The location cannot be determined.")
        { }
    }
 
    // Observer 클래스 (Provider에 등록(subscribe)하고 Notification을 받는다)
    // IObserver<in T> 인터페이스는 아래 3개의 매소드를 구현해야 한다.
    // void OnCompleted(), void OnError(Exception error), void OnNext(T value);
    public class LocationReporter : IObserver<Location>
    {
        private IDisposable unsubscriber;
        private string instName;
 
        public LocationReporter(string name)
        {
            instName = name;
        }
 
        public string Name
        { get { return instName; } }
 
        public virtual void Subscribe(IObservable<Location> provider)
        {
            if (provider != null)
                unsubscriber = provider.Subscribe(this);
        }
 
        public virtual void OnCompleted()
        {
            Unsubscribe();
            Console.WriteLine("The Location Tracker has completed transmitting data to {0}.", Name);
        }
 
        public virtual void OnError(Exception e)
        {
            Console.WriteLine("{0}: {1}", Name, e.Message);
        }
 
        public virtual void OnNext(Location value)
        {
            Console.WriteLine("{2}: The current location is {0}, {1}", value.Latitude, value.Longitude, Name);
        }
 
        public virtual void Unsubscribe()
        {
            unsubscriber.Dispose();
            Console.WriteLine("{0} unsubscribed.", Name);
        }
    }
}


소스를 입력하고 빌드한다.


위치정보 Notification이 잘 전달된다.


※참고

The IObserver<T> and IObservable<T> interfaces provide a generalized mechanism for push-based notification, also known as the observer design pattern.


반응형
Posted by J-sean
:
반응형


2022.01.06 - [C#] - C# AudioSwitcher System Audio/Sound Volume Control - 시스템 오디오/사운드 볼륨 컨트롤 1

의 소스를 수정해 Observer를 등록하고 VolumeChanged Notification을 받아 지정된 볼륨 이상 변경 하지 못 하도록 해 보자.


1
2
3
4
5
6
7
8
9
10
11
12
13
14
15
16
17
18
19
20
21
22
23
24
25
26
27
28
29
30
31
32
33
34
35
36
37
38
39
40
41
42
43
44
45
46
47
48
49
50
51
52
53
54
55
56
57
58
59
60
61
62
63
64
65
66
67
68
69
70
71
72
73
74
75
76
77
78
79
80
81
82
using System;
using System.Collections.Generic;
using System.Linq;
using System.Text;
using System.Threading.Tasks;
 
using System.Runtime.InteropServices;
using AudioSwitcher.AudioApi.CoreAudio;
using AudioSwitcher.AudioApi;
 
namespace ConsoleApp1
{
    class Program
    {
        [DllImport("kernel32.dll")]
        static extern IntPtr GetConsoleWindow();
 
        [DllImport("user32.dll")]
        static extern bool ShowWindow(IntPtr hWnd, int nCmdShow);
 
        static int maxVol;
 
        static void Main(string[] args)
        {
            const int SW_HIDE = 0// 창 숨기기
            const int SW_SHOW = 1// 창 보이기
 
            IntPtr handle = GetConsoleWindow();
            //ShowWindow(handle, SW_HIDE);            
 
            CoreAudioDevice defaultPlaybackDevice = new CoreAudioController().DefaultPlaybackDevice;
            Console.WriteLine($"Initial Volume: {defaultPlaybackDevice.Volume}");
 
            IObserver<DeviceVolumeChangedArgs> volumeChangeObserver = new VolumeChangeObserver();
            IDisposable subscriber = defaultPlaybackDevice.VolumeChanged.Subscribe(volumeChangeObserver);
 
            //subscriber.Dispose(); // 볼륨 제한 종료
 
            if (args.Length > 0)
            {
                maxVol = int.Parse(args[0]);
            }
            else
            {
                maxVol = 30;
            }
 
            defaultPlaybackDevice.Volume = maxVol; // 허용 최고 볼륨으로 초기화
 
            while (true)
            {
                System.Threading.Thread.Sleep(10000); // 10초 지연
            }
        }
 
        public class VolumeChangeObserver : IObserver<DeviceVolumeChangedArgs>
        {
            public virtual void OnCompleted()
            {
                Console.WriteLine("Completed.");
            }
 
            public virtual void OnError(Exception e)
            {
                Console.WriteLine(e.Message);
            }
 
            public virtual void OnNext(DeviceVolumeChangedArgs args)
            {
                if (args.Volume > maxVol)
                {
                    Console.WriteLine($"Volume limit: {maxVol}");
                    args.Device.Volume = maxVol; // args.Volume = read only
                }
                else
                {
                    Console.WriteLine($"Current volume: {args.Volume}");
                }
            }
        }
    }
}


소스를 입력하고 빌드한다.


옵션 없이 실행하면 볼륨을 30 이상 올릴 수 없다.

※ 참고

2022.01.08 - [C#] - C# Observer Design Pattern with The IObserver and IObservable interfaces

2023.10.26 - [Python] - Python Core Audio Windows Library 파이썬 코어 오디오 라이브러리

2023.10.28 - [C#] - C# Sound Meter 사운드 미터


반응형
Posted by J-sean
:
반응형

AudioSwitcher를 이용해 시스템 볼륨을 조정해 보자.


AudioSwitcher Nuget Package를 설치한다.


1
2
3
4
5
6
7
8
9
10
11
12
13
14
15
16
17
18
19
20
21
22
23
24
25
26
27
28
29
30
31
32
33
34
35
36
37
38
39
40
41
42
43
44
45
46
47
using System;
using System.Collections.Generic;
using System.Linq;
using System.Text;
using System.Threading.Tasks;
 
using System.Runtime.InteropServices;
using AudioSwitcher.AudioApi.CoreAudio;
 
namespace ConsoleApp1
{
    class Program
    {
        [DllImport("kernel32.dll")]
        static extern IntPtr GetConsoleWindow();
 
        [DllImport("user32.dll")]
        static extern bool ShowWindow(IntPtr hWnd, int nCmdShow);
 
        static void Main(string[] args)
        {
            const int SW_HIDE = 0// 창 숨기기
            const int SW_SHOW = 1// 창 보이기
 
            IntPtr handle = GetConsoleWindow();
            //ShowWindow(handle, SW_HIDE);
 
            CoreAudioDevice defaultPlaybackDevice = new CoreAudioController().DefaultPlaybackDevice;
            Console.WriteLine("Current Volume: " + defaultPlaybackDevice.Volume);
 
            while (true)
            {
                if (defaultPlaybackDevice.Volume > 20// 볼륨이 20 보다 크다면
                {
                    while (defaultPlaybackDevice.Volume > 20// 볼륨이 20 보다 크지 않을때 까지 무한 루프
                    {
                        defaultPlaybackDevice.Volume--// 볼륨 1 감소
                        Console.WriteLine("Current Volume: " + defaultPlaybackDevice.Volume);
                        System.Threading.Thread.Sleep(1000); // 매 1초 확인
                    }
                }
 
                System.Threading.Thread.Sleep(10000); // 매 10초 확인
            }
        }
    }
}


소스를 입력하고 빌드한다.


프로그램을 실행하면 시스템 볼륨이 20 이하일 때까지 1초마다 1씩 감소한다.


처음 35였던 볼륨이 20이 되었다.


2022.01.07 - [C#] - C# AudioSwitcher System Audio/Sound Volume Control - 시스템 오디오/사운드 볼륨 컨트롤 2


반응형
Posted by J-sean
:
반응형

C# 콘솔 프로그램을 관리자 권한으로 실행하도록 해 보자.


1
2
3
4
5
6
7
8
9
10
11
12
13
14
15
16
17
18
19
20
21
22
23
24
25
26
27
28
29
30
31
32
33
34
35
36
37
38
39
40
41
42
43
44
45
46
47
48
49
50
51
52
53
54
55
56
57
58
59
60
61
62
63
64
65
66
67
68
69
70
71
using System;
using System.Collections.Generic;
using System.Linq;
using System.Text;
using System.Threading.Tasks;
 
using System.Diagnostics;
using System.Security.Principal;
 
namespace ConsoleApp1
{
    class Program
    {
        static void Main(string[] args)
        {
            RunAdministrator();
 
            Console.WriteLine("관리자 권한으로 실행 중.");
            Console.ReadLine();
        }
 
        static void RunAdministrator()
        {
            if (!IsAdministrator())
            {
                try
                {
                    ProcessStartInfo processStartInfo = new ProcessStartInfo()
                    {
                        UseShellExecute = true,
                        FileName = System.Reflection.Assembly.GetEntryAssembly().Location,
                        //FileName = System.Reflection.Assembly.GetExecutingAssembly().Location,
                        WorkingDirectory = Environment.CurrentDirectory,
                        Verb = "runas"
                    };
                    //processStartInfo.UseShellExecute = true;
                    //processStartInfo.FileName = System.Reflection.Assembly.GetEntryAssembly().Location;
                    //processStartInfo.WorkingDirectory = Environment.CurrentDirectory;
                    //processStartInfo.Verb = "runas";
 
                    Process.Start(processStartInfo); // 관리자 권한으로 다시 실행.
                }
                catch (Exception e)
                {
                    Console.WriteLine(e.Message + ": 이 프로그램은 관리자 권한으로 실행해야 합니다.");
                    Console.Read();
 
                    Environment.Exit(0);
                }
 
                Console.WriteLine("관리자 권한으로 다시 실행 완료.");
                Console.ReadLine();
 
                Environment.Exit(0);
            }
        }
 
        static bool IsAdministrator()
        {
            WindowsIdentity identity = WindowsIdentity.GetCurrent();
 
            if (null != identity)
            {
                WindowsPrincipal principal = new WindowsPrincipal(identity);
                return principal.IsInRole(WindowsBuiltInRole.Administrator);
            }
 
            return false;
        }
    }
}


소스를 입력하고 빌드한다. 프로그램을 실행하면 사용자 계정 컨트롤 화면이 나오고 앱의 디바이스 변경 허용 여부를 묻는다.


디바이스 변경을 허용 하면 위와 같은 메세지가 나온다.


관리자 권한으로 다시 실행된 프로그램.


디바이스 변경을 거부하면 위와 같은 메세지가 나오고 종료된다.


윈폼의 경우 Main()가 있는 Program.cs파일을 아래와 같이 수정한다.


1
2
3
4
5
6
7
8
9
10
11
12
13
14
15
16
17
18
19
20
21
22
23
24
25
26
27
28
29
30
31
32
33
34
35
36
37
38
39
40
41
42
43
44
45
46
47
48
49
50
51
52
53
54
55
56
57
58
59
60
61
62
63
64
using System;
using System.Collections.Generic;
using System.Linq;
using System.Threading.Tasks;
using System.Windows.Forms;
 
using System.Security.Principal;
using System.Diagnostics;
 
namespace WindowsFormsApp1
{
    static class Program
    {
        /// <summary>
        /// The main entry point for the application.
        /// </summary>
        [STAThread]
        static void Main()
        {
            if (!IsAdministrator())
            {
                try
                {
                    ProcessStartInfo processStartInfo = new ProcessStartInfo()
                    {
                        UseShellExecute = true,
                        FileName = Application.ExecutablePath,
                        WorkingDirectory = Environment.CurrentDirectory,
                        Verb = "runas"
                    };
                    //processStartInfo.UseShellExecute = true;
                    //processStartInfo.FileName = Application.ExecutablePath,;
                    //processStartInfo.WorkingDirectory = Environment.CurrentDirectory;
                    //processStartInfo.Verb = "runas";
 
                    Process.Start(processStartInfo); // 관리자 권한으로 다시 실행 후 이 프로그램은 종료.
                }
                catch (Exception e)
                {
                    MessageBox.Show(e.Message + ": 이 프로그램은 관리자 권한으로 실행해야 합니다.");
                }
            }
            else
            {
                Application.EnableVisualStyles();
                Application.SetCompatibleTextRenderingDefault(false);
                Application.Run(new Form1());
            }
        }
 
        static bool IsAdministrator()
        {
            WindowsIdentity identity = WindowsIdentity.GetCurrent();
 
            if (null != identity)
            {
                WindowsPrincipal principal = new WindowsPrincipal(identity);
                return principal.IsInRole(WindowsBuiltInRole.Administrator);
            }
 
            return false;
        }
    }
}


반응형
Posted by J-sean
:
반응형

ipconfig 명령을 이용해 IP 주소 구성을 삭제 하거나 갱신하는 프로그램을 만들어 보자.

IP 주소 구성 삭제시 인터넷 연결을 끊을 수 있다.


1
2
3
4
5
6
7
8
9
10
11
12
13
14
15
16
17
18
19
20
21
22
23
24
25
26
27
28
29
30
31
32
33
34
35
36
37
38
39
40
41
42
43
44
45
46
47
48
49
50
51
52
using System;
using System.Collections.Generic;
using System.Linq;
using System.Text;
using System.Threading.Tasks;
 
using System.Diagnostics;
using System.Security;
 
 
namespace ConsoleApp1
{
    class Program
    {
        static void Main(string[] args)
        {
            SetInternetConnection("release"); // 인터넷 연결 해제
            //SetInternetConnection("renew"); // 인터넷 연결
        }
 
        static void SetInternetConnection(string command)
        {
            try
            {
                ProcessStartInfo processStartInfo = new ProcessStartInfo()
                {
                    FileName = "cmd.exe",
                    Arguments = "/c ipconfig /" + command,
                    WindowStyle = ProcessWindowStyle.Hidden
                };
 
                //ProcessStartInfo processStartInfo = new ProcessStartInfo();
                //processStartInfo.FileName = "cmd.exe";
                //processStartInfo.Arguments = "/c ipconfig /" + command;
                //processStartInfo.WindowStyle = ProcessWindowStyle.Hidden;
 
                Process.Start(processStartInfo);
                // This class contains a link demand at the class level that applies
                // to all members. A SecurityException is thrown when the immediate
                // caller does not have full-trust permission.
            }
            catch (SecurityException e)
            {
                Console.WriteLine("Security Exception: {0}", e.Message);
            }
            catch (Exception e)
            {
                Console.WriteLine("Exception: {0}", e.Message);
            }
        }
    }
}


소스를 입력하고 빌드한다.


프로그램을 실행하면 인터넷 연결이 끊긴다.


SetInternetConnection() 호출 주석을 바꾸면 인터넷이 연결된다.


반응형
Posted by J-sean
:
반응형

2022.01.04 - [C#] - C# Wireless Network Adapter Disable/Enable - 무선 네트워크 어댑터 활성화/비활성화 1

의 소스를 조금 더 심플하게 수정해 보자.


1
2
3
4
5
6
7
8
9
10
11
12
13
14
15
16
17
18
19
20
21
22
23
24
25
26
27
28
29
30
31
32
33
34
35
36
37
38
39
40
41
42
43
44
45
46
47
48
49
50
51
52
53
54
55
56
57
using System;
using System.Collections.Generic;
using System.Linq;
using System.Text;
using System.Threading.Tasks;
 
using System.Management;
 
 
namespace ConsoleApp1
{
    class Program
    {
        static void Main(string[] args)
        {
            ListAllNetworkAdapters();
        }
 
        private static void ListAllNetworkAdapters()
        {
            try
            {
                ManagementObjectSearcher searcher =
                    new ManagementObjectSearcher("root\\CIMV2""SELECT * FROM Win32_NetworkAdapter");
 
                foreach (ManagementObject queryObj in searcher.Get())
                {
                    if (queryObj["Name"].ToString().Contains("Wireless"))
                    {
                        Console.WriteLine("-----------------------------------");
                        Console.WriteLine("Win32_NetworkAdapter Instance");
                        Console.WriteLine("-----------------------------------");
                        Console.WriteLine("Name: {0}", queryObj["Name"]);
                        Console.WriteLine("NetEnabled: {0}", queryObj["NetEnabled"]);
 
                        if ((bool)queryObj["NetEnabled"])
                        {
                            queryObj.InvokeMethod("Disable"null); // 관리자 권한 실행 필요
                            Console.WriteLine("Disabled.");
                        }
                        else
                        {
                            queryObj.InvokeMethod("Enable"null); // 관리자 권한 실행 필요
                            Console.WriteLine("Enabled.");
                        }
 
                        Console.WriteLine("-----------------------------------");
                    }
                }
            }
            catch (ManagementException e)
            {
                Console.WriteLine("An error occurred while querying for WMI data: " + e.Message);
            }
        }
    }
}


소스를 입력하고 빌드한다.


활성화 되어 있던 와이파이가 표시되고 비활성화 되었다.


'사용 안 함' 상태에서 프로그램을 실행하면 '사용함' 상태로 바뀐다.

※ 이 프로그램은 관리자 권한으로 실행해야 한다.


반응형
Posted by J-sean
: