[MediaPipe] Face Landmark Detection 얼굴 특징 감지
AI, ML, DL 2025. 2. 11. 21:19 |반응형
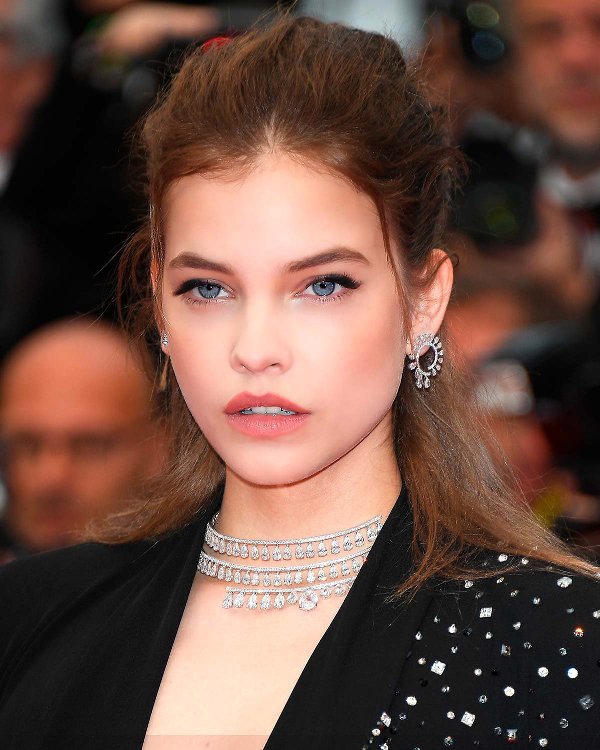
MeidaPipe를 사용해 얼굴 특징을 감지해 보자.
|
1
2
3
4
5
6
7
8
9
10
11
12
13
14
15
16
17
18
19
20
21
22
23
24
25
26
27
28
29
30
31
32
33
34
35
36
37
38
39
40
41
42
43
44
45
46
47
48
49
50
51
52
53
54
55
56
57
58
59
60
61
62
63
64
65
66
67
68
69
70
71
72
73
74
75
76
77
78
79
80
81
82
83
84
85
86
87
88
89
90
|
import numpy as np
import matplotlib.pyplot as plt
import cv2
from mediapipe import solutions
from mediapipe.framework.formats import landmark_pb2
import mediapipe as mp
from mediapipe.tasks import python
from mediapipe.tasks.python import vision
def draw_landmarks_on_image(rgb_image, detection_result):
face_landmarks_list = detection_result.face_landmarks
annotated_image = np.copy(rgb_image)
# Loop through the detected faces to visualize.
for idx in range(len(face_landmarks_list)):
face_landmarks = face_landmarks_list[idx]
# Draw the face landmarks.
face_landmarks_proto = landmark_pb2.NormalizedLandmarkList()
face_landmarks_proto.landmark.extend([
landmark_pb2.NormalizedLandmark(x=landmark.x, y=landmark.y, z=landmark.z) for landmark in face_landmarks
])
solutions.drawing_utils.draw_landmarks(
image=annotated_image,
landmark_list=face_landmarks_proto,
connections=mp.solutions.face_mesh.FACEMESH_TESSELATION,
landmark_drawing_spec=None,
connection_drawing_spec=mp.solutions.drawing_styles
.get_default_face_mesh_tesselation_style())
solutions.drawing_utils.draw_landmarks(
image=annotated_image,
landmark_list=face_landmarks_proto,
connections=mp.solutions.face_mesh.FACEMESH_CONTOURS,
landmark_drawing_spec=None,
connection_drawing_spec=mp.solutions.drawing_styles
.get_default_face_mesh_contours_style())
solutions.drawing_utils.draw_landmarks(
image=annotated_image,
landmark_list=face_landmarks_proto,
connections=mp.solutions.face_mesh.FACEMESH_IRISES,
landmark_drawing_spec=None,
connection_drawing_spec=mp.solutions.drawing_styles
.get_default_face_mesh_iris_connections_style())
return annotated_image
def plot_face_blendshapes_bar_graph(face_blendshapes):
# Extract the face blendshapes category names and scores.
face_blendshapes_names = [face_blendshapes_category.category_name for face_blendshapes_category in face_blendshapes]
face_blendshapes_scores = [face_blendshapes_category.score for face_blendshapes_category in face_blendshapes]
# The blendshapes are ordered in decreasing score value.
face_blendshapes_ranks = range(len(face_blendshapes_names))
fig, ax = plt.subplots(figsize=(12, 12))
bar = ax.barh(face_blendshapes_ranks, face_blendshapes_scores, label=[str(x) for x in face_blendshapes_ranks])
ax.set_yticks(face_blendshapes_ranks, face_blendshapes_names)
ax.invert_yaxis()
# Label each bar with values
for score, patch in zip(face_blendshapes_scores, bar.patches):
plt.text(patch.get_x() + patch.get_width(), patch.get_y(), f"{score:.4f}", va="top")
ax.set_xlabel('Score')
ax.set_title("Face Blendshapes")
plt.tight_layout()
plt.show()
# Import the necessary modules.
import mediapipe as mp
from mediapipe.tasks import python
from mediapipe.tasks.python import vision
# Create an FaceLandmarker object.
base_options = python.BaseOptions(model_asset_path='face_landmarker.task')
# https://ai.google.dev/edge/mediapipe/solutions/vision/face_landmarker
options = vision.FaceLandmarkerOptions(base_options=base_options, output_face_blendshapes=True,
output_facial_transformation_matrixes=True, num_faces=1)
detector = vision.FaceLandmarker.create_from_options(options)
# Load the input image.
image = mp.Image.create_from_file("face.jpg")
# Detect face landmarks from the input image.
detection_result = detector.detect(image)
# Process the detection result. In this case, visualize it.
annotated_image = draw_landmarks_on_image(image.numpy_view(), detection_result)
cv2.imshow('sean', cv2.cvtColor(annotated_image, cv2.COLOR_RGB2BGR))
cv2.waitKey(0)
|
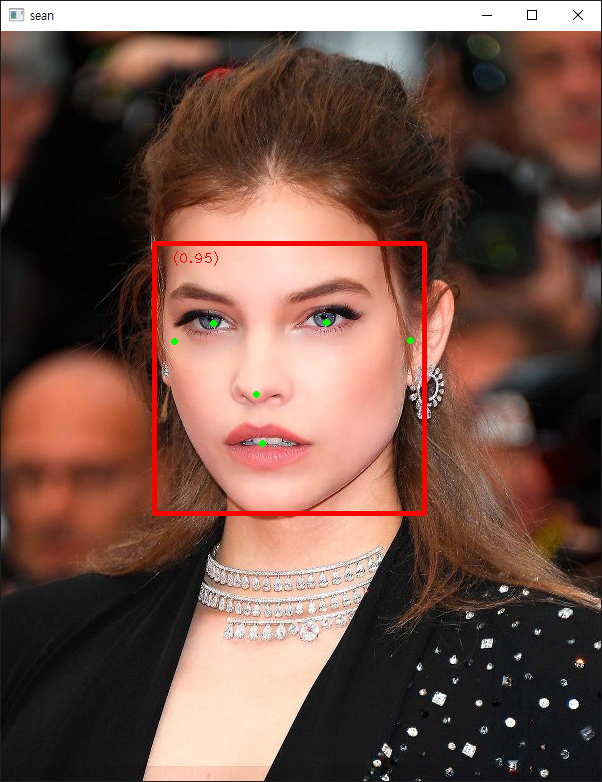
소스를 입력하고 실행한다.

결과에는 각 특징의 좌표 뿐만 아니라 blendshapes라는 얼굴 표정 데이터도 함께 담겨있다. 확인해 보자.
|
1
2
3
4
5
6
7
8
9
10
11
12
13
14
15
|
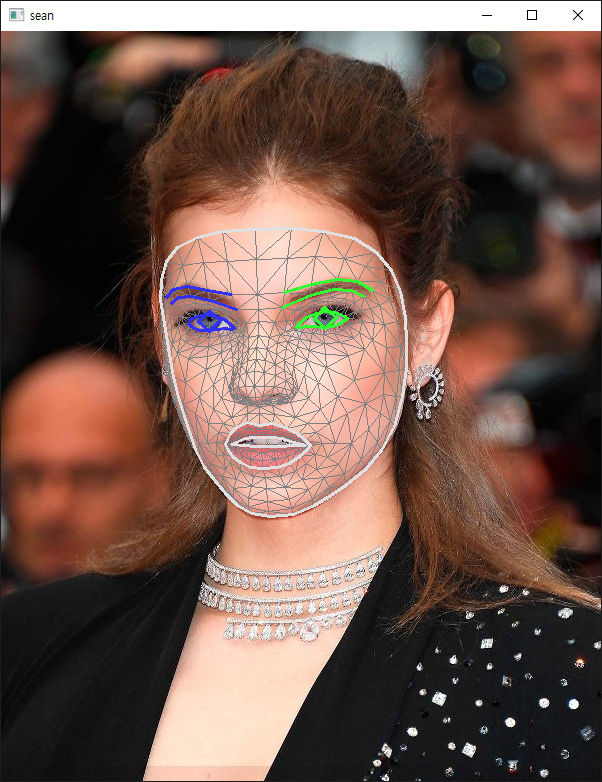
# The Face Landmarker returns a FaceLandmarkerResult object for each detection run. The result
# object contains a face mesh for each detected face, with coordinates for each face landmark.
# Optionally, the result object can also contain blendshapes, which denote facial expressions,
# and a facial transformation matrix to apply face effects on the detected landmarks.
score = []
for i in range(len(detection_result.face_blendshapes[0])):
score.append(detection_result.face_blendshapes[0][i].score)
score_sorted = np.sort(score)[::-1] # [::-1] = 내림차순
score_sorted_index = np.argsort(score)[::-1]
for i in range(len(score_sorted)):
if score_sorted[i] < 0.4: # 40% 이상의 표정만 출력
break
print("%d: %.2f, %s" %(i, score_sorted[i],
detection_result.face_blendshapes[0][score_sorted_index[i]].category_name))
|


반응형
'AI, ML, DL' 카테고리의 다른 글
| [AI] 한국어 형태소 분석기 Kiwipiepy & 워드 클라우드 Word Cloud (0) | 2025.11.13 |
|---|---|
| [MediaPipe] Async Pose Landmark Detection 비동기 자세 특징 감지 (0) | 2025.02.12 |
| [MediaPipe] Pose Landmark Detection 자세 특징 감지 (0) | 2025.02.11 |
| [MediaPipe] Face Detection 얼굴 감지 (0) | 2025.02.11 |
| [MediaPipe] Hand Landmark Detection 손 특징 감지 (0) | 2025.02.11 |