using System;
using System.Collections.Generic;
using System.ComponentModel;
using System.Data;
using System.Drawing;
using System.Linq;
using System.Text;
using System.Threading.Tasks;
using System.Windows.Forms;
using System.Runtime.InteropServices;
using System.Media;
namespace Christmas
{
public partial class Form1 : Form
{
[DllImport("User32.dll")]
public static extern IntPtr GetDC(IntPtr hwnd);
[DllImport("user32.dll")]
public static extern IntPtr ReleaseDC(IntPtr hWnd, IntPtr hDC);
// 바탕화면 refresh
[DllImport("Shell32.dll")]
private static extern int SHChangeNotify(int eventId, int flags, IntPtr item1, IntPtr item2);
int screenWidth;
int screenHeight;
IntPtr desktopPtr;
// 이미지 파일은 화면과 해상도가 달라서 작거나 크게 표시될 수 있다.
// Image로 받지 말고 비트맵으로 변환해 사용하면 된다.
Bitmap tree;
Bitmap leftTop;
Bitmap rightTop;
Bitmap rightDeer;
Bitmap cane;
Bitmap bulb;
Bitmap snowMan;
Bitmap merry;
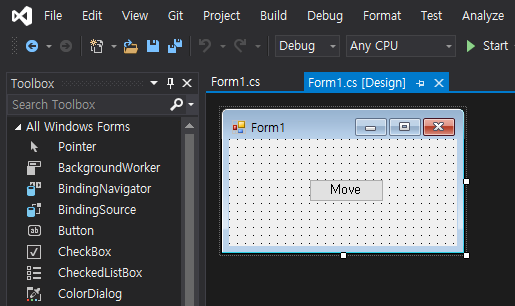
public Form1()
{
InitializeComponent();
screenWidth = Screen.PrimaryScreen.Bounds.Width;
screenHeight = Screen.PrimaryScreen.Bounds.Height;
desktopPtr = GetDC(IntPtr.Zero);
tree = new Bitmap(Properties.Resources.tree1);
rightDeer = new Bitmap(Properties.Resources.RightDeer);
leftTop = new Bitmap(Properties.Resources.LeftTop);
rightTop = new Bitmap(Properties.Resources.RightTop);
cane = new Bitmap(Properties.Resources.cane);
bulb = new Bitmap(Properties.Resources.bulb);
snowMan = new Bitmap(Properties.Resources.BottomSnowMan);
merry = new Bitmap(Properties.Resources.Merry);
}
~Form1()
{
ReleaseDC(IntPtr.Zero, desktopPtr);
}
private void Form1_Load(object sender, EventArgs e)
{
// 폼의 시작 위치를 생성자에서 설정하면 크기가 줄어드는 등 비정상적으로 동작한다.
StartPosition = FormStartPosition.Manual;
Location = new Point(screenWidth - Size.Width, screenHeight - Size.Height - 40);
// Gets or sets a value indicating whether the form will receive key events before the event is passed
// to the control that has focus.
// true if the form will receive all key events; false if the currently selected control on the form
// receives key events. The default is false.
// 키가 눌렸을때 포커스를 갖고 있는 컨트롤보다 폼이 먼저 키 이벤트를 받을 수 있게 한다. 단축키 지정을 위해.
KeyPreview = true;
// 타이머를 작동시키면 반투명 이미지 부분이 계속 진해진다. 필요하면 작동시키자.
//timer1.Enabled = true;
SoundPlayer p = new SoundPlayer();
p.Stream = Properties.Resources.Song;
p.Play();
using (Graphics g = Graphics.FromHdc(desktopPtr))
{
g.DrawImage(bulb, screenWidth - rightDeer.Width - bulb.Width, 0);
g.DrawImage(leftTop, 0, 0);
g.DrawImage(rightTop, screenWidth - rightTop.Width, 0);
g.DrawImage(rightDeer, screenWidth - rightDeer.Width, (screenHeight - rightDeer.Height) / 2);
g.DrawImage(cane, cane.Width / 4, (screenHeight - cane.Height) / 2);
g.DrawImage(snowMan, 0, screenHeight - snowMan.Height);
g.DrawImage(merry, screenWidth - merry.Width, screenHeight - merry.Height - 40);
g.DrawImage(tree, (screenWidth - tree.Width) / 2, 40);
}
}
private void Form1_KeyDown(object sender, KeyEventArgs e)
{
switch (e.KeyCode)
{
case Keys.Escape:
case Keys.Q:
Close();
break;
case Keys.R:
Reload();
break;
case Keys.H:
System.Diagnostics.Process.Start("https://s-engineer.tistory.com/");
break;
default:
break;
}
}
private void button1_Click(object sender, EventArgs e)
{
Close();
}
private void button2_Click(object sender, EventArgs e)
{
Reload();
}
private void Reload()
{
using (Graphics g = Graphics.FromHdc(desktopPtr))
{
g.DrawImage(bulb, screenWidth - rightDeer.Width - bulb.Width, 0);
g.DrawImage(leftTop, 0, 0);
g.DrawImage(rightTop, screenWidth - rightTop.Width, 0);
g.DrawImage(rightDeer, screenWidth - rightDeer.Width, (screenHeight - rightDeer.Height) / 2);
g.DrawImage(cane, cane.Width / 4, (screenHeight - cane.Height) / 2);
g.DrawImage(snowMan, 0, screenHeight - snowMan.Height);
g.DrawImage(merry, screenWidth - merry.Width, screenHeight - merry.Height - 40);
g.DrawImage(tree, (screenWidth - tree.Width) / 2, 40);
}
}
private void timer1_Tick(object sender, EventArgs e)
{
using (Graphics g = Graphics.FromHdc(desktopPtr))
{
g.DrawImage(bulb, screenWidth - rightDeer.Width - bulb.Width, 0);
g.DrawImage(leftTop, 0, 0);
g.DrawImage(rightTop, screenWidth - rightTop.Width, 0);
g.DrawImage(rightDeer, screenWidth - rightDeer.Width, (screenHeight - rightDeer.Height) / 2);
g.DrawImage(cane, cane.Width / 4, (screenHeight - cane.Height) / 2);
g.DrawImage(snowMan, 0, screenHeight - snowMan.Height);
g.DrawImage(merry, screenWidth - merry.Width, screenHeight - merry.Height - 40);
g.DrawImage(tree, (screenWidth - tree.Width) / 2, 40);
}
}
private void Form1_FormClosing(object sender, FormClosingEventArgs e)
{
// 바탕화면 refresh
SHChangeNotify(0x8000000, 0x1000, IntPtr.Zero, IntPtr.Zero);
}
private void linkLabel1_LinkClicked(object sender, LinkLabelLinkClickedEventArgs e)
{
linkLabel1.LinkVisited = true;
System.Diagnostics.Process.Start("https://s-engineer.tistory.com/");
}
}
}


