Linux(Ubuntu) Qt5 Image Display - 리눅스(우분투) Qt5 이미지 디스플레이
C, C++ 2021. 2. 13. 11:33 |반응형
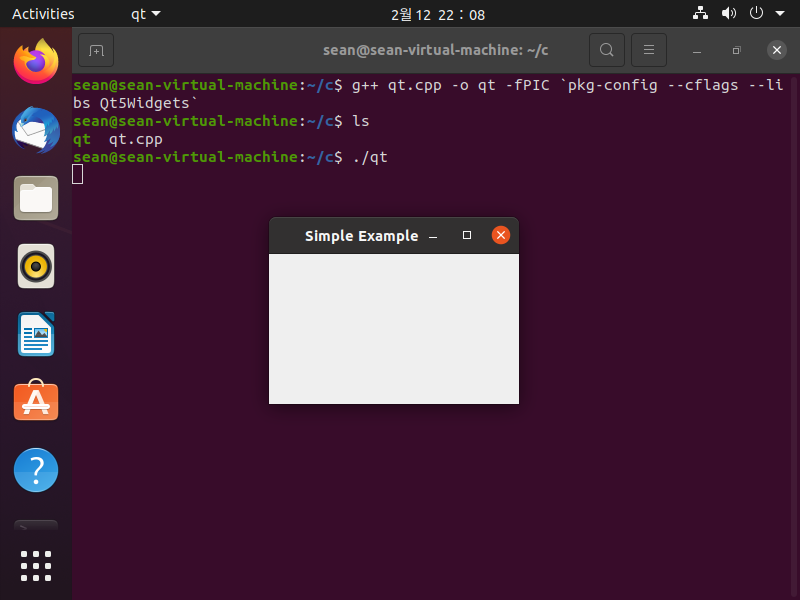
리눅스(우분투)에서 Qt5를 이용해 이미지를 디스플레이 해 보자.
|
1
2
3
4
5
6
7
8
9
10
11
12
13
14
15
16
17
18
19
20
21
22
23
24
25
26
27
28
29
30
31
32
33
34
35
36
37
38
39
40
41
42
43
44
45
46
47
48
49
50
51
52
53
54
55
56
57
58
59
60
61
|
#include <QApplication>
#include <QWidget>
#include <QPainter>
class Picture : public QWidget
{
public:
Picture(QWidget* parent = 0);
protected:
void paintEvent(QPaintEvent* event);
// This event handler can be reimplemented in a subclass
// to receive paint events passed in event.
void drawPicture(QPainter* qp);
private:
int height;
int width;
QImage image;
};
Picture::Picture(QWidget* parent) : QWidget(parent)
{
image.load("Barbara Palvin.png");
height = image.height();
width = image.width();
this->resize(width, height);
}
void Picture::paintEvent(QPaintEvent* e)
{
Q_UNUSED(e);
// Q_UNUSED( name)
// Indicates to the compiler that the parameter with the
// specified name is not used in the body of a function.
// This can be used to suppress compiler warnings while
// allowing functions to be defined with meaningful
// parameter names in their signatures.
QPainter qp(this);
drawPicture(&qp);
}
void Picture::drawPicture(QPainter* qp)
{
qp->drawImage(0, 0, image);
}
int main(int argc, char* argv[])
{
QApplication app(argc, argv);
Picture window;
window.setWindowTitle("Picture Example");
//window.resize(width, height);
window.show();
return app.exec();
}
|
소스를 입력한다. (qt.cpp)

반응형
'C, C++' 카테고리의 다른 글
| MariaDB(MySQL) C API (0) | 2021.08.29 |
|---|---|
| SQLite - C/C++ (0) | 2021.08.27 |
| Linux(Ubuntu) Qt5 GUI Programming - 리눅스(우분투) Qt5 GUI 프로그래밍 (0) | 2021.02.12 |
| Linux(Ubuntu) GTK+3(2) Image Display - 리눅스(우분투) GTK+3(2) 이미지 디스플레이 (0) | 2021.02.12 |
| Linux(Ubuntu) GTK+3(2) GUI Programming - 리눅스(우분투) GUI 프로그래밍 (0) | 2021.02.12 |