반응형

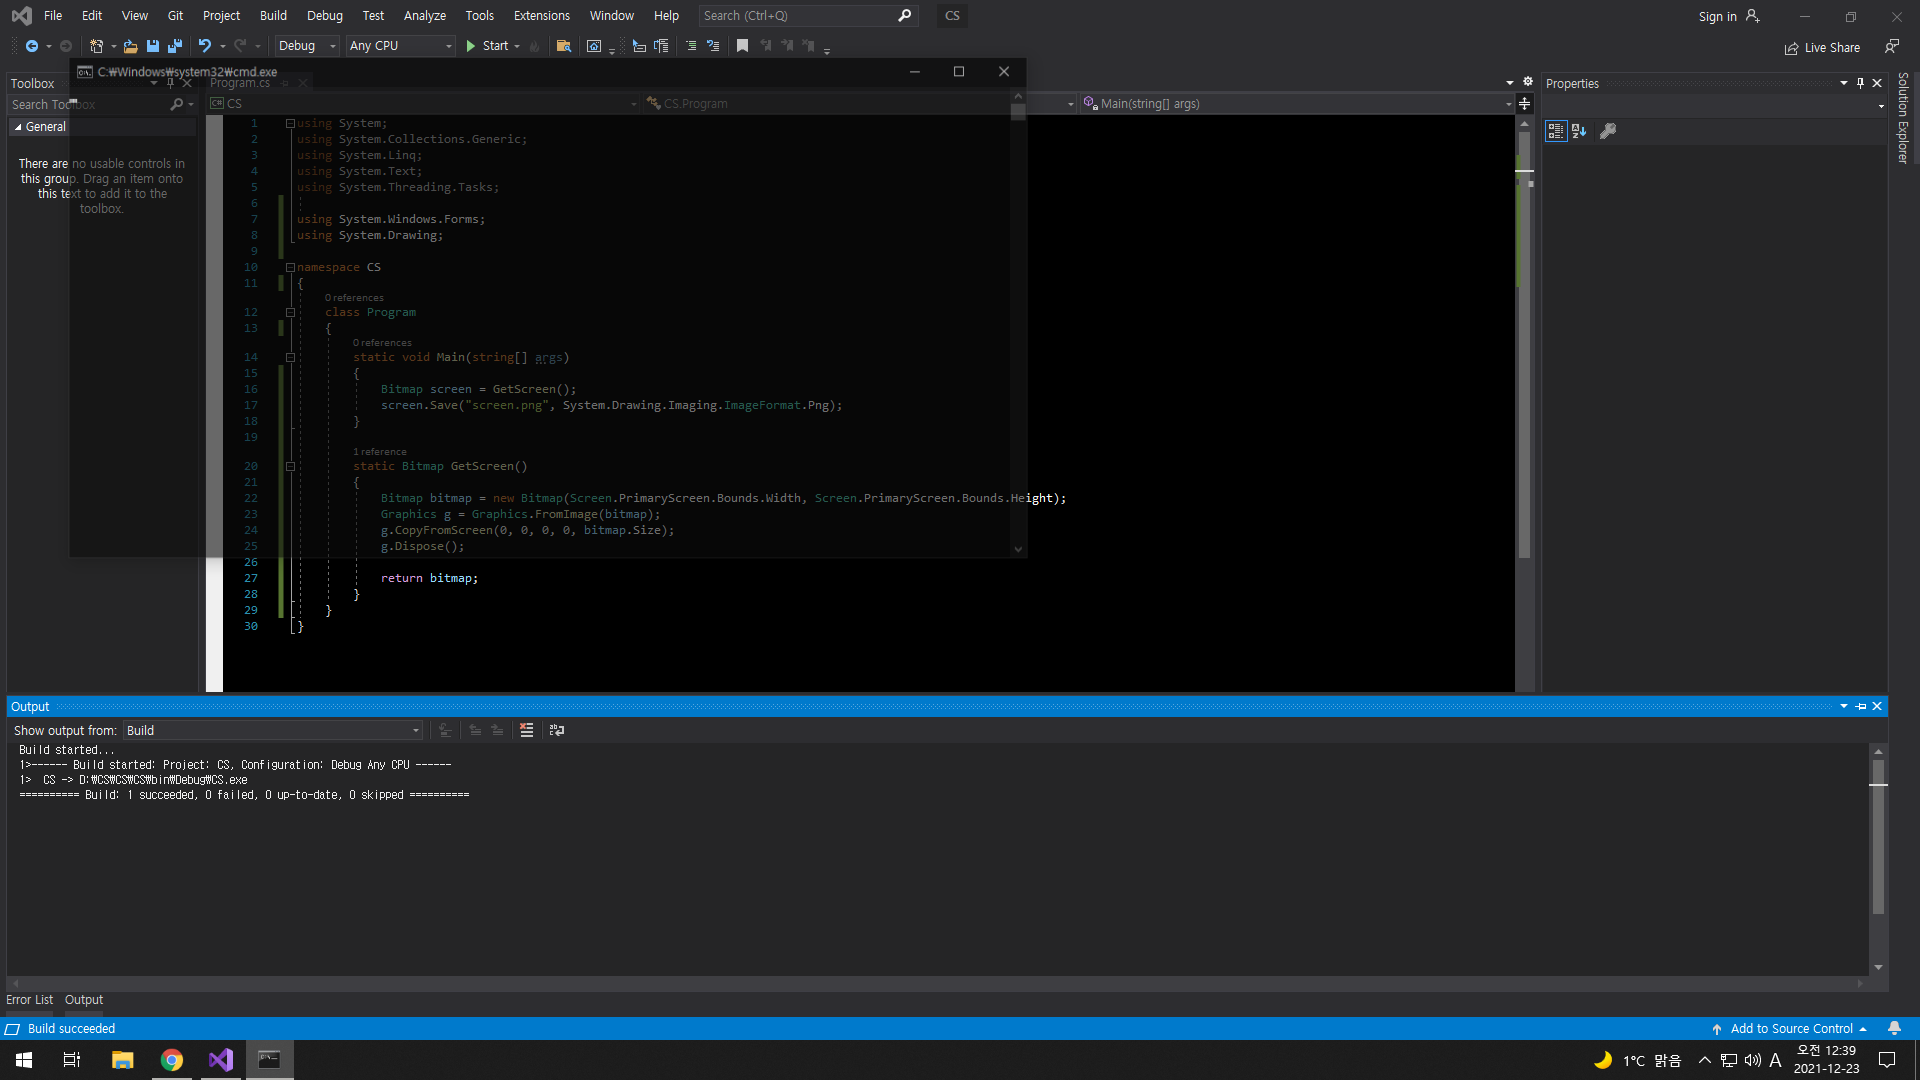
간단히 화면을 캡쳐해 보자.


1
2
3
4
5
6
7
8
9
10
11
12
13
14
15
16
17
18
19
20
21
22
23
24
25
26
27
28
29
30
using System;
using System.Collections.Generic;
using System.Linq;
using System.Text;
using System.Threading.Tasks;
 
using System.Windows.Forms;
using System.Drawing;
 
namespace CS
{
    class Program
    {
        static void Main(string[] args)
        {
            Bitmap screen = GetScreen();
            screen.Save("screen.png"System.Drawing.Imaging.ImageFormat.Png);
        }
 
        static Bitmap GetScreen()
        {
            Bitmap bitmap = new Bitmap(Screen.PrimaryScreen.Bounds.Width, Screen.PrimaryScreen.Bounds.Height);
            Graphics g = Graphics.FromImage(bitmap);
            g.CopyFromScreen(0000, bitmap.Size);
            g.Dispose();
 
            return bitmap;
        }
    }
}


소스를 입력하고 빌드한다.


실행하면 Output 폴더에 screen.png 파일이 생성된다.


반응형
Posted by J-sean
:
반응형

바탕화면에 이미지를 출력하고 움직여 보자.


폼과 버튼을 적당히 배치한다.


1
2
3
4
5
6
7
8
9
10
11
12
13
14
15
16
17
18
19
20
21
22
23
24
25
26
27
28
29
30
31
32
33
34
35
36
37
38
39
40
41
42
43
44
45
46
47
48
49
50
51
52
53
54
55
56
57
58
59
60
61
62
63
64
65
66
67
68
69
70
71
72
73
74
75
76
77
78
79
80
81
82
83
84
85
86
87
88
89
90
91
92
93
94
95
96
97
98
99
using System;
using System.Collections.Generic;
using System.ComponentModel;
using System.Data;
using System.Drawing;
using System.Linq;
using System.Text;
using System.Threading.Tasks;
using System.Windows.Forms;
 
using System.Runtime.InteropServices;
 
namespace WindowsFormsApp1
{
    public partial class Form1 : Form
    {
        [DllImport("user32.dll", ExactSpelling = true, SetLastError = true)]
        private static extern IntPtr GetDC(IntPtr hWnd);
 
        [DllImport("user32.dll", ExactSpelling = true)]
        private static extern IntPtr ReleaseDC(IntPtr hWnd, IntPtr hDC);
 
        public Form1()
        {
            InitializeComponent();
        }
 
        private void button1_Click(object sender, EventArgs e)
        {
            int step = 1;   // 이동 스텝
 
            Rectangle targetRect = new Rectangle(100150400400);   // 표시할 그림 사이즈(Horizontal: 100~499(400) pixel, Vertical: 150~549(400) pixel) 
            Point outPoint = new Point(500300);   // 모니터의 표시 위치(x, y)
 
            //Image img = Image.FromFile("Barbara.jpg");  // Resolution Horizontal: 300, Vertical: 300  
            // 이렇게 하면 이미지 파일과 아래 buffer 비트맵의 해상도(96, 96)가 달라서 (사이즈가) 제대로 표시되지 않는다.
            Bitmap img = new Bitmap(Image.FromFile("Barbara.jpg")); // Resolution Horizontal: 96, Vertical: 96
            Bitmap scr = ScreenCapture.Capture();
            Bitmap buffer = new Bitmap(targetRect.Width + step, targetRect.Height + step);
            IntPtr desktopDC = GetDC(IntPtr.Zero);
 
            Graphics dG = Graphics.FromHdc(desktopDC);
            Graphics bG = Graphics.FromImage(buffer);
            
            for (int i = 0, j = 0; i < 100; i += step, j += step)
            {
                bG.DrawImage(scr, 00new Rectangle(outPoint.X + i, outPoint.Y + j, targetRect.Width + step , targetRect.Height + step ), GraphicsUnit.Pixel);
                bG.DrawImage(img, step, step, targetRect, GraphicsUnit.Pixel);                
                dG.DrawImage(buffer, outPoint.X + i, outPoint.Y + j);
            }
 
            for (int i = 100, j = 100; i > 0; i -= step, j -= step)
            {
                bG.DrawImage(scr, 00new Rectangle(outPoint.X + i, outPoint.Y + j, targetRect.Width + step, targetRect.Height + step), GraphicsUnit.Pixel);
                bG.DrawImage(img, 00, targetRect, GraphicsUnit.Pixel);
                dG.DrawImage(buffer, outPoint.X + i, outPoint.Y + j);
            }
 
            dG.Dispose();
            bG.Dispose();
            ReleaseDC(IntPtr.Zero, desktopDC);
        }
    }
 
    public class ScreenCapture
    {
        [DllImport("user32.dll", ExactSpelling = true, SetLastError = true)]
        private static extern IntPtr GetDC(IntPtr hWnd);
 
        [DllImport("user32.dll", ExactSpelling = true)]
        private static extern IntPtr ReleaseDC(IntPtr hWnd, IntPtr hDC);
 
        [DllImport("gdi32.dll", ExactSpelling = true)]
        private static extern IntPtr BitBlt(IntPtr hDestDC, int x, int y, int nWidth, int nHeight, IntPtr hSrcDC, int xSrc, int ySrc, int dwRop);
 
        [DllImport("user32.dll", EntryPoint = "GetDesktopWindow")]
        private static extern IntPtr GetDesktopWindow();
 
        public static Bitmap Capture()
        {
            int screenWidth = Screen.PrimaryScreen.Bounds.Width;
            int screenHeight = Screen.PrimaryScreen.Bounds.Height;
 
            Bitmap screenBmp = new Bitmap(screenWidth, screenHeight);
            Graphics g = Graphics.FromImage(screenBmp);
 
            IntPtr desktopDC = GetDC(GetDesktopWindow());
            IntPtr hDC = g.GetHdc();
 
            BitBlt(hDC, 00, screenWidth, screenHeight, desktopDC, 000x00CC0020);    //SRCCOPY (DWORD)0x00CC0020
 
            ReleaseDC(GetDesktopWindow(), desktopDC);
            g.ReleaseHdc(hDC);
            g.Dispose();
 
            return screenBmp;
        }
    }
}


소스를 입력하고 빌드한다.

Barbara.jpg
0.05MB


실행하고 버튼을 클릭한다.


지정된 위치에 이미지가 출력되고 움직인다.


반응형
Posted by J-sean
:
반응형

C#으로 스크린을 캡쳐 해 보자.


폼과 버튼을 적당히 배치한다.


1
2
3
4
5
6
7
8
9
10
11
12
13
14
15
16
17
18
19
20
21
22
23
24
25
26
27
28
29
30
31
32
33
34
35
36
37
38
39
40
41
42
43
44
45
46
47
48
49
50
51
52
53
54
55
56
57
58
59
60
61
62
63
64
65
66
using System;
using System.Collections.Generic;
using System.ComponentModel;
using System.Data;
using System.Drawing;
using System.Linq;
using System.Text;
using System.Threading.Tasks;
using System.Windows.Forms;
 
using System.Runtime.InteropServices;
 
namespace WindowsFormsApp1
{
    public partial class Form1 : Form
    {
        public Form1()
        {
            InitializeComponent();            
        }
 
        private void button1_Click(object sender, EventArgs e)
        {
            Bitmap bm = ScreenCapture.Capture();
 
            Graphics g = CreateGraphics();
            g.DrawImage(bm, 1040new Rectangle(100100450250), GraphicsUnit.Pixel);
            g.Dispose();
        }
    }
 
    public class ScreenCapture
    {
        [DllImport("user32.dll", ExactSpelling = true, SetLastError = true)]
        private static extern IntPtr GetDC(IntPtr hWnd);
 
        [DllImport("user32.dll", ExactSpelling = true)]
        private static extern IntPtr ReleaseDC(IntPtr hWnd, IntPtr hDC);
 
        [DllImport("gdi32.dll", ExactSpelling = true)]
        private static extern IntPtr BitBlt(IntPtr hDestDC, int x, int y, int nWidth, int nHeight, IntPtr hSrcDC, int xSrc, int ySrc, int dwRop);
 
        [DllImport("user32.dll", EntryPoint = "GetDesktopWindow")]
        private static extern IntPtr GetDesktopWindow();
 
        public static Bitmap Capture()
        {
            int screenWidth = Screen.PrimaryScreen.Bounds.Width;
            int screenHeight = Screen.PrimaryScreen.Bounds.Height;
 
            Bitmap screenBmp = new Bitmap(screenWidth, screenHeight);
            Graphics g = Graphics.FromImage(screenBmp);
 
            IntPtr desktopDC = GetDC(GetDesktopWindow());
            IntPtr hDC = g.GetHdc();
 
            BitBlt(hDC, 00, screenWidth, screenHeight, desktopDC, 000x00CC0020);    //SRCCOPY (DWORD)0x00CC0020
 
            ReleaseDC(GetDesktopWindow(), desktopDC);
            g.ReleaseHdc(hDC);
            g.Dispose();
 
            return screenBmp;
        }
    }
}


소스를 입력하고 빌드한다.


실행하면 버튼만 하나 나타난다. 클릭하자.


지정한 위치의 화면이 캡쳐되어 표시된다.


반응형
Posted by J-sean
:
반응형

KiCad에는 PCB에 로고(그림)를 넣는 메뉴가 없다. 직선과 원만으로 로고를 그리기는 어려우므로 아래 방법을 사용한다.


KiCad를 실행하고 새로운 프로젝트를 만든다.


Bitmap to Component Converter를 실행한다.


Load Bitmap 버튼을 클릭하고 원하는 로고나 사진을 불러온다.


Format은 Pcbnew(.kicad_mod file), Board Layer for Outline은 Front silk screen으로 선택한다.


Greyscale Picture


Black&White Picture

PCB위에 silk screen으로 적용하는 경우 결과는 Black&White Picture와 거의 같다. Picture가 마음에 들지 않는다면 원본 파일을 적당히 전처리 해 준다. 이미지가 너무 크거나 작다면 미리 사이즈를 수정해야 할 수도 있다. 상단의 Bitmap Info와 Image Options의 Black/White Threshold를 확인하자.


이미지 선택이 완료 되었으면 Export를 클릭하고 적당한 폴더에 Pcbnew 파일을 만든다.


생성된 Pcbnew(.kicad_mod) 파일은 이미지 정보가 들어있는 텍스트 파일이다.


Bitmap to Component Converter를 종료하고 Footprint Editor를 클릭한다.


Footprint Editor


File - New Library...를 클릭한다.


적당한 폴더에 라이브러리 경로 파일(.pretty)을 저장한다.


이 프로젝트에서만 사용할 Footprint 라이브러리라면 Project를 선택한다.


Test 라이브러리가 만들어졌다.


File - Import Footprint from KiCad File...을 클릭하고 Bitmap to Component Converter에서 만든 Pcbnew 파일을 선택한다.


이미지가 import된다.


File - Save를 클릭하고 Test 라이브러리에 저장한다.


Footprint Editor를 종료하고 PCB Layout Editor를 클릭한다.


Add footprints를 클릭한다.


Footprint Editor에서 저장한 Test - camping을 선택한다.


이미지가 silk screen으로 표시된다.


이렇게 완성된다.


반응형
Posted by J-sean
:
반응형

Screen capture with Windows API and OpenCV.


1
2
3
4
5
6
7
8
9
10
11
12
13
14
15
16
17
18
19
20
21
22
23
24
25
26
27
28
29
30
31
32
33
34
35
36
37
38
39
40
41
42
43
44
45
46
47
48
49
50
51
52
53
54
55
56
57
58
59
60
61
62
63
64
65
66
67
68
69
70
71
72
73
74
75
76
77
78
79
80
81
82
83
84
85
86
87
88
89
90
91
92
93
94
95
#include <Windows.h>
#include <iostream>
#include "opencv2/imgproc.hpp"
#include "opencv2/highgui.hpp"
 
using namespace std;
using namespace cv;
 
class hWnd2Mat
{
public:
    hWnd2Mat(HWND hWindow, float scale = 1);
    virtual ~hWnd2Mat();
    virtual void Read();
    Mat capture;
 
private:
    HWND hWnd;
    HDC hWindowDC, hWindowCompatibleDC;
    int height, width, srcHeight, srcWidth;
    HBITMAP hBitmap;
    BITMAPINFOHEADER bi;
};
 
hWnd2Mat::hWnd2Mat(HWND hWindow, float scale)
{
    hWnd = hWindow;
    hWindowDC = GetDC(hWnd);
    hWindowCompatibleDC = CreateCompatibleDC(hWindowDC);
    SetStretchBltMode(hWindowCompatibleDC, COLORONCOLOR);
 
    RECT windowsize;    // get the height and width of the screen
    GetClientRect(hWnd, &windowsize);
 
    srcHeight = windowsize.bottom;
    srcWidth = windowsize.right;
    height = (int)(windowsize.bottom * scale);
    width = (int)(windowsize.right * scale);
 
    capture.create(height, width, CV_8UC4);
 
    // create a bitmap
    hBitmap = CreateCompatibleBitmap(hWindowDC, width, height);
    bi.biSize = sizeof(BITMAPINFOHEADER);    // http://msdn.microsoft.com/en-us/library/windows/window/dd183402%28v=vs.85%29.aspx
    bi.biWidth = width;
    bi.biHeight = -height;  //this is the line that makes it draw upside down or not
    bi.biPlanes = 1;
    bi.biBitCount = 32;
    bi.biCompression = BI_RGB;
    bi.biSizeImage = 0;
    bi.biXPelsPerMeter = 0;
    bi.biYPelsPerMeter = 0;
    bi.biClrUsed = 0;
    bi.biClrImportant = 0;
 
    // use the previously created device context with the bitmap
    SelectObject(hWindowCompatibleDC, hBitmap);
};
 
void hWnd2Mat::Read()
{
    // copy from the window device context to the bitmap device context
    StretchBlt(hWindowCompatibleDC, 00, width, height, hWindowDC, 00, srcWidth, srcHeight, SRCCOPY);
    //change SRCCOPY to NOTSRCCOPY for wacky colors!
    GetDIBits(hWindowCompatibleDC, hBitmap, 0, height, capture.data, (BITMAPINFO*)&bi, DIB_RGB_COLORS);
    //copy from hWindowCompatibleDC to hBitmap
};
 
hWnd2Mat::~hWnd2Mat()
{
    DeleteObject(hBitmap);
    DeleteDC(hWindowCompatibleDC);
    ReleaseDC(hWnd, hWindowDC);
};
 
int main()
{
    HWND hWndDesktop = GetDesktopWindow();
    hWnd2Mat desktop(hWndDesktop, 1);    // scale = 1
 
    cout << "Screen capure in 3 seconds." << endl;
    
    for (int i = 3; i > 0; i--)
    {
        cout << i << ".." << endl;
        Sleep(1000);
    }
 
    desktop.Read();
    imshow("Capture", desktop.capture);
 
    waitKey();
 
    return 0;
}


It captures your desktop image in 3 seconds.


반응형
Posted by J-sean
:
반응형

'Pillow 화면 변화 감지(Pixel Checksum) 1'에서는 모든 픽셀의 값을 확인해서 좌표까지 알아내기 때문에 시간이 오래 걸린다.

ImageStat 모듈을 사용해 모든 픽셀을 확인하지 않고 전체적인 변화 여부만 감지하면 빠르게 확인 할 수 있다.


1
2
3
4
5
6
7
8
9
10
11
12
13
14
15
16
17
18
19
20
21
22
23
24
25
26
27
28
29
30
31
32
from PIL import Image
from PIL import ImageGrab
from PIL import ImageChops
from PIL import ImageStat
import time
 
def PixelCheck(x1, y1, x2, y2):
    im1 = ImageGrab.grab((x1, y1, x2, y2))
    # Take a snapshot of the screen. The pixels inside the bounding box are returned as an “RGB” image
    # on Windows or “RGBA” on macOS. If the bounding box is omitted, the entire screen is copied.
    while 1:
        time.sleep(0.1)
        im2 = ImageGrab.grab((x1, y1, x2, y2))
        im = ImageChops.difference(im1, im2)
        # Returns the absolute value of the pixel-by-pixel difference between the two images.
        # 마우스로 인한 변경은 반영 되지 않는다. 같은 이미지이면 difference()의 결과 이미지는 모든 픽셀이 0.
        stat = ImageStat.Stat(im)
        # Calculate statistics for the given image. If a mask is included, only the regions covered by
        # that mask are included in the statistics. You can also pass in a previously calculated histogram.
        if stat.sum != [000]: # Sum of all pixels for each band in the image.
            print("Change detected: sum[%s]: %s" %(im.getbands().__str__(), stat.sum.__str__()))
            # Returns a tuple containing the name of each band in this image. For example, getbands on
            # an RGB image returns (“R”, “G”, “B”).
            return
 
x1, y1, x2, y2 = map(int, input("Enter x1, y1, x2, y2 values: ").split()) # 추적할 영역의 좌상단, 우하단 좌표
PixelCheck(x1, y1, x2, y2)
# x1, y1, x2, y2 = input("Enter x1, y1, x2, y2 values: ").split()
# x1 = int(x1)
# y1 = int(y1)
# x2 = int(x2)
# y2 = int(y2)
cs


반응형

'Python' 카테고리의 다른 글

Pillow 이미지 서치(Image Search) 1  (0) 2018.11.30
pywin32 Windows Extensions for Python 2  (0) 2018.11.27
pywin32 Windows Extensions for Python 1  (0) 2018.11.27
Pillow 화면 변화 감지(Pixel Checksum) 1  (0) 2018.11.20
PyMySQL  (2) 2018.11.19
Posted by J-sean
:
반응형

Pillow 라이브러리를 사용해서 바탕화면의 변화를 추적할 영역을 지정하고 영역에 변화가 있을때 변화된 영역의 좌상단 좌표를 반환 한다.

지정된 영역의 모든 pixel을 확인하기 때문에 넓은 영역을 지정할 수록 시간이 오래 걸린다.


1
2
3
4
5
6
7
8
9
10
11
12
13
14
15
16
17
18
19
20
21
22
23
24
25
26
27
28
29
from PIL import Image
from PIL import ImageGrab
from PIL import ImageChops
import time
 
def PixelCheck(x1, y1, x2, y2):
    im1 = ImageGrab.grab((x1, y1, x2, y2))
    # Take a snapshot of the screen. The pixels inside the bounding box are returned as an “RGB” image
    # on Windows or “RGBA” on macOS. If the bounding box is omitted, the entire screen is copied.
    while 1:
        time.sleep(0.1)
        im2 = ImageGrab.grab((x1, y1, x2, y2))
        im = ImageChops.difference(im1, im2)
        # Returns the absolute value of the pixel-by-pixel difference between the two images.
        # 마우스로 인한 변경은 반영 되지 않는다. 같은 이미지이면 difference()의 결과 이미지는 모든 픽셀이 0.
        for y in range(im.height):
            for x in range(im.width):
                if im.getpixel((x, y)) != (000): # Returns the pixel value at a given position.
                    return x, y
 
x1, y1, x2, y2 = map(int, input("Enter x1, y1, x2, y2 values: ").split())
# x1, y1, x2, y2 = input("Enter x1, y1, x2, y2 values: ").split()
# x1 = int(x1)
# y1 = int(y1)
# x2 = int(x2)
# y2 = int(y2)
 
coord = PixelCheck(x1, y1, x2, y2) # 추적할 영역의 좌상단, 우하단 좌표
print(x1 + coord[0], y1 + coord[1]) # 추적 영역 중 변화된 영역의 좌상단 좌표(스크린 기준)
cs


PixelAccess class 를 사용해 PIL.Image data를 pixel level 에서 읽어 판단하기. (쓰기도 가능)

1
2
3
4
5
6
7
8
9
10
11
12
13
14
15
16
17
18
19
20
21
22
23
24
25
26
27
28
29
30
31
32
33
34
35
from PIL import Image
from PIL import ImageGrab
from PIL import ImageChops
import time
 
def PixelCheck(x1, y1, x2, y2):
    im1 = ImageGrab.grab((x1, y1, x2, y2))
    # Take a snapshot of the screen. The pixels inside the bounding box are returned as an “RGB” image
    # on Windows or “RGBA” on macOS. If the bounding box is omitted, the entire screen is copied.
    while 1:
        time.sleep(0.1)
        im2 = ImageGrab.grab((x1, y1, x2, y2))
        im = ImageChops.difference(im1, im2)
        # Returns the absolute value of the pixel-by-pixel difference between the two images.
        # 마우스로 인한 변경은 반영 되지 않는다. 같은 이미지이면 difference()의 결과 이미지는 모든 픽셀이 0.
        px = im.load()
        # Allocates storage for the image and loads the pixel data. In normal cases, you don’t need to
        # call this method, since the Image class automatically loads an opened image when it is accessed
        # for the first time.
        for y in range(im.height):
            for x in range(im.width):
                if px[x, y] != (000):
                    return x, y
        # Accessing individual pixels is fairly slow. If you are looping over all of the pixels in an image,
        # there is likely a faster way using other parts of the Pillow API.
 
x1, y1, x2, y2 = map(int, input("Enter x1, y1, x2, y2 values: ").split())
# x1, y1, x2, y2 = input("Enter x1, y1, x2, y2 values: ").split()
# x1 = int(x1)
# y1 = int(y1)
# x2 = int(x2)
# y2 = int(y2)
 
coord = PixelCheck(x1, y1, x2, y2) # 추적할 영역의 좌상단, 우하단 좌표
print(x1 + coord[0], y1 + coord[1]) # 추적 영역 중 변화된 영역의 좌상단 좌표(스크린 기준)
cs


반응형

'Python' 카테고리의 다른 글

Pillow 이미지 서치(Image Search) 1  (0) 2018.11.30
pywin32 Windows Extensions for Python 2  (0) 2018.11.27
pywin32 Windows Extensions for Python 1  (0) 2018.11.27
Pillow 화면 변화 감지(Pixel Checksum) 2  (0) 2018.11.21
PyMySQL  (2) 2018.11.19
Posted by J-sean
: