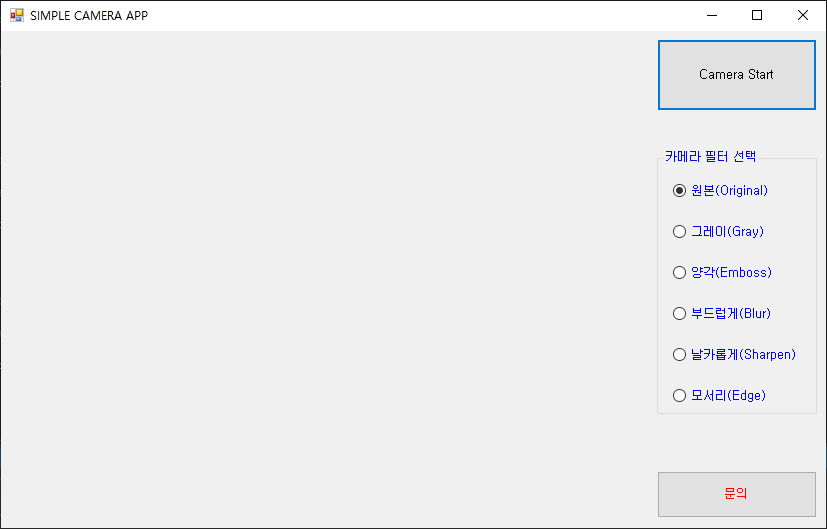
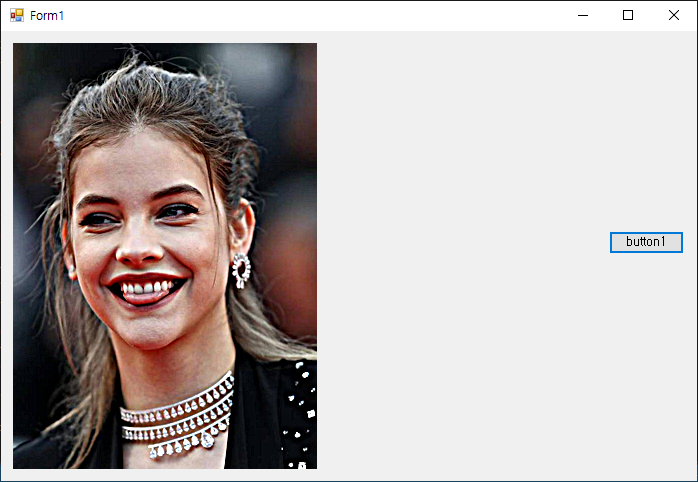
반응형

ipconfig 명령을 이용해 IP 주소 구성을 삭제 하거나 갱신하는 프로그램을 만들어 보자.

IP 주소 구성 삭제시 인터넷 연결을 끊을 수 있다.


1
2
3
4
5
6
7
8
9
10
11
12
13
14
15
16
17
18
19
20
21
22
23
24
25
26
27
28
29
30
31
32
33
34
35
36
37
38
39
40
41
42
43
44
45
46
47
48
49
50
51
52
using System;
using System.Collections.Generic;
using System.Linq;
using System.Text;
using System.Threading.Tasks;
 
using System.Diagnostics;
using System.Security;
 
 
namespace ConsoleApp1
{
    class Program
    {
        static void Main(string[] args)
        {
            SetInternetConnection("release"); // 인터넷 연결 해제
            //SetInternetConnection("renew"); // 인터넷 연결
        }
 
        static void SetInternetConnection(string command)
        {
            try
            {
                ProcessStartInfo processStartInfo = new ProcessStartInfo()
                {
                    FileName = "cmd.exe",
                    Arguments = "/c ipconfig /" + command,
                    WindowStyle = ProcessWindowStyle.Hidden
                };
 
                //ProcessStartInfo processStartInfo = new ProcessStartInfo();
                //processStartInfo.FileName = "cmd.exe";
                //processStartInfo.Arguments = "/c ipconfig /" + command;
                //processStartInfo.WindowStyle = ProcessWindowStyle.Hidden;
 
                Process.Start(processStartInfo);
                // This class contains a link demand at the class level that applies
                // to all members. A SecurityException is thrown when the immediate
                // caller does not have full-trust permission.
            }
            catch (SecurityException e)
            {
                Console.WriteLine("Security Exception: {0}", e.Message);
            }
            catch (Exception e)
            {
                Console.WriteLine("Exception: {0}", e.Message);
            }
        }
    }
}


소스를 입력하고 빌드한다.


프로그램을 실행하면 인터넷 연결이 끊긴다.


SetInternetConnection() 호출 주석을 바꾸면 인터넷이 연결된다.


반응형
Posted by J-sean
:
반응형

2022.01.04 - [C#] - C# Wireless Network Adapter Disable/Enable - 무선 네트워크 어댑터 활성화/비활성화 1

의 소스를 조금 더 심플하게 수정해 보자.


1
2
3
4
5
6
7
8
9
10
11
12
13
14
15
16
17
18
19
20
21
22
23
24
25
26
27
28
29
30
31
32
33
34
35
36
37
38
39
40
41
42
43
44
45
46
47
48
49
50
51
52
53
54
55
56
57
using System;
using System.Collections.Generic;
using System.Linq;
using System.Text;
using System.Threading.Tasks;
 
using System.Management;
 
 
namespace ConsoleApp1
{
    class Program
    {
        static void Main(string[] args)
        {
            ListAllNetworkAdapters();
        }
 
        private static void ListAllNetworkAdapters()
        {
            try
            {
                ManagementObjectSearcher searcher =
                    new ManagementObjectSearcher("root\\CIMV2""SELECT * FROM Win32_NetworkAdapter");
 
                foreach (ManagementObject queryObj in searcher.Get())
                {
                    if (queryObj["Name"].ToString().Contains("Wireless"))
                    {
                        Console.WriteLine("-----------------------------------");
                        Console.WriteLine("Win32_NetworkAdapter Instance");
                        Console.WriteLine("-----------------------------------");
                        Console.WriteLine("Name: {0}", queryObj["Name"]);
                        Console.WriteLine("NetEnabled: {0}", queryObj["NetEnabled"]);
 
                        if ((bool)queryObj["NetEnabled"])
                        {
                            queryObj.InvokeMethod("Disable"null); // 관리자 권한 실행 필요
                            Console.WriteLine("Disabled.");
                        }
                        else
                        {
                            queryObj.InvokeMethod("Enable"null); // 관리자 권한 실행 필요
                            Console.WriteLine("Enabled.");
                        }
 
                        Console.WriteLine("-----------------------------------");
                    }
                }
            }
            catch (ManagementException e)
            {
                Console.WriteLine("An error occurred while querying for WMI data: " + e.Message);
            }
        }
    }
}


소스를 입력하고 빌드한다.


활성화 되어 있던 와이파이가 표시되고 비활성화 되었다.


'사용 안 함' 상태에서 프로그램을 실행하면 '사용함' 상태로 바뀐다.

※ 이 프로그램은 관리자 권한으로 실행해야 한다.


반응형
Posted by J-sean
:
반응형

2022.01.04 - [C#] - C# Finding All Network Adapters Using WMI - 모든 네트워크 어댑터 찾기의 내용을 기본으로 무선 네트워크(Wi-Fi) 어댑터를 활성화/비활성화 하는 프로그램을 만들어 보자.


1
2
3
4
5
6
7
8
9
10
11
12
13
14
15
16
17
18
19
20
21
22
23
24
25
26
27
28
29
30
31
32
33
34
35
36
37
38
39
40
41
42
43
44
45
46
47
48
49
50
51
52
53
54
using System;
using System.Collections.Generic;
using System.Linq;
using System.Text;
using System.Threading.Tasks;
 
using System.Management;
 
 
namespace ConsoleApp1
{
    class Program
    {
        static void Main(string[] args)
        {
            string name = "Wireless";
            ListAllNetworkAdapters(name);
        }
 
        private static void ListAllNetworkAdapters(string name)
        {
            ManagementObjectSearcher networkAdapterSearcher = new ManagementObjectSearcher("root\\cimv2", $"select * from Win32_NetworkAdapter where name like '%{name}%'");
            ManagementObjectCollection objectCollection = networkAdapterSearcher.Get();
 
            Console.WriteLine("There are {0} network adapaters:\n", objectCollection.Count);
 
            foreach (ManagementObject networkAdapter in objectCollection)
            {
                PropertyDataCollection networkAdapterProperties = networkAdapter.Properties;
                foreach (PropertyData networkAdapterProperty in networkAdapterProperties)
                {
                    if (networkAdapterProperty.Value != null)
                    {
                        Console.WriteLine("Network adapter property name: {0}", networkAdapterProperty.Name);
                        Console.WriteLine("Network adapter property value: {0}", networkAdapterProperty.Value);
                    }
                }
                Console.WriteLine("--------------------------------------------------------------------\n");
 
                Console.WriteLine($"{networkAdapterProperties["Name"].Value} enabled: {networkAdapterProperties["NetEnabled"].Value}");
                if ((bool)networkAdapterProperties["NetEnabled"].Value)
                {
                    networkAdapter.InvokeMethod("Disable"null); // 관리자 권한 실행 필요
                    Console.WriteLine("Disabled.");
                }
                else
                {
                    networkAdapter.InvokeMethod("Enable"null); // 관리자 권한 실행 필요
                    Console.WriteLine("Enabled.");
                }
            }
        }
    }
}


소스를 입력하고 빌드한다.


시스템에 있는 모든(한 개) 와이파이 어댑터의 정보가 출력되고 '사용 안 함' 상태로 변경된다. (아래 그림 참조)


'사용 안 함' 상태에서 프로그램을 실행하면 '사용함' 상태로 변경된다.

※ 이 프로그램은 관리자 권한으로 실행해야 한다.


반응형
Posted by J-sean
:
반응형

WMI(Windows Management Instrumentation)를 이용해 컴퓨터의 모든 네트워크 어댑터를 확인해 보자.


1
2
3
4
5
6
7
8
9
10
11
12
13
14
15
16
17
18
19
20
21
22
23
24
25
26
27
28
29
30
31
32
33
34
35
36
37
38
39
40
41
using System;
using System.Collections.Generic;
using System.Linq;
using System.Text;
using System.Threading.Tasks;
 
using System.Management;
 
 
namespace ConsoleApp1
{
    class Program
    {
        static void Main(string[] args)
        {
            ListAllNetworkAdapters();
        }
 
        private static void ListAllNetworkAdapters()
        {
            ManagementObjectSearcher networkAdapterSearcher = new ManagementObjectSearcher("root\\cimv2""select * from Win32_NetworkAdapter");
            ManagementObjectCollection objectCollection = networkAdapterSearcher.Get();
 
            Console.WriteLine("There are {0} network adapaters:\n", objectCollection.Count);
 
            foreach (ManagementObject networkAdapter in objectCollection)
            {
                PropertyDataCollection networkAdapterProperties = networkAdapter.Properties;
                foreach (PropertyData networkAdapterProperty in networkAdapterProperties)
                {
                    if (networkAdapterProperty.Value != null)
                    {
                        Console.WriteLine("Network adapter property name: {0}", networkAdapterProperty.Name);
                        Console.WriteLine("Network adapter property value: {0}", networkAdapterProperty.Value);
                    }
                }
                Console.WriteLine("--------------------------------------------------------------------\n");
            }
        }
    }
}


소스를 입력하고 빌드한다.


내 컴퓨터에서는 16개의 네트워크 어댑터를 찾았다.


반응형
Posted by J-sean
:
반응형

C#으로 만든 클래스 라이브러리(DLL)는 C++ 라이브러리처럼 간단히 사용할 수 없다. C++에서 C# 라이브러리를 사용해 보자.


Class Library (.NET Framework) 프로젝트를 선택한다.


적당한 이름과 위치를 지정한다.


프로젝트가 생성되면 Tools - NuGet Package Manager - Manage NuGet Packages for Solution... 을 선택한다.


Browse에서 dllexport를 검색하고 설치한다.


DllExport설치 중간에 위와 같은 프로그램이 실행된다.


Installed 체크박스와 x64 라디오 버튼을 선택하고 Apply 버튼을 클릭한다.


DllExport 설치가 완료되면 프로젝트를 다시 로드한다. 'Reload All' 버튼을 클릭한다.


Solution Platforms를 x64로 바꾸고 간단한 소스 입력 후 빌드한다.


라이브러리 파일이 생성된다.


위에서 생성한 C# 라이브러리 파일을 사용하는 x64 C++ 프로젝트를 만들고 빌드한다.


실행파일이 있는 폴더에 C# 라이브러리 파일을 복사한다.


C++로 만든 프로그램을 실행하면 C# 라이브러리를 이용한 결과가 표시된다.


DllExport 를 설치하고 나면 C# 라이브러리 솔루션 폴더에 DllExport.bat 파일이 생성되어 있다.


여러번 설치를 반복하다 보면 솔루션 폴더에 DllExport.bat 파일이 생성되지 않는 경우도 있는데 packages 폴더에서 복사한다. DllExport.bat 파일이 솔루션 폴더에 없으면 빌드시 에러가 발생한다.


환경 설정을 다시 하기 위해선 위와 같이 명령어를 실행한다. (dllexport -action Configure)

※ 참고

https://github.com/3F/DllExport
https://youtu.be/9Hyg3_WE9Ks
https://youtu.be/sBWt-KdQtoc


반응형
Posted by J-sean
:
반응형

C#으로 클래스 라이브러리(DLL)를 만들어 보자.


Class Library (.NET Framework) 프로젝트를 선택한다.


적당한 이름과 위치를 지정한다.


1
2
3
4
5
6
7
8
9
10
11
12
13
14
15
16
17
18
19
20
21
using System;
using System.Collections.Generic;
using System.Linq;
using System.Text;
using System.Threading.Tasks;
 
namespace CSDll
{
    public class Class1
    {
        public static int Add(int a, int b)
        {
            return a + b;
        }
 
        public static int Sub(int a, int b)
        {
            return a - b;
        }
    }
}


소스를 입력하고 빌드한다.


클래스 라이브러리(DLL)가 생성된다.


마찬가지로 적당한 이름과 위치에 Console App (.NET Framework)을 생성한다.


위에서 생성한 라이브러리를 사용하기 위해 using 선언을 하면 에러가 발생한다. 사용하려는 라이브러리를 찾을 수 없기 때문이다.


Project - Add Reference... 를 선택한다.


Browse에서 Browse... 버튼을 클릭한다.


사용하려는 라이브러리 파일을 선택하고 Add 버튼을 클릭한다.


라이브러리가 추가되면 OK 버튼을 클릭한다.


에러 표시가 사라졌다.


1
2
3
4
5
6
7
8
9
10
11
12
13
14
15
16
17
18
19
using System;
using System.Collections.Generic;
using System.Linq;
using System.Text;
using System.Threading.Tasks;
 
using CSDll;
 
namespace ConsoleApp1
{
    class Program
    {
        static void Main(string[] args)
        {
            Console.WriteLine("3 + 2 = {0}", Class1.Add(32));
            Console.WriteLine("3 - 2 = {0}", Class1.Sub(32));
        }
    }
}


라이브러리를 사용하는 코드를 입력하고 빌드한다.


문제없이 실행된다.


Output 폴더를 확인해 보면 라이브러리(CSDll.dll)가 복사되어 있다. 라이브러리 파일은 실행파일과 함께 배포해야 한다.


반응형
Posted by J-sean
:
반응형

유니티에서 OpenCV를 사용할 수 있도록 라이브러리(DLL)를 만들어 보자.


Visual Studio에서 C++ - Windows - Empty Project를 선택한다.


적당한 이름과 폴더를 지정한다.


프로젝트가 생성되었으면 C++ File을 추가한다. (Add New Item)


Solution Platforms는 x64로 변경한다.


프로젝트 Property Pages - General - Configuration Type - Dynamic Library (.dll)로 변경한다.


Advanced - Target File Extension - .dll로 변경한다.


C/C++ - General - Additional Include Directories에 OpenCV Include 폴더를 추가한다.


Linker - General - Additional Library Directories에 OpenCV Library 폴더를 추가한다.


Linker - Input - Additional Dependencies에 OpenCV 라이브러리(opencv_worldXXXd.lib)를 추가한다.


1
2
3
4
5
6
7
8
9
10
11
12
13
14
15
16
#include <opencv2/opencv.hpp>
 
struct Color32
{
    uchar red;
    uchar green;
    uchar blue;
    uchar alpha;
};
 
extern "C" __declspec(dllexportvoid FlipImage(Color32 **rawImage, int width, int height)
{
    using namespace cv;
    Mat image(height, width, CV_8UC4, *rawImage);
    flip(image, image, -1);
}


프로젝트 세팅이 끝나면 이미지의 상하좌우를 반전하는 소스를 입력하고 빌드한다.


라이브러리 파일(OpenCVDll.dll)이 생성된다.


유니티3D 프로젝트를 생성한다.


Assets에 Plugin 폴더를 만들고 OpenCV 라이브러리 파일(opencv_worldXXX.dll)과 위에서 만든 라이브러리 파일(OpenCVDll.dll)을 복사한다.


원하는 이미지 파일을 Assets 폴더에 복사한다.


아래와 같이 텍스쳐 세팅을 변경한다.

Texture Type - Sprite (2D and UI)

Advanced - Read/Write Enabled - Check

Default - Format - RGBA 32 bit

Apply 클릭


Image UI를 생성한다.


Source Image에 위에서 추가한 이미지를 선택한다.


스크립트 컴포넌트를 추가한다.


1
2
3
4
5
6
7
8
9
10
11
12
13
14
15
16
17
18
19
20
21
22
23
24
25
26
27
using System.Collections;
using System.Collections.Generic;
using UnityEngine;
 
using System.Runtime.InteropServices;
using UnityEngine.UI;
 
public class OpenCVTest : MonoBehaviour
{
    [DllImport("OpenCVDll")]
    private static extern void FlipImage(ref Color32[] rawImage, int width, int height);
 
    // Start is called before the first frame update
    void Start()
    {
        Color32[] image = GetComponent<Image>().sprite.texture.GetPixels32();
        FlipImage(ref image, 608912);
        GetComponent<Image>().sprite.texture.SetPixels32(image);
        GetComponent<Image>().sprite.texture.Apply();
    }
 
    // Update is called once per frame
    void Update()
    {
 
    }
}


OpenCVDll.dll을 사용하는 스크립트를 작성하고 저장한다.


유니티로 돌아오면 스크립트가 컴파일 된다. 실행 버튼을 클릭한다.


이미지의 상하좌우가 반전된다.


3D 오브젝트에 적용해 보자. Image UI를 삭제하고 Cube를 생성한다.


위에서 사용했던 이미지는 삭제하고 다시 복사한다. 그리고 아래와 같이 세팅한다.

Advanced - Read/Write Enabled - Check

Default - Format - RGBA 32 bit

Apply 클릭


Material을 생성하고 위에서 세팅한 이미지를 적용한다. (Albedo 옆 동그라미 클릭)


Cube에 새로 생성한 Material을 적용하고 OpenCVTest 스크립트를 추가한다.


1
2
3
4
5
6
7
8
9
10
11
12
13
14
15
16
17
18
19
20
21
22
23
24
25
26
27
28
29
30
31
32
33
34
using System.Collections;
using System.Collections.Generic;
using UnityEngine;
 
using System.Runtime.InteropServices;
 
public class OpenCVTest : MonoBehaviour
{
    [DllImport("OpenCVDll")]
    private static extern void FlipImage(ref Color32[] rawImage, int width, int height);
 
    // Start is called before the first frame update
    void Start()
    {
        Color32[] image = (GetComponent<Renderer>().material.mainTexture as Texture2D).GetPixels32();
        FlipImage(ref image, 608912);
        (GetComponent<Renderer>().material.mainTexture as Texture2D).SetPixels32(image);
        (GetComponent<Renderer>().material.mainTexture as Texture2D).Apply();
 
        // Assets - Resources 폴더에 이미지를 저장하고 로드해서 텍스쳐로 활용하는 예
        //Texture2D texture2D = Resources.Load("Barbara") as Texture2D;
        //Color32[] image = texture2D.GetPixels32();
        //FlipImage(ref image, 608, 912);
        //texture2D.SetPixels32(image);
        //texture2D.Apply();
        //GetComponent<Renderer>().material.mainTexture = texture2D;
    }
 
    // Update is called once per frame
    void Update()
    {
 
    }
}


OpenCVTest 스크립트는 위와 같이 수정하고 저장한다.


유니티로 돌아오면 스크립트가 컴파일된다. 실행 버튼을 클릭한다.


상하좌우가 반전된다.


반응형
Posted by J-sean
:

OpenCV with C# and Camera

OpenCV 2021. 12. 29. 17:32 |
반응형

C#으로 OpenCV와 카메라를 사용해 보자.


C#에서 OpenCV를 사용하기 위한 준비는 아래 링크를 참고 한다.

2021.11.20 - [OpenCV] - OpenCV with C#


하지만 링크와 같이 OpenCvSharp4.Windows만 설치하면 Extensions가 설치 되지 않으므로 마찬가지로 NuGet Package Manager에서 검색하고 설치한다. (BitmapConverter.ToBitmap()을 사용하기 위해)


OpenCvSharp4.Extensions를 설치한다.


폼에 PictureBox와 Button을 적당히 배치한다.


1
2
3
4
5
6
7
8
9
10
11
12
13
14
15
16
17
18
19
20
21
22
23
24
25
26
27
28
29
30
31
32
33
34
35
36
37
38
39
40
41
42
43
44
45
46
47
48
49
50
51
52
53
54
55
56
57
58
59
60
61
62
63
64
65
66
67
68
69
70
71
72
73
74
75
76
77
78
79
80
81
82
83
84
85
86
87
88
89
90
91
92
using System;
using System.Collections.Generic;
using System.ComponentModel;
using System.Data;
using System.Drawing;
using System.Linq;
using System.Text;
using System.Threading.Tasks;
using System.Windows.Forms;
 
using System.Threading;
using OpenCvSharp;
using OpenCvSharp.Extensions;
 
namespace OpenCV
{
    public partial class Form1 : Form
    {
        bool isCameraOn;
 
        Thread thread;
        Mat mat;
        VideoCapture videoCapture;
 
        public Form1()
        {
            InitializeComponent();
 
            pictureBox1.SizeMode = PictureBoxSizeMode.StretchImage;
            button1.Text = "Start";
            isCameraOn = false;
        }
 
        private void CameraCallback()
        {
            mat = new Mat();
            videoCapture = new VideoCapture(0);
 
            if (!videoCapture.IsOpened())
            {
                Text = "Camera open failed!";
                return;
            }
 
            while (true)
            {
                videoCapture.Read(mat);
 
                if (!mat.Empty())
                {
                    pictureBox1.Image = BitmapConverter.ToBitmap(mat);
 
                    //System.IO.MemoryStream memoryStream = new System.IO.MemoryStream(mat.ToBytes());
                    //pictureBox1.Image = new Bitmap(memoryStream);
                }
            }
        }
 
        private void button1_Click(object sender, EventArgs e)
        {
            if (isCameraOn == false)
            {
                thread = new Thread(new ThreadStart(CameraCallback));
 
                thread.Start();
                isCameraOn = true;
                button1.Text = "Stop";
            }
            else
            {
                if (videoCapture.IsOpened())
                {
                    thread.Abort();
                    videoCapture.Release();
                    mat.Release();
                }
                isCameraOn = false;
                button1.Text = "Start";
            }
        }
 
        private void Form1_FormClosing(object sender, FormClosingEventArgs e)
        {
            if (thread != null && thread.IsAlive && videoCapture.IsOpened())
            {
                thread.Abort();
                videoCapture.Release();
                mat.Release();
            }
        }
    }
}


소스를 입력하고 빌드한다. (주석에 있는 내용을 사용하면 BitmapConverter.ToBitmap()을 사용하지 않아도 되므로 OpenCvSharp.Extensions도 설치할 필요가 없다)


실행하면 Start 버튼이 보인다.


Start 버튼을 클릭하면 Stop으로 바뀌고 카메라 영상이 재생된다.


반응형

'OpenCV' 카테고리의 다른 글

Compiling and Running OpenPose from Source  (2) 2022.05.15
GDI+ and OpenCV - Bitmap to Mat & Mat to Bitmap Conversion  (0) 2022.01.02
OpenCvSharp for Network  (0) 2021.12.28
OpenCV with C#  (0) 2021.11.20
OpenCV with Qt and MSVC in Windows  (0) 2021.09.26
Posted by J-sean
: