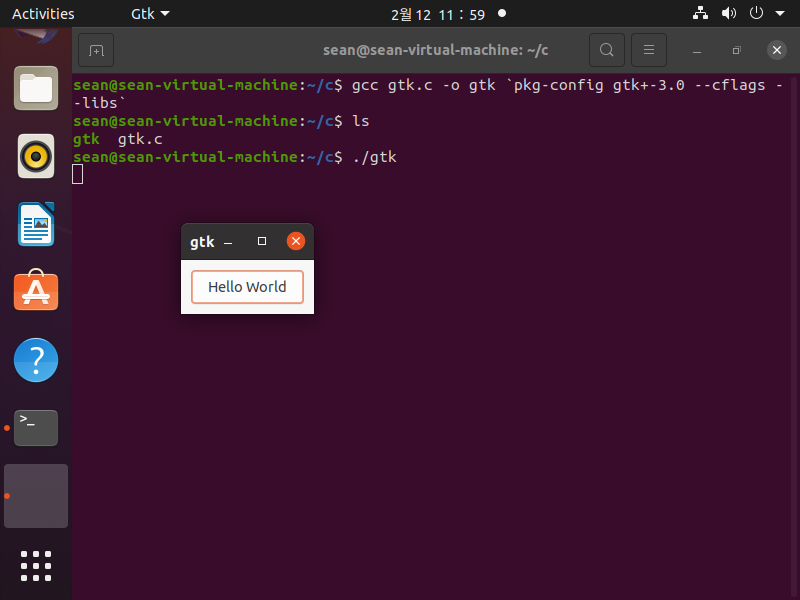
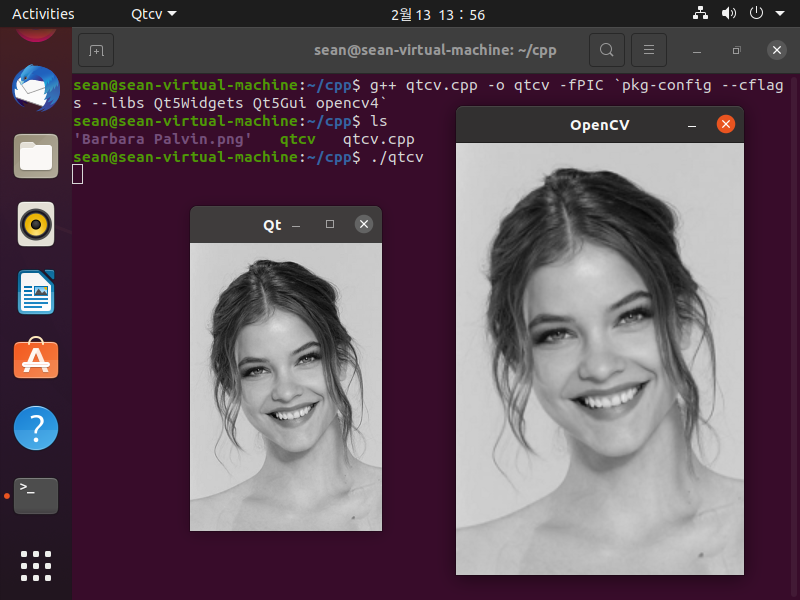
OpenCV with Qt in Linux(Ubuntu) - 리눅스(우분투)에서 Qt로 OpenCV 이미지 디스플레이
OpenCV 2021. 2. 13. 14:11 |반응형
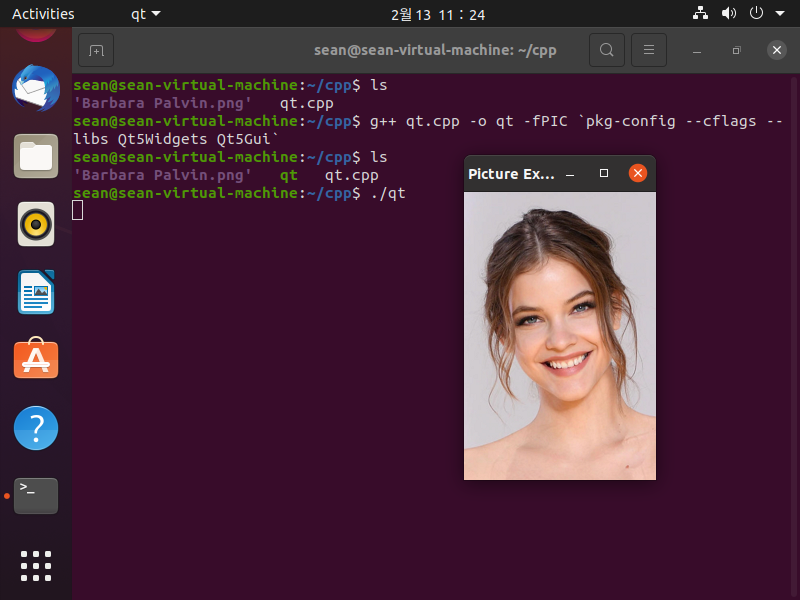
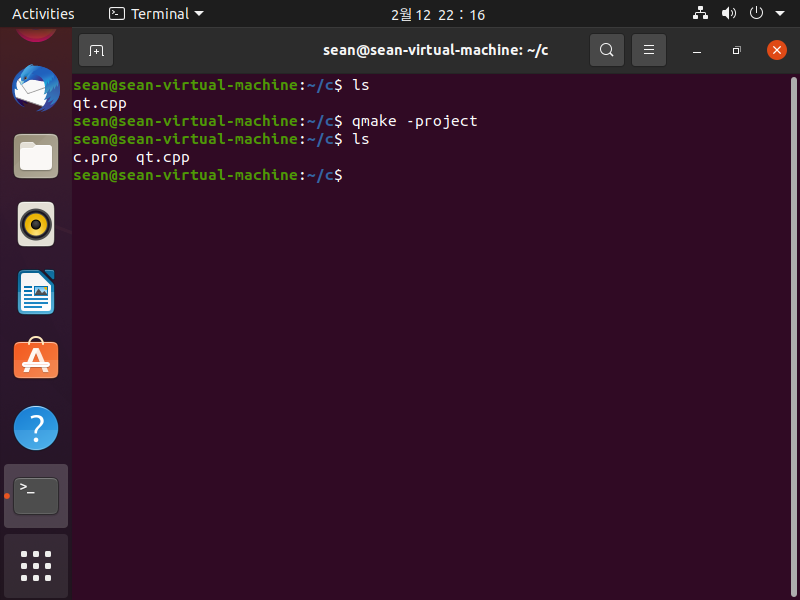
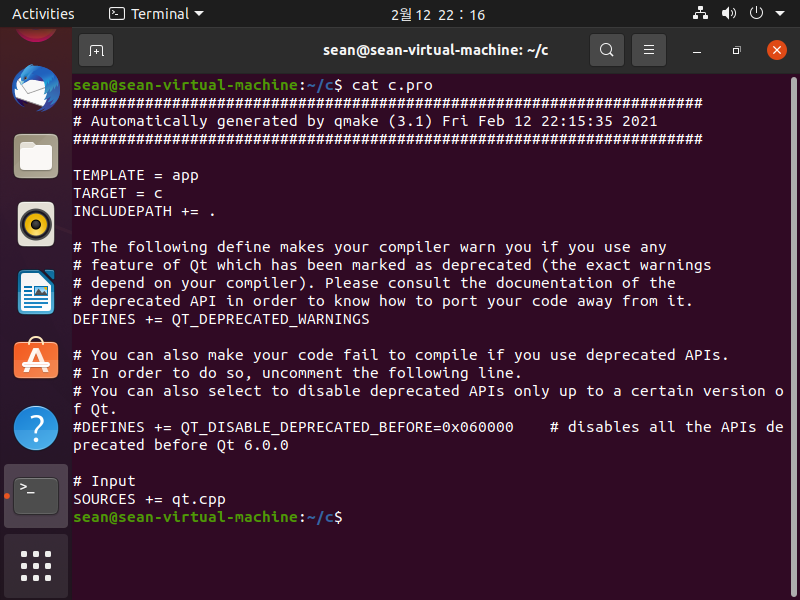
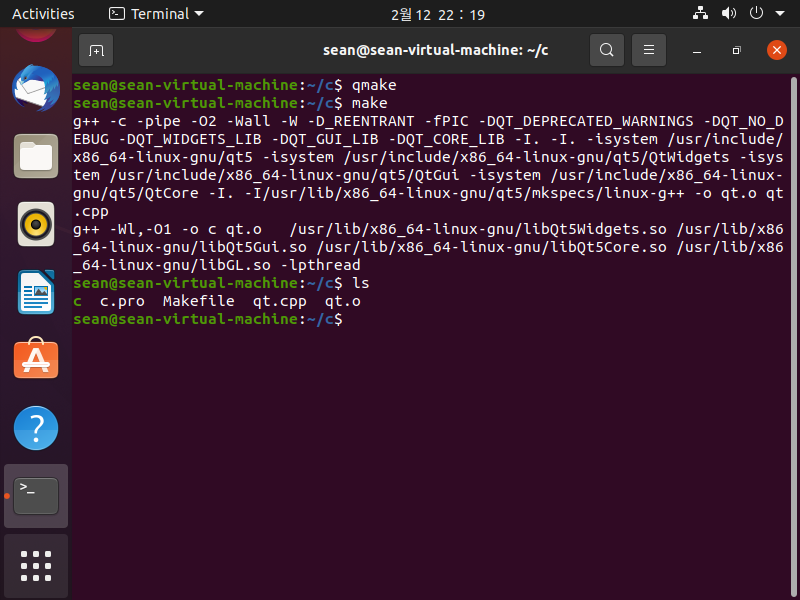
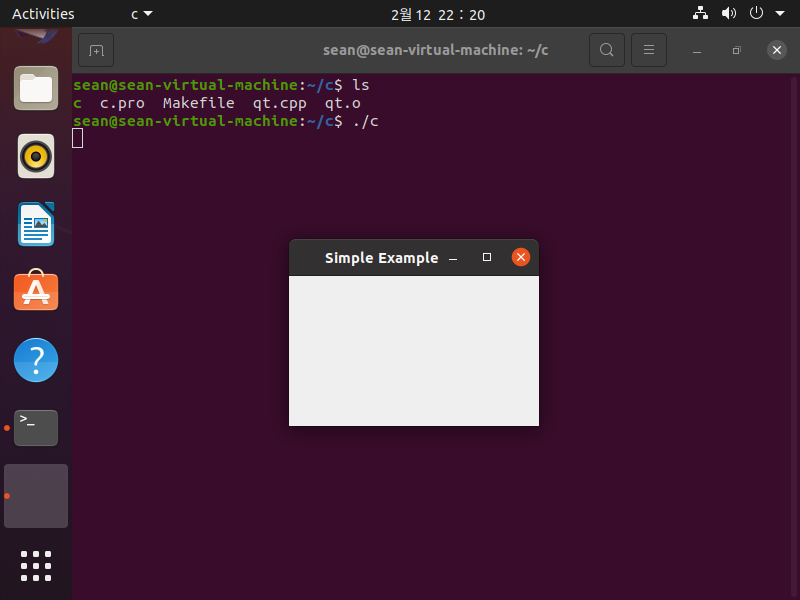
리눅스(우분투)에서 OpenCV 이미지(cv::Mat)를 Qt로(QImage::QImage) 디스플레이 해 보자.
(cv::Mat ↔ QImage::QImage)
|
1
2
3
4
5
6
7
8
9
10
11
12
13
14
15
16
17
18
19
20
21
22
23
24
25
26
27
28
29
30
31
32
33
34
35
36
37
38
39
40
41
42
43
44
45
46
47
48
49
50
51
52
53
54
55
56
57
58
59
60
61
62
63
64
65
66
67
68
69
70
71
72
73
74
75
76
77
78
79
80
81
82
83
84
85
86
87
88
89
90
91
92
93
94
95
96
97
98
99
100
101
102
103
104
105
106
107
108
109
|
#include <QApplication>
#include <QWidget>
#include <QPainter>
#include <opencv2/opencv.hpp>
class Picture : public QWidget
{
public:
Picture(QWidget* parent = 0);
~Picture();
protected:
void paintEvent(QPaintEvent* event);
// This event handler can be reimplemented in a subclass to receive paint events passed in event.
void drawPicture(QPainter* qp);
QImage Mat2QImage(cv::Mat const& src);
cv::Mat QImage2Mat(QImage const& src);
private:
int height;
int width;
QImage qtImage;
cv::Mat cvImage;
};
Picture::Picture(QWidget* parent) : QWidget(parent)
{
//image.load("Barbara Palvin.png");
//cvimage = QImage2Mat(image);
//Read images from OpenCV. Not from Qt.
cvImage = cv::imread("Barbara Palvin.png", cv::IMREAD_COLOR);
if (cvImage.empty())
{
std::cerr << "Image load failed." << std::endl;
exit(EXIT_FAILURE);
}
cv::Mat tempCvImage;
cv::cvtColor(cvImage, tempCvImage, cv::COLOR_RGB2GRAY);
qtImage = Mat2QImage(tempCvImage);
tempCvImage = QImage2Mat(qtImage);
cv::resize(tempCvImage, tempCvImage, cv::Size(), 1.5, 1.5);
cv::imshow("OpenCV", tempCvImage);
height = qtImage.height();
width = qtImage.width();
this->resize(width, height);
}
Picture::~Picture()
{
}
void Picture::paintEvent(QPaintEvent* e)
{
Q_UNUSED(e);
// Q_UNUSED( name)
// Indicates to the compiler that the parameter with the specified name is not used in the body
// of a function. This can be used to suppress compiler warnings while allowing functions to be
// defined with meaningful parameter names in their signatures.
QPainter qp(this);
drawPicture(&qp);
}
void Picture::drawPicture(QPainter* qp)
{
qp->drawImage(0, 0, qtImage);
}
QImage Picture::Mat2QImage(cv::Mat const& src)
{
cv::Mat temp;
cv::cvtColor(src, temp, cv::COLOR_BGR2RGB);
QImage dest((const uchar*)temp.data, temp.cols, temp.rows, temp.step, QImage::Format_RGB888);
dest.bits();
// Enforce deep copy
// See documentation of QImage::QImage (const uchar * data, int width, int height, Format format)
return dest;
}
cv::Mat Picture::QImage2Mat(QImage const& src)
{
cv::Mat temp(src.height(), src.width(), CV_8UC3, (uchar*)src.bits(), src.bytesPerLine());
cv::Mat result; // Deep copy
cv::cvtColor(temp, result, cv::COLOR_BGR2RGB);
return result;
}
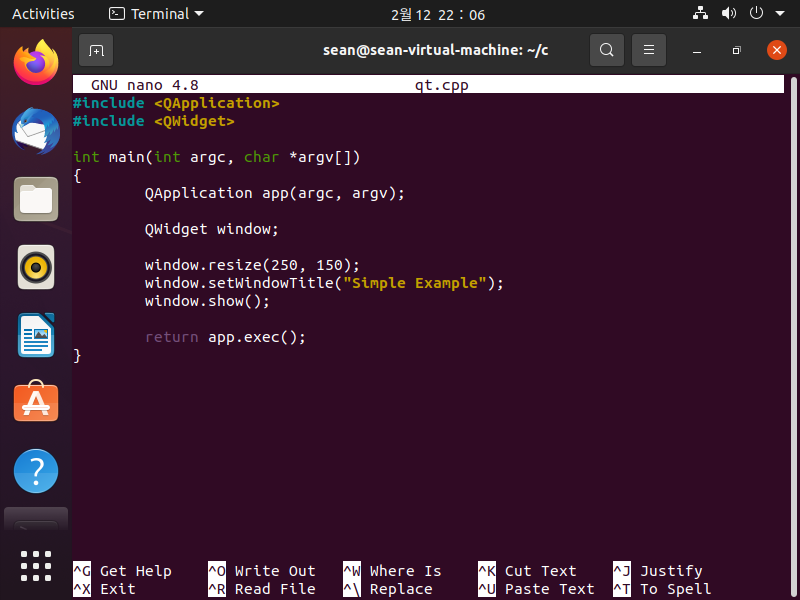
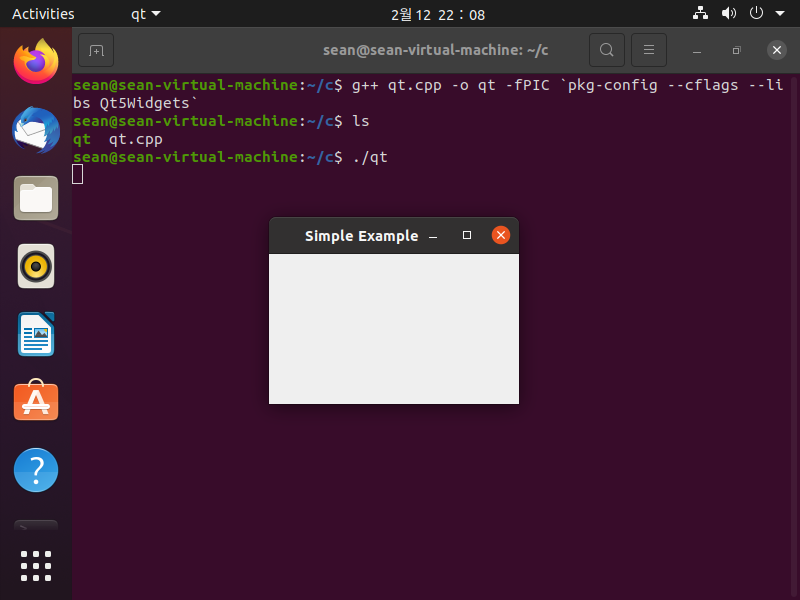
int main(int argc, char* argv[])
{
QApplication app(argc, argv);
Picture window;
window.setWindowTitle("Qt");
//window.resize(width, height);
window.show();
return app.exec();
}
|
소스를 입력한다. (qtcv.cpp)
반응형
'OpenCV' 카테고리의 다른 글
| OpenCV with C# (0) | 2021.11.20 |
|---|---|
| OpenCV with Qt and MSVC in Windows (0) | 2021.09.26 |
| Haar-cascade Detection 얼굴 검출 (10) | 2019.12.15 |
| QR Code detect and decode - QR 코드 리더 (0) | 2019.12.15 |
| Simple color detection by Hue - Hue(HSV)값으로 특정색 검출하기 (0) | 2019.11.17 |