반응형

안드로이드 앱 프로그래밍 with 코틀린 11-5 뷰페이저2


1
2
3
4
5
6
7
8
9
10
11
12
13
14
15
16
<?xml version="1.0" encoding="utf-8"?>
<FrameLayout xmlns:android="http://schemas.android.com/apk/res/android"
    xmlns:tools="http://schemas.android.com/tools"
    android:layout_width="match_parent"
    android:layout_height="match_parent"
    tools:context=".OneFragment">
 
    <!-- TODO: Update blank fragment layout -->
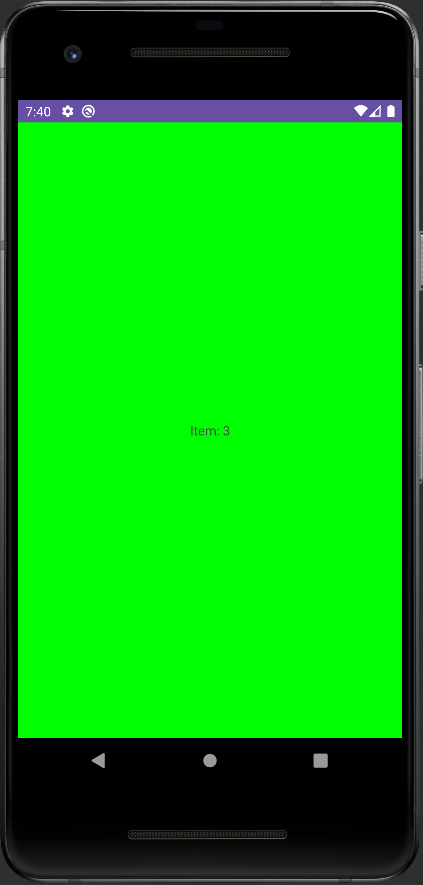
    <TextView
        android:layout_width="match_parent"
        android:layout_height="match_parent"
        android:background="#FF0000"
        android:gravity="center_horizontal|center_vertical"
        android:text="One Fragment" />
 
</FrameLayout>


fragment_one.xml


1
2
3
4
5
6
7
8
9
10
11
12
13
14
15
16
17
package com.example.myapplication
 
import android.os.Bundle
import androidx.fragment.app.Fragment
import android.view.LayoutInflater
import android.view.View
import android.view.ViewGroup
 
class OneFragment : Fragment() {
    override fun onCreateView(
        inflater: LayoutInflater, container: ViewGroup?,
        savedInstanceState: Bundle?
    ): View? {
        // Inflate the layout for this fragment
        return inflater.inflate(R.layout.fragment_one, container, false)
    }
}


OneFragment.kt

같은 형태로 TextView 배경색만 바꿔서 TwoFragment, ThreeFragment도 만들어 준다.


1
2
3
4
5
6
7
8
9
10
11
12
13
14
<?xml version="1.0" encoding="utf-8"?>
<LinearLayout xmlns:android="http://schemas.android.com/apk/res/android"
    xmlns:app="http://schemas.android.com/apk/res-auto"
    xmlns:tools="http://schemas.android.com/tools"
    android:layout_width="match_parent"
    android:layout_height="match_parent"
    android:orientation="vertical"
    tools:context=".MainActivity">
 
    <androidx.viewpager2.widget.ViewPager2
        android:id="@+id/viewpager"
        android:layout_width="match_parent"
        android:layout_height="match_parent" />
</LinearLayout>


activity_main.xml


1
2
3
4
5
6
7
8
9
10
11
12
13
14
15
16
17
18
19
20
21
22
23
24
25
26
27
28
29
30
31
32
33
34
35
36
37
38
package com.example.myapplication
 
import androidx.appcompat.app.AppCompatActivity
import android.os.Bundle
import android.util.Log
import androidx.fragment.app.Fragment
import androidx.fragment.app.FragmentActivity
import androidx.viewpager2.adapter.FragmentStateAdapter
import androidx.viewpager2.widget.ViewPager2
 
class MainActivity : AppCompatActivity() {
    override fun onCreate(savedInstanceState: Bundle?) {
        super.onCreate(savedInstanceState)
        setContentView(R.layout.activity_main)
 
        val viewPager2: ViewPager2 = findViewById(R.id.viewpager)
        viewPager2.adapter = MyFragmentPagerAdapter(this)
 
        //viewPager2.orientation = ViewPager2.ORIENTATION_VERTICAL
        // 이 설정을 적용하면 스와이프 방향이 세로로 바뀐다.
    }
}
 
class MyFragmentPagerAdapter(activity: FragmentActivity) : FragmentStateAdapter(activity) {
    val fragments: List<Fragment>
    init {
        fragments = listOf(OneFragment(), TwoFragment(), ThreeFragment())
        Log.d("Sean""Fragments size: ${fragments.size}")
    }
 
    override fun getItemCount(): Int {
        return fragments.size
    }
 
    override fun createFragment(position: Int): Fragment {
        return fragments[position]
    }
}


MainActivity.kt


실행 화면


반응형
Posted by J-sean
:

ViewPager2 뷰페이저2

Android 2023. 7. 11. 16:53 |
반응형

안드로이드 앱 프로그래밍 with 코틀린 11-5 뷰페이저2


1
2
3
4
5
6
7
8
9
10
11
12
13
14
<?xml version="1.0" encoding="utf-8"?>
<LinearLayout xmlns:android="http://schemas.android.com/apk/res/android"
    xmlns:app="http://schemas.android.com/apk/res-auto"
    xmlns:tools="http://schemas.android.com/tools"
    android:layout_width="match_parent"
    android:layout_height="match_parent"
    android:orientation="vertical"
    tools:context=".MainActivity">
 
    <androidx.viewpager2.widget.ViewPager2
        android:id="@+id/viewpager"
        android:layout_width="match_parent"
        android:layout_height="match_parent" />
</LinearLayout>


activity_main.xml


1
2
3
4
5
6
7
8
9
10
11
12
13
14
<?xml version="1.0" encoding="utf-8"?>
<LinearLayout xmlns:android="http://schemas.android.com/apk/res/android"
    xmlns:app="http://schemas.android.com/apk/res-auto"
    xmlns:tools="http://schemas.android.com/tools"
    android:layout_width="match_parent"
    android:layout_height="match_parent">
 
    <TextView
        android:id="@+id/itemPagerTextView"
        android:layout_width="match_parent"
        android:layout_height="match_parent"
        android:gravity="center_horizontal|center_vertical"
        android:text="TextView" />
</LinearLayout>


item_main.xml


1
2
3
4
5
6
7
8
9
10
11
12
13
14
15
16
17
18
19
20
21
22
23
24
25
26
27
28
29
30
31
32
33
34
35
36
37
38
39
40
41
42
43
44
45
46
47
48
49
50
package com.example.myapplication
 
import android.graphics.Color
import androidx.appcompat.app.AppCompatActivity
import android.os.Bundle
import android.view.LayoutInflater
import android.view.View
import android.view.ViewGroup
import android.widget.TextView
import androidx.recyclerview.widget.RecyclerView
import androidx.viewpager2.widget.ViewPager2
 
class MainActivity : AppCompatActivity() {
    override fun onCreate(savedInstanceState: Bundle?) {
        super.onCreate(savedInstanceState)
        setContentView(R.layout.activity_main)
 
        val data = mutableListOf<String>()
        for(i in 1..3){
            data.add("Item: $i")
        }
 
        val viewPager2: ViewPager2 = findViewById(R.id.viewpager)
        viewPager2.adapter = MyPagerAdapter(data)
    }
}
 
class MyPagerViewHolder(itemView: View) : RecyclerView.ViewHolder(itemView) {
    val itemPagerTextView: TextView = itemView.findViewById(R.id.itemPagerTextView)
}
 
class MyPagerAdapter(private val itemList: MutableList<String>): RecyclerView.Adapter<RecyclerView.ViewHolder>(){
    override fun getItemCount(): Int {
        return itemList.size
    }
 
    override fun onCreateViewHolder(parent: ViewGroup, viewType: Int): RecyclerView.ViewHolder {
        val view = LayoutInflater.from(parent.context).inflate(R.layout.item_main, parent, false)
        return MyPagerViewHolder(view)
    }
 
    override fun onBindViewHolder(holder: RecyclerView.ViewHolder, position: Int) {
        (holder as MyPagerViewHolder).itemPagerTextView.text = itemList[position]
        when (position % 3) {
            0 -> (holder as MyPagerViewHolder).itemPagerTextView.setBackgroundColor(Color.RED)
            1 -> (holder as MyPagerViewHolder).itemPagerTextView.setBackgroundColor(Color.BLUE)
            2 -> (holder as MyPagerViewHolder).itemPagerTextView.setBackgroundColor(Color.GREEN)
        }
    }
}


MainActivity.kt


실행 화면


반응형
Posted by J-sean
:
반응형

안드로이드 앱 프로그래밍 with 코틀린 11-4 리사이클러뷰


1
2
3
4
5
6
7
8
9
10
11
12
13
14
<?xml version="1.0" encoding="utf-8"?>
<LinearLayout xmlns:android="http://schemas.android.com/apk/res/android"
    xmlns:app="http://schemas.android.com/apk/res-auto"
    xmlns:tools="http://schemas.android.com/tools"
    android:layout_width="match_parent"
    android:layout_height="match_parent"
    android:orientation="vertical"
    tools:context=".MainActivity">
 
    <androidx.recyclerview.widget.RecyclerView
        android:id="@+id/recyclerview"
        android:layout_width="wrap_content"
        android:layout_height="wrap_content" />
</LinearLayout>


activity_main.xml


1
2
3
4
5
6
7
8
9
10
11
12
13
14
15
<?xml version="1.0" encoding="utf-8"?>
<LinearLayout xmlns:android="http://schemas.android.com/apk/res/android"
    xmlns:app="http://schemas.android.com/apk/res-auto"
    xmlns:tools="http://schemas.android.com/tools"
    android:id="@+id/item_root"
    android:layout_width="wrap_content"
    android:layout_height="wrap_content">
 
    <TextView
        android:id="@+id/item_data"
        android:layout_width="0dp"
        android:layout_height="wrap_content"
        android:layout_weight="1"
        android:text="TextView" />
</LinearLayout>


item_main.xml


1
2
3
4
5
6
7
8
9
10
11
12
13
14
15
16
17
18
19
20
21
22
23
24
25
26
27
28
29
30
31
32
33
34
35
36
37
38
39
40
41
42
43
44
45
46
47
48
49
50
51
52
package com.example.myapplication
 
import androidx.appcompat.app.AppCompatActivity
import android.os.Bundle
import android.util.Log
import android.view.LayoutInflater
import android.view.View
import android.view.ViewGroup
import android.widget.TextView
import androidx.recyclerview.widget.DividerItemDecoration
import androidx.recyclerview.widget.LinearLayoutManager
import androidx.recyclerview.widget.RecyclerView
 
class MainActivity : AppCompatActivity() {
    override fun onCreate(savedInstanceState: Bundle?) {
        super.onCreate(savedInstanceState)
 
        setContentView(R.layout.activity_main)
 
        val data = mutableListOf<String>()
        for(i in 1..10){
            data.add("Item: $i")
        }
 
        val recyclerView: RecyclerView = findViewById(R.id.recyclerview)
        recyclerView.layoutManager = LinearLayoutManager(this)
        recyclerView.adapter = MyAdapter(data)
        recyclerView.addItemDecoration(DividerItemDecoration(this, LinearLayoutManager.VERTICAL))
    }
}
 
class MyViewHolder(itemView: View) : RecyclerView.ViewHolder(itemView) {
    val textView: TextView = itemView.findViewById(R.id.item_data)
}
 
class MyAdapter(private val itemList: MutableList<String>): RecyclerView.Adapter<RecyclerView.ViewHolder>(){
    override fun getItemCount(): Int {
        return itemList.size
    }
 
    override fun onCreateViewHolder(parent: ViewGroup, viewType: Int): RecyclerView.ViewHolder {
        val view = LayoutInflater.from(parent.context).inflate(R.layout.item_main, parent, false)
        return MyViewHolder(view)
    }
 
    override fun onBindViewHolder(holder: RecyclerView.ViewHolder, position: Int) {
        (holder as MyViewHolder).textView.text = itemList[position]
        (holder as MyViewHolder).textView.setOnClickListener {
            Log.d("Sean""Item clicked: $position")
        }
    }
}


Main_Activity.kt


실행 화면


반응형
Posted by J-sean
:
반응형

컴퓨터를 사용하다 보면 알 수 없는 이유로 프로그램이 멈출 때가 있다. 내 컴퓨터에서 그런 문제가 발생한다면 바로 디버깅 해 볼 수 있지만 다른 장소의 컴퓨터에서 발생하는 경우에는 바로 디버깅할 수 없다. 이럴때는 아래 링크를 참고해 메모리 덤프 파일을 생성하고 분석해 볼 수 있다.


2023.07.02 - [Reverse Engineering] - BSOD Crash on Crtl + Scroll 매뉴얼 메모리 덤프


이 프로그램(LabApp.exe)이 작동을 멈춰서(hang) 덤프를 생성했다.


'!process 0 1f labapp.exe' 명령으로 멈춘 프로세스 정보를 확인해 본다.

프로세스 주소: ffffc58f9a4df080
스레드 주소: ffffc58f9a506080


조금 더 내려보면 덤프 생성시 작동중이던 스레드 콜스택을 확인 할 수 있다.

아래와 같은 OnHangBtn 함수가 실행중이었다. 프로그램이 멈춘 이유를 찾았으니 쉽게 해결 할 수 있다.

void CLabAppDlg::OnHangBtn() 
{
    while (1)
    {
         // do nothing
        ;
    }
}


만약 소스 파일이 없는 프로그램이라면 아래 내용을 계속 진행한다.


'.process ffffc58f9a4df080' 명령으로 프로세스 컨텍스트를 바꾼다.


'.thread ffffc58f9a506080' 명령으로 레지스터 컨텍스트를 바꾼다.

레지스터 컨텍스트까지 바꾸면 LabApp.exe 프로세스의 실행중이던 스레드 스텍 프레임으로 바뀐다. 그런데 제일 마지막에 실행되었던 OnHangBtn 함수 이름이 표시되지 않고 주소로만 표시된다.


※ 참고

'.thread /p ffffc58f9a506080' 명령으로 프로세스, 레지스터 컨텍스트를 한번에 바꿀 수도 있다.


0x401b27(OnHangBtn 함수 주소) 어셈블리 코드를 확인해 보자.

eax 레지스터에 1을 넣고 test eax, eax 연산을 진행한다. eax를 AND 연산하면 0이 아니기 때문에 ZF는 0이고 rip(eip)는 0x401b27로 무한히 돌아가게(jmp) 된다. 문제의 원인이 파악 되었다.


반응형
Posted by J-sean
:
반응형

수동으로 언제든 간단하게 크래시를 발생시켜 블루 스크린이 뜨게 해 보자.


CrashOnCtrlScroll 키를 생성한다. (USB 키보드 사용)

PS/2 키보드의 경우 아래 경로에 키를 생성한다. HKEY_LOCAL_MACHINE\System\CurrentControlSet\Services\i8042prt\Parameters


그리고 재부팅 후 원하는 순간에 (키보드 오른쪽에 있는)Ctrl키를 누르고 Scroll Lock키를 두 번 누른다.


블루 스크린이 뜬다. (중지 코드: MANUALLY_INITIATED_CRASH)


지정된 폴더에 메모리 덤프가 생성된다.


Windbg로 확인해 보면 매뉴얼 크래시가 표시된다.


※ 참고

Forcing a system crash from the keyboard


반응형
Posted by J-sean
:
반응형

WinDbg는 타임스템프가 일치하지 않으면 심볼 파일을 로드하지 않는다. 모듈과 심볼이 일치하지 않아 정보가 정확하지 않을 수 있기 때문이다. 정확한 심볼을 구할 수 없다면 타임스템프가 다르더라도 가지고 있는 심볼을 강제 로드할 수 있다.


MyDrv모듈의 심볼이 없다. (Timestamp: Jun 10 2018 22:15:07)


심볼 파일을 확인해 보니 날짜가 다르다. 그래서 자동으로 로드되지 않았던 것이다.


.reload 명령어에 /i 옵션을 주고 심볼을 로드한다.

  • /i: 타임스템프를 무시한다.
  • 모듈 시작 주소: 9afd0000
  • 모듈 크기: 9afd7000 - 9afd0000 = 7000

이미지를 찾을 수 없다는 Win32 에러(0x2)가 나타나지만 무시한다.

Win32 Error Codes


다시 모듈을 확인해 보면 심볼이 로드되어 있다.


스텍 프레임에도 반영되어 표시된다.

물론 타임스템프가 다르기 때문에 정확한 정보를 표시하지 못할 수 있다.


이번엔 심볼 파일을 찾지 못하는 경우 어떻게 해결할 수 있는지 확인해 보자.

위 상황과는 약간 다르다. 같은 에러 메세지가 나타났지만 이번엔 정말 심볼을 로드하지 못한 것이다. 어떤 이유에 의해 심볼 파일의 경로가 바뀌거나 삭제되는 경우 심볼 파일을 찾지 못하게 된다.


WinDbg가 어떤 경로를 헤매고 다녔는지 얘기할 수 있게 해주자.

※ 다시 말할 수 없게 하려면 '!sym quiet'를 실행한다.


다시 한 번 .reload... 명령어를 실행하면 실패한 검색 경로가 모두 표시된다.


WinDbg가 원하는 검색 경로를 만들고 심볼 파일을 넣어준 후 심볼을 로드하면 해결된다.


2023.04.29 - [Reverse Engineering] - WinDbg 설치 하고 심볼 경로 설정하기(feat. 심볼 강제 로드)


반응형
Posted by J-sean
:
반응형

실행중인 프로그램이 특정 조건을 만족하면 메모리 덤프 파일을 생성하도록 해 보자.


문제가 있는(메모리 덤프를 생성할) 프로그램을 미리 실행시킨다.


Procdump.zip
0.70MB

위 파일을 다운로드하고 압축을 푼다.


ProcDump 폴더로 이동한다.


'procdump 프로세스명' 으로 실행하면 바로 미니 덤프를 생성한다.


미니 덤프가 생성되었다.


'-ma -c 20 -s 5' 옵션을 주고 실행한다.

-ma: 전체 덤프 생성

-c: 덤프 생성 CPU 사용율 임계값

-s: 덤프 생성 조건 연속 시간

= CPU 사용율이 20%이상으로 5초 지속되면 전체 덤프 파일을 생성한다.


CPU 사용률이 20%를 넘기자 카운트가 시작되고 5초 후 전체 덤프 파일이 생성된다.


전체 덤프 파일이 생성되었다.


덤프 파일을 분석하면 어디서 문제가 발생하는지 파악할 수 있다.


이번엔 '-ma -t' 옵션으로 실행한다.

-t: 프로세스가 종료되면 덤프 파일을 생성한다. (크래시 발생으로 비정상 종료되어도 덤프 파일 생성)


프로세스가 종료되자 전체 덤프 파일이 생성된다.


전체 덤프 파일이 생성되었다.


※ 참고

ProcDump


반응형
Posted by J-sean
:
반응형

응용 프로그램이 비정상 종료하는 경우 덤프 파일을 생성하도록 해 보자.


응용 프로그램 크래시 발생시 자동으로 에러 리포트가 작성된다. 하지만 문제 파일, 운영체제 등의 정보만 들어 있어 별 의미가 없다.


크래시 발생시 덤프할 파일명으로 레지스트리 키를 만든다.


Value Description Type Default Value
DumpFolder 덤프 파일 생성 폴더 REG_EXPAND_SZ %LOCALAPPDATA%\CrashDumps
DumpCount 폴더에 보관할 덤프파일 갯수 REG_DWORD 10
DumpType 덤프 타입
1: 미니 덤프
2: 전체 덤프
RED_DWORD 1


응용 프로그램 크래시가 발생하면 레지스트리에 설정한 대로 덤프 파일이 생성된다.


위 내용은 응용 프로그램마다 개별적으로 적용하는 경우이고 ...\Windows Error Reporting\LocalDumps 레지스트리에 키 값을 만들어주면 모든 프로그램에 대해 동일한 덤프 세팅을 적용할 수 있다. 기본적으로 C:\Users\XXXX\AppData\Local\CrashDumps에 덤프 파일이 생성되도록 설정되어 있다.


※ 참고

Collecting User-Mode Dumps


반응형
Posted by J-sean
: