반응형

안드로이드 앱은 구글 애드몹(AdMob)으로 광고를 넣을 수 있지만 윈도우 데스크탑 프로그램은 광고를 넣을 수 없다.

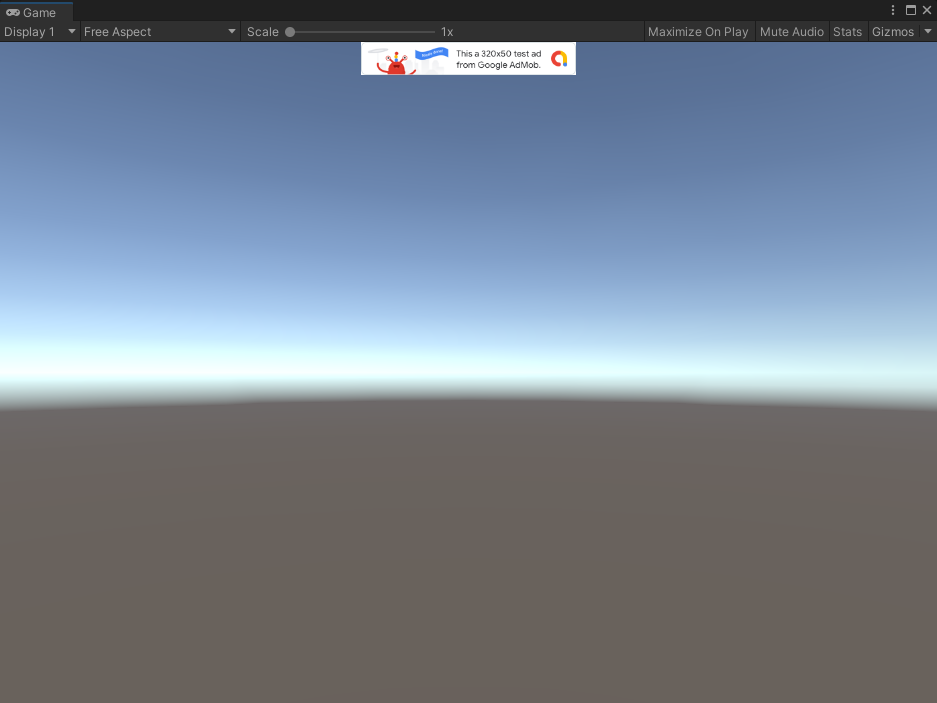
AdsJumbo를 이용해 C# 윈폼(WinForm) 프로그램에 광고를 넣어보자.


NuGet Package Manager에서 AdsJumbo를 설치한다.


폼 디자인너 툴박스에 AdsJumboWinForm이 추가된다.

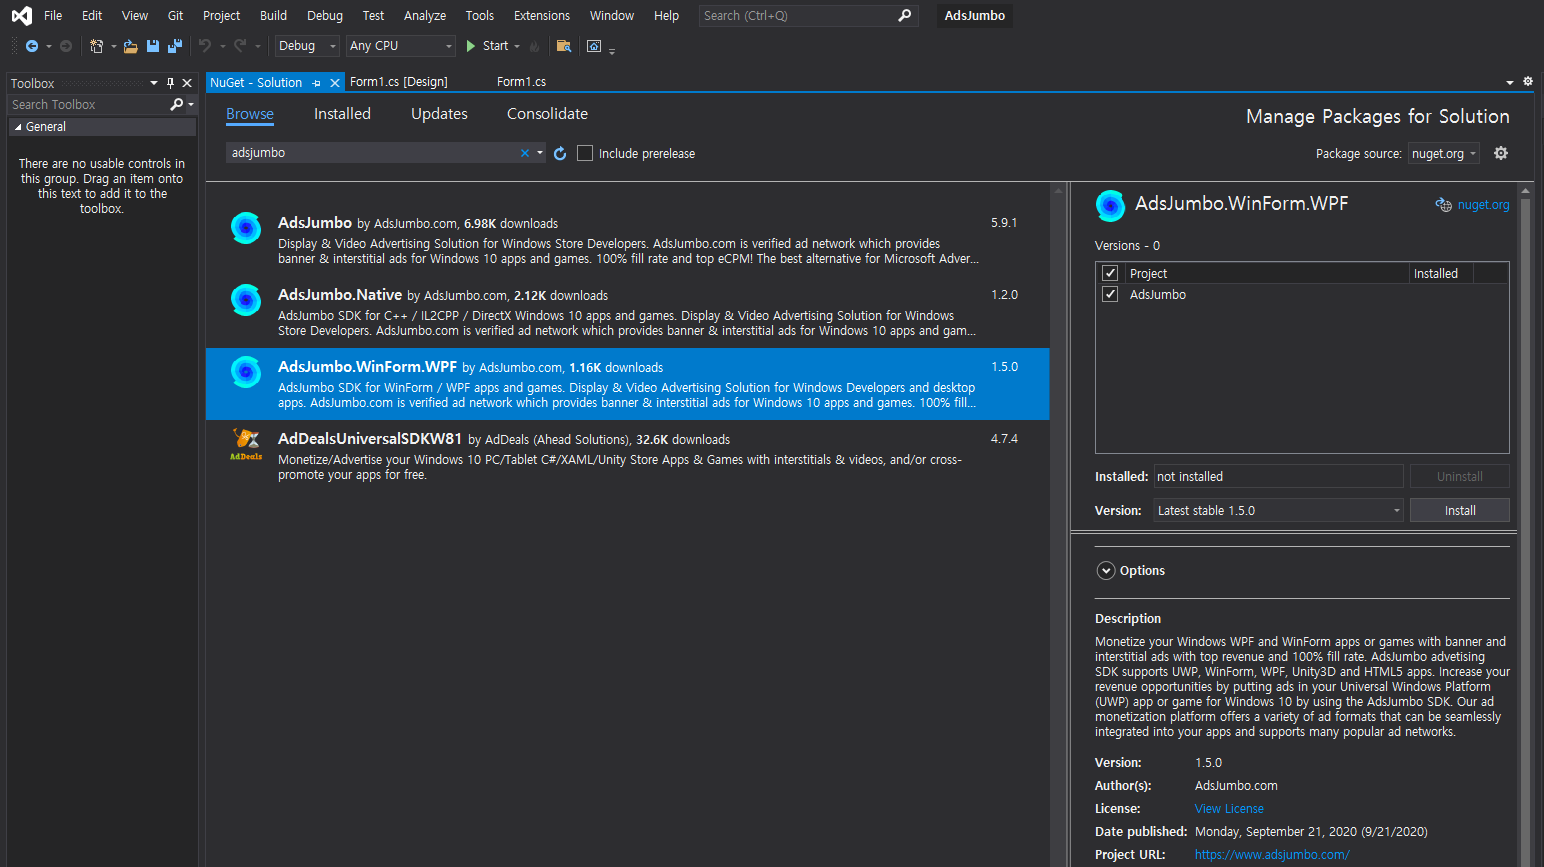
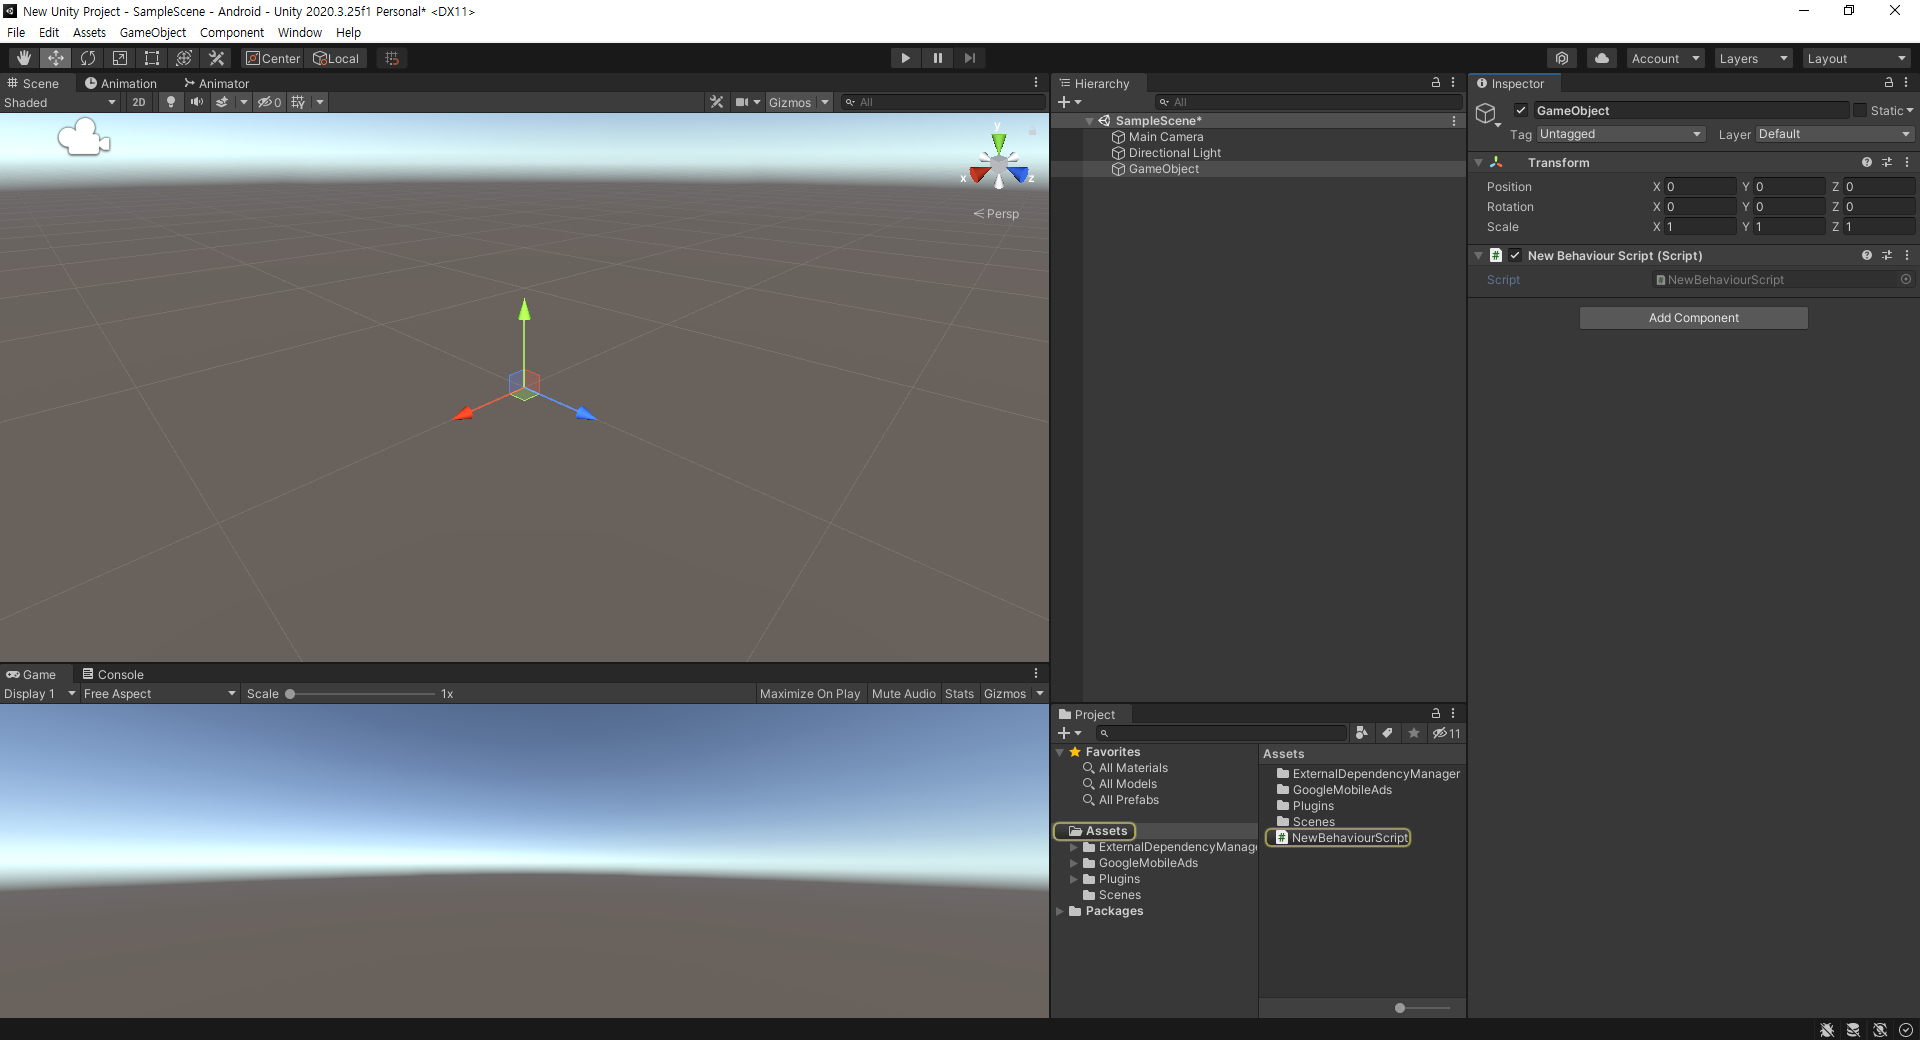
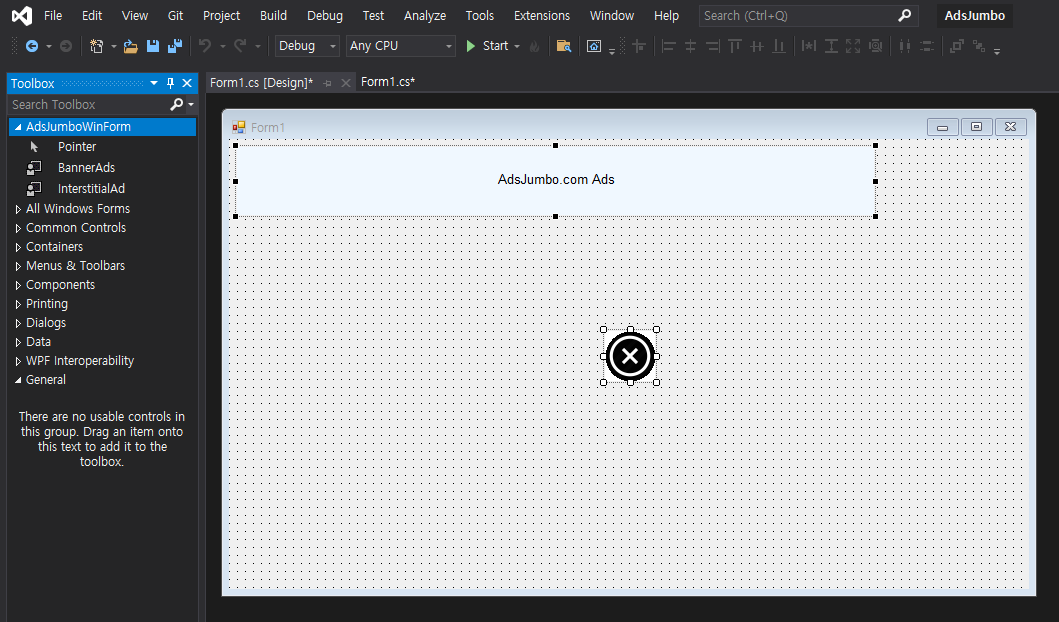
Nuget Package 설치 후 바로 툴박스에 추가되지 않는다면 솔루션을 다시 열어준다.


BannerAds와 InterstitialAd를 하나씩 적당히 배치한다.


1
2
3
4
5
6
7
8
9
10
11
12
13
14
15
16
17
18
19
20
21
22
23
24
25
26
27
28
29
30
31
32
33
34
35
using System;
using System.Collections.Generic;
using System.ComponentModel;
using System.Data;
using System.Drawing;
using System.Linq;
using System.Text;
using System.Threading.Tasks;
using System.Windows.Forms;
 
namespace AdsJumbo
{
    public partial class Form1 : Form
    {
        public Form1()
        {
            InitializeComponent();
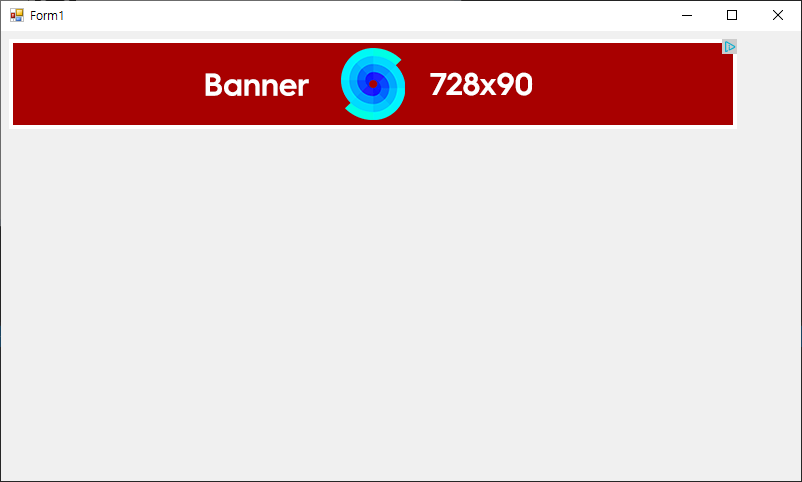
 
            bannerAds1.ShowAd(72890"your_app_id");
            _ = AsyncAds();
            // Starting with C# 7.0, C# supports discards, which are placeholder
            // variables that are intentionally unused in application code.
            // Discards are equivalent to unassigned variables; they don't have
            // a value.
        }
 
        private async Task AsyncAds()
        {
            await Task.Delay(5000);
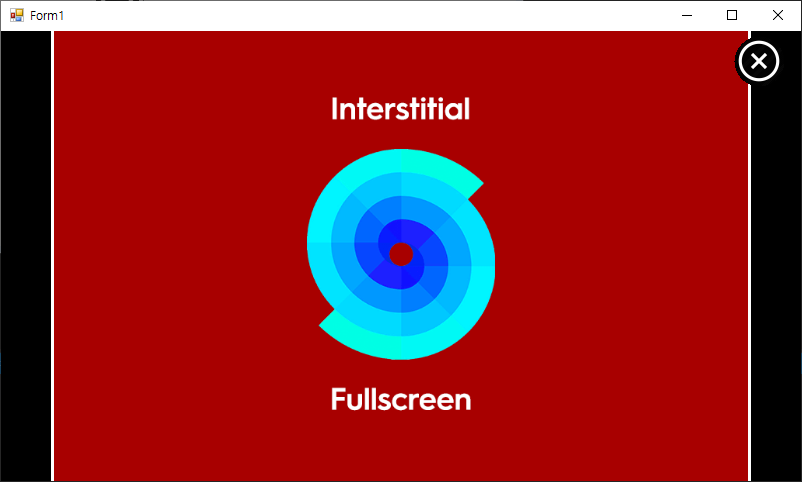
            interstitialAd1.ShowInterstitialAd("your_app_id");
            // The best place is to show an interstitial ad when the app is fully
            // loaded (eg. OnNavigated or your can simple timer await Task.Delay(2000) event)
        }
    }
}


소스를 입력하고 빌드한다.


프로그램을 실행하면 배너 광고가 표시된다.


5초후 전면 광고가 표시된다.


반응형
Posted by J-sean
:
반응형

안드로이드에서 애드몹을 이용해 수익을 창출해 보자.


프로젝트 수준의 build.gradle 파일에서 Google의 Maven 저장소와 Maven 중앙 저장소를 포함한다. (기본적으로 적용 되어있다)

공식문서에는 아래와 같이 allprojects 섹션에도 포함하라고 나오지만 하지 않아도 된다. (포함 하면 세팅값 충돌 문제가 발생한다)

프로젝트 수준의 build.gradle 파일에서 Google의 Maven 저장소와 Maven 중앙 저장소를 buildscript 및 allprojects 섹션에 포함하세요.

※ Error: Build was configured to prefer settings repositories over project repositories but repository 'Google' was added by build file 'build.gradle'


모듈의 앱 수준 Gradle 파일(일반적으로 app/build.gradle)에 Google 모바일 광고 SDK의 종속 항목을 추가한다.

※ 참고

File - Project Structure... - Dependencies - app - + - Library Dependency - com.google.android.gms:play-services-ads 입력 - Search 클릭


AdMob 앱 ID(AdMob UI에서 식별됨)를 앱의 AndroidManifest.xml 파일에 추가한다.

실제 앱에서는 위에 표시된 앱 ID가 아닌 실제 AdMob 앱 ID를 사용한다.


레이아웃을 위와 같이 변경한다.


레이아웃에 AdView를 추가한다.

실제 앱에서는 위에 표시된 테스트 광고 단위 ID가 아닌 실제 광고 단위 ID를 사용한다.


위와 같이 표시된다.

adView 옆의 경고(!)는 레이아웃과 뷰세팅값의 불일치로 나타나는 경고로, 간단히 수정 가능하다.

■ Invalid layout param in a LinearLayout: layout_centerHorizontal

- The given layout_param is not defined for the given layout, meaning it has no effect. This usually happens when you change the parent layout or move view code around without updating the layout params. This will cause useless attribute processing at runtime, and is misleading for others reading the layout so the parameter should be removed.


액티비티 JAVA 파일에 광고를 로드하는 코드를 작성한다.


앱을 실행 시키면 광고가 표시된다.

※ 참고

AdMob 모바일 광고 SDK(Android)


반응형
Posted by J-sean
:
반응형

우선 액션바를 제거해 보자.


My Application이라는 액션바가 기본적으로 나타난다.


themes.xml 파일을 불러온다.


style 태그의 parent를 위와같이 변경한다.


아니면 'Customize your theme here' 메세지 아래에 위와 같은 코드를 작성한다.


앱을 실행하면 액션바가 나타나지 않는다.


JAVA 코드에서도 액티비티의 액션바 레퍼런스를 이용해 액션바를 감출 수 있다.


이번엔 상태 표시줄을 제거해 보자.


themes.xml 파일의 'Customize your theme here' 메세지 아래에 위와 같은 코드를 작성한다.


앱을 실행하면 상태 표시줄이 나타나지 않는다.


JAVA 코드에서도 상태 표시줄을 감출 수 있다. (버전에 따라 여러가지 방법이 있다)

상태 표시줄을 숨기면 액션바도 보이지 않게 해야한다. (바로 위 예에서는 상태 표시줄만 숨겼지만 별 문제는 없어 보였다. 정확히 어떤 문제가 있는지는 잘 모르겠다. 이 예에서도 actionBar.hide()를 주석처리해도 별 문제는 없다)


액션바, 상태 표시줄이 모두 숨겨져 앱이 전체화면으로 표시된다.

※ 참고

상태 표시줄 숨기기


반응형
Posted by J-sean
:
반응형

C#으로 JSON 데이터를 파싱하고 원하는 값을 찾아보자.


아래와 같은 JSON 데이터 파일을 준비한다.


data.json
0.00MB


Newtonsoft.Json을 설치한다.


1
2
3
4
5
6
7
8
9
10
11
12
13
14
15
16
17
18
19
20
21
22
23
24
25
26
27
28
29
30
31
32
33
34
35
36
37
38
39
40
41
42
43
44
45
46
47
48
49
50
51
52
53
54
55
56
57
58
59
60
61
62
63
using System;
using System.Collections.Generic;
using System.Linq;
using System.Text;
using System.Threading.Tasks;
 
using System.IO;
 
using Newtonsoft.Json;
using Newtonsoft.Json.Linq;
 
namespace ConsoleApp1
{
    class Program
    {
        static void Main(string[] args)
        {
            string jsonData = File.ReadAllText(@"d:\data.json");
            //Console.WriteLine(jsonData);
 
            JObject jObject = JObject.Parse(jsonData);
            //Console.WriteLine(jObject.ToString());
 
            Console.WriteLine("Last Update: " + (jObject["LastUpdate"]));
            Console.WriteLine("SalesRecord Count: " + (jObject["SalesRecord"]).Count());
            Console.WriteLine("SalesRecord[2]\"total\": " + jObject["SalesRecord"][2]["total"]);
 
            JToken jToken = jObject["SalesRecord"];
            foreach (JToken data in jToken)
            {
                Console.WriteLine("■ " + data["date"+ ": " + data["item"]);
            }
 
            Item item = JsonConvert.DeserializeObject<Item>(jsonData);
            Console.WriteLine("Last Update: " + item.LastUpdate);
            foreach (Record record in item.SalesRecord)
            {
                Console.WriteLine("■ " + record.date + ": " + record.item);
            }
 
            string serializedJsonData = JsonConvert.SerializeObject(item);
            //Console.WriteLine(serializedJsonData);
            JObject serializedJObject = JObject.Parse(jsonData);
            //Console.WriteLine(serializedJObject);
        }
 
        // 모든 필드명이 json 데이터의 key와 일치해야 한다.
        class Item
        {
            public string LastUpdate;
            public List<Record> SalesRecord;
        }
 
        class Record
        {
            public string date;
            public string item;
            public int price;
            public int quantity;
            public int total;
        }
    }
}


소스를 입력하고 빌드한다.


JSON 데이터가 원하는대로 출력된다.


반응형
Posted by J-sean
:
반응형

HTTP 요청을 보내고 응답을 받아 보자.


1
2
3
4
5
6
7
8
9
10
11
12
13
14
15
16
17
18
19
20
21
22
23
24
25
26
27
28
29
30
31
32
33
34
35
36
37
38
using System;
using System.Collections.Generic;
using System.Linq;
using System.Text;
using System.Threading.Tasks;
 
using System.Net.Http;
 
namespace ConsoleApp1
{
    class Program
    {
        // HttpClient is intended to be instantiated once per application, rather than per-use.
        static readonly HttpClient httpClient = new HttpClient();
 
        static async Task Main(string[] args)
        {
            try
            {
                Console.Write("Enter URI: ");
                string uriString = Console.ReadLine();
 
                HttpResponseMessage httpResponseMessage = await httpClient.GetAsync(uriString.Trim());
                httpResponseMessage.EnsureSuccessStatusCode();
                // Throws an exception if the IsSuccessStatusCode property for the HTTP response is false.
                string responseBody = await httpResponseMessage.Content.ReadAsStringAsync();
                // Above three lines can be replaced with new helper method below
                //string responseBody = await httpClient.GetStringAsync(uriString.Trim());
 
                Console.WriteLine(responseBody);
            }
            catch (HttpRequestException e)
            {
                Console.WriteLine(e.Message);
            }
        }
    }
}


소스를 입력하고 빌드한다.


원하는 URI를 입력하면 데이터가 출력된다.


반응형
Posted by J-sean
:
반응형

WebRequest 클래스를 이용해 웹페이지 데이터(내용)를 요청해 보자.


1
2
3
4
5
6
7
8
9
10
11
12
13
14
15
16
17
18
19
20
21
22
23
24
25
26
27
28
29
30
31
32
33
34
35
36
37
38
39
40
41
42
43
44
45
46
47
48
49
50
51
52
53
54
55
using System;
using System.Collections.Generic;
using System.Linq;
using System.Text;
using System.Threading.Tasks;
 
using System.Net;
using System.IO;
 
namespace ConsoleApp1
{
    class Program
    {
        static void Main(string[] args)
        {
            WebRequest webRequest = null;
            WebResponse webResponse = null;
 
            Stream stream = null;
            StreamReader streamReader = null;
 
            try
            {
                Console.Write("Enter URI: ");
                string uriString = Console.ReadLine();
 
                webRequest = WebRequest.Create(uriString.Trim());
                // If required by the server, set the credentials.
                webRequest.Credentials = CredentialCache.DefaultCredentials;
 
                webResponse = webRequest.GetResponse();
                Console.WriteLine("WebResponse status: " + ((HttpWebResponse)webResponse).StatusDescription);
 
                stream = webResponse.GetResponseStream();
                streamReader = new StreamReader(stream);
 
                string readString = streamReader.ReadToEnd();
                Console.WriteLine(readString);
            }
            catch (Exception exc)
            {
                Console.WriteLine(exc.Message);
            }
            finally
            {
                if (webResponse != null)
                    webResponse.Close();
                if (streamReader != null)
                    streamReader.Close();
                if (stream != null)
                    stream.Close();
            }
        }
    }
}


소스를 작성하고 빌드한다.


원하는 URI를 입력하면 데이터가 출력된다.


반응형
Posted by J-sean
:
반응형

2022.01.18 - [Unity] - Unity3D - 유니티3D with AdMob 광고

Unity3D 앱에 배너 광고를 넣어 보자.


Empty 오브젝트를 만들고 스크립트를 추가한다.


1
2
3
4
5
6
7
8
9
10
11
12
13
14
15
16
17
18
19
20
21
22
23
24
25
26
27
28
29
30
31
32
33
34
35
36
37
38
39
40
41
42
43
44
45
46
47
48
49
50
51
52
53
54
55
56
57
58
59
60
61
62
63
64
65
66
67
68
69
70
71
72
73
74
75
76
77
78
79
80
81
82
83
84
85
86
87
88
89
90
91
92
93
94
95
96
97
98
99
100
101
102
103
104
105
106
107
108
109
110
111
112
113
114
115
116
117
118
#define UNITY_ANDROID
 
using System.Collections;
using System.Collections.Generic;
using UnityEngine;
 
using System;
using GoogleMobileAds.Api;
 
public class NewBehaviourScript : MonoBehaviour
{
    private BannerView bannerView;
 
    // Start is called before the first frame update
    void Start()
    {
        // Initialize the Google Mobile Ads SDK.
        // Before loading ads, have your app initialize the Google Mobile Ads SDK
        // by calling MobileAds.initialize() which initializes the SDK and calls back
        // a completion listener once initialization is complete (or after a 30-second
        // timeout). This needs to be done only once, ideally at app launch.
        MobileAds.Initialize(initStatus =>
        {
            Dictionary<string, AdapterStatus> map = initStatus.getAdapterStatusMap();
            foreach (KeyValuePair<string, AdapterStatus> keyValuePair in map)
            {
                string className = keyValuePair.Key;
                AdapterStatus adapterStatus = keyValuePair.Value;
                switch (adapterStatus.InitializationState)
                {
                    case AdapterState.Ready:
                        // The adapter initialization ready.
                        MonoBehaviour.print($"Adapter: {className} is {adapterStatus.Description}");
                        // Adapter: ExampleClass is Ready
                        break;
 
                    case AdapterState.NotReady:
                        // The adapter initialization not ready.
                        MonoBehaviour.print($"Adapter: {className} is {adapterStatus.Description}");
                        break;
 
                    default:
                        break;
                }
            }
        });
 
        this.RequestBanner();
    }
 
    private void RequestBanner()
    {
        #if UNITY_ANDROID
        string adUnitId = "ca-app-pub-3940256099942544/6300978111";
        #elif UNITY_IPHONE
            string adUnitId = "ca-app-pub-3940256099942544/2934735716";
        #else
            string adUnitId = "unexpected_platform";
        #endif
 
        // Create a 320x50 banner at the top of the screen.
        this.bannerView = new BannerView(adUnitId, AdSize.Banner, AdPosition.Top);
 
        // Called when an ad request has successfully loaded.
        this.bannerView.OnAdLoaded += this.HandleOnAdLoaded;
        // Called when an ad request failed to load.
        this.bannerView.OnAdFailedToLoad += this.HandleOnAdFailedToLoad;
        // Called when an ad is clicked.
        this.bannerView.OnAdOpening += this.HandleOnAdOpened;
        // Called when the user returned from the app after an ad click.
        this.bannerView.OnAdClosed += this.HandleOnAdClosed;
        // Removed OnAdLeavingApplication event for all formats.
        //this.bannerView.OnAdLeavingApplication += this.HandleOnAdLeavingApplication;
 
        // Create an empty ad request.
        AdRequest request = new AdRequest.Builder().Build();
 
        // Load the banner with the request.
        this.bannerView.LoadAd(request);
    }
 
    // Update is called once per frame
    void Update()
    {
 
    }
 
    public void HandleOnAdLoaded(object sender, EventArgs args)
    {
        MonoBehaviour.print("HandleAdLoaded event received");
    }
 
    public void HandleOnAdFailedToLoad(object sender, AdFailedToLoadEventArgs args)
    {
        MonoBehaviour.print("HandleFailedToReceiveAd event received with message: "
            + args.ToString());
    }
 
    public void HandleOnAdOpened(object sender, EventArgs args)
    {
        MonoBehaviour.print("HandleAdOpened event received");
    }
 
    public void HandleOnAdClosed(object sender, EventArgs args)
    {
        MonoBehaviour.print("HandleAdClosed event received");
    }
 
    //public void HandleOnAdLeavingApplication(object sender, EventArgs args)
    //{
    //    MonoBehaviour.print("HandleAdLeavingApplication event received");
    //}
 
    private void OnDestroy()
    {
        this.bannerView.Destroy();
    }
}


스크립트 소스를 입력하고 저장한다.


게임을 실행하면 화면 상단에 배너가 표시된다.


반응형
Posted by J-sean
:
반응형


2022.0118 - [Unity] - Unity3D - 유니티3D with AdMob 광고의 내용을 진행하다 보면 예상치 못한 에러를 만날 수 있다. 몇 가지 에러를 해결해 보자.


Resolving Android Dependencies 과정 중 발생하는 에러

환경 변수에 JAVA_HOME이 등록되지 않아 발생하는 에러다.


유니티 설치 폴더에 있는 OpenJDK 경로를 JAVA_HOME 변수로 등록한다.


Google.IOSResolver.dll을 로드할 수 없어 발생하는 에러

안드로이드 앱을 개발하기 위해 iOS Build Support를 설치하지 않아 발생하는 에러다.


Unity Hub를 실행한다.


설치되어 있는 Unity 아이콘 오른쪽 점(...)을 클릭하고 Add Modules를 선택한다.


iOS Build Support를 선택하고 DONE을 클릭해 설치한다.


반응형
Posted by J-sean
: