반응형

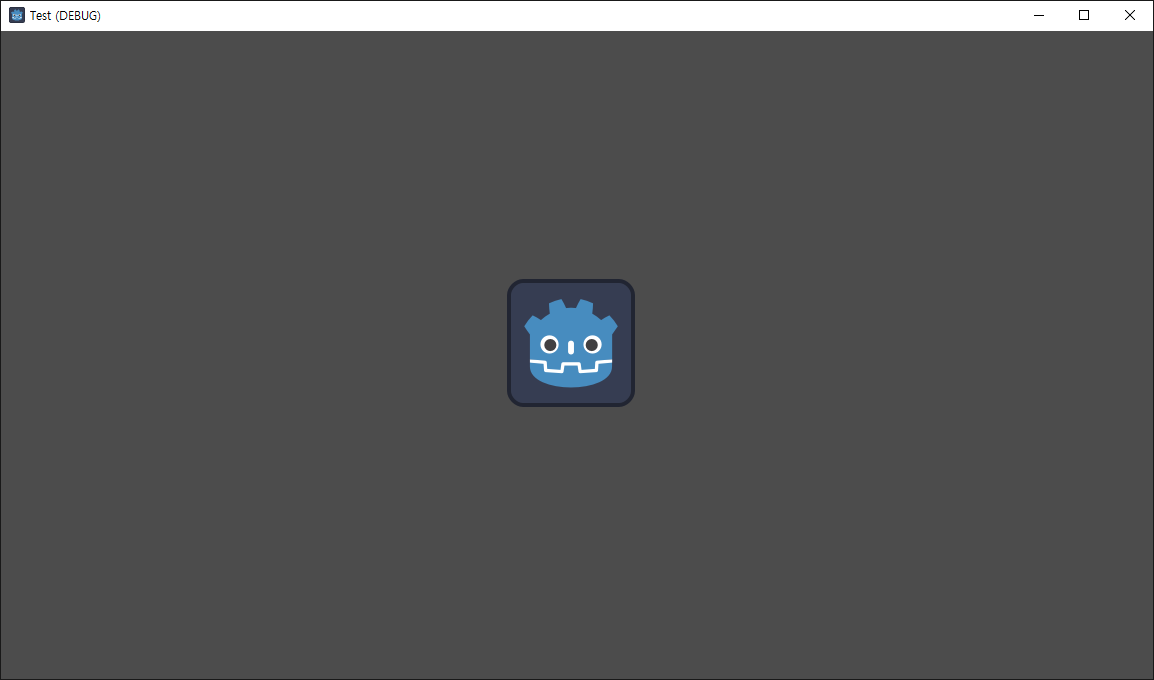
배경이 투명한 애플리케이션을 만들어 보자.


우선 Built-in Render Pipeline의 경우다.


Clear Flags - Solid Color, Background - Black


Use DXGI flip model swapchain for D3D11 체크 해제


Auto Graphics API for Windows 체크 해제 하고 Direct3D11을 위로 올린다.


간단한 입력을 위해 Input Manager를 사용했다.


using System;
using UnityEngine;
using System.Runtime.InteropServices;

public class NewBehaviourScript : MonoBehaviour
{
    public struct MARGINS
    {
        public int leftWidth;
        public int rightWidth;
        public int topHeight;
        public int bottomHeight;
    }

    [DllImport("user32.dll")]
    public static extern IntPtr GetActiveWindow();

    [DllImport("user32.dll")]
    public static extern IntPtr SetWindowLongPtr(IntPtr hWnd, int nIndex, IntPtr dwNewLong);

    [DllImport("user32.dll")]
    public static extern int BringWindowToTop(IntPtr hwnd);

    [DllImport("user32.dll")]
    [return: MarshalAs(UnmanagedType.Bool)]
    public static extern bool SetWindowPos(IntPtr hWnd, IntPtr hWndInsertAfter, int x, int y, int cx, int cy, uint uFlags);

    [DllImport("Dwmapi.dll")]
    public static extern uint DwmExtendFrameIntoClientArea(IntPtr hWnd, ref MARGINS margins);

    static readonly IntPtr HWND_TOPMOST = new IntPtr(-1);
    static readonly IntPtr HWND_NOTOPMOST = new IntPtr(-2);

    IntPtr hWnd;
    const UInt32 SWP_NOSIZE = 0x0001;
    const UInt32 SWP_NOMOVE = 0x0002;

    const int GWL_EXSTYLE = -20;
    const long WS_EX_LAYERED = 0x00080000L;
    const long WS_EX_TRANSTPARENT = 0x00000020L;

    void Start()
    {
        Application.runInBackground = true;

        hWnd = GetActiveWindow();

        MARGINS margins = new MARGINS { leftWidth = -1 };
        DwmExtendFrameIntoClientArea(hWnd, ref margins);
        // Negative margins have special meaning to DwmExtendFrameIntoClientArea.
        // Negative margins create the "sheet of glass" effect, where the client area
        // is rendered as a solid surface with no window border.
        SetWindowLongPtr(hWnd, GWL_EXSTYLE, (IntPtr)WS_EX_LAYERED);

        BringWindowToTop(hWnd);
        SetWindowPos(hWnd, HWND_TOPMOST, 0, 0, 0, 0, SWP_NOSIZE);
    }

    bool toggle = true;
    void Update()
    {
        if (Input.GetKeyUp(KeyCode.Space))
        {
            toggle = !toggle;

            BringWindowToTop(hWnd);
            SetWindowPos(hWnd, HWND_TOPMOST, 0, 0, 0, 0, SWP_NOSIZE);

            if (toggle)
            {
                SetWindowLongPtr(hWnd, GWL_EXSTYLE, (IntPtr)WS_EX_LAYERED);
            }
            else
            {
                SetWindowLongPtr(hWnd, GWL_EXSTYLE, (IntPtr)(WS_EX_LAYERED | WS_EX_TRANSTPARENT));
            }
        }
    }
}


스크립트를 작성하고 적당한 오브젝트에 추가한다. 스페이스 키를 누르면 배경의 존재 유무가 변경된다.


빌드하고 실행하면 투명한 배경에서 애플리케이션이 표시된다.


Univeral Reder Pipeline의 경우,

1. 프로젝트 창에서 Assets/settings/PC_Renderer(예: Renderer2D)/Post-Processing/*Enabled 체크 해제*
2. 프로젝트 창에서 Assets/settings/PC_RP(예: UniversalRP)/Quality/HDR/*체크 해제*

작업을 추가로 진행해야 한다.


※ 참고

https://youtu.be/RqgsGaMPZTw?si=ypzYCdXufnlmBRSd


반응형
Posted by J-sean
:
반응형

투명한 윈도우를 만들어 보자.


1
2
3
4
5
6
7
8
9
10
11
12
13
14
15
16
17
18
19
20
21
22
23
24
25
26
27
28
29
30
31
32
33
34
35
36
37
#include "raylib.h"
 
int main(void)
{
    const int screenWidth = 450;
    const int screenHeight = 500;
 
    SetConfigFlags(FLAG_WINDOW_TRANSPARENT | FLAG_WINDOW_UNDECORATED);
    InitWindow(screenWidth, screenHeight, "raylib example");
    SetTargetFPS(60);
 
    Image rayimage = LoadImage("palvin.jpg");
    // NOTE: Textures MUST be loaded after Window initialization (OpenGL context is required)
    Texture2D texture = LoadTextureFromImage(rayimage);
 
    //Texture2D texture = LoadTexture("palvin.jpg");
    // Image 사용 없이 LoadTexture("palvin.jpg")로 해도 된다.
    // 이 경우, 아래 UnloadImage(rayimage);는 삭제한다.
 
    while (!WindowShouldClose())
    {
        BeginDrawing();
 
        ClearBackground(BLANK);
 
        DrawTexture(texture, 1010, WHITE);
 
        EndDrawing();
    }
 
    UnloadImage(rayimage);
    UnloadTexture(texture);
 
    CloseWindow();
 
    return 0;
}


소스를 입력하고 빌드한다.


타이틀바가 없고 배경이 투병한 윈도우에 이미지가 출력된다.


Window Flags


반응형

'SDL, raylib' 카테고리의 다른 글

[raylib] Window Handle 윈도우 핸들  (0) 2025.05.04
[raylib] Particle 파티클 (Snow)  (0) 2025.05.04
[raylib] raylib with opencv  (0) 2025.05.03
[raylib] raylib 설정하고 사용하기  (0) 2025.05.02
[SDL3] Framerate Per Second FPS  (0) 2025.04.22
Posted by J-sean
:
반응형

픽셀 파티클 시스템을 만들어 보자.


더보기


1
2
3
4
5
6
7
8
9
10
11
12
13
14
15
16
17
18
19
20
21
22
23
24
25
26
27
28
29
30
31
32
33
34
35
36
37
38
39
40
41
42
43
44
45
46
47
48
49
50
51
52
53
54
55
56
57
58
59
60
61
62
63
64
65
66
67
68
69
70
71
72
73
74
75
76
77
78
79
80
81
82
83
84
85
86
87
88
89
90
91
92
93
94
95
96
97
98
99
100
101
102
103
104
105
106
107
108
109
110
111
112
113
#define SDL_MAIN_USE_CALLBACKS 1
#include <SDL3/SDL.h>
#include <SDL3/SDL_main.h>
#include <stdio.h>
 
SDL_Window* window = NULL;
SDL_Renderer* renderer = NULL;
 
int screen_width = 640;
int screen_height = 480;
 
float speed = 0.001f;
Uint64 start;
Uint64 end;
float fps = 3000;
 
typedef struct {
    float x, y;
    float vx, vy;
    int life;
} s_particle;
 
const int number_particles = 100;
s_particle particles[number_particles];
 
void spawn_particle(s_particle* pt) {
    pt->= SDL_randf() * screen_width;
    pt->= SDL_randf() * screen_height;
    pt->vx = (SDL_randf() * 2 - 1* speed;
    pt->vy = (SDL_randf() * 2 - 1* speed;
    // '* 2 - 1' 의 의미: 음의 방향으로도 움직이기 위해서.
    pt->life = (int)fps + SDL_rand((int)fps * 2);
}
 
void draw_particle(s_particle pt[]) {
    for (int i = 0; i < number_particles; i++) {
        s_particle* particle = &pt[i];
        particle->+= particle->vx;
        particle->+= particle->vy;
        particle->life--;
 
        if (particle->life <= 0)
            spawn_particle(particle);
 
        SDL_SetRenderDrawColor(renderer, 02550, SDL_ALPHA_OPAQUE);
        SDL_RenderPoint(renderer, particle->x, particle->y);
    }
}
 
SDL_AppResult SDL_AppInit(void** appstate, int argc, char* argv[])
{
    SDL_SetAppMetadata("Example""1.0""sean");
 
    if (!SDL_Init(SDL_INIT_VIDEO)) {
        SDL_Log("Couldn't initialize SDL: %s", SDL_GetError());
        return SDL_APP_FAILURE;
    }
 
    if (!SDL_CreateWindowAndRenderer("examples/renderer/clear", screen_width, screen_height, 0&window, &renderer)) {
        SDL_Log("Couldn't create window/renderer: %s", SDL_GetError());
        return SDL_APP_FAILURE;
    }
 
    for (int i = 0; i < number_particles; i++) {
        spawn_particle(&particles[i]);
    }
 
    return SDL_APP_CONTINUE;
}
 
SDL_AppResult SDL_AppEvent(void* appstate, SDL_Event* event)
{
    switch (event->type) {
    case SDL_EVENT_QUIT:
        return SDL_APP_SUCCESS;
    case SDL_EVENT_KEY_DOWN:
        printf("Key pressed: %s\n", SDL_GetKeyName(event->key.key));
        if (event->key.key == SDLK_ESCAPE)
            return SDL_APP_SUCCESS;
        break;
    default:
        break;
    }
 
    return SDL_APP_CONTINUE;
}
 
SDL_AppResult SDL_AppIterate(void* appstate)
{
    // FPS 계산. 사용하지는 않음.
    start = SDL_GetPerformanceCounter();
 
    {
        SDL_SetRenderDrawColor(renderer, 000, SDL_ALPHA_OPAQUE);
        SDL_RenderClear(renderer);
 
        draw_particle(particles);
 
        SDL_RenderPresent(renderer);
    }
 
    end = SDL_GetPerformanceCounter();
    fps = 1.0f / ((end - start) / (float)SDL_GetPerformanceFrequency());
 
    return SDL_APP_CONTINUE;
}
 
void SDL_AppQuit(void* appstate, SDL_AppResult result)
{
    SDL_DestroyRenderer(renderer);
    SDL_DestroyWindow(window);
    SDL_Quit();
}


위 코드에서는 FPS를 설정하지 않고 시스템의 CPU 속도에 맞게 speed 변수를 적당히 조절했다. FPS 설정이 필요하면 아래 링크를 참고한다.

2025.04.22 - [C, C++] - [SDL] Framerate Per Second FPS


파티클들이 사방으로 움직인다.


이번엔 불꽃놀이 파티클을 만들어 보자.


더보기


1
2
3
4
5
6
7
8
9
10
11
12
13
14
15
16
17
18
19
20
21
22
23
24
25
26
27
28
29
30
31
32
33
34
35
36
37
38
39
40
41
42
43
44
45
46
47
48
49
50
51
52
53
54
55
56
57
58
59
60
61
62
63
64
65
66
67
68
69
70
71
72
73
74
75
76
77
78
79
80
81
82
83
84
85
86
87
88
89
90
91
92
93
94
95
96
97
98
99
100
101
102
103
104
105
106
107
108
109
110
111
112
113
114
115
116
117
118
119
120
121
122
123
124
125
126
127
128
129
#define SDL_MAIN_USE_CALLBACKS 1
 
#include <SDL3/SDL.h>
#include <SDL3/SDL_main.h>
#include <stdio.h>
 
SDL_Window* window = NULL;
SDL_Renderer* renderer = NULL;
 
int screen_width = 640;
int screen_height = 480;
 
float speed = 3.0f;
float fps = 60;
 
typedef struct {
    float x, y;
    float vx, vy;
    SDL_Color color;
    int life;
    bool exist;
} s_particle;
 
const int number_particles = 1000;
s_particle particles[number_particles];
SDL_Point spawn_point;
 
void spawn_particle(s_particle* pt) {
    pt->exist = true;
    pt->= spawn_point.x;
    pt->= spawn_point.y;
 
    float x = (SDL_randf() * 2 - 1);
    float y = (SDL_randf() * 2 - 1);
    float n = SDL_sqrtf(x * x + y * y);
    // 벡터 정규화. 불꽃이 원형으로 퍼져나가기 위해.
    // '* 2 - 1' 의 의미: 음의 방향으로도 움직이기 위해.
    pt->vx = (x / n) * speed * SDL_randf();
    pt->vy = (y / n) * speed * SDL_randf();
 
    pt->color.r = SDL_rand(256);
    pt->color.g = SDL_rand(256);
    pt->color.b = SDL_rand(256);
    pt->life = (int)fps + SDL_rand((int)fps * 0.5f);
}
 
void draw_particle(s_particle pt[]) {
    for (int i = 0; i < number_particles; i++) {
        s_particle* particle = &pt[i];
        if (particle->exist) {
            particle->+= particle->vx;
            particle->+= particle->vy;
            particle->life--;
 
            if (particle->life <= 0) {
                particle->exist = false;
                continue;
            }
            SDL_SetRenderDrawColor(renderer, particle->color.r, particle->color.g, particle->color.b, SDL_ALPHA_OPAQUE);
            SDL_RenderPoint(renderer, particle->x, particle->y);
        }
    }
}
 
SDL_AppResult SDL_AppInit(void** appstate, int argc, char* argv[])
{
    SDL_SetAppMetadata("Example""1.0""sean");
 
    if (!SDL_Init(SDL_INIT_VIDEO)) {
        SDL_Log("Couldn't initialize SDL: %s", SDL_GetError());
        return SDL_APP_FAILURE;
    }
 
    if (!SDL_CreateWindowAndRenderer("examples/renderer/clear", screen_width, screen_height, 0&window, &renderer)) {
        SDL_Log("Couldn't create window/renderer: %s", SDL_GetError());
        return SDL_APP_FAILURE;
    }
 
    return SDL_APP_CONTINUE;
}
 
SDL_AppResult SDL_AppEvent(void* appstate, SDL_Event* event)
{
    switch (event->type) {
    case SDL_EVENT_QUIT:
        return SDL_APP_SUCCESS;
    case SDL_EVENT_MOUSE_BUTTON_DOWN:
        if (event->button.button == 1) { // 왼쪽 버튼 클릭. 오른쪽 버튼은 3.
            printf("x: %f, y: %f\n", event->button.x, event->button.y);
            spawn_point.x = event->button.x;
            spawn_point.y = event->button.y;
            for (int i = 0; i < number_particles; i++)
                spawn_particle(&particles[i]);
        }
        break;
    case SDL_EVENT_KEY_DOWN:
        printf("Key pressed: %s\n", SDL_GetKeyName(event->key.key));
        if (event->key.key == SDLK_ESCAPE)
            return SDL_APP_SUCCESS;
        break;
    default:
        break;
    }
 
    return SDL_APP_CONTINUE;
}
 
SDL_AppResult SDL_AppIterate(void* appstate)
{
    SDL_Delay(1000 / fps);
 
    {
        SDL_SetRenderDrawColor(renderer, 000, SDL_ALPHA_OPAQUE);
        SDL_RenderClear(renderer);
 
        draw_particle(particles);
 
        SDL_RenderPresent(renderer);
    }
 
    return SDL_APP_CONTINUE;
}
 
void SDL_AppQuit(void* appstate, SDL_AppResult result)
{
    SDL_DestroyRenderer(renderer);
    SDL_DestroyWindow(window);
    SDL_Quit();
}


마우스 클릭 지점에서 간단한 불꽃놀이 파티클이 생성된다.


이번엔 픽셀이 아닌 비트맵 이미지로 파티클 시스템을 만들어 보자.

snow.bmp
0.00MB


snow1.bmp
0.00MB


더보기


1
2
3
4
5
6
7
8
9
10
11
12
13
14
15
16
17
18
19
20
21
22
23
24
25
26
27
28
29
30
31
32
33
34
35
36
37
38
39
40
41
42
43
44
45
46
47
48
49
50
51
52
53
54
55
56
57
58
59
60
61
62
63
64
65
66
67
68
69
70
71
72
73
74
75
76
77
78
79
80
81
82
83
84
85
86
87
88
89
90
91
92
93
94
95
96
97
98
99
100
101
102
103
104
105
106
107
108
109
110
111
112
113
114
115
116
117
118
119
120
121
122
123
124
125
126
127
128
129
130
131
132
133
134
135
136
137
138
139
#define SDL_MAIN_USE_CALLBACKS 1
#include <SDL3/SDL.h>
#include <SDL3/SDL_main.h>
#include <stdio.h>
 
SDL_Window* window = NULL;
SDL_Renderer* renderer = NULL;
 
int screen_width = 640;
int screen_height = 480;
 
float speed = 0.01f;
Uint64 start;
Uint64 end;
float fps = 3000;
 
typedef struct {
    float x, y;
    float vx, vy;
    int life;
} s_particle;
 
const int number_particles = 200;
s_particle particles[number_particles];
 
// 파티클 이미지 텍스쳐와 렉트
SDL_Texture* texture;
SDL_FRect rect;
 
void spawn_particle(s_particle* pt) {
    pt->= SDL_randf() * screen_width;
    pt->= SDL_randf() * screen_height;
    pt->vx = (SDL_randf() * 2 - 1* speed;
    pt->vy = (SDL_randf() * 2 - 1* speed;
    // '* 2 - 1' 의 의미: 음의 방향으로도 움직이기 위해서.
    pt->life = (int)fps + SDL_rand((int)fps * 2);
}
 
void draw_particle(s_particle pt[]) {
    for (int i = 0; i < number_particles; i++) {
        s_particle* particle = &pt[i];
        particle->+= particle->vx;
        particle->+= particle->vy;
        particle->life--;
 
        if (particle->life <= 0)
            spawn_particle(particle);
 
        // 텍스쳐 그리기
        rect.x = particle->- rect.w / 2;
        rect.y = particle->- rect.h / 2;
        SDL_RenderTexture(renderer, texture, NULL&rect);
 
        //SDL_SetRenderDrawColor(renderer, 255, 0, 0, SDL_ALPHA_OPAQUE);
        //SDL_RenderPoint(renderer, particle->x, particle->y);
    }
}
 
SDL_AppResult SDL_AppInit(void** appstate, int argc, char* argv[])
{
    SDL_SetAppMetadata("Example""1.0""sean");
 
    if (!SDL_Init(SDL_INIT_VIDEO)) {
        SDL_Log("Couldn't initialize SDL: %s", SDL_GetError());
        return SDL_APP_FAILURE;
    }
 
    if (!SDL_CreateWindowAndRenderer("example", screen_width, screen_height, 0&window, &renderer)) {
        SDL_Log("Couldn't create window/renderer: %s", SDL_GetError());
        return SDL_APP_FAILURE;
    }
 
    for (int i = 0; i < number_particles; i++) {
        spawn_particle(&particles[i]);
    }
 
    // 비트맵 로드
    SDL_Surface* bmpSurface = SDL_LoadBMP("snow.bmp");
    if (!bmpSurface) {
        SDL_Log("Couldn't load BMP: %s", SDL_GetError());
        return SDL_APP_FAILURE;
    }
 
    // 컬러키(투명) 설정
    SDL_SetSurfaceColorKey(bmpSurface, true, SDL_MapSurfaceRGB(bmpSurface, 0x000x000x00));
    //SDL_SetSurfaceColorKey(bmpSurface, true, SDL_MapRGB(SDL_GetPixelFormatDetails(bmpSurface->format), NULL, 0x00, 0x00, 0x00));
    rect = { 00, (float)bmpSurface->w, (float)bmpSurface->h };
    texture = SDL_CreateTextureFromSurface(renderer, bmpSurface);
 
    SDL_DestroySurface(bmpSurface);
 
    return SDL_APP_CONTINUE;
}
 
SDL_AppResult SDL_AppEvent(void* appstate, SDL_Event* event)
{
    switch (event->type) {
    case SDL_EVENT_QUIT:
        return SDL_APP_SUCCESS;
    case SDL_EVENT_KEY_DOWN:
        printf("Key pressed: %s\n", SDL_GetKeyName(event->key.key));
        if (event->key.key == SDLK_ESCAPE)
            return SDL_APP_SUCCESS;
        break;
    default:
        break;
    }
 
    return SDL_APP_CONTINUE;
}
 
SDL_AppResult SDL_AppIterate(void* appstate)
{
    // FPS 계산. 사용하지는 않음.
    start = SDL_GetPerformanceCounter();
 
    {
        SDL_SetRenderDrawColor(renderer, 000, SDL_ALPHA_OPAQUE);
        SDL_RenderClear(renderer);
 
        draw_particle(particles);
 
        SDL_RenderPresent(renderer);
    }
 
    end = SDL_GetPerformanceCounter();
    fps = 1.0f / ((end - start) / (float)SDL_GetPerformanceFrequency());
 
    return SDL_APP_CONTINUE;
}
 
void SDL_AppQuit(void* appstate, SDL_AppResult result)
{
    SDL_DestroyTexture(texture);
 
    SDL_DestroyRenderer(renderer);
    SDL_DestroyWindow(window);
    SDL_Quit();
}


알파채널이 없는 비트맵이라 조금 어색하지만 눈이 사방으로 흩날린다.


이번엔 진짜 눈처럼 내리는 환경을 만들어 보자.


더보기


1
2
3
4
5
6
7
8
9
10
11
12
13
14
15
16
17
18
19
20
21
22
23
24
25
26
27
28
29
30
31
32
33
34
35
36
37
38
39
40
41
42
43
44
45
46
47
48
49
50
51
52
53
54
55
56
57
58
59
60
61
62
63
64
65
66
67
68
69
70
71
72
73
74
75
76
77
78
79
80
81
82
83
84
85
86
87
88
89
90
91
92
93
94
95
96
97
98
99
100
101
102
103
104
105
106
107
108
109
110
111
112
113
114
115
116
117
118
119
120
121
122
123
124
125
126
127
128
129
130
131
132
133
134
135
136
137
138
139
#define SDL_MAIN_USE_CALLBACKS 1
#include <SDL3/SDL.h>
#include <SDL3/SDL_main.h>
#include <stdio.h>
 
SDL_Window* window = NULL;
SDL_Renderer* renderer = NULL;
 
int screen_width = 640;
int screen_height = 480;
 
Uint64 start;
Uint64 end;
float fps;
 
typedef struct {
    float x, y;
    float vx, vy;
} s_particle;
 
const int number_particles = 400;
s_particle particles[number_particles];
 
// 파티클 이미지 텍스쳐와 렉트
SDL_Texture* texture;
SDL_FRect rect;
 
void spawn_particle(s_particle* pt) {
    pt->= (SDL_randf() * 2 - 1* screen_width * 10;
    pt->= SDL_randf() * screen_height * -2;
    // 넓은 범위에서 눈이 생성되게 해서 실행 초기에 눈이 쏟아져 내리는걸 방지.
    pt->vx = SDL_randf() * 0.5f; // 눈은 오른쪽으로만 흩날린다.
    pt->vy = SDL_randf() + 0.8f;
}
 
void draw_particle(s_particle pt[]) {
    for (int i = 0; i < number_particles; i++) {
        s_particle* particle = &pt[i];
        particle->+= particle->vx;
        particle->+= particle->vy;
        // 눈이 화면 왼쪽에서도 바람에 날려 올 수 있도록 생존 범위 조정.
        if (particle->> screen_width || particle->< -screen_width || particle->> screen_height)
            spawn_particle(particle);
 
        // 텍스쳐 그리기
        rect.x = particle->- rect.w / 2;
        rect.y = particle->- rect.h / 2;
        SDL_RenderTexture(renderer, texture, NULL&rect);
 
        //SDL_SetRenderDrawColor(renderer, 255, 0, 0, SDL_ALPHA_OPAQUE);
        //SDL_RenderPoint(renderer, particle->x, particle->y);
    }
}
 
SDL_AppResult SDL_AppInit(void** appstate, int argc, char* argv[])
{
    SDL_SetAppMetadata("Example""1.0""sean");
 
    if (!SDL_Init(SDL_INIT_VIDEO)) {
        SDL_Log("Couldn't initialize SDL: %s", SDL_GetError());
        return SDL_APP_FAILURE;
    }
 
    SDL_SetHint(SDL_HINT_RENDER_VSYNC, "1");
    // A variable controlling whether updates to the SDL screen surface should be synchronized
    // with the vertical refresh, to avoid tearing.
 
    if (!SDL_CreateWindowAndRenderer("example", screen_width, screen_height, 0&window, &renderer)) {
        SDL_Log("Couldn't create window/renderer: %s", SDL_GetError());
        return SDL_APP_FAILURE;
    }
 
    for (int i = 0; i < number_particles; i++) {
        spawn_particle(&particles[i]);
    }
 
    // 비트맵 로드
    SDL_Surface* bmpSurface = SDL_LoadBMP("snow.bmp");
    if (!bmpSurface) {
        SDL_Log("Couldn't load BMP: %s", SDL_GetError());
        return SDL_APP_FAILURE;
    }
 
    // 컬러키(투명) 설정
    SDL_SetSurfaceColorKey(bmpSurface, true, SDL_MapSurfaceRGB(bmpSurface, 0x000x000x00));
    //SDL_SetSurfaceColorKey(bmpSurface, true, SDL_MapRGB(SDL_GetPixelFormatDetails(bmpSurface->format), NULL, 0x00, 0x00, 0x00));
    rect = { 00, (float)bmpSurface->w, (float)bmpSurface->h };
    texture = SDL_CreateTextureFromSurface(renderer, bmpSurface);
 
    SDL_DestroySurface(bmpSurface);
 
    return SDL_APP_CONTINUE;
}
 
SDL_AppResult SDL_AppEvent(void* appstate, SDL_Event* event)
{
    switch (event->type) {
    case SDL_EVENT_QUIT:
        return SDL_APP_SUCCESS;
    case SDL_EVENT_KEY_DOWN:
        printf("Key pressed: %s\n", SDL_GetKeyName(event->key.key));
        if (event->key.key == SDLK_ESCAPE)
            return SDL_APP_SUCCESS;
        break;
    default:
        break;
    }
 
    return SDL_APP_CONTINUE;
}
 
SDL_AppResult SDL_AppIterate(void* appstate)
{
    // FPS 계산. 사용하지는 않음.
    start = SDL_GetPerformanceCounter();
 
    {
        SDL_SetRenderDrawColor(renderer, 000, SDL_ALPHA_OPAQUE);
        SDL_RenderClear(renderer);
 
        draw_particle(particles);
 
        SDL_RenderPresent(renderer);
    }
 
    end = SDL_GetPerformanceCounter();
    fps = 1.0f / ((end - start) / (float)SDL_GetPerformanceFrequency());
 
    return SDL_APP_CONTINUE;
}
 
void SDL_AppQuit(void* appstate, SDL_AppResult result)
{
    SDL_DestroyTexture(texture);
 
    SDL_DestroyRenderer(renderer);
    SDL_DestroyWindow(window);
    SDL_Quit();
}


실제 프로그램을 실행하면 훨씬 자연스럽게 눈이 내린다.


이번엔 배경이 투명한 윈도우를 만들어 보자.


1
2
3
4
5
6
7
8
9
10
11
12
13
14
15
16
17
18
19
20
21
22
23
24
25
26
...
SDL_AppResult SDL_AppInit(void** appstate, int argc, char* argv[])
{
    ...
    if (!SDL_CreateWindowAndRenderer("example", screen_width, screen_height, SDL_WINDOW_TRANSPARENT | SDL_WINDOW_BORDERLESS, &window, &renderer)) {
        SDL_Log("Couldn't create window/renderer: %s", SDL_GetError());
        return SDL_APP_FAILURE;
    }
    ...
}
...
SDL_AppResult SDL_AppIterate(void* appstate)
{
    start = SDL_GetPerformanceCounter();
 
    {
        //SDL_SetRenderDrawColor(renderer, 0, 0, 0, SDL_ALPHA_OPAQUE);
        SDL_RenderClear(renderer);
 
        draw_particle(particles);
 
        SDL_RenderPresent(renderer);
    }
    ...
}
...


윈도우 생성시 SDL_WINDOW_TRANSPARENT |  SDL_WINDOW_BOARDERLESS 옵선을 주고 SDL_SetRenderDrawColor() 호출을 삭제하면 투명한 배경의 윈도우를 만들 수 있다.


1
2
3
4
5
6
7
8
9
10
11
12
13
14
15
16
17
18
19
20
21
22
23
24
25
26
27
28
...
SDL_AppResult SDL_AppInit(void** appstate, int argc, char* argv[])
{
    ...    
    if (!SDL_CreateWindowAndRenderer("example", screen_width, screen_height, SDL_WINDOW_TRANSPARENT | SDL_WINDOW_BORDERLESS | SDL_WINDOW_FULLSCREEN, &window, &renderer)) {
        SDL_Log("Couldn't create window/renderer: %s", SDL_GetError());
        return SDL_APP_FAILURE;
    }
 
    SDL_SetRenderDrawBlendMode(renderer, SDL_BLENDMODE_BLEND);
    ...
}
...
SDL_AppResult SDL_AppIterate(void* appstate)
{
    start = SDL_GetPerformanceCounter();
 
    {
        SDL_SetRenderDrawColor(renderer, 0000);
        SDL_RenderClear(renderer);
 
        draw_particle(particles);
 
        SDL_RenderPresent(renderer);
    }
    ...
}
...


아니면 위 코드와 같이 바꿔도 투명한 배경의 윈도우를 만들 수 있다. 위 코드의 경우 SDL_SetRendererDrawColor()의 r, g, b, a 값을 바꾸면 반투명하면서 색이 있는 배경의 윈도우를 만들 수 있다.

예) SDL_SetRendererDrawColor(renderer, 0, 0, 0, 128); // 약간 어두운 투명 배경

   SDL_SetRendererDrawColor(renderer, 128, 0, 0, 128); // 약간 붉은 투명 배경


윈도우의 배경이 투명해서 데스크탑에서 눈이 내리는것 처럼 보인다.


만약 전체 화면으로 만들고 싶다면 아래 내용을 추가(변경)하면 된다.

1. #include <Windows.h>

2. int screen_width =  GetSystemMetrics(SM_CXSCREEN);
   int screen_height = GetSystemMetrics(SM_CYSCREEN);

3. SDL_CreateWindowAndRenderer("example", screen_width, screen_height, SDL_WINDOW_TRANSPARENT | SDL_WINDOW_BORDERLESS | SDL_WINDOW_FULLSCREEN, &window, &renderer)


※ 참고

2025.07.23 - [SDL, raylib] - [SDL] Particle 파티클 (Snow) 2


반응형
Posted by J-sean
:
반응형

GIMP를 이용해 투명 배경을 만들어 보자.


Mario.png
0.00MB

투명 배경이 필요한 그림을 준비한다.


GIMP로 불러온다.


Layer - Transparency - Color to Alpha... 를 선택한다.


Color의 컬러 픽커를 이용하면 정확히 한 픽셀을 선택하기가 어렵다. 위 그림과 같이 여러 픽셀이 선택되면 평균값이 계산 되는거 같다.


Color를 선택해 원하는 색을 직접 입력하자. [0..100], [0..255] 선택에 주의한다.


투명하게 만들 색을 입력하고 확인하면 Alpha Channel이 생성되고 배경이 투명하게 바뀐다.


File - Export As... 를 선택하고 PNG 파일로 저장한다.


반응형
Posted by J-sean
:
반응형

Godot Sprite에는 Colorkey를 설정하는 옵션이 없다.PNG 이미지는 알파 채널을 통해 투명 배경을 설정할 수 있어 상관 없지만 JPG, BMP같은 이미지 파일은 투명 배경이 없어 곤란하다. 하지만 셰이더를 이용해 같은 효과를 만들 수 있다.


스프라이트를 추가하고 텍스쳐를 지정한다.


Material - New Shader Material을 선택한다.


Shader - New Shader를 선택한다.


적당한 이름을 지정하고 셰이더 파일을 생성한다.


Shader Editor를 활성화 한다.


1
2
3
4
5
6
7
8
9
10
11
12
13
14
15
16
17
18
19
20
21
22
23
24
25
shader_type canvas_item;
// Get texture and a key that we want as transparent
uniform sampler2D Diffuse;
uniform vec4 ChromaKey : source_color;
 
void vertex() {
    // Called for every vertex the material is visible on.
}
 
void fragment() {
    // Called for every pixel the material is visible on.
    
    // The color value is the sampled pixel color
    COLOR = texture(Diffuse, UV);
 
    // If the color is the same as the chroma key, make it transparent.
    if (COLOR == ChromaKey) {
        COLOR.a = 0.0;
    }
}
 
//void light() {
    // Called for every pixel for every light affecting the CanvasItem.
    // Uncomment to replace the default light processing function with this one.
//}


위와 같은 코드를 작성한다.


Shader Parameters를 아래와 같이 지정한다.

ChromaKey: R:54 G:61 B:82 A:255 (Godot 이미지의 배경색)

Diffuse: 텍스쳐 이미지와 동일하게 지정

※ Diffuse에 이미지 지정시 Texture 파라미터의 filter를 선택할 수 없어 이미지가 흐리게 보일 수 있다. 필요하다면 셰이더 코드에서 Diffuse 선언을 아래와 같이 수정한다.

uniform sampler2D Diffuse : filter_nearest;


Godot 이미지의 배경이 투명해졌다.


하지만 게임을 실행해 보면 배경이 투명하지 않다.


1
2
3
4
// If the color is the same as the chroma key, make it transparent.
if (distance(COLOR, ChromaKey) < 0.001) {
    COLOR.a = 0.0;
}


vec4 타입의 ChromaKey와 COLOR 데이터 타입의 비교에서 약간의 오차가 발생하는거 같다.

if()을 위와 같이 수정한다.


원하는 색이 정상적으로 투명하게 변한다.


※ 참고

이렇게 하나의 스프라이트에 셰이더를 적용하면 같은 씬의 다른 스프라이트에도 모두 같은 방식으로 셰이더를 적용해야 아래와 같은 에러가 생기지 않는 경우가 발생할 수 있다.

E 0:00:01:0199   swap_buffers: Vulkan: Cannot submit graphics queue. Error code: VK_ERROR_DEVICE_LOST
  <C++ Error>    Condition "err" is true. Returning: ERR_CANT_CREATE
  <C++ Source>   drivers/vulkan/vulkan_context.cpp:2536 @ swap_buffers()
E 0:00:01:0208   prepare_buffers: Vulkan: Did not create swapchain successfully. Error code: VK_NOT_READY
  <C++ Error>    Condition "err != VK_SUCCESS" is true. Breaking.
  <C++ Source>   drivers/vulkan/vulkan_context.cpp:2459 @ prepare_buffers()


반응형
Posted by J-sean
:
반응형

투명한 배경의 윈도우를 만들어 보자.


스프라이트를 추가하고 스크립트를 연결한다.


1
2
3
4
5
6
7
8
9
10
11
12
13
14
15
using Godot;
 
public partial class Control : Sprite2D
{
    // Called when the node enters the scene tree for the first time.
    public override void _Ready()
    {
        GetViewport().TransparentBg = true;
    }
 
    public override void _Process(double delta)
    {
        RotationDegrees += 180.0f * (float)delta;
    }
}


위와 같은 코드를 작성한다.


Project Settings - Display - Window - Borderless / Transparent 옵션을 모두 체크한다.


실행하면 배경은 물론 타이틀바도 없는 윈도우에서 게임이 플레이된다.


반응형
Posted by J-sean
:
반응형

로드한 이미지에 컬러키를 설정하고 투명하게 처리해 보자.


player.bmp

파란 배경의 BMP 파일을 준비한다.


1
2
3
4
5
6
7
8
9
10
11
12
13
14
15
16
17
18
19
20
21
22
23
24
25
26
27
28
29
30
31
32
33
34
35
36
37
38
39
40
41
42
43
44
45
46
47
48
49
50
51
52
#include <iostream>
#include "SDL.h"
 
#pragma comment(lib, "sdl2.lib")
#pragma comment(lib, "sdl2main.lib")
 
int main(int argc, char* argv[]) {
    SDL_Init(SDL_INIT_VIDEO);
    SDL_Window* window = SDL_CreateWindow("SDL Test", SDL_WINDOWPOS_UNDEFINED,
        SDL_WINDOWPOS_UNDEFINED, 640480, SDL_WINDOW_RESIZABLE);
    SDL_Renderer* renderer = SDL_CreateRenderer(window, -10);
 
    SDL_Surface* bmpSurface = SDL_LoadBMP("player.bmp");
    SDL_SetColorKey(bmpSurface, SDL_TRUE, SDL_MapRGB(bmpSurface->format, 000xFF));
    // Set the color key (transparent pixel) in a surface.
    // The color key defines a pixel value that will be treated as transparent in a blit.
    // For example, one can use this to specify that cyan pixels should be considered
    // transparent, and therefore not rendered.
    SDL_Rect destRect = { 00, bmpSurface->w, bmpSurface->h };
    SDL_Texture* texture = SDL_CreateTextureFromSurface(renderer, bmpSurface);
 
    SDL_Event event;
    bool quit = false;
 
    while (!quit) {
        while (SDL_PollEvent(&event)) {
            switch (event.type) {
            case SDL_QUIT:
                quit = true;
                break;
            case SDL_KEYDOWN:
                printf("Key pressed: %s\n", SDL_GetKeyName(event.key.keysym.sym));
                if (event.key.keysym.sym == SDLK_ESCAPE)
                    quit = true;
                break;
            default:
                break;
            }
        }
 
        SDL_RenderCopy(renderer, texture, NULL&destRect);
        SDL_RenderPresent(renderer);
    }
 
    SDL_FreeSurface(bmpSurface);
    SDL_DestroyTexture(texture);
    SDL_DestroyRenderer(renderer);
    SDL_DestroyWindow(window);
    SDL_Quit();
 
    return 0;
}


파란색(0, 0, 255)을 컬러키로 설정하는 코드를 작성하고 빌드한다.


파란색이 투명하게 처리되어 표시된다.


컬러키 설정 부분을 주석처리하고 빌드해 보자.


//SDL_SetColorKey(bmpSurface, SDL_TRUE, SDL_MapRGB(bmpSurface->format, 0, 0, 0xFF));


파란색이 그대로 표시된다.


반응형
Posted by J-sean
:
반응형

보통 이미지 뷰어는 투명 영역을 체크무늬나 검정색으로 표시한다. 이미지의 투명한 영역이 투과되어 보이는 이미지 뷰어를 사용해 보자.


투명 배경에 흰색 글자가 표시되어 있다. 흰색 배경의 브라우저를 사용한다면 위 이미지가 보이지 않는다.


pqiv를 설치한다.


pqiv -c -i -P '50, 50' sean.png 명령을 실행한다. '&' 옵션을 주지 않아도 백그라운드로 실행된다.


-c, --transparent-background

Draw pqiv's window borderless and transparent. In window mode, a mouse click activates and deactivates window decorations.


-i, --hide-info-box

Initially hide the infobox. Whether the box is visible can be toggled by pressing 'i' at runtime by default.


-P, --window-position=POSITION

Set the initial window position. POSITION may either be 'x,y'  screen coordinates or 'off' to not position the window at all.


그 외 옵션은 Ubuntu Manpage를 참고하자.


반응형
Posted by J-sean
: