반응형

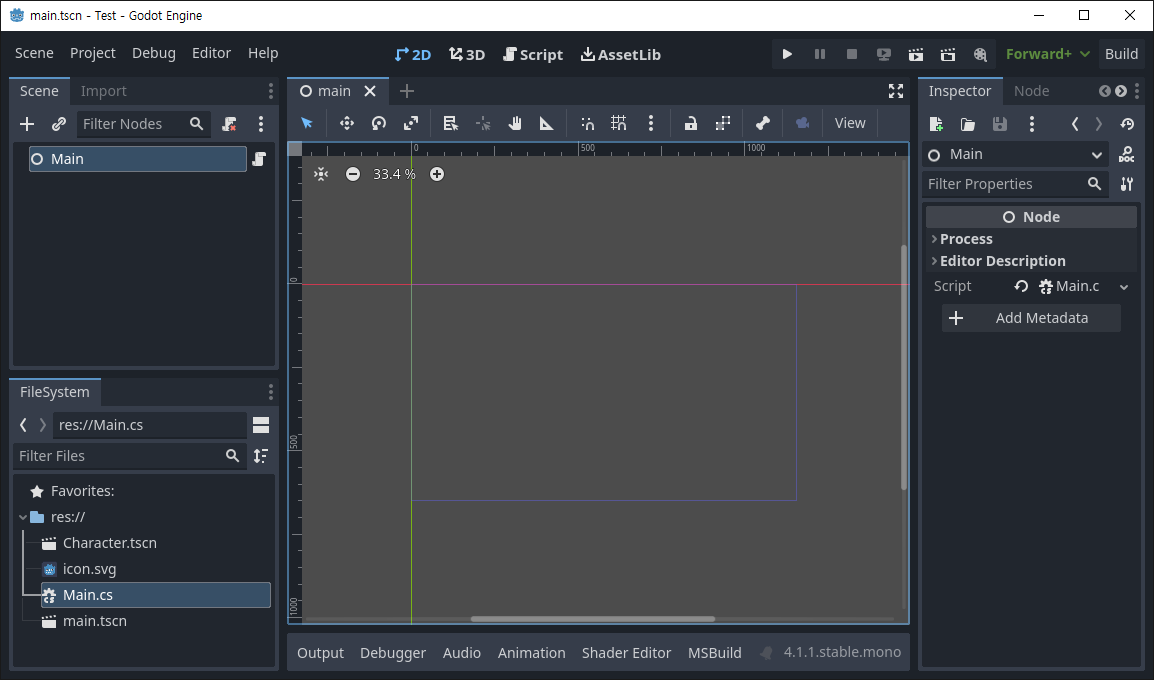
마우스 커서를 보이지 않게 하자.


1
2
3
4
public override void _Ready()
{
    Input.MouseMode = Input.MouseModeEnum.ConfinedHidden;
}


Input.MouseModeEnum.Hidden을 사용하면 마우스 커서가 게임 화면 안에 있을때만 보이지 않는다.

게임 화면 밖으로 나가면 보이기 때문에 전체 화면으로 게임을 실행해도 화면 끝에서 보일 수 있다.


반응형
Posted by J-sean
:
반응형

캐릭터 이동 방법을 몇 가지 알아보자.


씬을 준비한다.

CharacterBody2D 노드를 생성하고 Sprite2D, CollisionShape2D 노드를 자식노드로 추가한다.

● CharacterBody2D - control.cs 스크립트 추가

● Sprite2D - Texture 지정

● CollisionShape2D - Shape 속성 설정


1
2
3
4
5
6
7
8
9
10
11
12
13
14
15
16
17
18
19
20
21
22
23
24
25
26
27
28
29
30
using Godot;
 
public partial class control : CharacterBody2D
{
    private int speed = 200;
 
    public override void _PhysicsProcess(double delta)
    {
        LookAt(GetGlobalMousePosition());
        if(Input.IsKeyPressed(Key.Up))
        {
            Velocity = new Vector2(speed, 0).Rotated(Rotation);
            //Position += Velocity * (float)delta;
            //
            // When moving a CharacterBody2D, you should not set its
            // position property directly. Instead, you use the
            // move_and_collide() or move_and_slide() methods.These
            // methods move the body along a given vector and detect
            // collisions.
 
            MoveAndSlide();
        }
        if(Input.IsKeyPressed(Key.Down))
        {
            Velocity = new Vector2(-speed, 0).Rotated(Rotation);
            //Position += Velocity * (float)delta;
            MoveAndSlide();
        }
    }
}


위와 같이 스크립트를 작성한다.


게임을 실행하고 위, 아래 키를 누르면 캐릭터가 마우스를 따라 움직인다.


이번엔 마우스를 클릭한 지점으로 움직이는 캐릭터를 만들어 보자.


1
2
3
4
5
6
7
8
9
10
11
12
13
14
15
16
17
18
19
20
21
22
23
24
25
26
27
28
using Godot;
 
public partial class control : CharacterBody2D
{
    private int speed = 200;
    private Vector2 target = new Vector2();
 
    public override void _PhysicsProcess(double delta)
    {
        LookAt(GetGlobalMousePosition());
 
        if(Input.IsMouseButtonPressed(MouseButton.Left))
        {
            target = GetGlobalMousePosition();
        }
 
        Velocity = Position.DirectionTo(target) * speed;
        //Position += Velocity * (float)delta;
        //
        // When moving a CharacterBody2D, you should not set its
        // position property directly. Instead, you use the
        // move_and_collide() or move_and_slide() methods.These
        // methods move the body along a given vector and detect
        // collisions.
        if(Position.DistanceTo(target) > 2)
            MoveAndSlide();
    }
}


control.cs 스크립트를 위와 같이 작성한다.


마우스가 클릭된 지점을 따라 캐릭터가 움직인다.


※ 참고

Using CharacterBody2D/3D

CharacterBody2D

2D movement overview


반응형
Posted by J-sean
:
반응형

키보드와 마우스 입력을 간단히 확인해 보자.


노드에 스크립트를 추가한다.


1
2
3
4
5
6
7
8
9
10
11
12
13
14
15
16
17
18
19
20
21
22
23
24
25
26
27
using Godot;
 
public partial class Main : Node
{
    // Called when the node enters the scene tree for the first time.
    public override void _Ready()
    {
    }
 
    // Called every frame. 'delta' is the elapsed time since the previous frame.
    public override void _Process(double delta)
    {
        if(Input.IsMouseButtonPressed(MouseButton.Left))
        {
            GD.Print($"Mouse Left Button: {GetViewport().GetMousePosition()}");
        }
        if(Input.IsMouseButtonPressed(MouseButton.Right))
        {
            GD.Print($"Mouse Right Button: {GetViewport().GetMousePosition()}");
        }
        if(Input.IsKeyPressed(Key.Escape))
        {
            GD.Print("Escape Key");
            //GetTree().Quit();
        }
    }
}


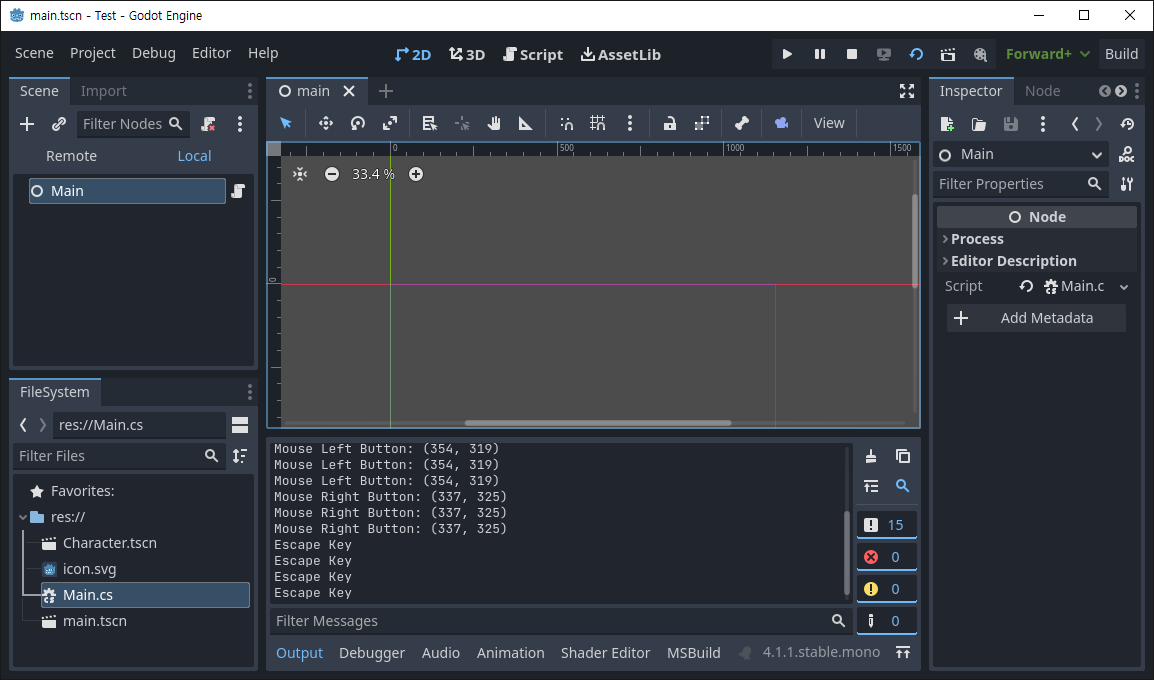
마우스와 키보드 입력을 감지하는 코드를 작성한다. IsMouseButtonPressed()와 IsKeyPressed()는 버튼이나 키가 눌려있는 동안 계속해서 true를 반환한다. 눌리거나 떼는 순간만 반응하고 싶다면 아래 함수를 사용한다.

Input.IsActionJustPressed()
Input.IsActionJustReleased()


버튼이나 키가 눌리면 Output창에 표시된다.


1
2
3
4
5
6
7
8
9
10
using Godot;
 
public partial class Script : Node2D
{
    public override void _Input(InputEvent @event)
    {
        if (@event.IsActionPressed("ui_accept"))
            GD.Print(@event.AsText());
    }
}


_Input()와 InputEvent를 사용하는 코드를 작성한다. InputEvent.IsActionPressed()는 눌리는 순간 한 번만 반응한다.


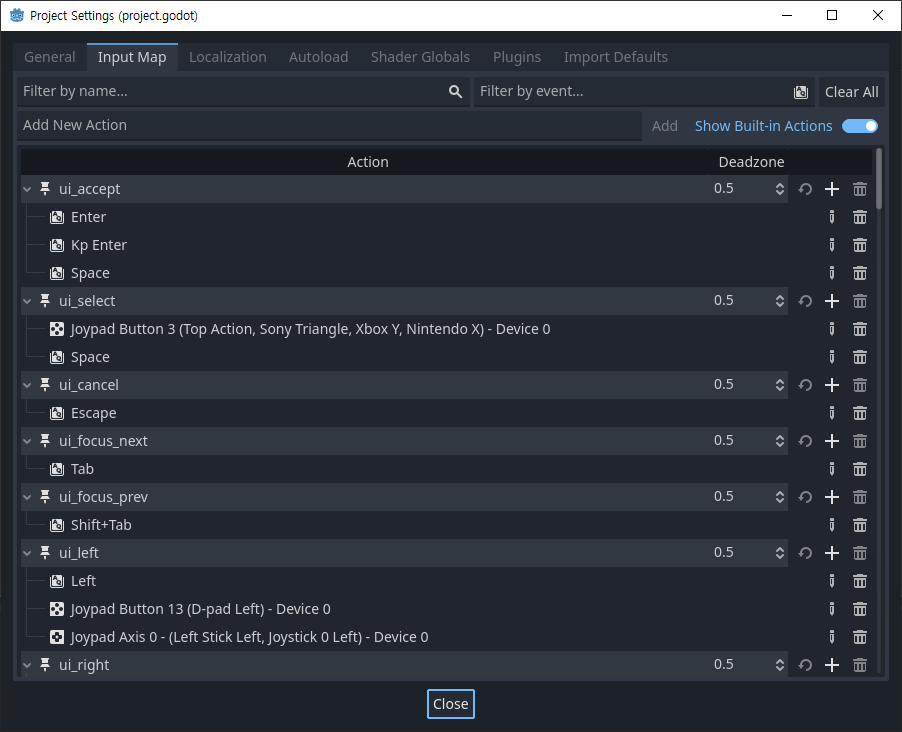
Input Map에 등록된 목록을 사용할 수 있다.


ui_accept로 등록된 Enter키나 Space키가 눌리면 AsText()에 의해 키 이름(Enter/Space)이 출력된다.


1
2
3
4
5
6
7
8
9
10
11
12
13
14
15
16
17
18
19
20
21
22
23
24
25
using Godot;
 
public partial class Script : Node2D
{
    public override void _Input(InputEvent @event)
    {
        if (@event is InputEventMouseButton mouseEvent && mouseEvent.Pressed)
        {
            switch (mouseEvent.ButtonIndex)
            {
                case MouseButton.Left:
                    GD.Print(@event.AsText() + " at: " + mouseEvent.Position);
                    break;
                case MouseButton.Right:
                    GD.Print(@event.AsText() + " at: " + GetViewport().GetMousePosition());
                    // mouseEvent.position과 GetViewport().GetMousePosition()는 같은
                    // 결과를 출력한다.
                    break;
                case MouseButton.WheelUp:
                    GD.Print(@event.AsText());
                    break;
            }
        }
    }
}


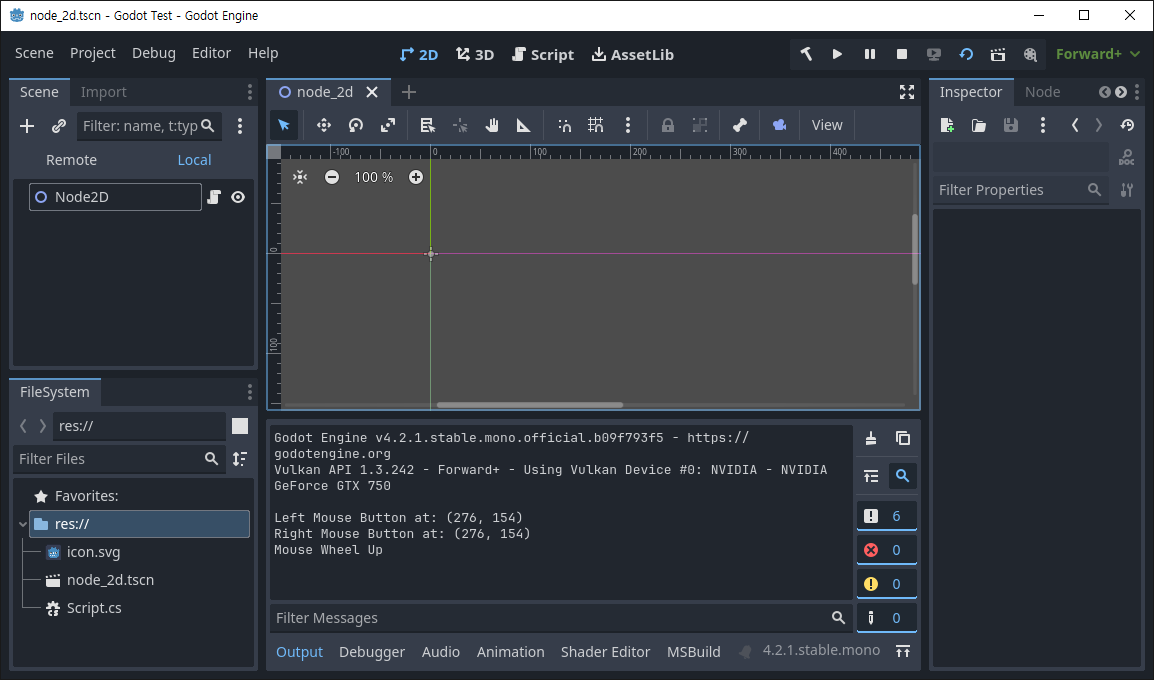
이번엔 버튼 동작을 구분하는 코드를 입력한다.


버튼 동작과 위치가 표시된다.


※ 참고

Input Handling


반응형
Posted by J-sean
:
반응형

커서를 바꿔보자.


1
2
3
4
5
6
7
8
9
10
11
12
13
14
15
16
17
18
19
20
21
22
23
24
25
26
27
28
29
30
31
32
33
34
35
36
37
38
39
40
41
42
43
44
45
46
47
48
49
50
51
52
53
54
55
56
57
58
59
60
61
62
63
64
65
66
67
68
69
70
71
72
73
74
75
76
77
78
79
80
81
82
83
84
85
86
87
88
89
90
91
92
93
94
95
96
97
98
99
100
101
102
import pygame
 
pygame.init()
screen = pygame.display.set_mode((640480))
pygame.display.set_caption("Example code for the cursors module")
 
# 시스템 커서 생성
systemCursor = pygame.cursors.Cursor(pygame.SYSTEM_CURSOR_NO)
#pygame.SYSTEM_CURSOR_ARROW       arrow
#pygame.SYSTEM_CURSOR_IBEAM       i-beam
#pygame.SYSTEM_CURSOR_WAIT        wait
#pygame.SYSTEM_CURSOR_CROSSHAIR   crosshair
#pygame.SYSTEM_CURSOR_WAITARROW   small wait cursor
#                                 (or wait if not available)
#pygame.SYSTEM_CURSOR_SIZENWSE    double arrow pointing
#                                 northwest and southeast
#pygame.SYSTEM_CURSOR_SIZENESW    double arrow pointing
#                                 northeast and southwest
#pygame.SYSTEM_CURSOR_SIZEWE      double arrow pointing
#                                 west and east
#pygame.SYSTEM_CURSOR_SIZENS      double arrow pointing
#                                 north and south
#pygame.SYSTEM_CURSOR_SIZEALL     four pointed arrow pointing
#                                 north, south, east, and west
#pygame.SYSTEM_CURSOR_NO          slashed circle or crossbones
#pygame.SYSTEM_CURSOR_HAND        hand
 
# 비트맵 커서 생성.
bitmapCursor1 = pygame.cursors.Cursor(*pygame.cursors.arrow)
#pygame.cursors.arrow
#pygame.cursors.diamond
#pygame.cursors.broken_x
#pygame.cursors.tri_left
#pygame.cursors.tri_right
 
custom_strings = (           # size: 24x24
  "XX                      ",
  "XXX                     ",
  "XXXX                    ",
  "XX.XX                   ",
  "XX..XX                  ",
  "XX...XX                 ",
  "XX    XX                ",
  "XX     XX               ",
  "XX      XX              ",
  "XX       XX             ",
  "XX        XX            ",
  "XX        XXX           ",
  "XX      XXXXX           ",
  "XX XXX..XX              ",
  "XXXX XX..XX             ",
  "XX   XX..XX             ",
  "     XX..XX             ",
  "      XX..XX            ",
  "      XX..XX            ",
  "       XXXX             ",
  "       XX               ",
  "                        ",
  "                        ",
  "                        ")
 
bitmapCursor2 = pygame.cursors.Cursor(
    (2424), (00), *pygame.cursors.compile(custom_strings))
# Cursor클래스 인수: Cursor(size, hotspot, xormasks, andmasks)
# size는 8의 배수. hotspot은 클릭 지점. xormasks와 andmasks는
# pygame.cursors.compile()로 만들 수 있다. compile()에는 직접
# 만든 스트링이나 아래 상수 대입 가능.
#pygame.cursors.thickarrow_strings
#pygame.cursors.sizer_x_strings
#pygame.cursors.sizer_y_strings
#pygame.cursors.sizer_xy_strings
#pygame.cursor.textmarker_strings
 
# Surface 커서 생성.
surf = pygame.Surface((4040)) # 이미지를 로드할 수 도 있다.
surf.fill((1205050))        # 이미지를 로드하는 경우 불필요한 코드
surfaceCursor = pygame.cursors.Cursor((2020), surf)
 
cursors = [systemCursor, bitmapCursor1, bitmapCursor2, surfaceCursor]
cursor_index = 0
 
pygame.mouse.set_cursor(cursors[cursor_index])
 
clock = pygame.time.Clock()
going = True
while going:
    clock.tick(60)
    screen.fill((07530))
    pygame.display.flip()
 
    for event in pygame.event.get():
        if event.type == pygame.QUIT or (event.type == pygame.KEYDOWN and
                                        event.key == pygame.K_ESCAPE):
            going = False
 
        # 마우스 버튼이 눌리면 커서를 바꾼다.
        if event.type == pygame.MOUSEBUTTONDOWN:
            cursor_index += 1
            cursor_index %= len(cursors)
            pygame.mouse.set_cursor(cursors[cursor_index])
 
pygame.quit()


마우스를 클릭할 때 마다 커서가 바뀐다.


반응형
Posted by J-sean
:
반응형

캐릭터가 마우스를 따라 회전 하도록 해 보자.


1
2
3
4
5
6
7
8
9
10
11
12
13
14
15
16
17
18
19
20
21
22
23
24
25
26
27
28
29
30
31
32
33
34
35
36
37
38
39
40
41
42
43
44
45
46
47
48
49
50
51
52
53
54
55
56
57
58
59
60
import pygame
 
pygame.init()
pygame.display.set_caption("Super fun game development")
screen = pygame.display.set_mode((640480))
clock = pygame.time.Clock()
 
class Player(pygame.sprite.Sprite):
    def __init__(self, pos):
        super().__init__()
        self.image = pygame.image.load("player.png").convert()
        self.image.set_colorkey(self.image.get_at((00)))
        self.image = pygame.transform.scale(self.image,
                    (self.image.get_width()*1.5self.image.get_height()*1.5))
        self.original_image = self.image
        # 원본 이미지 보관.
        self.rect = self.image.get_rect(center=pos)
        self.pos = pygame.math.Vector2(pos)
        # pos를 벡터로 변환.
 
    def rotate(self):        
        direction = pygame.mouse.get_pos() - self.pos
        # 플레이어에서 마우스로의 벡터.
        radius, angle = direction.as_polar()
        print(angle)
        # radius는 마우스까지의 거리, angle은 방위각.
        # 오른쪽=0(-0), 아래=90, 왼쪽=180(-180), 위=-90
        self.image = pygame.transform.rotate(self.original_image, -angle+180)
        # 이미지를 회전하고 각도 보정. 이전 프레임의 회전된 이미지가 아닌
        # 원본 이미지를 이용한다.
        self.rect = self.image.get_rect(center=self.rect.center)
        # rect 재설정.
 
    def update(self):
        self.rotate()
 
def main():
    all_sprites = pygame.sprite.Group(Player(screen.get_rect().center))
 
    running = True
 
    while running:
        for event in pygame.event.get():
            if event.type == pygame.QUIT:
                running = False
            elif event.type == pygame.KEYDOWN and event.key == pygame.K_ESCAPE:
                running = False 
    
        all_sprites.update()
    
        screen.fill("black")
        all_sprites.draw(screen)
    
        pygame.display.flip()
        clock.tick(60)
 
    pygame.quit()
 
if __name__ == '__main__':
   main()


캐릭터가 마우스를 따라 회전한다.


반응형
Posted by J-sean
:
반응형

아두이노 프로 마이크로를 이용해 간단한 USB키보드를 만들 수 있다.


2019/10/27 - [C, C++] - Sending a keyboard input 키 입력 보내기


Arduino Pro Micro Pin Map


Tactile Switch를 연결한다.

D4 - Tactile Switch - GND


1
2
3
4
5
6
7
8
9
10
11
12
13
14
15
16
17
18
19
20
21
22
23
24
#include <Keyboard.h>
 
const char PIN_RETURN = 4;
 
void setup() {
  // put your setup code here, to run once:
  pinMode(PIN_RETURN, INPUT_PULLUP);
  Keyboard.begin();
}
 
void loop() {
  // put your main code here, to run repeatedly:
  if (digitalRead(PIN_RETURN)== LOW)
  {
    Keyboard.press(KEY_RETURN);
    delay(100);
    Keyboard.release(KEY_RETURN); // Keyboard.releaseAll();
    delay(100);
  }
 
  delay(100);
}
 
// https://www.arduino.cc/reference/en/language/functions/usb/keyboard/


스위치를 누르면 Enter키가 입력되는 소스.

※ 참고: https://www.arduino.cc/reference/en/language/functions/usb/keyboard/


Arduino Leonardo 보드를 선택하고 컴파일후 업로드 한다.


장치 관리자를 확인하면 'HID 키보드 장치'로 인식된다. 스위치를 누르면 Enter키가 입력된다.


반응형
Posted by J-sean
:
반응형

The SendInput function inserts the events in the INPUT structures serially into the keyboard or mouse input stream.

마우스 입력을 보낸다.


1
2
3
4
5
6
7
8
9
10
11
12
13
14
15
16
17
18
19
20
21
22
23
24
25
26
27
28
29
30
31
32
33
34
35
36
37
38
39
40
41
42
43
44
45
46
47
48
49
50
51
52
53
54
55
56
57
58
59
60
61
62
63
64
65
66
67
68
69
70
71
72
73
74
75
76
77
78
79
80
81
82
83
84
85
86
87
88
89
90
91
92
93
94
95
96
97
98
99
100
101
102
103
104
105
106
107
108
109
110
111
112
113
114
115
116
117
118
119
120
121
#include <Windows.h>
#include <iostream>
 
using namespace std;
 
void PrintMenu()
{
    cout << "--- Mouse sender ---" << endl << endl;
    cout << "0: End" << endl;
    cout << "1: Get cursor position" << endl;
    cout << "2: Send left button click" << endl;
    cout << "3: Send right button click" << endl;
    cout << "4: Send cursor move" << endl;
    cout << "Choose: ";
}
 
void GetCursorPosition()
{
    Sleep(2000);    // Wait for 2 seconds before get the cursor position.
 
    POINT cursorPos;
    GetCursorPos(&cursorPos);
 
    cout << "Current cursor position : (x: " << cursorPos.x << ", y: " << cursorPos.y << ")" << endl;
}
 
void SendLeftClick()
{
    Sleep(5000);
 
    INPUT input;
    ZeroMemory(&input, sizeof(INPUT));
    input.type = INPUT_MOUSE;
    input.mi.dwFlags = MOUSEEVENTF_LEFTDOWN;
    SendInput(1&input, sizeof(INPUT));
 
    input.mi.dwFlags = MOUSEEVENTF_LEFTUP;
    SendInput(1&input, sizeof(INPUT));
}
 
void SendRightClick()
{
    Sleep(5000);
 
    INPUT input;
    ZeroMemory(&input, sizeof(INPUT));
    input.type = INPUT_MOUSE;
    input.mi.dwFlags = MOUSEEVENTF_RIGHTDOWN;
    SendInput(1&input, sizeof(INPUT));
 
    input.mi.dwFlags = MOUSEEVENTF_RIGHTUP;
    SendInput(1&input, sizeof(INPUT));
}
 
void SendMove()
{
    int x, y;
    int screenWidth = GetSystemMetrics(SM_CXSCREEN);
    int screenHeight = GetSystemMetrics(SM_CYSCREEN);
 
    cout << "Screen size: (" << screenWidth << ", " << screenHeight << ")" << endl;
    cout << "[x: 0~" << screenWidth - 1 << ", y: 0~" << screenHeight - 1 << "]" << endl;
    cout << "x: ";
    cin >> x;
    cout << "y: ";
    cin >> y;
 
    INPUT input;
    ZeroMemory(&input, sizeof(INPUT));
    input.type = INPUT_MOUSE;
    input.mi.dwFlags = MOUSEEVENTF_MOVE | MOUSEEVENTF_ABSOLUTE;
    // If MOUSEEVENTF_ABSOLUTE value is specified, dx and dy contain normalized absolute coordinates
    // between 0 and 65,535. The event procedure maps these coordinates onto the display surface.
    // Coordinate (0,0) maps onto the upper-left corner of the display surface; coordinate (65535,65535)
    // maps onto the lower-right corner. In a multimonitor system, the coordinates map to the primary monitor.
    //
    // If the MOUSEEVENTF_ABSOLUTE value is not specified, dxand dy specify movement relative to the previous
    // mouse event(the last reported position).Positive values mean the mouse moved right(or down); negative
    // values mean the mouse moved left(or up).
    float dx = x * (65535.0f / (screenWidth - 1));
    float dy = y * (65535.0f / (screenHeight - 1));
    input.mi.dx = LONG(dx);
    input.mi.dy = LONG(dy);
    SendInput(1&input, sizeof(INPUT));
}
 
int main()
{
    int choice = 1;
 
    while (choice)
    {
        PrintMenu();
        cin >> choice;
 
        switch (choice)
        {
        case 1:
            GetCursorPosition();
 
            break;
        case 2:
            SendLeftClick();
 
            break;
        case 3:
            SendRightClick();
 
            break;
        case 4:
            SendMove();
 
            break;
        default:
 
            return 0;
        }
    }
 
    return 0;
}


Run the program and choose the event you want to send.


반응형
Posted by J-sean
: