반응형

3D 모델을 임포트하고 텍스쳐를 적용해 보자.


모델과 텍스쳐를 임포트한다.


Woman.fbx
2.63MB
WomanSkin.png
0.00MB


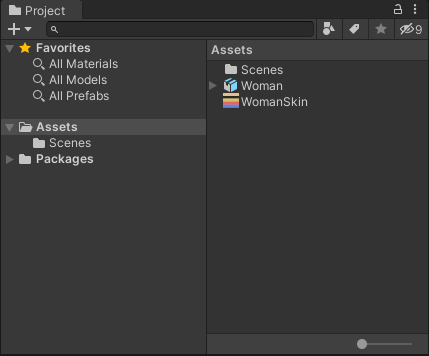
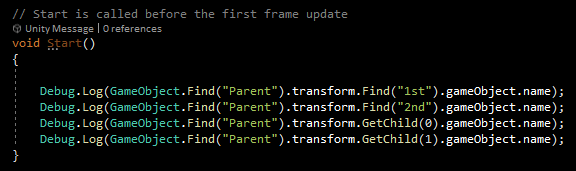
임포트한 모델을 씬으로 불러와도 텍스쳐가 자동으로 적용되지 않는다. 인스펙터창의 Texture (Material)은 비활성화 되어 있다.


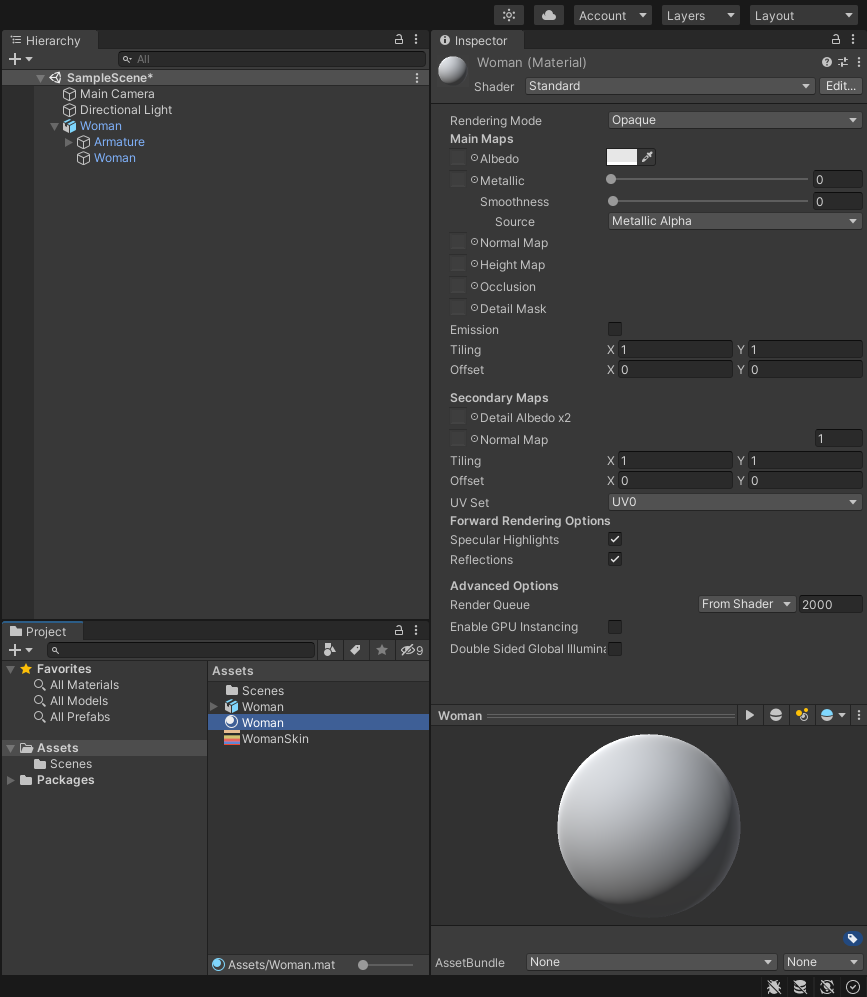
임포트한 모델의 Texture (Material)에서 Create Material Preset을 클릭한다.


모델의 Material과 동일한 Material이 생성된다. (여기서 먼저 Albedo 왼쪽 작은 원을 클릭하고 WomanSkin 텍스쳐를 선택해도 된다)


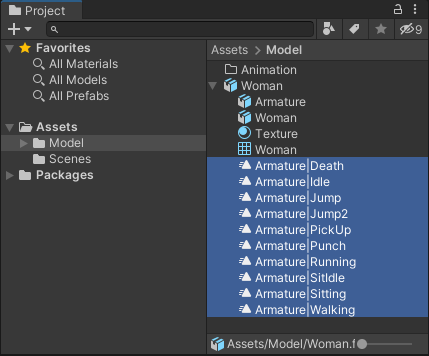
모델을 선택하고 위에서 생성한 Woman Material을 Drag&Drop한다. 씬에 있는 모델에 직접 Drag&Drop 하거나 인스펙터창 Add Component 버튼 아래에 Drag&Drop한다. 아니면 Woman - Skinned Mesh Renderer - Materials - Element 0 에서 박스 오른쪽 작은 원을 클릭하고 Woman 머테리얼을 선택한다.


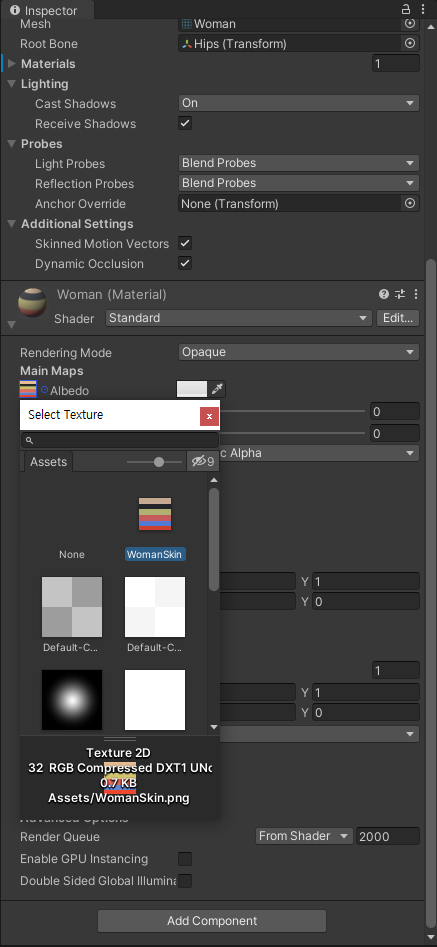
Woman (Material) - Albedo 왼쪽 작은 동그라미를 클릭하고 WomanSkin을 선택한다.


텍스쳐가 적용되었다.


반응형
Posted by J-sean
:
반응형

모델에 포함된 애니메이션도 인스펙터 창에서 직접 수정 할 수 있다.


모델을 임포트한다.


Woman.fbx
2.63MB


Assets 창에서 모델을 선택하고 인스펙터 창에서 Animation 탭으로 이동한다.


Idle 애니메이션을 선택하고 Loop Time을 체크한다. Apply를 클릭한다.


Assets창 모델의 애니메이션을 확인하면 Loop Time이 체크 되어있다.


씬에 모델을 Drag&Drop 한다.


애니메이터 컨트롤을 생성한다.


생성한 애니메이터 컨트롤을 씬에 있는 모델에 Drag&Drop 한다.


애니메이터 창을 확인한다.


Assets창 모델의 애니메이션(Idle)을 애니메이터창으로 Drag&Drop 한다.


플레이하면 Idle상태가 반복된다.


다른 애니메이션도 추가해 테스트 해 보자.


반응형
Posted by J-sean
:
반응형

캐릭터 모델을 임포트하고 애니메이션(애니메이터)을 사용해 보자.


Woman.fbx
2.63MB


Assets - Model 폴더에 모델을 복사한다.


Project 창에서 확인할 수 있다.


Animation 폴더를 만든다.


모델에 포함된 애니메이션을 복사한다(Ctrl+D)


Animation 폴더에 넣는다.


애니메이션 목록 중 Walking 에는 Loop Time을 체크한다.


경고는 신경쓰지 않는다.


모델을 씬으로 불러온다.


애니메이션 목록 중 Idle, Jump, Walking을 모델로 drag&drop 한다.


Animator를 확인해 보자.


위 그림과 같은 트랜지션을 만든다.


Walk(Bool), Jump(Trigger) 파라미터를 만든다.


Idle -> Walk 트랜지션의 컨디션을 설정한다. (Walk -> true, Has Exit Time 체크 해제)


Walk -> Idle 트랜지션의 컨디션을 설정한다. (Walk -> false, Has Exit Time 체크 해제)


Any State -> Jump 트랜지션의 컨디션을 설정한다. (Jump, Has Exit Time 체크 해제)


컨트롤러 스크립트를 만든다.


1
2
3
4
5
6
7
8
9
10
11
12
13
14
15
16
17
18
19
20
21
22
23
24
25
26
27
28
29
30
31
32
33
34
35
using System.Collections;
using System.Collections.Generic;
using UnityEngine;
 
public class Controller : MonoBehaviour
{
    private Animator animator;
 
    // Start is called before the first frame update
    void Start()
    {
        animator = GetComponent<Animator>();
    }
 
    // Update is called once per frame
    void Update()
    {
        float xInput = Input.GetAxis("Horizontal");
        float zInput = Input.GetAxis("Vertical");
 
        if (xInput != 0 || zInput != 0)
        {
            animator.SetBool("Walk"true);
        }
        else
        {
            animator.SetBool("Walk"false);
        }
 
        if (Input.GetKeyDown(KeyCode.Space))
        {
            animator.SetTrigger("Jump");
        }
    }
}
 

스크립트를 작성한다.


컨트롤러 스크립트를 모델에 넣는다.


이 상태에서 실행해 보면 Idle, Walk는 생각대로 작동하지만 Jump 후 다시 Idle이나 Walk로 돌아가지 못한다.

Jump 후 다른 애니메이션으로 가는 트랜지션이 없기 때문이다.


Jump -> Idle 트랜지션을 만들고 Has Exit Time을 체크한다. (컨디션은 설정하지 않는다)


다시 실행해 보자.


반응형
Posted by J-sean
:
반응형

하나의 객체만 존재해야 하는 싱글턴 패턴 게임 매니저 예제.


1
2
3
4
5
6
7
8
9
10
11
12
13
14
15
16
17
18
19
20
21
22
23
24
25
26
27
28
29
30
31
32
33
34
35
36
37
38
39
40
41
42
43
44
45
46
47
48
49
50
51
52
53
54
55
56
57
58
using System.Collections;
using System.Collections.Generic;
using UnityEngine;
 
using UnityEngine.SceneManagement;
using UnityEngine.UI;
 
public class GameManager : MonoBehaviour
{
    public static GameManager instance;
 
    public bool isGameover = false;
    private Text scoreText; // Awake()에서 대입.
    public Text gameoverText;   // Editor - Inspector에서 대입. 시작할 때 비활성화 된
                                // 오브젝트이기 때문에 GameObject.Find()로 찾을 수 없다.
                                // 자식 오브젝트를 찾는 방식으로만 찾을 수 있다.
    
    public int marbleCount; // 마블 생성기에서 초기화.
 
    private void Awake()
    {
        if (instance == null)
        {
            instance = this;
 
            scoreText = GameObject.Find("ScoreText").GetComponent<Text>();
        }
        else
        {
            Debug.LogWarning("Game manager exists already.");
            Destroy(gameObject);
        }
    }
 
    // Update is called once per frame
    void Update()
    {
        if (!isGameover)
        {
            if (marbleCount <= 0)
            {
                isGameover = true;
                gameoverText.gameObject.SetActive(true);
            }
 
            scoreText.text = marbleCount + " marbles to go!!";            
        }
        else
        {
            if (Input.GetKeyDown(KeyCode.N))
            {
                isGameover = false;
                gameoverText.gameObject.SetActive(false);
                SceneManager.LoadScene(SceneManager.GetActiveScene().name);                
            }
        }
    }
}
cs


다른 스크립트에서 GameManager.instance.XXX 와 같은 방식으로 사용한다.


반응형
Posted by J-sean
:
반응형

씬에 있는 비활성화된 오브젝트는 FindXXX()로 직접 찾을 수 없다. 하지만 부모 오브젝트가 있는 자식 오브젝트라면 부모 오브젝트를 먼저 찾고 transform 컴포넌트의 Find(), GetChild() 등으로 찾을 수 있다.


부모 오브젝트(Parent) 아래에 자식 오브젝트(1st, 2nd)를 만든다.


자식 오브젝트(1st, 2nd)는 비활성화 시킨다.


적당한 스크립트에 비활성화된 자식 오브젝트를 찾는 코드를 입력한다.


찾은 자식 오브젝트의 이름이 출력된다.


반응형
Posted by J-sean
:
반응형

유니티 3D를 실행하면 Directional Light가 하나 추가 되어 있다.


Directional Light의 기본 세팅


기본 Directional Light의 영향으로 모든 오브젝트에 빛이 비춘다.


하지만 Directional Light를 끄면 완전히 어두워질 거라는 예상과 다르게 빛이 남아 있다.

어디에서 빛이 비추는지 찾아 보자.


Window - Rendering - Lighting


Environment 탭을 확인하면 Skybox부터 Environment Lighting, Environment Reflections 등의 세팅을 확인할 수 있다.


Environment Lighting - Intensity Multiplier 및 Environment Refections - Intensity Multiplier를 0으로 세팅한다.


완전히 어두워졌다.


그 외, Skybox Material등의 설정도 바꿀 수 있다.


반응형
Posted by J-sean
:
반응형

상하좌우로 방향을 전환하는 컨트롤러 스크립트를 만들어 보자.


1
2
3
4
5
6
7
8
9
10
11
12
13
14
15
16
17
18
19
20
21
22
23
24
25
26
27
28
29
30
31
32
33
34
35
36
37
38
39
40
41
42
43
44
45
46
47
48
using System.Collections;
using System.Collections.Generic;
using UnityEngine;
 
public class Controller : MonoBehaviour
{
    private Rigidbody m_rigidbody;
    public float speed = 3f;
 
    // Start is called before the first frame update
    void Start()
    {
        m_rigidbody = GetComponent<Rigidbody>();
    }
    
    // Update is called once per frame
    void Update()
    {
        if (GameManager.instance.isGameover)
            return;
 
        float xInput = Input.GetAxis("Horizontal");
        float zInput = Input.GetAxis("Vertical");
 
        float xSpeed = xInput * speed;
        float zSpeed = zInput * speed;
 
        Vector3 newVelocity = new Vector3(xSpeed, 0f, zSpeed);
        m_rigidbody.velocity = newVelocity;
        
        if (xInput > 0)
        {
            transform.rotation = Quaternion.Euler(new Vector3(0f, 180f, 0f));
        }
        else if (xInput < 0)
        {
            transform.rotation = Quaternion.Euler(new Vector3(0f, 0f, 0f));
        }
        else if (zInput > 0)
        {
            transform.rotation = Quaternion.Euler(new Vector3(0f, 90f, 0f));
        }
        else if (zInput < 0)
        {
            transform.rotation = Quaternion.Euler(new Vector3(0f, 270f, 0f));
        }
    }
}


팩맨이 움직이는 방향으로 회전한다.


반응형
Posted by J-sean
:
반응형

텍스트 파일로 간단한 맵을 생성해 보자.


1
2
3
4
5
6
7
8
9
10
11
12
13
14
15
16
17
18
19
20
21
22
23
24
25
26
27
28
29
using System.Collections;
using System.Collections.Generic;
using UnityEngine;
 
public class Spawner : MonoBehaviour
{
    public GameObject[] objects;    
 
    // Start is called before the first frame update
    void Start()
    {
        string path = Application.dataPath + "/Map.txt";
        string[] map = System.IO.File.ReadAllLines(path);
 
        if (map.Length > 0)
        {
            for (int i=0; i<map.Length; i++)
            {
                for (int j=0; j<map[i].Length; j++)
                {
                    if (map[i][j] != ' ')
                        Instantiate(objects[int.Parse(map[i][j].ToString())], new Vector3(-(i * 1), 0-(j * 1)), Quaternion.identity);
                        //Instantiate(objects[(int)char.GetNumericValue(map[i][j])], new Vector3(-(i * 1), 0, -(j * 1)), Quaternion.identity);
                    
                }
            }
        }
    }
}
 

위 스크립를 작성하고 Empty Object에 추가한다.

Map.txt
0.00MB

Assets 폴더에 Map.txt 파일을 준비한다.

0: 큐브, 1: 스피어


스크립트가 추가된 오브젝트의 Inspector 창에서 Objects에 미리 준비한 Cube, Sphere 오브젝트를 추가한다.


간단한 미로맵이 완성 되었다.


반응형
Posted by J-sean
: