반응형

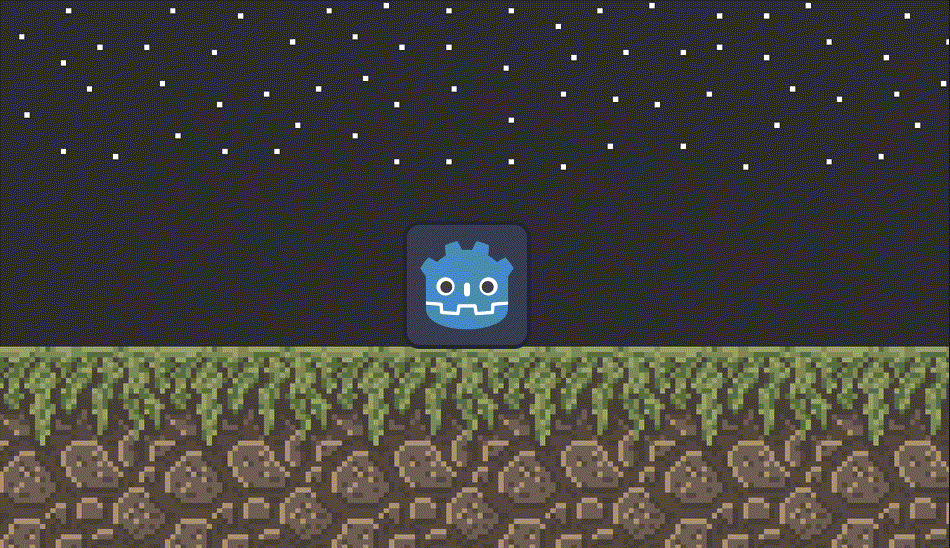
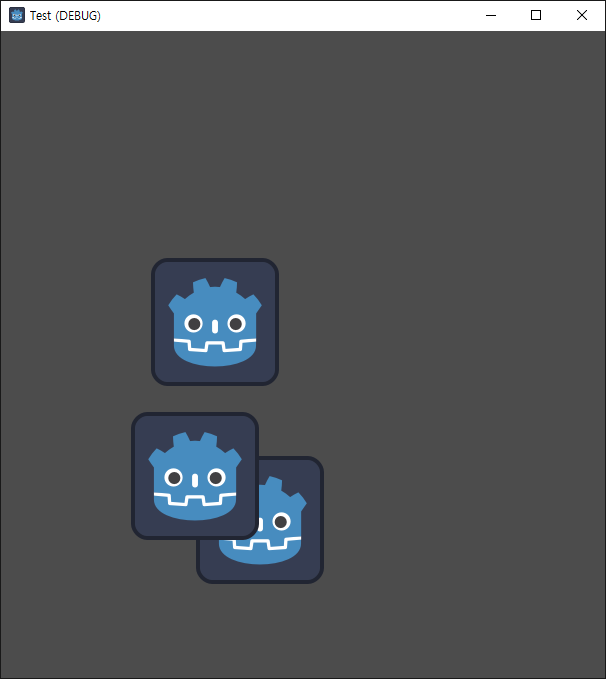
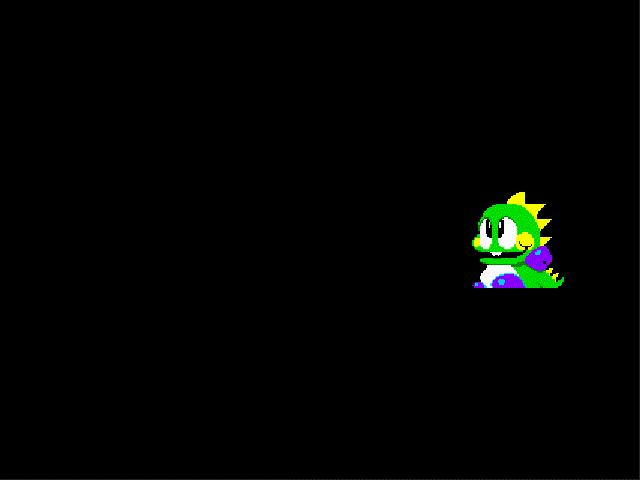
트윈을 사용해 캐릭터를 이동해 보자.


씬에 스프라이트를 생성하고 스크립트를 추가한다.


1
2
3
4
5
6
7
8
9
10
11
12
13
14
15
16
17
18
19
20
21
22
23
24
25
26
27
28
29
30
31
32
33
34
35
36
37
38
39
40
41
using Godot;
 
public partial class control : Sprite2D
{
    // Called when the node enters the scene tree for the first time.
    public override void _Ready()
    {
    }
 
    // Called every frame. 'delta' is the elapsed time since the previous frame.
    public override void _Process(double delta)
    {
        // IsMouseButtonPressed()는 짧게 한 번 클릭해도 여러번 True를 반환 할 수 있다.
        // 정확히 한 번만 호출되어야 한다면 Input.IsActionJustPressed()를 사용하자.
        if (Input.IsMouseButtonPressed(MouseButton.Left))
        {
            Tween tween = CreateTween().SetParallel(true);
            // SetParallel(true) 다음에 추가되는 트위너들은 모두 동시에 실행된다.
                        
            tween.TweenProperty(this"rotation_degrees"903.0f).AsRelative();
            // 클릭 한 번에 IsMouseButtonPressed()가 여러번 true를 반환하기 때문에
            // 90도 이상 회전하는 것처럼 보일 수 있다.
            // Asrelative()가 없다면 월드 좌표계 90도로 회전하고 더 이상 회전하지 않는다.
 
            tween.TweenProperty(this"position", GetGlobalMousePosition(),
                3.0f).SetTrans(Tween.TransitionType.Elastic).SetEase(Tween.EaseType.Out);
            // Godot Object 인수로 this 대신 GetNode("/root/Sprite2D") 또는
            // GetNode("../Sprite2D")를 넣을 수 있다.
 
            //tween.TweenCallback(Callable.From(()=>GD.Print("Finished."))).SetDelay(1.0f);
            tween.TweenCallback(Callable.From(Lastcall)).SetDelay(3.0f);
            // 임의의 함수(Lastcall)를 호출한다. SetDelay()로 트위너의 동작이 모두 끝난 후
            // 호출되도록 할 수 있다.
        }
    }
 
    public void Lastcall()
    {
        GD.Print("Finished.");
    }
}


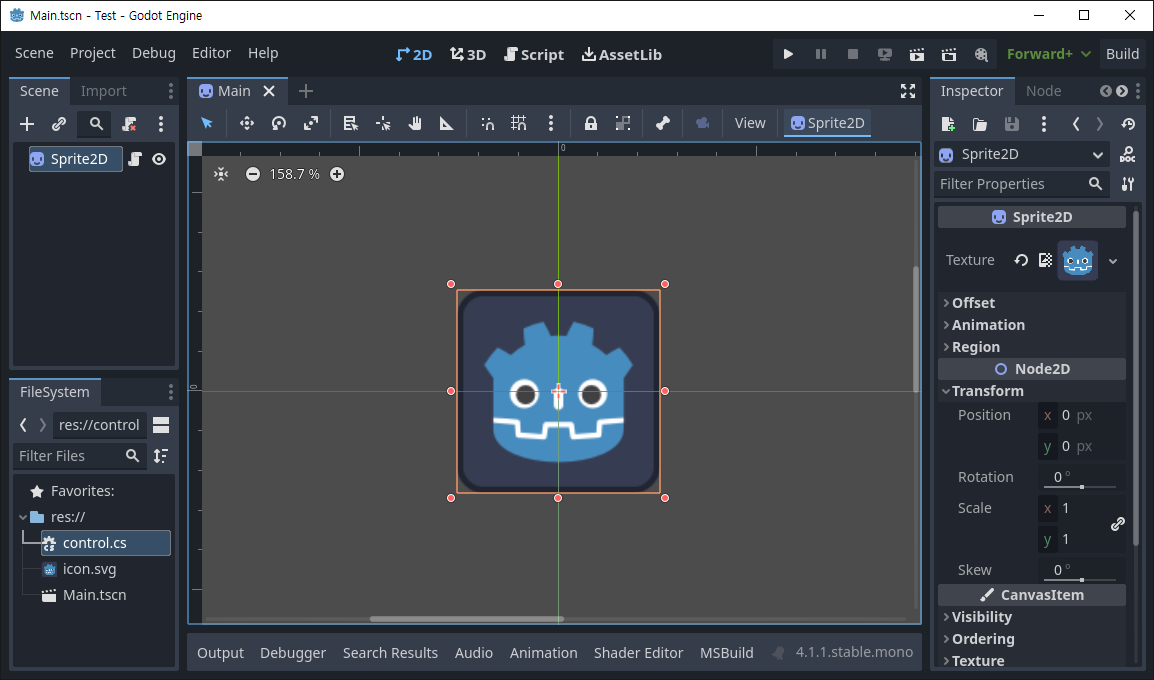
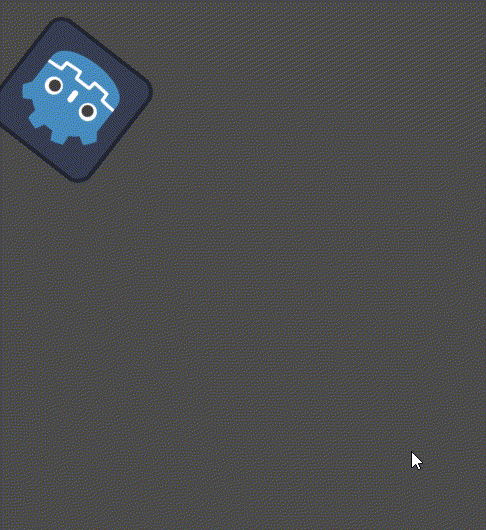
Tween을 사용해 이동하는 코드를 작성한다.


※ 참고

Tween


반응형
Posted by J-sean
:
반응형

캐릭터의 더블 점프를 구현해 보자.


CharacterBody2D 노드를 이용해 캐릭터를 만든다.


● CharacterBody2D - control.cs 스크립트를 추가

● Sprite2D - Texture 지정

● CollsionShape2D - Shape 속성 설정


1
2
3
4
5
6
7
8
9
10
11
12
13
14
15
16
17
18
19
20
21
22
23
24
25
26
27
28
29
30
31
32
33
34
35
36
37
38
39
40
41
42
43
44
45
46
47
48
49
using Godot;
 
public partial class control : CharacterBody2D
{
    public const float Speed = 300.0f;
    public const float JumpVelocity = -400.0f;
 
    // Get the gravity from the project settings to be synced with RigidBody nodes.
    public float gravity = ProjectSettings.GetSetting("physics/2d/default_gravity").AsSingle();
 
    private bool isFirstJump = false;
 
    public override void _PhysicsProcess(double delta)
    {
        Vector2 velocity = Velocity;
 
        // Add the gravity.
        if (!IsOnFloor())
            velocity.Y += gravity * (float)delta;
 
        // Handle First Jump.
        if (Input.IsActionJustPressed("ui_accept"&& IsOnFloor())
        {
            velocity.Y = JumpVelocity;
            isFirstJump = true;
        }
        // Handle Second Jump.
        else if (Input.IsActionJustPressed("ui_accept"&& isFirstJump == true)
        {
            velocity.Y = JumpVelocity;
            isFirstJump = false;
        }
 
        // Get the input direction and handle the movement/deceleration.
        // As good practice, you should replace UI actions with custom gameplay actions.
        Vector2 direction = Input.GetVector("ui_left""ui_right""ui_up""ui_down");
        if (direction != Vector2.Zero)
        {
            velocity.X = direction.X * Speed;
        }
        else
        {
            velocity.X = Mathf.MoveToward(Velocity.X, 0, Speed);
        }
 
        Velocity = velocity;
        MoveAndSlide();
    }
}


더블 점프 구현을 위한 control.cs 스크립트는 위와 같이 작성한다.


Node2D 노드를 이용해 Ground 를 만든다.


● StaticBody2D

● Sprite2D - Texture 지정(ground.jpg)

● CollisionShape2D - Shape 속성을 Sprite2D 땅 부분에 맞게 설정


gound.jpg
0.20MB


Node 노드를 이용해 전체 게임을 구성한다.


위에서 만든 캐릭터와 그라운드를 Node 노드의 자식노드로 추가한다. (Instantiate Child Scene)


배경 이외의 부분이 보이지 않도록 윈도우 사이즈를 적당히 조절한다.


게임을 실행하고 이중 점프를 테스트 한다.


※ 참고

Using CharacterBody2D/3D

CharacterBody2D

2D movement overview


반응형
Posted by J-sean
:
반응형

캐릭터 이동 방법을 몇 가지 알아보자.


씬을 준비한다.

CharacterBody2D 노드를 생성하고 Sprite2D, CollisionShape2D 노드를 자식노드로 추가한다.

● CharacterBody2D - control.cs 스크립트 추가

● Sprite2D - Texture 지정

● CollisionShape2D - Shape 속성 설정


1
2
3
4
5
6
7
8
9
10
11
12
13
14
15
16
17
18
19
20
21
22
23
24
25
26
27
28
29
30
using Godot;
 
public partial class control : CharacterBody2D
{
    private int speed = 200;
 
    public override void _PhysicsProcess(double delta)
    {
        LookAt(GetGlobalMousePosition());
        if(Input.IsKeyPressed(Key.Up))
        {
            Velocity = new Vector2(speed, 0).Rotated(Rotation);
            //Position += Velocity * (float)delta;
            //
            // When moving a CharacterBody2D, you should not set its
            // position property directly. Instead, you use the
            // move_and_collide() or move_and_slide() methods.These
            // methods move the body along a given vector and detect
            // collisions.
 
            MoveAndSlide();
        }
        if(Input.IsKeyPressed(Key.Down))
        {
            Velocity = new Vector2(-speed, 0).Rotated(Rotation);
            //Position += Velocity * (float)delta;
            MoveAndSlide();
        }
    }
}


위와 같이 스크립트를 작성한다.


게임을 실행하고 위, 아래 키를 누르면 캐릭터가 마우스를 따라 움직인다.


이번엔 마우스를 클릭한 지점으로 움직이는 캐릭터를 만들어 보자.


1
2
3
4
5
6
7
8
9
10
11
12
13
14
15
16
17
18
19
20
21
22
23
24
25
26
27
28
using Godot;
 
public partial class control : CharacterBody2D
{
    private int speed = 200;
    private Vector2 target = new Vector2();
 
    public override void _PhysicsProcess(double delta)
    {
        LookAt(GetGlobalMousePosition());
 
        if(Input.IsMouseButtonPressed(MouseButton.Left))
        {
            target = GetGlobalMousePosition();
        }
 
        Velocity = Position.DirectionTo(target) * speed;
        //Position += Velocity * (float)delta;
        //
        // When moving a CharacterBody2D, you should not set its
        // position property directly. Instead, you use the
        // move_and_collide() or move_and_slide() methods.These
        // methods move the body along a given vector and detect
        // collisions.
        if(Position.DistanceTo(target) > 2)
            MoveAndSlide();
    }
}


control.cs 스크립트를 위와 같이 작성한다.


마우스가 클릭된 지점을 따라 캐릭터가 움직인다.


※ 참고

Using CharacterBody2D/3D

CharacterBody2D

2D movement overview


반응형
Posted by J-sean
:
반응형

추가한 캐릭터를 삭제해 보자.


Sprite2D 노드를 추가하고 이름을 Character로 바꾼다. Texture 속성에 이미지를 넣고 스크립트를 추가한다.


1
2
3
4
5
6
7
8
9
10
11
12
13
14
15
16
using Godot;
 
public partial class Character : Sprite2D
{
    // Called when the node enters the scene tree for the first time.
    public override void _Ready()
    {
    }
 
    // Called every frame. 'delta' is the elapsed time since the previous frame.
    public override async void _Process(double delta)
    {
        await ToSignal(GetTree().CreateTimer(1.0), SceneTreeTimer.SignalName.Timeout);
        QueueFree();
    }
}


1초 대기 후 큐에서 삭제하는 스크립트를 작성한다.


새로운 씬을 만들고 Node 노드를 생성해서 Main으로 이름을 바꾸고 스크립트를 추가한다.


1
2
3
4
5
6
7
8
9
10
11
12
13
14
15
16
17
18
19
20
21
22
23
24
using Godot;
 
public partial class Main : Node
{
    [Export]
    public PackedScene CharacterScene { get; set; }
 
    // Called when the node enters the scene tree for the first time.
    public override void _Ready()
    {
    }
 
    // Called every frame. 'delta' is the elapsed time since the previous frame.
    public override void _Process(double delta)
    {
        if (Input.IsActionJustPressed("lclick"))
        {
            Character character = CharacterScene.Instantiate<Character>();
            character.Position = GetViewport().GetMousePosition();
 
            AddChild(character);
        }
    }
}


왼쪽 마우스 버튼을 클릭하면 캐릭터를 생성하는 스크립트를 작성한다.


Project Settings - Input Map 에 마우스 클릭 액션을 추가한다.


Main 씬에서 Build 버튼을 클릭한다. Inspector에 CharacterScene 속성이 생기면 Character.tscn을 추가한다.


Main 씬을 실행하고 왼쪽 버튼을 클릭하면 스프라이트가 표시되고 1초 후 사라진다.


이번엔 특정 액션(마우스 오른쪽 버튼 클릭) 발생시 모든 캐릭터를 한번에 삭제해 보자.


1
2
3
4
5
6
7
8
9
10
11
12
13
14
15
16
using Godot;
 
public partial class Character : Sprite2D
{
    // Called when the node enters the scene tree for the first time.
    public override void _Ready()
    {
    }
 
    // Called every frame. 'delta' is the elapsed time since the previous frame.
    public override async void _Process(double delta)
    {
        //await ToSignal(GetTree().CreateTimer(1.0), SceneTreeTimer.SignalName.Timeout);
        //QueueFree();
    }
}


캐릭터 클래스에서 1초 대기 후 큐에서 삭제하는 코드를 삭제한다.


1
2
3
4
5
6
7
8
9
10
11
12
13
14
15
16
17
18
19
20
21
22
23
24
25
26
27
28
using Godot;
 
public partial class Main : Node
{
    [Export]
    public PackedScene CharacterScene { get; set; }
 
    // Called when the node enters the scene tree for the first time.
    public override void _Ready()
    {
    }
 
    // Called every frame. 'delta' is the elapsed time since the previous frame.
    public override void _Process(double delta)
    {
        if (Input.IsActionJustPressed("lclick"))
        {
            Character character = CharacterScene.Instantiate<Character>();
            character.Position = GetViewport().GetMousePosition();
 
            AddChild(character);
        }
        if (Input.IsActionJustPressed("rclick"))
        {
            GetTree().CallGroup("chargroup", Node.MethodName.QueueFree);
        }
    }
}


메인 클래스에서 마우스 우클릭시 "chargroup"에 속한 노드의 QueueFree()를 호출하는 코드를 작성한다.


Character씬에서 Node 탭 - Group 탭에서 chargroup을 추가한다.


Godot의 group은 다른 게임엔진의 tag와 같은 역할을 한다.


마우스 왼쪽 버튼을 클릭하면 스프라이트가 생성되고 오른쪽 버튼을 클릭하면 모두 사라진다.


※ 참고

Node - void QueueFree()

Groups


반응형
Posted by J-sean
:
반응형

사용자 시그널을 받아 보자.


Node2D를 생성하고 스크립트(Receiver.cs)를 붙여준다.


1
2
3
4
5
6
7
8
9
10
11
12
13
14
15
16
17
18
19
20
21
22
using Godot;
 
public partial class Receiver : Node2D
{
    // Called when the node enters the scene tree for the first time.
    public override void _Ready()
    {
        Sender sender = GetNode<Sender>("Sprite2D");
        // "Sprite2D" is the name of the Node in the scene.
        sender.Accept += OnAccept;
    }
 
    private void OnAccept()
    {
        GD.Print("Accept!!");
    }
 
    // Called every frame. 'delta' is the elapsed time since the previous frame.
    public override void _Process(double delta)
    {
    }
}


Accept 시그널(엔터키)을 받는 스크립트를 작성한다.


Sprite2D를 생성하고 스크립트(Sender.cs)를 붙여준다.


1
2
3
4
5
6
7
8
9
10
11
12
13
14
15
16
17
18
19
20
21
using Godot;
 
public partial class Sender : Sprite2D
{
    [Signal]
    public delegate void AcceptEventHandler();    
 
    // Called when the node enters the scene tree for the first time.
    public override void _Ready()
    {
    }
 
    // Called every frame. 'delta' is the elapsed time since the previous frame.
    public override void _Process(double delta)
    {
        if (Input.IsActionJustPressed("ui_accept"))
        {
            EmitSignal(SignalName.Accept);
        }
    }
}


Accept 시그널(엔터키)을 보내는 스크립트를 작성한다.

시그널 delegate 이름은 [시그널 이름 + EventHandler] 형식으로 작성한다. 위 코드의 경우 시그널 이름이 Accept이고 delegate 이름은 AcceptEventHandler이다.


씬을 저장하고 게임을 실행하면 엔터키가 눌릴 때마다 Output 창에 Accept!! 메세지가 출력된다.


※ 참고

Using signals

C# signals


반응형
Posted by J-sean
:
반응형

타이머가 보내는 시그널을 받아보자.


Sprite2D 노드를 생성하고 Texture를 연결한다.


Sprite2D 노드의 자식 노드로 Timer 노드를 생성하고 Autostart 속성을 활성화 한다.


Sprite2D 노드에 스크립트를 생성한다.


1
2
3
4
5
6
7
8
9
10
11
12
13
14
15
16
17
18
19
20
21
using Godot;
 
public partial class player : Sprite2D
{
    // Called when the node enters the scene tree for the first time.
    public override void _Ready()
    {
        Timer timer = GetNode<Timer>("Timer");
        timer.Timeout += OnTimeout;
    }
 
    private void OnTimeout()
    {
        GD.Print("Timeout!!");
    }
 
    // Called every frame. 'delta' is the elapsed time since the previous frame.
    public override void _Process(double delta)
    {
    }
}


Timeout 시그널을 받는 스크립트를 작성한다.


Sprite2D 노드에 스크립트(player.cs)가 생성되었다.


씬을 저장하고 게임을 실행하면 Output 창에 Timeout!! 메세지가 반복해서 출력된다.


※ 참고

Using signals

C# signals


반응형
Posted by J-sean
:
반응형

Tweening을 적용해 보자.


1
2
3
4
5
6
7
8
9
10
11
12
13
14
15
16
17
18
19
20
21
22
23
24
25
26
27
28
29
30
31
32
33
34
35
36
37
38
39
40
41
import pygame
import pytweening
 
pygame.init()
pygame.display.set_caption("Super fun game development")
screen = pygame.display.set_mode((640480))
clock = pygame.time.Clock()
running = True
 
player = pygame.image.load("player.png").convert()
player.set_colorkey(player.get_at((00)))
player_size = (player.get_width()*1.5, player.get_height()*1.5)
player = pygame.transform.scale(player, player_size)
player_pos = player.get_rect()
player_pos.center = (screen.get_width()/2-200, screen.get_height()/2)
 
= 0
# pytweening 인수
 
while running:
    for event in pygame.event.get():
        if event.type == pygame.QUIT:
            running = False
        elif event.type == pygame.KEYDOWN and event.key == pygame.K_ESCAPE:
            running = False
    
    n += 0.005
    if n > 1:
        n = 0
 
    dx = int(pytweening.easeInOutBounce(n) * 400)
    #dx = int(pytweening.easeInOutElastic(n) * 400)
    # 최종적으로 400 픽셀 이동. (0 <= n <= 1)
        
    screen.fill("black")
    screen.blit(player, (player_pos.left+dx, player_pos.top))
        
    pygame.display.flip()
    clock.tick(60)
 
pygame.quit()


easeInOutBounce


easeInOutElastic


반응형
Posted by J-sean
:
반응형

스프라이트 애니메이션을 만들어 보자.


1
2
3
4
5
6
7
8
9
10
11
12
13
14
15
16
17
18
19
20
21
22
23
24
25
26
27
28
29
30
31
32
33
34
35
36
37
38
39
40
41
42
43
44
45
46
47
48
49
50
51
52
53
54
55
56
57
58
59
60
61
62
63
64
65
66
67
68
69
70
71
72
73
74
75
76
77
78
79
80
81
82
83
84
85
86
87
88
89
90
91
92
93
94
95
96
97
98
99
100
101
import pygame
 
pygame.init()
pygame.display.set_caption("Super fun game development")
screen = pygame.display.set_mode((640480))
clock = pygame.time.Clock()
 
# 이미지 로드 함수.
def LoadImage(path, scale=None, colorkey=None):
    image = pygame.image.load(path).convert()
 
    if scale is not None:
        image = pygame.transform.scale(image, (image.get_width()*scale, image.get_height()*scale))
 
    if colorkey is not None:
        if colorkey == -1:
            colorkey = image.get_at((00))
        image.set_colorkey(colorkey)
 
    return image
 
# pygame.sprite.Sprite 클래스를 상속하는 클래스는 update()를 재정의하고 image, rect 속성을 가져야한다.
class Cat(pygame.sprite.Sprite):
    def __init__(self, position):
        #super(Cat, self).__init__()        
        pygame.sprite.Sprite.__init__(self)
 
        self.elapsedTime = 0
        self.limitTime = 1000/8
        # 1초에 한 사이클. Cat의 Run 동작은 8프레임이다.
        
        self.direction = 1
        self.speed = 4
        self.index = 0
        self.images = [
            LoadImage("Run1.png"0.5-1), LoadImage("Run2.png"0.5-1), LoadImage("Run3.png"0.5-1),
            LoadImage("Run4.png"0.5-1), LoadImage("Run5.png"0.5-1), LoadImage("Run6.png"0.5-1),
            LoadImage("Run7.png"0.5-1), LoadImage("Run8.png"0.5-1) ]
        self.image = self.images[self.index]
        self.rect = self.image.get_rect(center=position)
 
    def flip_image(self):
        self.images = [pygame.transform.flip(image, TrueFalsefor image in self.images]
        # list comprehension
 
    def update(self):
        # 1초에 8프레임 업데이트.
        self.elapsedTime += clock.get_time()
        if self.elapsedTime < self.limitTime:
            pass
        else:
            self.elapsedTime = 0
            self.index += 1
            if self.index >= len(self.images):
                self.index = 0
            self.image = self.images[self.index]
 
def main():
    cat = Cat(position=(screen.get_width()/2, screen.get_height()/2))
    #all_sprites = pygame.sprite.Group(cat)
    all_sprites = pygame.sprite.Group()
    # 스프라이트 오브젝트를 관리하기 위한 컨테이너 클래스
    all_sprites.add(cat)
    # 스프라이트를 삭제할 때는 all_sprites.remove(cat)
    running = True
    
    while running:
        for event in pygame.event.get():
            if event.type == pygame.QUIT:
                running = False
            elif event.type == pygame.KEYDOWN and event.key == pygame.K_ESCAPE:
                running = False
 
        keys = pygame.key.get_pressed()
        if keys[pygame.K_LEFT]:
            if cat.direction > 0:
                cat.flip_image()
                cat.direction = -1
            cat.rect.move_ip(-cat.speed, 0)
            
        if keys[pygame.K_RIGHT]:
            if cat.direction < 0:
                cat.flip_image()
                cat.direction = 1
            cat.rect.move_ip(cat.speed, 0)
 
        all_sprites.update()
        # 그룹에 속한 모든 스프라이트의 update()를 호출한다.
        
        screen.fill("blue")        
        all_sprites.draw(screen)
        # 그룹에 속한 모든 스프라이트의 image, rect 속성을 이용해 screen에 출력한다.
        # 그룹은 스프라이트의 순서(z-order)를 임의로 정한다.
        pygame.display.flip()
 
        clock.tick(60)
 
    pygame.quit()
 
if __name__ == '__main__':
   main()


Cat.zip
0.49MB


고양이가 자연스럽게 걷고있다.


※ 참고

Z-Order에 따라 스프라이트를 그려야 한다면 아래 링크를 확인하자.

LayeredUpdates

This group is fully compatible with pygame.sprite.Sprite.
You can set the default layer through kwargs using 'default_layer' and an integer for the layer. The default layer is 0.
If the sprite you add has an attribute _layer then that layer will be used. If the **kwarg contains 'layer' then the sprites passed will be added to that layer (overriding the sprite.layer attribute). If neither sprite has attribute layer nor **kwarg then the default layer is used to add the sprites.


반응형
Posted by J-sean
: