반응형

SDL 기본 라이브러리는 WAV 형식의 오디오만 처리할 수 있다. mp3, ogg 등의 형식을 처리하기 위해서는 SDL_mixer 라이브러리가 필요하다.


우선 SDL 기본 라이브러리로 WAV 사운드를 출력해 보자.


1
2
3
4
5
6
7
8
9
10
11
12
13
14
15
16
17
18
19
20
21
22
23
24
25
26
27
28
29
30
31
32
33
34
35
36
37
38
39
40
41
42
43
44
45
46
47
48
49
50
51
52
53
#include <iostream>
#include "SDL.h"
 
#pragma comment(lib, "sdl2.lib")
#pragma comment(lib, "sdl2main.lib")
 
int main(int argc, char* argv[]) {
    SDL_Init(SDL_INIT_AUDIO);
 
    SDL_AudioSpec wav_spec;
    Uint8* wav_buffer;
    Uint32 wav_length;
 
    if (SDL_LoadWAV("sound.wav"&wav_spec, &wav_buffer, &wav_length) == NULL) {
        // Use this function to load a WAVE from a file.
        printf("SDL_LoadWAV Error: %s\n", SDL_GetError());
        return -1;
    }
 
    int bitDepth = SDL_AUDIO_BITSIZE(wav_spec.format);
    int bytesPerSecond = (bitDepth * wav_spec.channels * wav_spec.freq) / 8;
    float durationSec = (float)wav_length / bytesPerSecond;
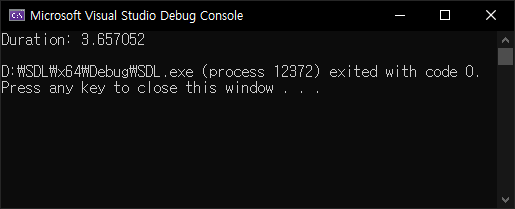
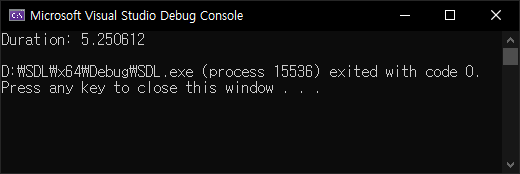
    printf("Duration: %f\n", durationSec);
    // wav 파일 재생 시간 구하기.
 
    SDL_AudioDeviceID dev = SDL_OpenAudioDevice(NULL0&wav_spec, NULL0);
    // Open a specific audio device.
    if (dev == NULL) {
        printf("SDL_AudioDeviceID Error: %s\n", SDL_GetError());
        return -1;
    }
 
    if (SDL_QueueAudio(dev, wav_buffer, wav_length) != 0) {
        // Queue more audio on non-callback devices.
        printf("SDL_QueueAudio Error: %s\n", SDL_GetError());
        return -1;
    }
 
    SDL_PauseAudioDevice(dev, 0);
    // Use this function to pause and unpause audio playback on a specified device.
    // dev: a device opened by SDL_OpenAudioDevice()
    // pause_on: non-zero to pause, 0 to unpause
    SDL_Delay(durationSec * 1000);
    // Wait a specified number of milliseconds before returning.
 
    SDL_FreeWAV(wav_buffer);
    // Free data previously allocated with SDL_LoadWAV() or SDL_LoadWAV_RW().
    SDL_CloseAudioDevice(dev);
    //Use this function to shut down audio processing and close the audio device.
    SDL_Quit();
 
    return 0;
}


코드를 작성하고 빌드한다.


실행하면 재생 시간이 표시되고 사운드가 출력된다.


※ 참고

SDL_AudioFormat


이번엔 SDL_mixer를 이용해 mp3, ogg 등의 사운드를 출력해 보자. 아래 링크에서 SDL_mixer를 다운받고 적당히 설치한다.

SDL Libraries


1
2
3
4
5
6
7
8
9
10
11
12
13
14
15
16
17
18
19
20
21
22
23
24
25
26
27
28
29
30
31
32
33
34
35
36
37
38
39
40
#include <iostream>
#include "SDL.h"
#include "SDL_mixer.h"
 
#pragma comment(lib, "sdl2.lib")
#pragma comment(lib, "sdl2main.lib")
#pragma comment(lib, "sdl2_mixer.lib")
 
int main(int argc, char* argv[]) {
    SDL_Init(SDL_INIT_AUDIO);
 
    if (Mix_OpenAudio(48000, MIX_DEFAULT_FORMAT, 22048!= 0) {
        // Open the default audio device for playback.
        printf("Mix_OpenAudio Error: %s\n", Mix_GetError());
        return -1;
    }
 
    Mix_Music* music = Mix_LoadMUS("sound.mp3");
    // Load a supported audio format into a music object.
    if (music == NULL) {
        printf("Mix_LoadMUS Error: %s\n", Mix_GetError());
        return -1;
    }
    printf("Duration: %f\n", Mix_MusicDuration(music));
    // Get a music object's duration, in seconds.
 
    Mix_PlayMusic(music, 0);
    // Play a new music object. (0 means "play once and stop")
    SDL_Delay(int(Mix_MusicDuration(music) * 1000));
 
    Mix_FreeMusic(music);
    // Free a music object. If this music is currently playing,
    // it will be stopped.
    Mix_CloseAudio();
    // Close the mixer, halting all playing audio.
 
    SDL_Quit();
 
    return 0;
}


코드를 작성하고 빌드한다.


실행하면 재생시간이 표시되고 사운드가 출력된다.


※ 참고

SDL_mixer API


반응형
Posted by J-sean
:
반응형

마이크를 통해 입력된 음성 데이터를 스피커로 출력해 보자.


1
2
3
4
5
6
7
8
9
10
11
12
13
14
15
import sounddevice as sd
import numpy as np
 
def callback(indata, outdata, frames, time, status):
    volume_norm = np.linalg.norm(indata)    
    print("Volume: " + '='*(int(volume_norm)) + ' '*(79-(int(volume_norm))) + '\r', end = '')
    
    # indata를 outdata에 넣으면 마이크로 넘어온 데이터가 스피커로 출력된다.
    outdata[:] = indata
 
try:
    with sd.Stream(callback=callback):
        input("Press Enter to quit.\n\n")
except KeyboardInterrupt:
    print("exit.")


코드를 실행하면 마이크에 입력된 음성이 스피커로 출력된다.


python-sounddevice

PyAudio Examples


반응형
Posted by J-sean
:

C# Sound Meter 사운드 미터

C# 2023. 10. 28. 20:10 |
반응형

Sound Meter를 표시해 보자.


NAudio 패키지를 설치한다.


1
2
3
4
5
6
7
8
9
10
11
12
13
14
15
16
17
18
19
20
21
22
23
24
25
26
27
28
29
30
31
32
33
34
35
36
37
38
39
40
41
using System;
using System.Text;
using NAudio.CoreAudioApi;
 
namespace ConsoleApp1
{    class Program
    {
        static void Main()
        {
            MMDeviceEnumerator enumerator = new MMDeviceEnumerator();
            MMDevice device = enumerator.GetDefaultAudioEndpoint(DataFlow.Render, Role.Console);
            
            while (true)
            {
                //Console.Write("\r{0}", device.AudioMeterInformation.MasterPeakValue);
                //System.Threading.Thread.Sleep(100);
 
                System.Threading.Thread.Sleep(100);
 
                float volume = device.AudioMeterInformation.MasterPeakValue;
                int scale = (int)Math.Floor(volume * 79);
 
                StringBuilder sb = new StringBuilder();
 
                Console.Write("\r");
                sb.Append("Value: " + scale + " ");
 
                if (scale < 1)
                {
                    sb.Append(' '79);
                    Console.Write(sb.ToString());
                    continue;
                }
                
                sb.Append('=', scale);
                sb.Append(' '79 - scale);
                Console.Write(sb.ToString());
            }
        }
    }
}


코드를 작성하고 실행한다.


시스템 오디오에서 나는 소리값이 표시된다.


※ 참고

Displaying a Volume Meter using NAudio

2023.10.26 - [Python] - Python Core Audio Windows Library 파이썬 코어 오디오 라이브러리

2022.01.06 - [C#] - C# AudioSwitcher System Audio/Sound Volume Control - 시스템 오디오/사운드 볼륨 컨트롤 1

2022.01.07 - [C#] - C# AudioSwitcher System Audio/Sound Volume Control - 시스템 오디오/사운드 볼륨 컨트롤 2


반응형
Posted by J-sean
:
반응형

pycaw를 이용해 시스템 오디오 볼륨을 설정해 보자.


pycaw를 설치한다.


1
2
3
4
5
6
7
8
9
10
11
12
13
14
15
16
17
18
19
20
21
22
23
24
25
from ctypes import cast, POINTER
from comtypes import CLSCTX_ALL
from pycaw.pycaw import AudioUtilities, IAudioEndpointVolume
from time import sleep
 
devices = AudioUtilities.GetSpeakers()
interface = devices.Activate(IAudioEndpointVolume._iid_, CLSCTX_ALL, None)
volume = cast(interface, POINTER(IAudioEndpointVolume))
 
# Control volume
#volume.SetMasterVolumeLevel(-0.0, None) # Max(100%)
#volume.SetMasterVolumeLevel(-3.3, None) # 80%
#volume.SetMasterVolumeLevel(-10.3, None) # 50%
#volume.SetMasterVolumeLevel(-23.6, None) # 20%
#volume.SetMasterVolumeLevel(-64.0, None) # Min(0%)
 
while(True):
    current = volume.GetMasterVolumeLevel()    
    print("Current Volume:", current)
 
    if (current > -23.6):
        current -= 1
        volume.SetMasterVolumeLevel(current, None)
 
    sleep(1)


위와 같이 코드를 작성하고 실행한다.


100% 었던 볼륨이 20% 이하로 내려간다.


실행시 콘솔 화면이 뜨지 않게 하려면 파일 확장명을 .pyw로 바꾼다.


※ 참고

pycaw

2022.01.06 - [C#] - C# AudioSwitcher System Audio/Sound Volume Control - 시스템 오디오/사운드 볼륨 컨트롤 1

2022.01.07 - [C#] - C# AudioSwitcher System Audio/Sound Volume Control - 시스템 오디오/사운드 볼륨 컨트롤 2

2023.10.28 - [C#] - C# Sound Meter 사운드 미터


반응형
Posted by J-sean
:
반응형

사운드를 로드하고 플레이 해 보자.


1
2
3
4
5
6
7
8
9
10
11
12
13
14
15
16
17
18
19
20
21
22
23
24
25
26
27
28
29
30
31
32
33
34
35
import pygame
 
pygame.init()
pygame.display.set_caption("Super fun game development")
screen = pygame.display.set_mode((640480))
clock = pygame.time.Clock()
running = True
 
player = pygame.image.load("player.png").convert()
player.set_colorkey(player.get_at((00)))
player_size = (player.get_width()*1.5, player.get_height()*1.5)
player = pygame.transform.scale(player, player_size)
player_pos = player.get_rect()
player_pos.center = (screen.get_width()/2, screen.get_height()/2)
 
sound = pygame.mixer.Sound("music.mp3")
# 사운드 리소스를 로드하고 오브젝트를 반환한다.
sound.play()
# 로드한 사운드 오브젝트를 플레이한다.
 
while running:
    for event in pygame.event.get():
        if event.type == pygame.QUIT:
            running = False
        elif event.type == pygame.KEYDOWN and event.key == pygame.K_ESCAPE:
            running = False
 
 
    screen.fill("black")
    screen.blit(player, player_pos)
    
    pygame.display.flip()
    clock.tick(60)
 
pygame.quit()


music.mp3
4.01MB


로드한 사운드가 플레이 된다.


반응형
Posted by J-sean
:
반응형

AudioSwitcher를 이용해 시스템 볼륨을 조정해 보자.


AudioSwitcher Nuget Package를 설치한다.


1
2
3
4
5
6
7
8
9
10
11
12
13
14
15
16
17
18
19
20
21
22
23
24
25
26
27
28
29
30
31
32
33
34
35
36
37
38
39
40
41
42
43
44
45
46
47
using System;
using System.Collections.Generic;
using System.Linq;
using System.Text;
using System.Threading.Tasks;
 
using System.Runtime.InteropServices;
using AudioSwitcher.AudioApi.CoreAudio;
 
namespace ConsoleApp1
{
    class Program
    {
        [DllImport("kernel32.dll")]
        static extern IntPtr GetConsoleWindow();
 
        [DllImport("user32.dll")]
        static extern bool ShowWindow(IntPtr hWnd, int nCmdShow);
 
        static void Main(string[] args)
        {
            const int SW_HIDE = 0// 창 숨기기
            const int SW_SHOW = 1// 창 보이기
 
            IntPtr handle = GetConsoleWindow();
            //ShowWindow(handle, SW_HIDE);
 
            CoreAudioDevice defaultPlaybackDevice = new CoreAudioController().DefaultPlaybackDevice;
            Console.WriteLine("Current Volume: " + defaultPlaybackDevice.Volume);
 
            while (true)
            {
                if (defaultPlaybackDevice.Volume > 20// 볼륨이 20 보다 크다면
                {
                    while (defaultPlaybackDevice.Volume > 20// 볼륨이 20 보다 크지 않을때 까지 무한 루프
                    {
                        defaultPlaybackDevice.Volume--// 볼륨 1 감소
                        Console.WriteLine("Current Volume: " + defaultPlaybackDevice.Volume);
                        System.Threading.Thread.Sleep(1000); // 매 1초 확인
                    }
                }
 
                System.Threading.Thread.Sleep(10000); // 매 10초 확인
            }
        }
    }
}


소스를 입력하고 빌드한다.


프로그램을 실행하면 시스템 볼륨이 20 이하일 때까지 1초마다 1씩 감소한다.


처음 35였던 볼륨이 20이 되었다.


2022.01.07 - [C#] - C# AudioSwitcher System Audio/Sound Volume Control - 시스템 오디오/사운드 볼륨 컨트롤 2


반응형
Posted by J-sean
:
반응형

컴퓨터에 사운드 카드가 기본 사양이 되기 전, 큰 결심을 하고서야 구입할 수 있었던 옥소리나 사운드 블래스터등의 고가 사운드 카드를 컴퓨터에 설치하고 듣던 게임 음악은 정말 놀라웠다. 삐~ 소리만 나는 줄 알았던 컴퓨터에서 이런 소리가 날 수 있다니..


옥소리(사운드 카드)를 광고하는 옥소리(배우)


옥소리 사운드 카드


그리고는 MP3로 대표되는 여러가지 오디오 압축 포맷 덕분에 작은 용량으로도 많은 노래를 저장할 수 있게 되었고 컴퓨터가 아닌 작은 기기에서도 노래를 재생할 수 있는 플레이어들이 등장하기 시작했다. 물론 저렴한 가격은 아니었던거 같다.


최초의 MP3 플레이어


지금은 중국에서 한국까지 오는 배송비를 포함해도 천원이 조금 넘는 저렴한 가격에 MP3 디코더를 구입해 직접 간단한 MP3 플레이어를 만들 수 있다.


앰프가 포함된 MP3 디코더


알리 익스프레스에서는 Nondestructive Decoder Board 라는 이름으로 판매되고 있다. 왜 nondestructive 일까.. 무슨 의미로 nondestructive를 붙인걸까.. 알 수가 없다.


어쨌든 USB 2.0 type A, Micro 5 pin, 또는 3.7~5.5V 배터리로 작동 가능하며 Micro SD 카드에 듣고 싶은 음악을 담아 플레이 할 수 있다. 3.5mm 이어폰 잭을 연결하거나 4Ω 3W의 스피커를 연결해 듣는다.


■ Prev/V--: 이전 곡 / 길게 누르면(약 2초) 소리 작게

■ Next/V++: 다음 곡 / 길게 누르면 소리 크게

■ P/P/Mode: 플레이 / 정지, 길게 누르면 U Disk, Micro SD 카드 전환 (U Disk는 5V 전원 필요)

■ Repeat: 1곡 반복 / 전체 반복


U Disk를 지원한다고 적혀 있어서 FAT, FAT32 파일 시스템으로 포맷한 USB 드라이브에 음악음 담아 시도해 봤지만 플레이 되지 않았다. Micro SD 카드는 문제없이 플레이 되었다.


간단한 MP3 플레이어가 필요한 경우 유용하게 사용할 수 있을거 같다.


※ 참고: 2020/12/09 - [Review] - MP3 Decoder with Built-in Amplifier Module (GPD2846A)


반응형
Posted by J-sean
: