[Pygame] Pygame GUI 파이게임 그래픽 유저 인터페이스
Python 2024. 1. 29. 11:52 |반응형
파이게임과 GUI 라이브러리를 사용해 보자.
ImGui를 사용해 보려 했는데, OpenGL을 이용해야 하고 pygame.Surface.fill()을 사용할 수 없는 등 마음에 들지 않아 Pygame GUI를 사용하기로 했다.

|
1
2
3
4
5
6
7
8
9
10
11
12
13
14
15
16
17
18
19
20
21
22
23
24
25
26
27
28
29
30
31
32
33
34
35
36
37
38
39
40
41
42
43
44
|
import pygame
import pygame_gui
pygame.init()
pygame.display.set_caption("Super fun game development")
screenSize = (640, 480)
screen = pygame.display.set_mode(screenSize, pygame.DOUBLEBUF | pygame.RESIZABLE)
clock = pygame.time.Clock()
manager = pygame_gui.UIManager(screenSize)
hello_button = pygame_gui.elements.UIButton(relative_rect=pygame.Rect((10, 10), (100, 50)),
text='Say Hello', manager=manager)
running = True
while running:
time_delta = clock.tick(60)/1000
# As you may have noticed we also had to create a pygame Clock to track the amount of time
# in seconds that passes between each loop of the program. We need this 'time_delta' value
# because several of the UI elements make use of timers and this is a convenient place to
# get it.
for event in pygame.event.get():
if event.type == pygame.QUIT:
running = False
elif event.type == pygame.KEYDOWN and event.key == pygame.K_ESCAPE:
running = False
if event.type == pygame_gui.UI_BUTTON_PRESSED:
if event.ui_element == hello_button:
print('Hello World!')
manager.process_events(event)
manager.update(time_delta)
screen.fill("black")
pygame.draw.circle(screen, "gray", screen.get_rect().center, 100)
manager.draw_ui(screen)
pygame.display.flip()
pygame.quit()
|
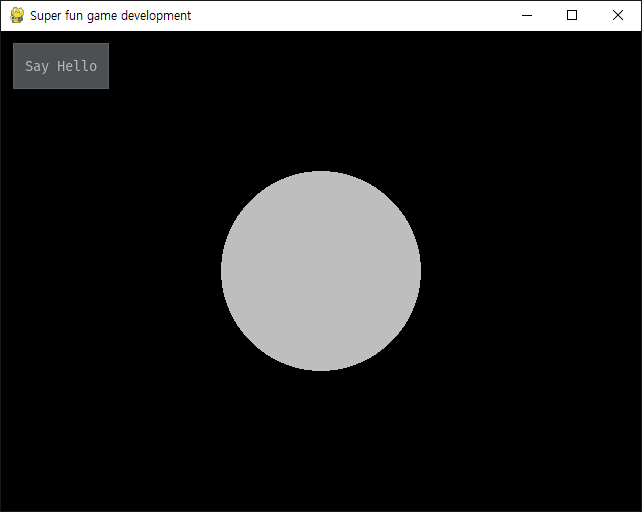
코드를 입력하고 실행한다.
2024.01.28 - [Python] - [Pygame] Box2D 파이게임 물리 라이브러리
위 링크의 코드를 이용해 조금 더 실용적인 예제를 만들어 보자.
|
1
2
3
4
5
6
7
8
9
10
11
12
13
14
15
16
17
18
19
20
21
22
23
24
25
26
27
28
29
30
31
32
33
34
35
36
37
38
39
40
41
42
43
44
45
46
47
48
49
50
51
52
53
54
55
56
57
58
59
60
61
62
63
64
65
66
|
import math
import pygame
import pygame_gui
from Box2D import *
pygame.init()
pygame.display.set_caption("Physics Test")
screen = pygame.display.set_mode((640, 480))
running = True
player = pygame.image.load("player.png").convert()
manager = pygame_gui.UIManager((640, 480))
again_button = pygame_gui.elements.UIButton(relative_rect=pygame.Rect((350, 10), (200, 100)),
text='Play again', manager=manager)
world = b2World(gravity=(0, 9.8), doSleep=True)
groundBody = world.CreateStaticBody(position=(0, 400), shapes=b2PolygonShape(box=(500, 0)))
wallBody = world.CreateStaticBody(position=(300, 0), shapes=b2PolygonShape(box=(0, 400)))
playerBody = world.CreateDynamicBody(position=(0, 0), linearVelocity=(50, 0), angularVelocity=0.2)
playerFixtureDef = playerBody.CreatePolygonFixture(box=(player.get_width()/2,
player.get_height()/2), density=1, friction=0.5, restitution=0.7)
timeStep = 1.0 / 300
vel_iters, pos_iters = 6, 2
while running:
for event in pygame.event.get():
if event.type == pygame.QUIT:
running = False
elif event.type == pygame.KEYDOWN and event.key == pygame.K_SPACE:
playerBody.transform = ((0, 0), 0)
playerBody.linearVelocity = (50, 0)
playerBody.angularVelocity = 0.2
elif event.type == pygame.KEYDOWN and event.key == pygame.K_ESCAPE:
running = False
if event.type == pygame_gui.UI_BUTTON_PRESSED:
if event.ui_element == again_button:
playerBody.transform = ((0, 0), 0)
playerBody.linearVelocity = (50, 0)
playerBody.angularVelocity = 0.2
manager.process_events(event)
manager.update(timeStep)
world.Step(timeStep, vel_iters, pos_iters)
world.ClearForces()
screen.fill("black")
pygame.draw.rect(screen, "brown", (0, 400, 600, 20))
pygame.draw.rect(screen, "yellow", (300, 0, 20, 400))
rotated_player = pygame.transform.rotate(player, playerBody.angle * 180/math.pi)
screen.blit(rotated_player, (playerBody.position[0] - rotated_player.get_width()/2,
playerBody.position[1] - rotated_player.get_height()/2))
manager.draw_ui(screen)
pygame.display.flip()
pygame.quit()
|
코드를 입력하고 실행한다.
※ 참고
반응형
'Python' 카테고리의 다른 글
| [Pygame] Pygame Gravity 파이게임 중력 (0) | 2024.02.03 |
|---|---|
| [Pygame] Pygame Simple Camera 파이게임 간단한 카메라 (0) | 2024.02.02 |
| [Pygame] Box2D 파이게임 물리 라이브러리 (0) | 2024.01.28 |
| pypdf Splitting, Merging, Cropping, and Transforming the Pages of PDF File 파이썬 PDF 파일 분할, 병합, 자르기, 회전(변형) (1) | 2024.01.06 |
| Pillow PDF Converter PDF 변환기 (2) | 2024.01.06 |